Modern software development practices like DevOps demand agility, automation, and collaboration to deliver high-quality software. One of the key aspects of these practices is Continuous Integration and Continuous Delivery (CI/CD). Continuous integration refers to the practice where developers frequently integrate their code changes into a shared repository, followed by automated builds and tests. Continuous delivery refers to automation of deploying changes to test or production environment.
Azure DevOps is Microsoft Azure’s solution to collaborate tools, people (project managers, developers) and processes to deliver rapid and reliable software releases. Azure Pipelines is the tool used by Azure DevOps for Continuous Integration and Continuous Delivery.
There are three different ways through which you can deploy Azure Resource Manager Templates.
- First method is to deploy a Local ARM Template.
- Second method is making use of Linked ARM Templates
- Third method is to use CI/CD tool Azure Pipelines
In this article, I shall walk you through following key topics to make use of Azure Pipelines as a CI/CD tool to build and deploy ARM templates:
- What is Azure Pipelines?
- Azure Pipelines Key Concepts
- Azure Pipelines Requirement – Version Control System
- Step-by-Step Process – Using Azure Pipelines to Deploy ARM Template
- Prepare a GitHub Repository
- Create a DevOps Organization & Project
- Create a Pipeline & Deploy ARM Template
- Verify the Deployment
- Conclusion
What is Azure Pipelines?
Azure Pipelines is part of Azure DevOps and is used to automatically build, test and deploy software using CI/CD practices.
Azure Pipelines support Node.js, Python, Java, PHP, Ruby, C#, C++, Go, XCode, .NET, Android, and iOS applications. These apps can be run in parallel on Linux, macOS, and Windows operating system. Azure Pipelines support deployment to multiple targets including Microsoft Azure, Amazon Web Services, Google Cloud Platform and On-premises.
Azure Pipelines Key Concepts
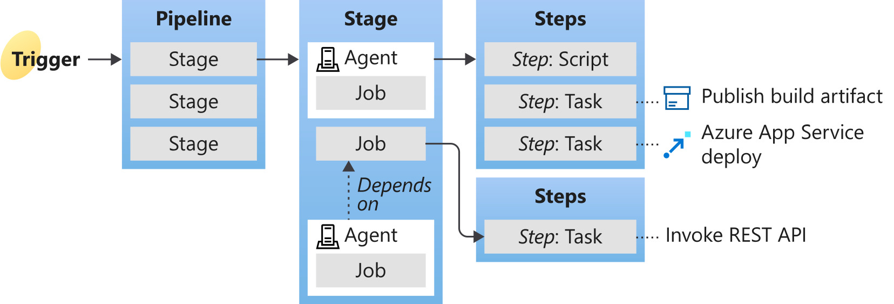
Following are the key concepts used as part of Azure Pipelines:
Trigger: A trigger tells a pipeline when to run. You can configure a pipeline to run upon a push to repository or at scheduled times
Pipeline: A pipeline is a workflow that defines how you build, test and deploy your application
Stage: A stage is a way of organizing jobs in a pipeline based on varying needs such as grouping based on different management teams or approval chain requirements
Job: A job refers to the set of execution steps that run together on the same agent
Agent: An agent is compute node with agent software installed e.g. Microsoft-hosted Ubuntu agent or Self-hosted Ubuntu agent
Step: A step is the smallest building block of a pipeline and can either be a script or a task
Script: A script is a step that uses command line, PowerShell, or Bash to run code in a pipeline
Task: A task is a prepackaged procedure that has been abstracted with a set of inputs to perform an action. AzureResourceManagerTemplateDeployment@3 task is used to deploy ARM templates as part of CI /CD pipelines
Artifact: An artifact is a collection of files or packages published by a run
Azure Pipelines support two types of pipelines: YAML-based and Classic pipelines. In this article, we shall be using YAML-based pipeline. You can think of YAML as the script that defines what your pipeline should do. Your pipeline is typically named as azure-pipelines.yml and is stored in the repo like application code. The YAML file is versioned alongside your application code, adhering to the same branching structure.
Azure Pipelines Requirement – Version Control System
Azure Pipelines requires that the application source code is hosted in a version control system. It can be configured to automatically build and validate any changes pushed to the version control repository. Azure Pipelines supports several version control systems including Azure Repos Git, GitHub and TFVC. In this article, we shall be using GitHub as version control system.
Step-by-Step Process to Deploy ARM Template Using Azure Pipelines
Now let’s start step-by-step process to use Azure Pipelines tool to Deploy Azure Resource Manager Template.
Step-1: Prepare a GitHub Repository
First, we need to prepare a GitHub repository to store our ARM template.
Create a GitHub Repository
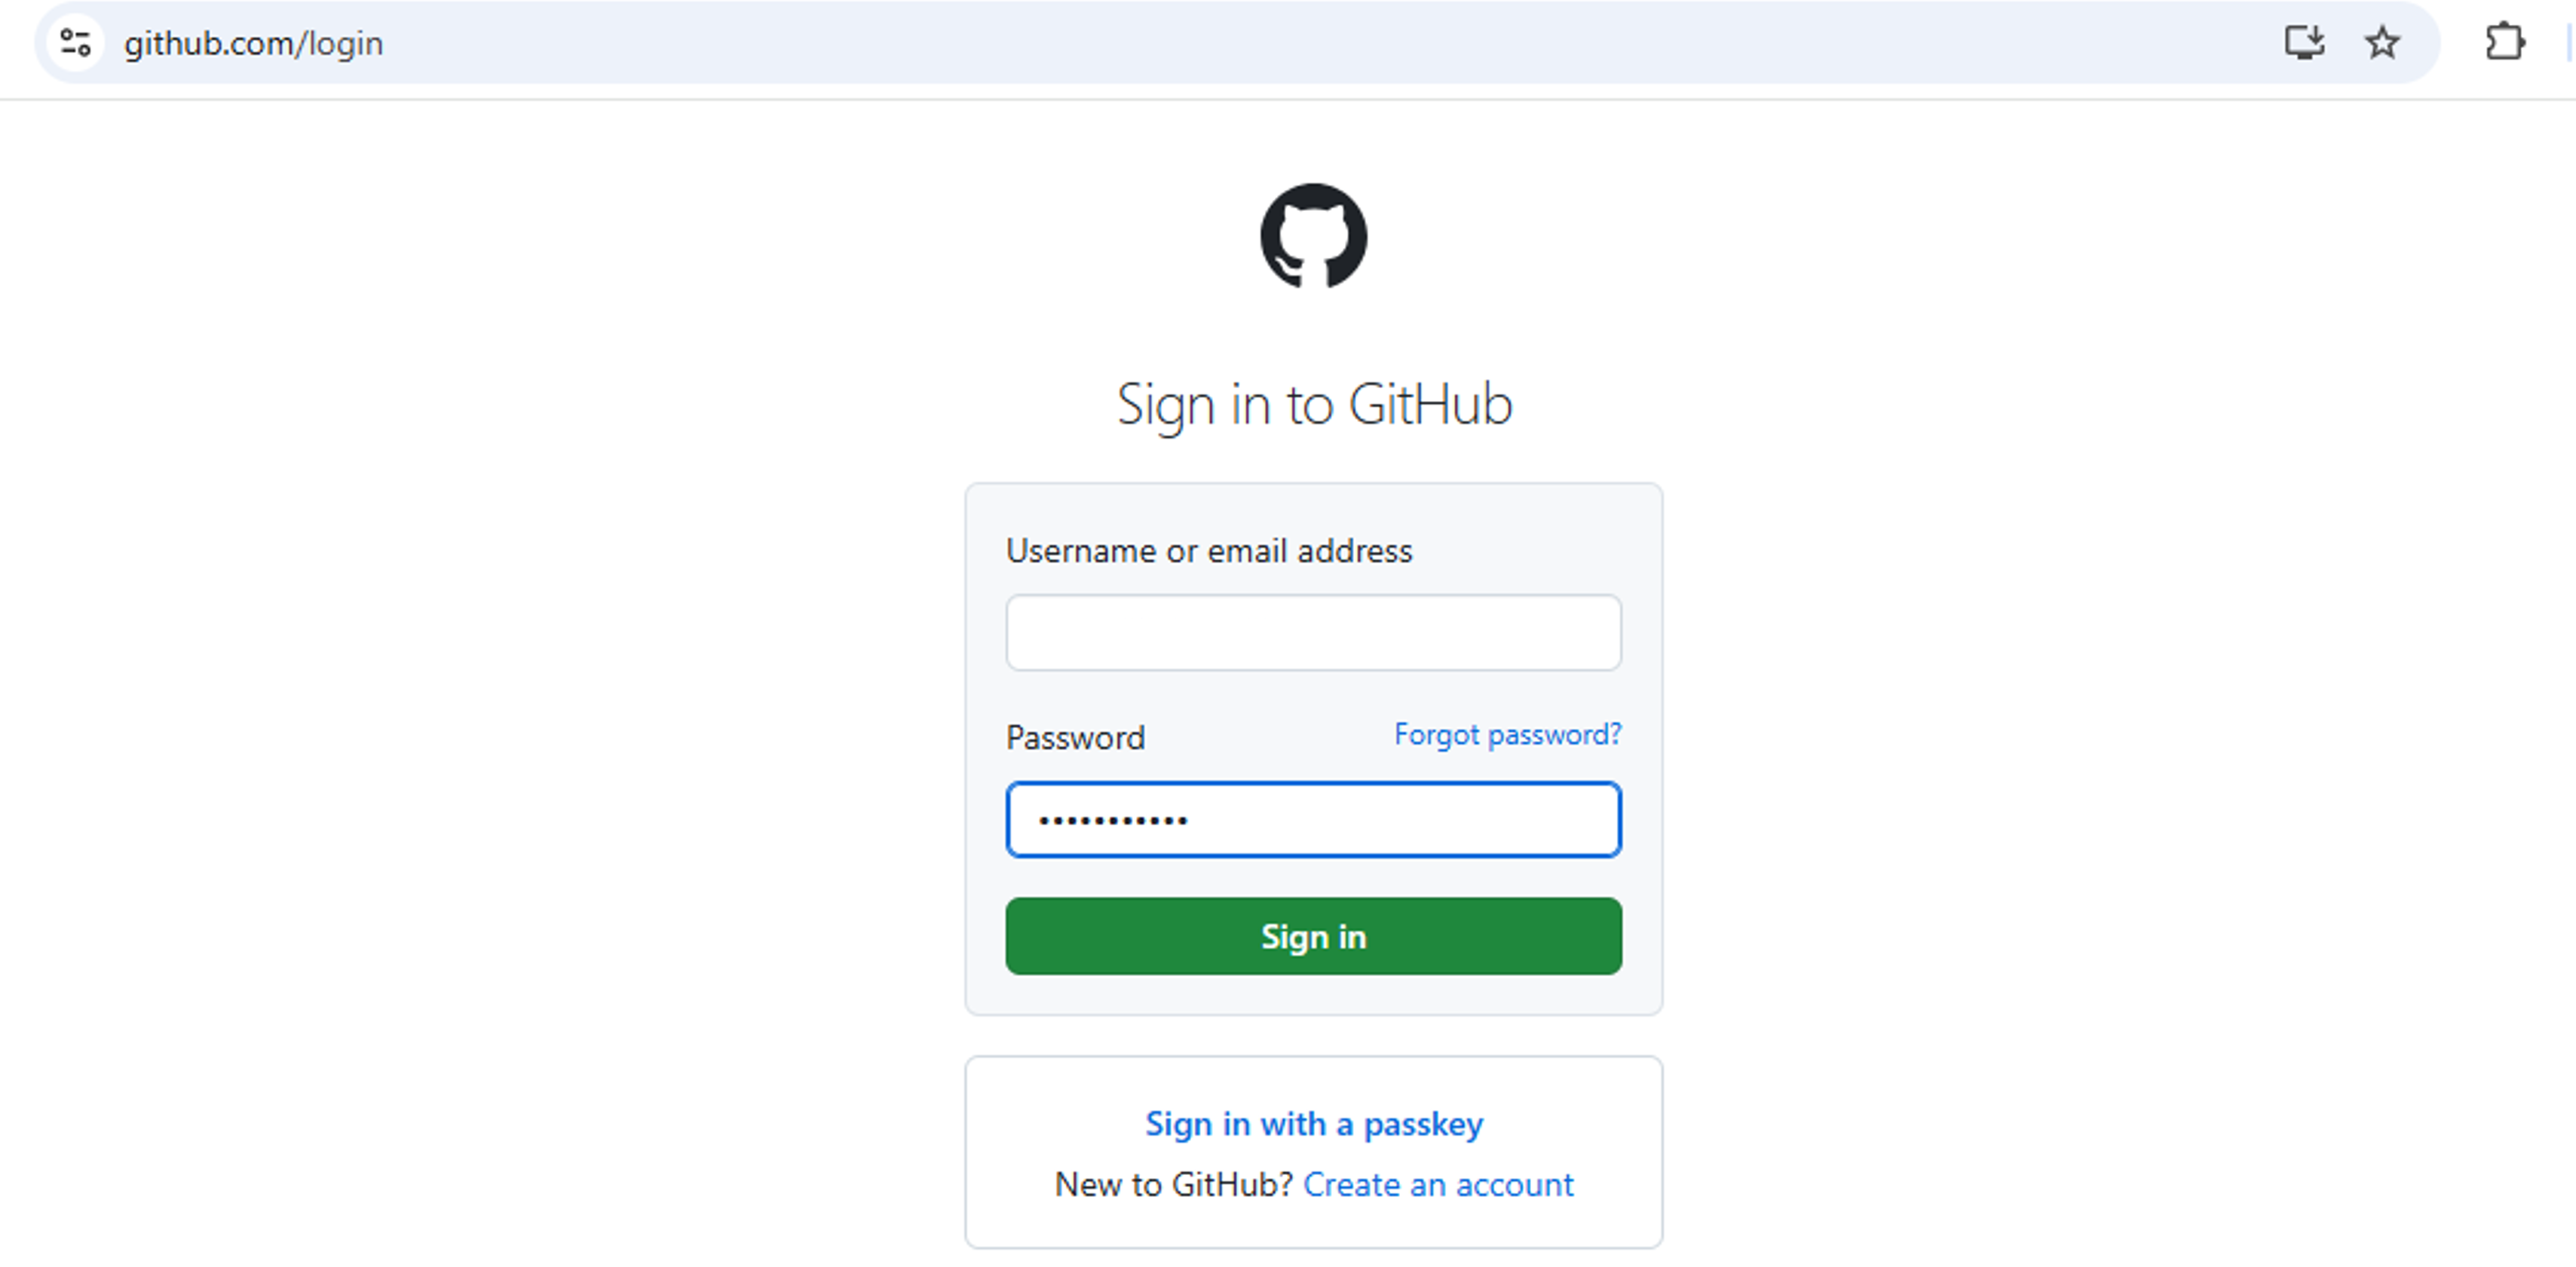
- Sign in to your GitHub account. In case you don’t have an account, create a new account

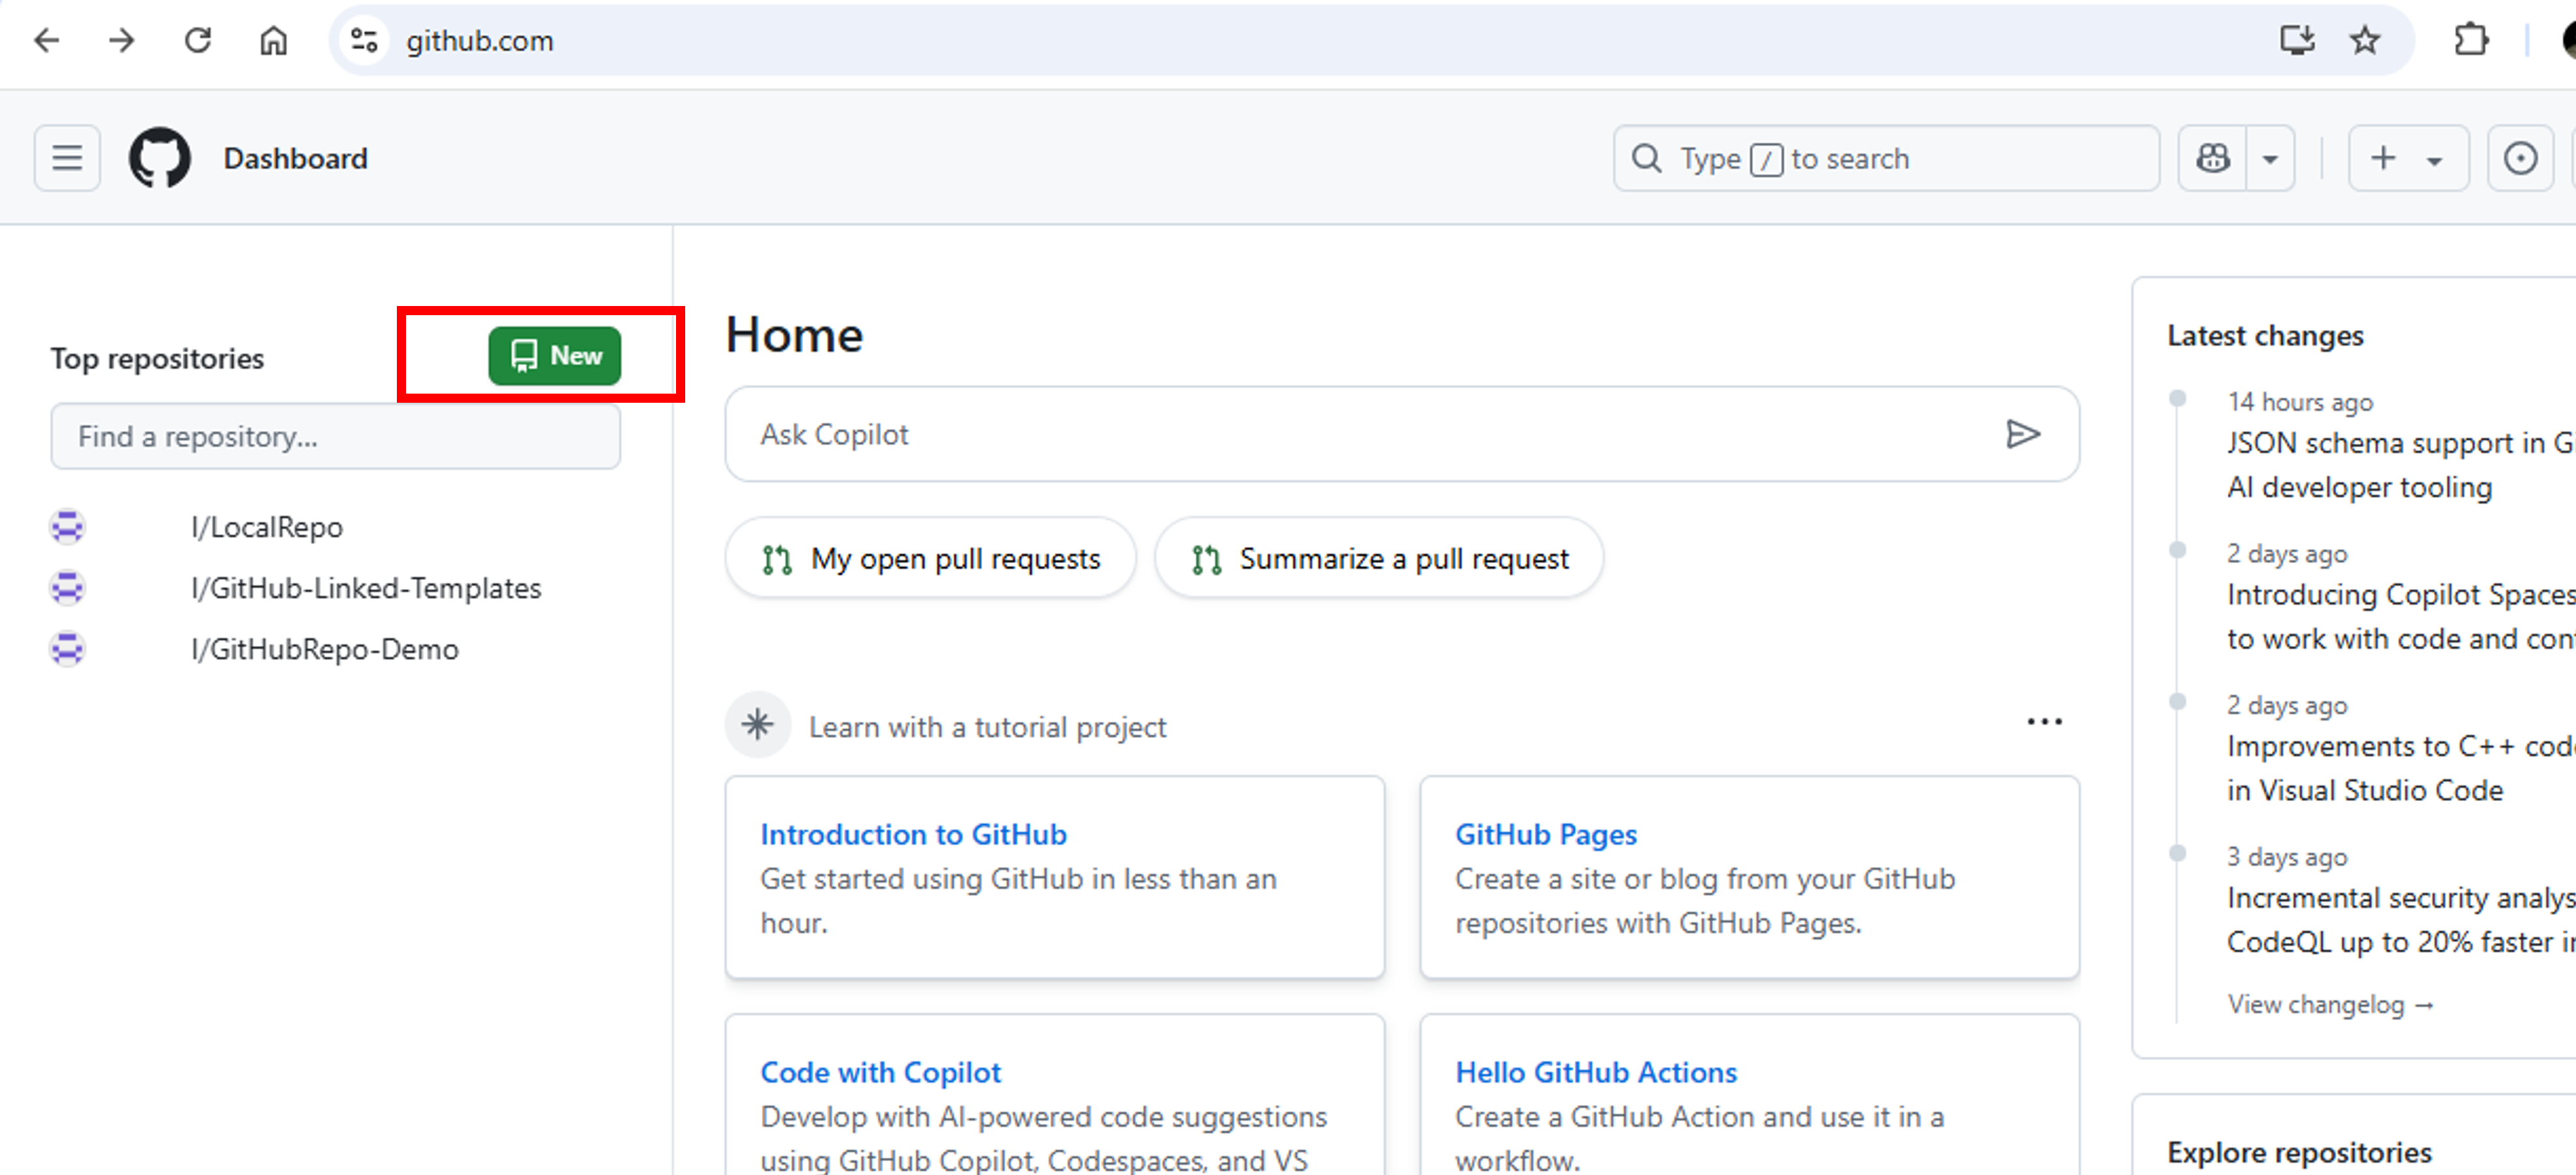
- Create a new repository by clicking New button as depicted in snap below. A GitHub repository is a folder-like structure on GitHub where you store your code and its history and collaborate with others.

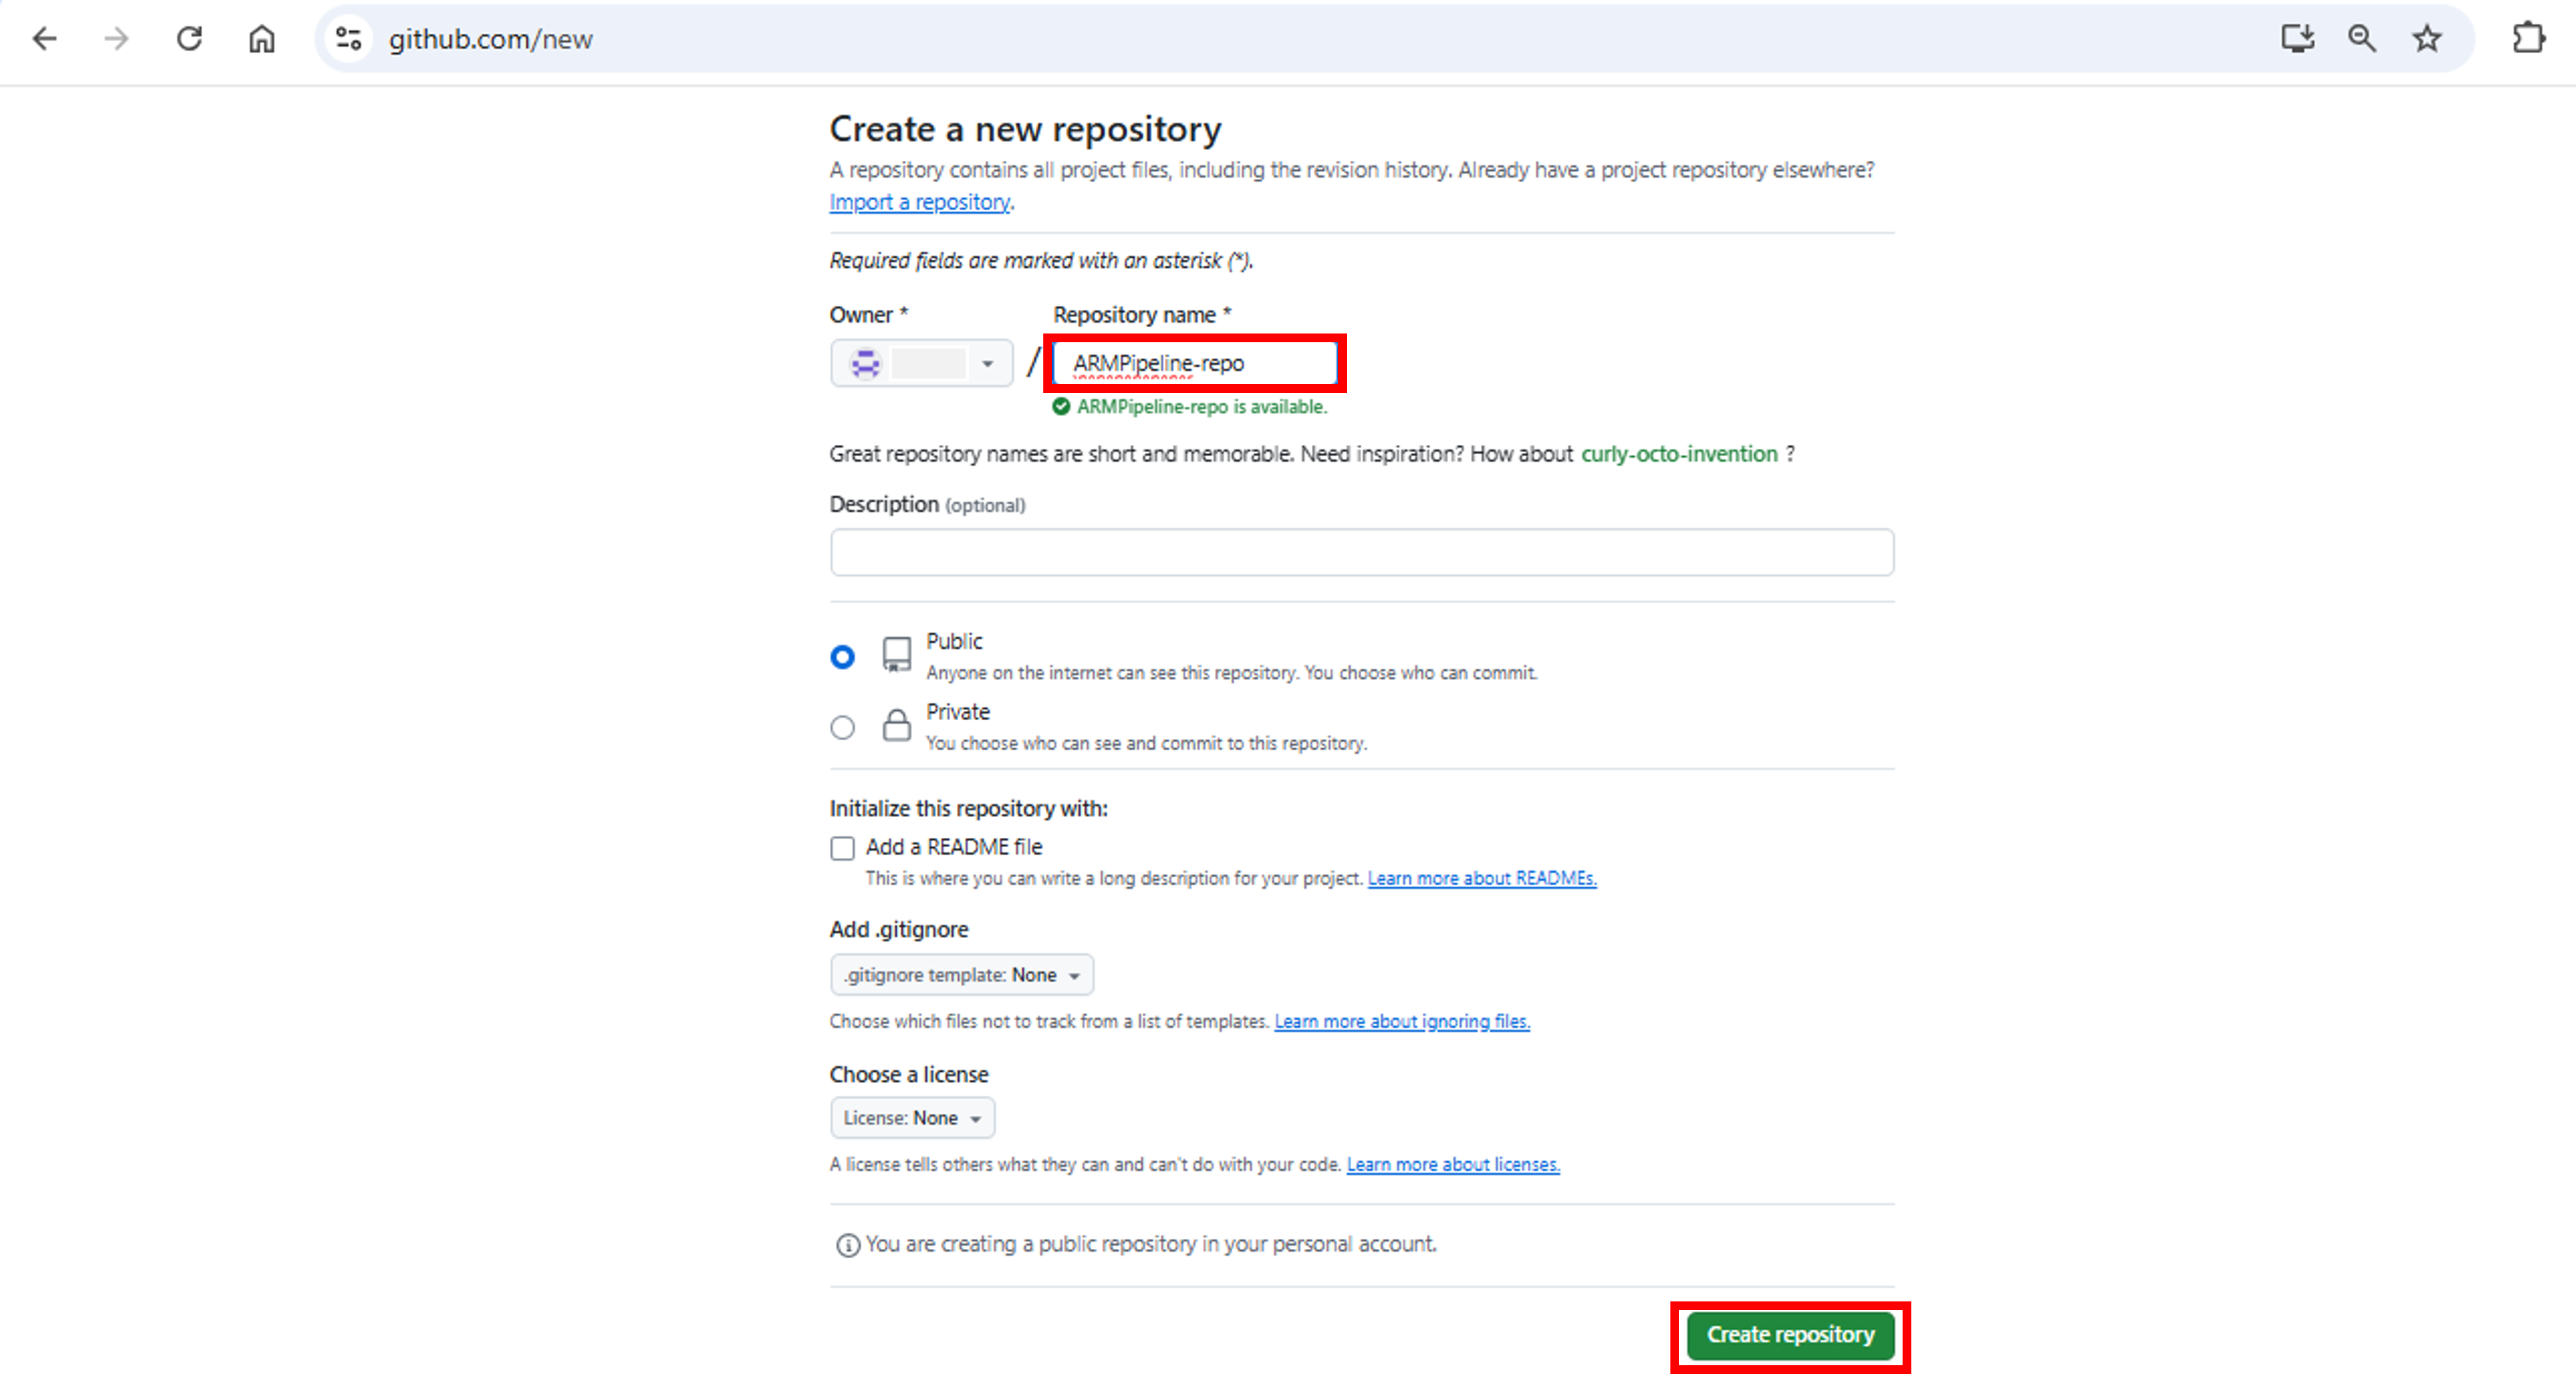
- Give a name to the repository. For this tutorial, I have named it ARMPipeline-repo. Click on Create Repository.

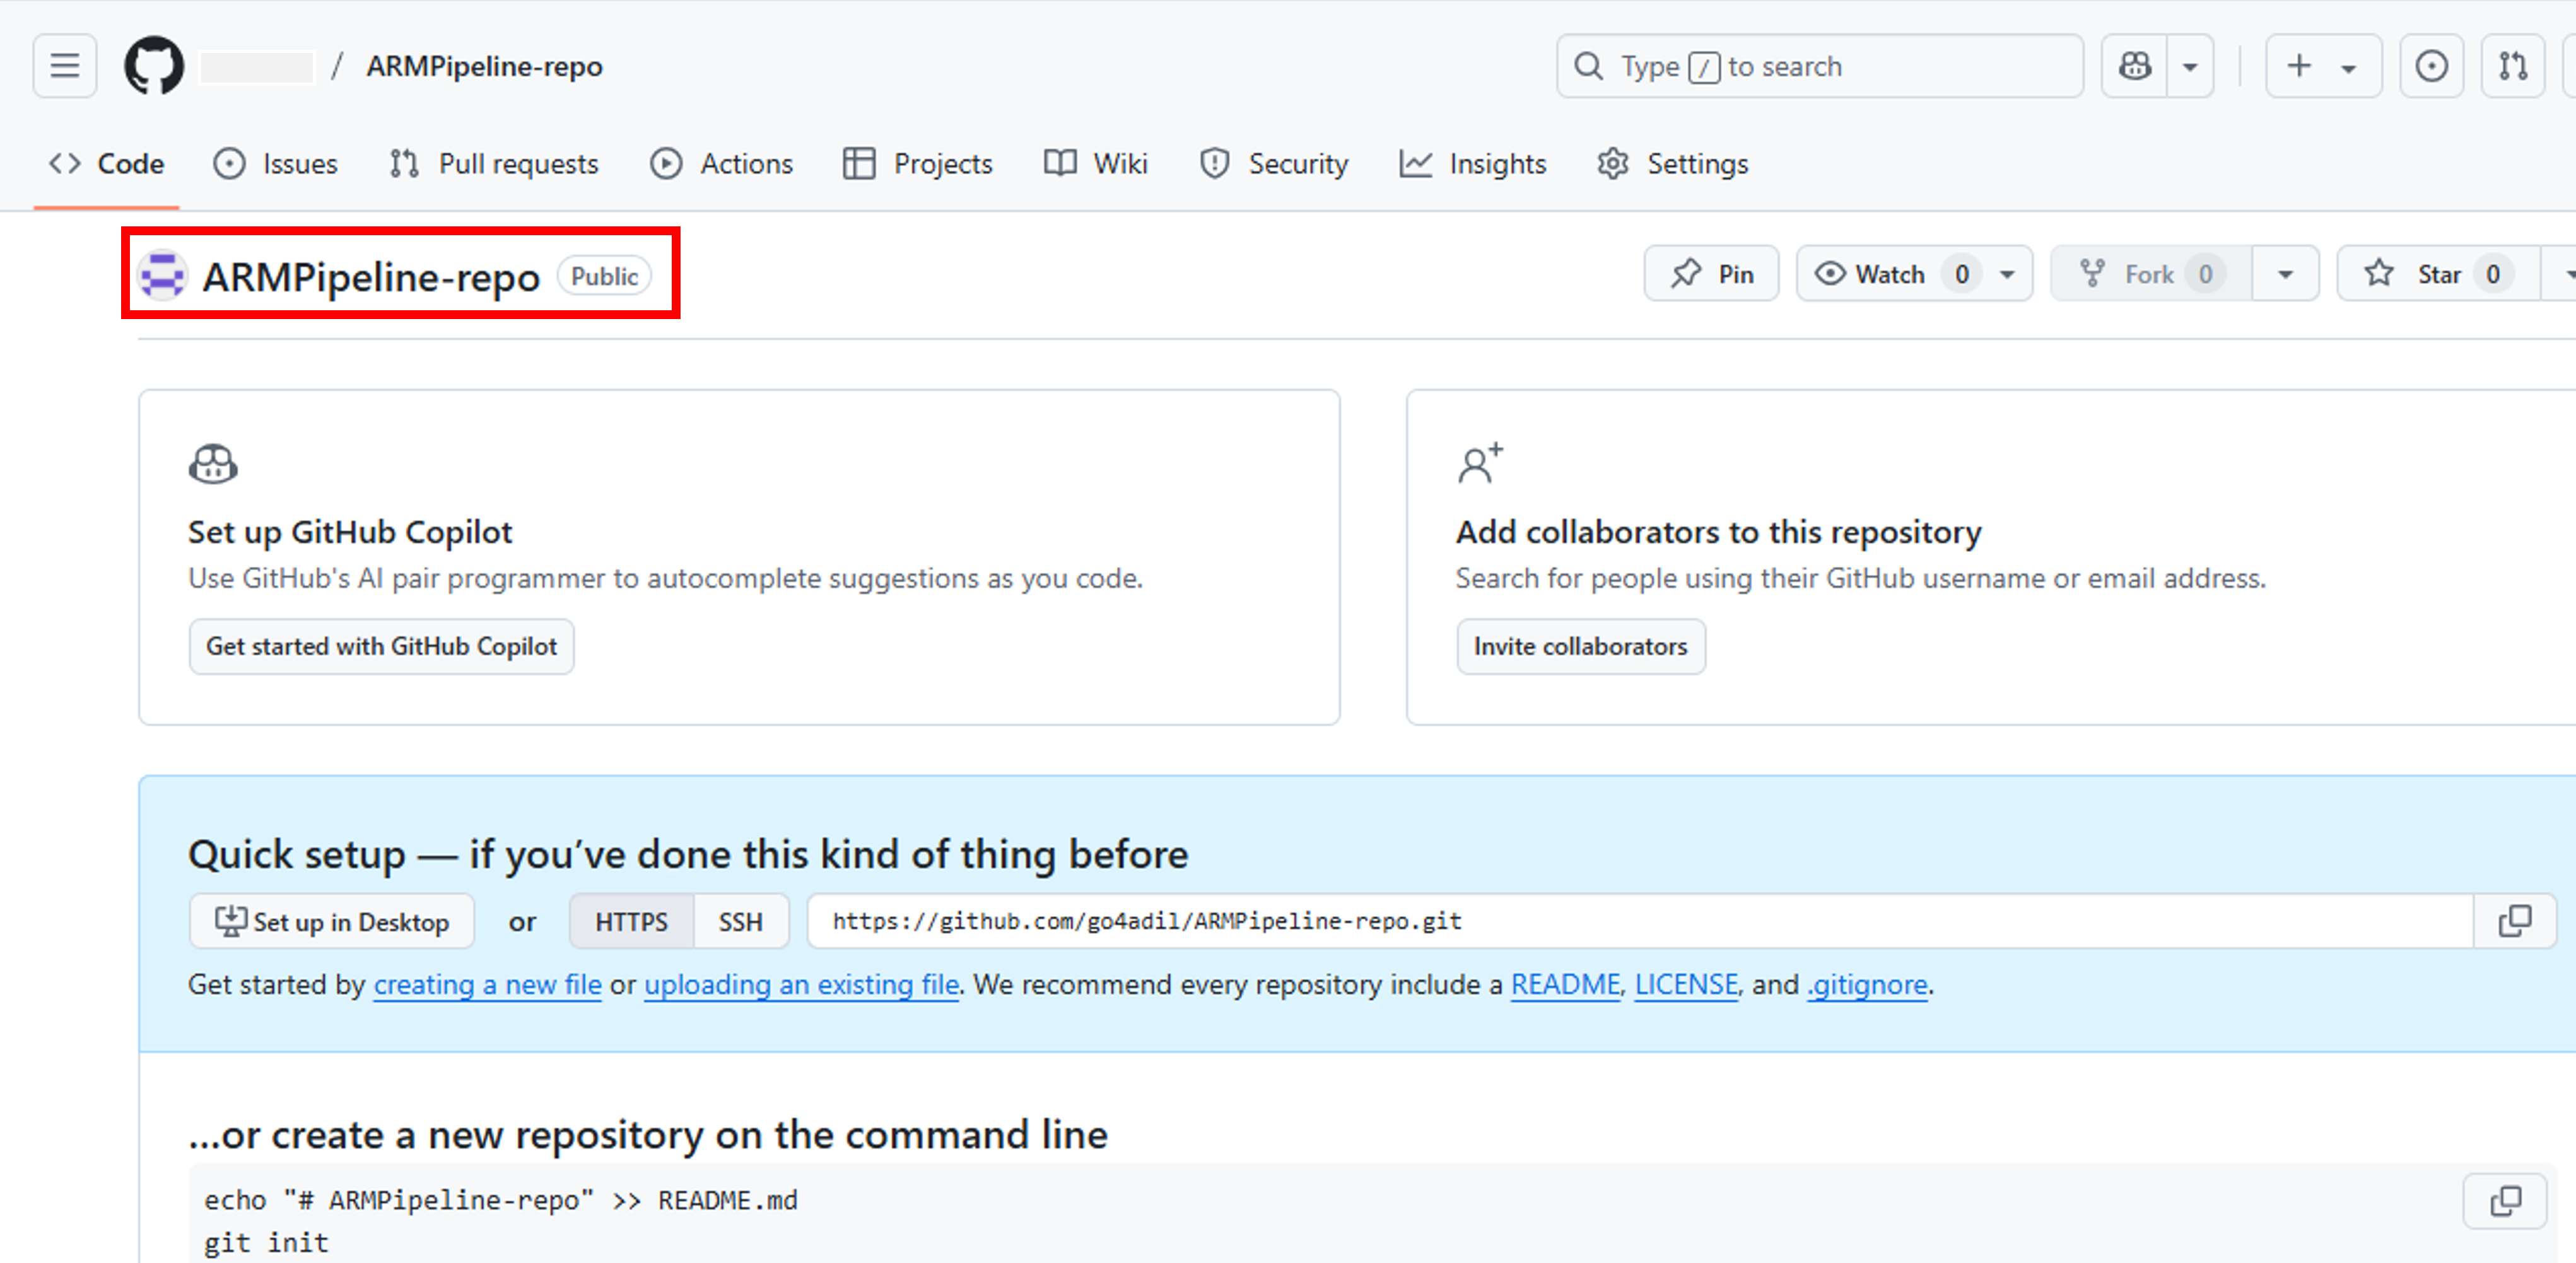
- A new repository will be created. Repository hosted on GitHub is called remote repository.

Clone Remote Repository
Next, we need to clone a local repository from this remote repository and then push changes committed in local repository to the remote repository.
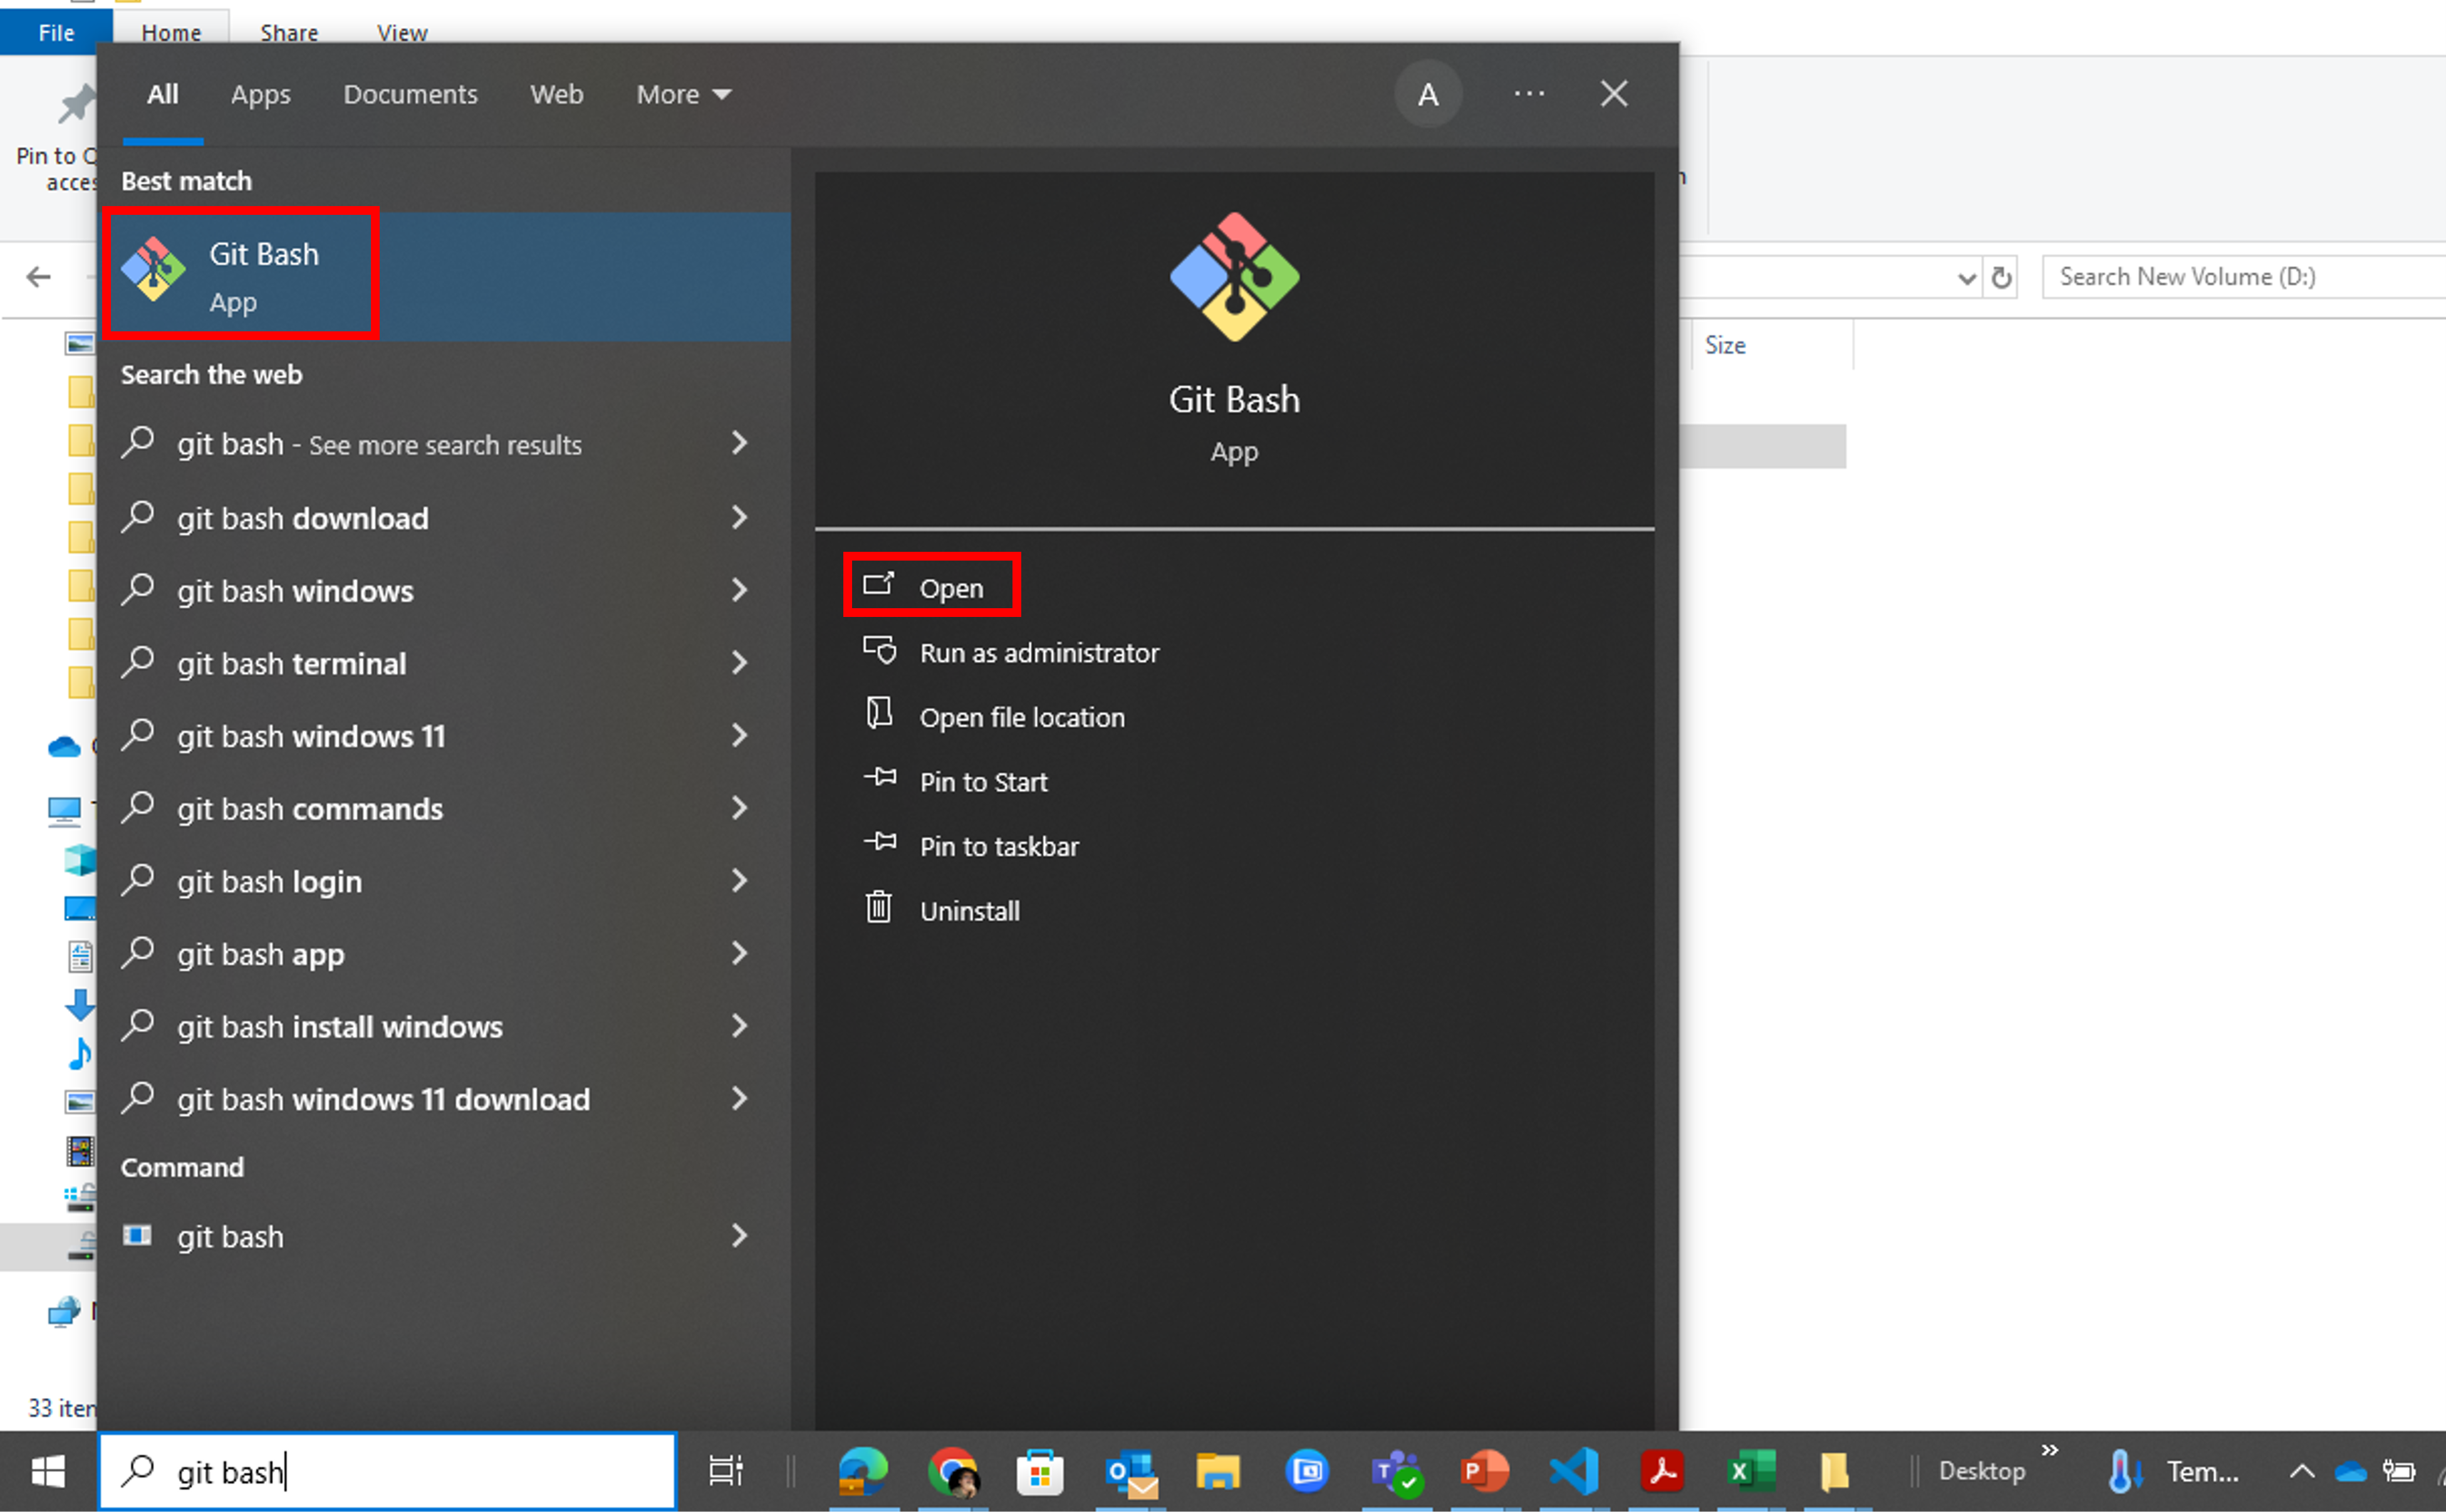
- Run Git Bash application. If you don’t have Git Bash installed, install Git based on your OS. Click on the link to install Git for Windows

- Change directory to the location where you want to store your local repository. For this tutorial, I shall use D drive. Type cd d:
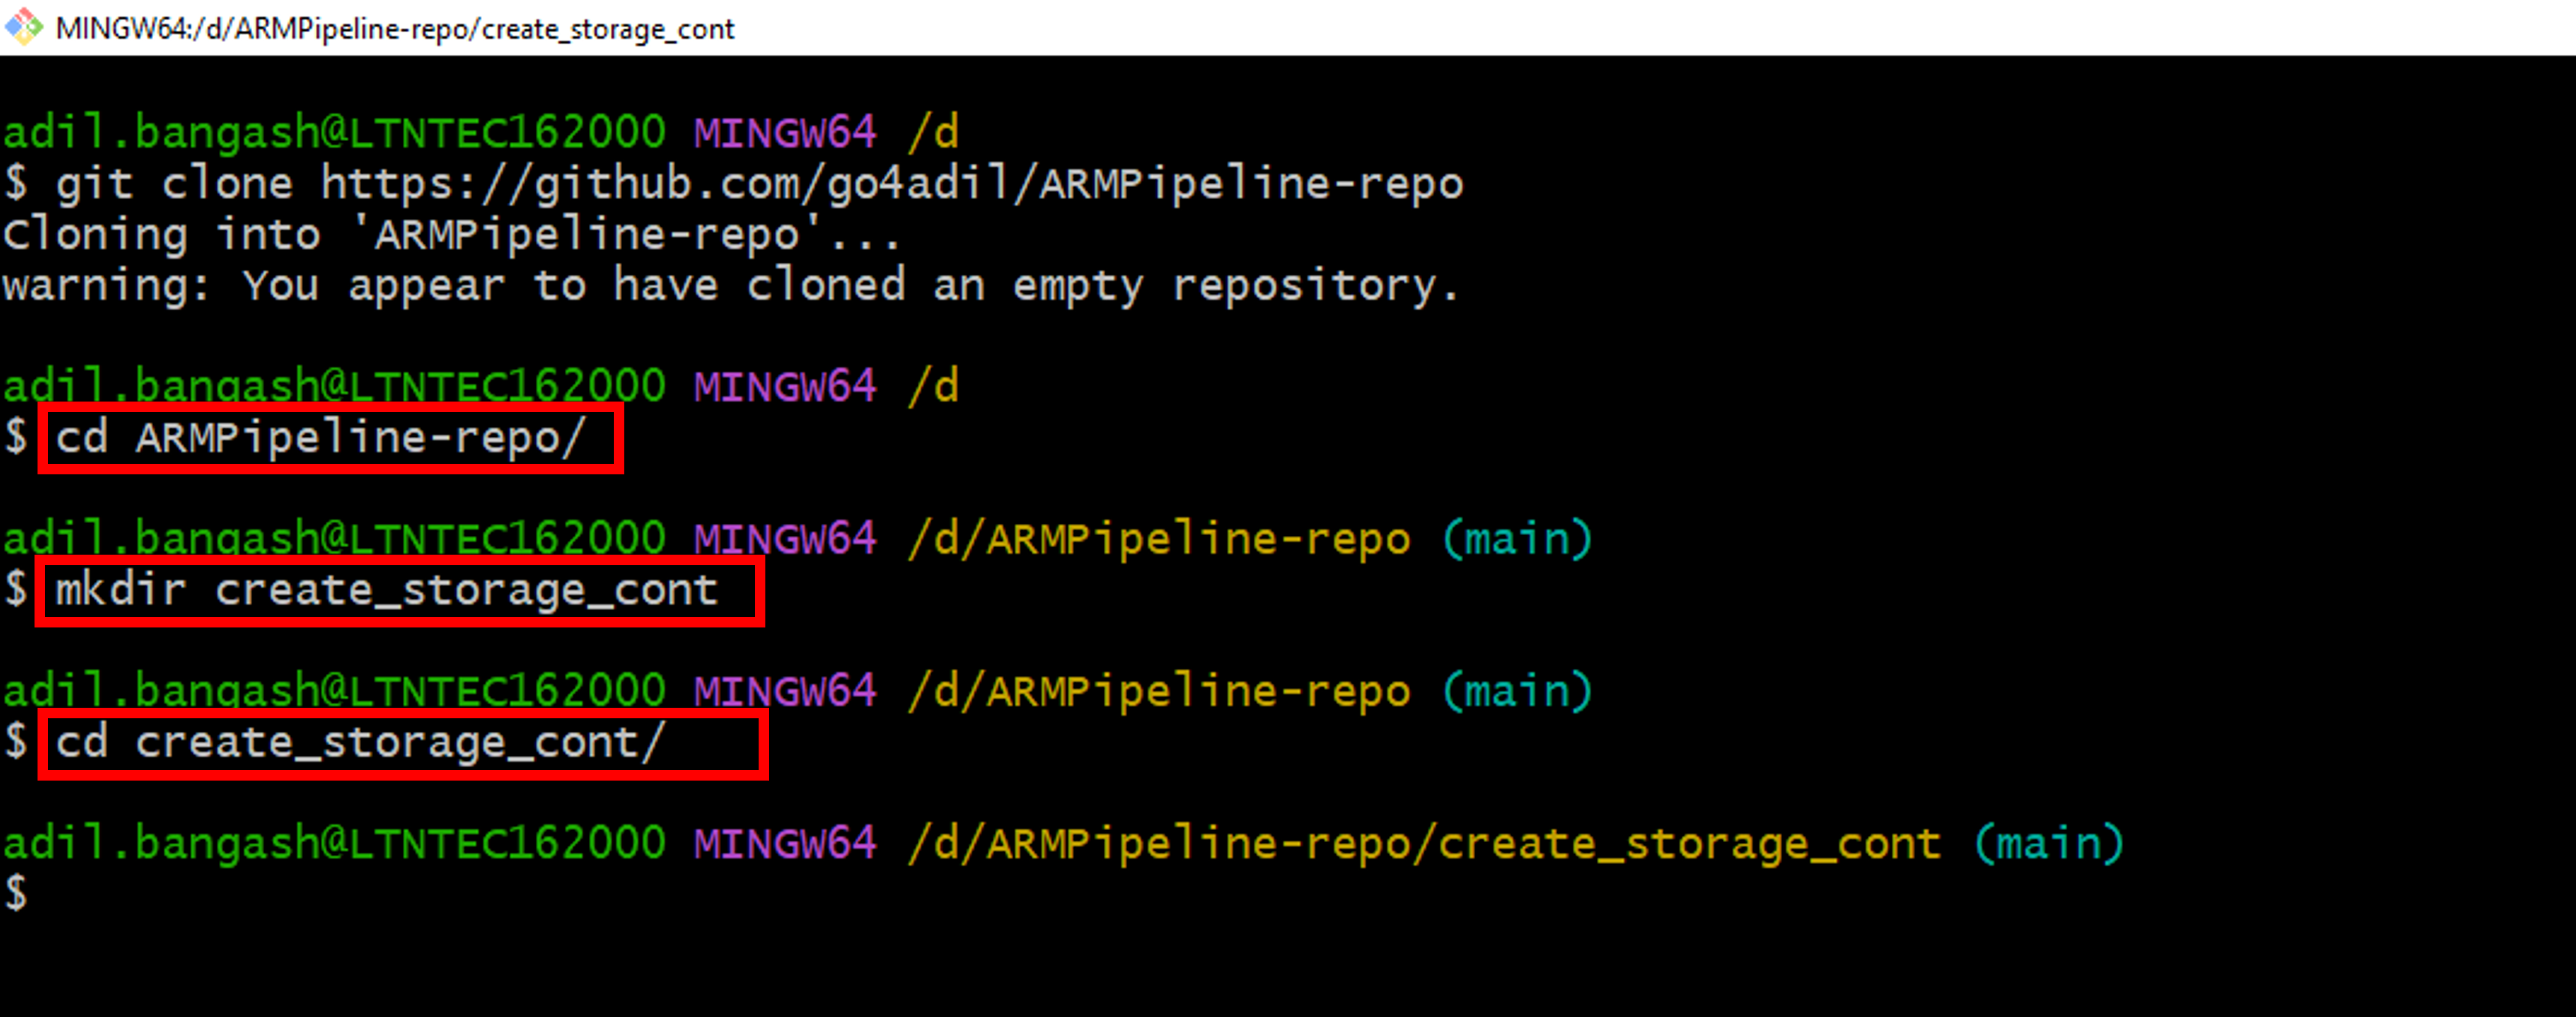
- Type git clone https://github.com/[yourAccountName]/ARMPipeline-repo and press Enter

- A new repository (folder) with the same name as remote repository will be created locally on your machine in the specified directory

- Now type following commands to create a new directory named create_storage_cont and change your path to this newly created directory. This directory will be used to store our ARM template
cd ARMPipeline-repo
mkdir create_storage_cont
cd create_storage_cont

Download a Quickstart Template
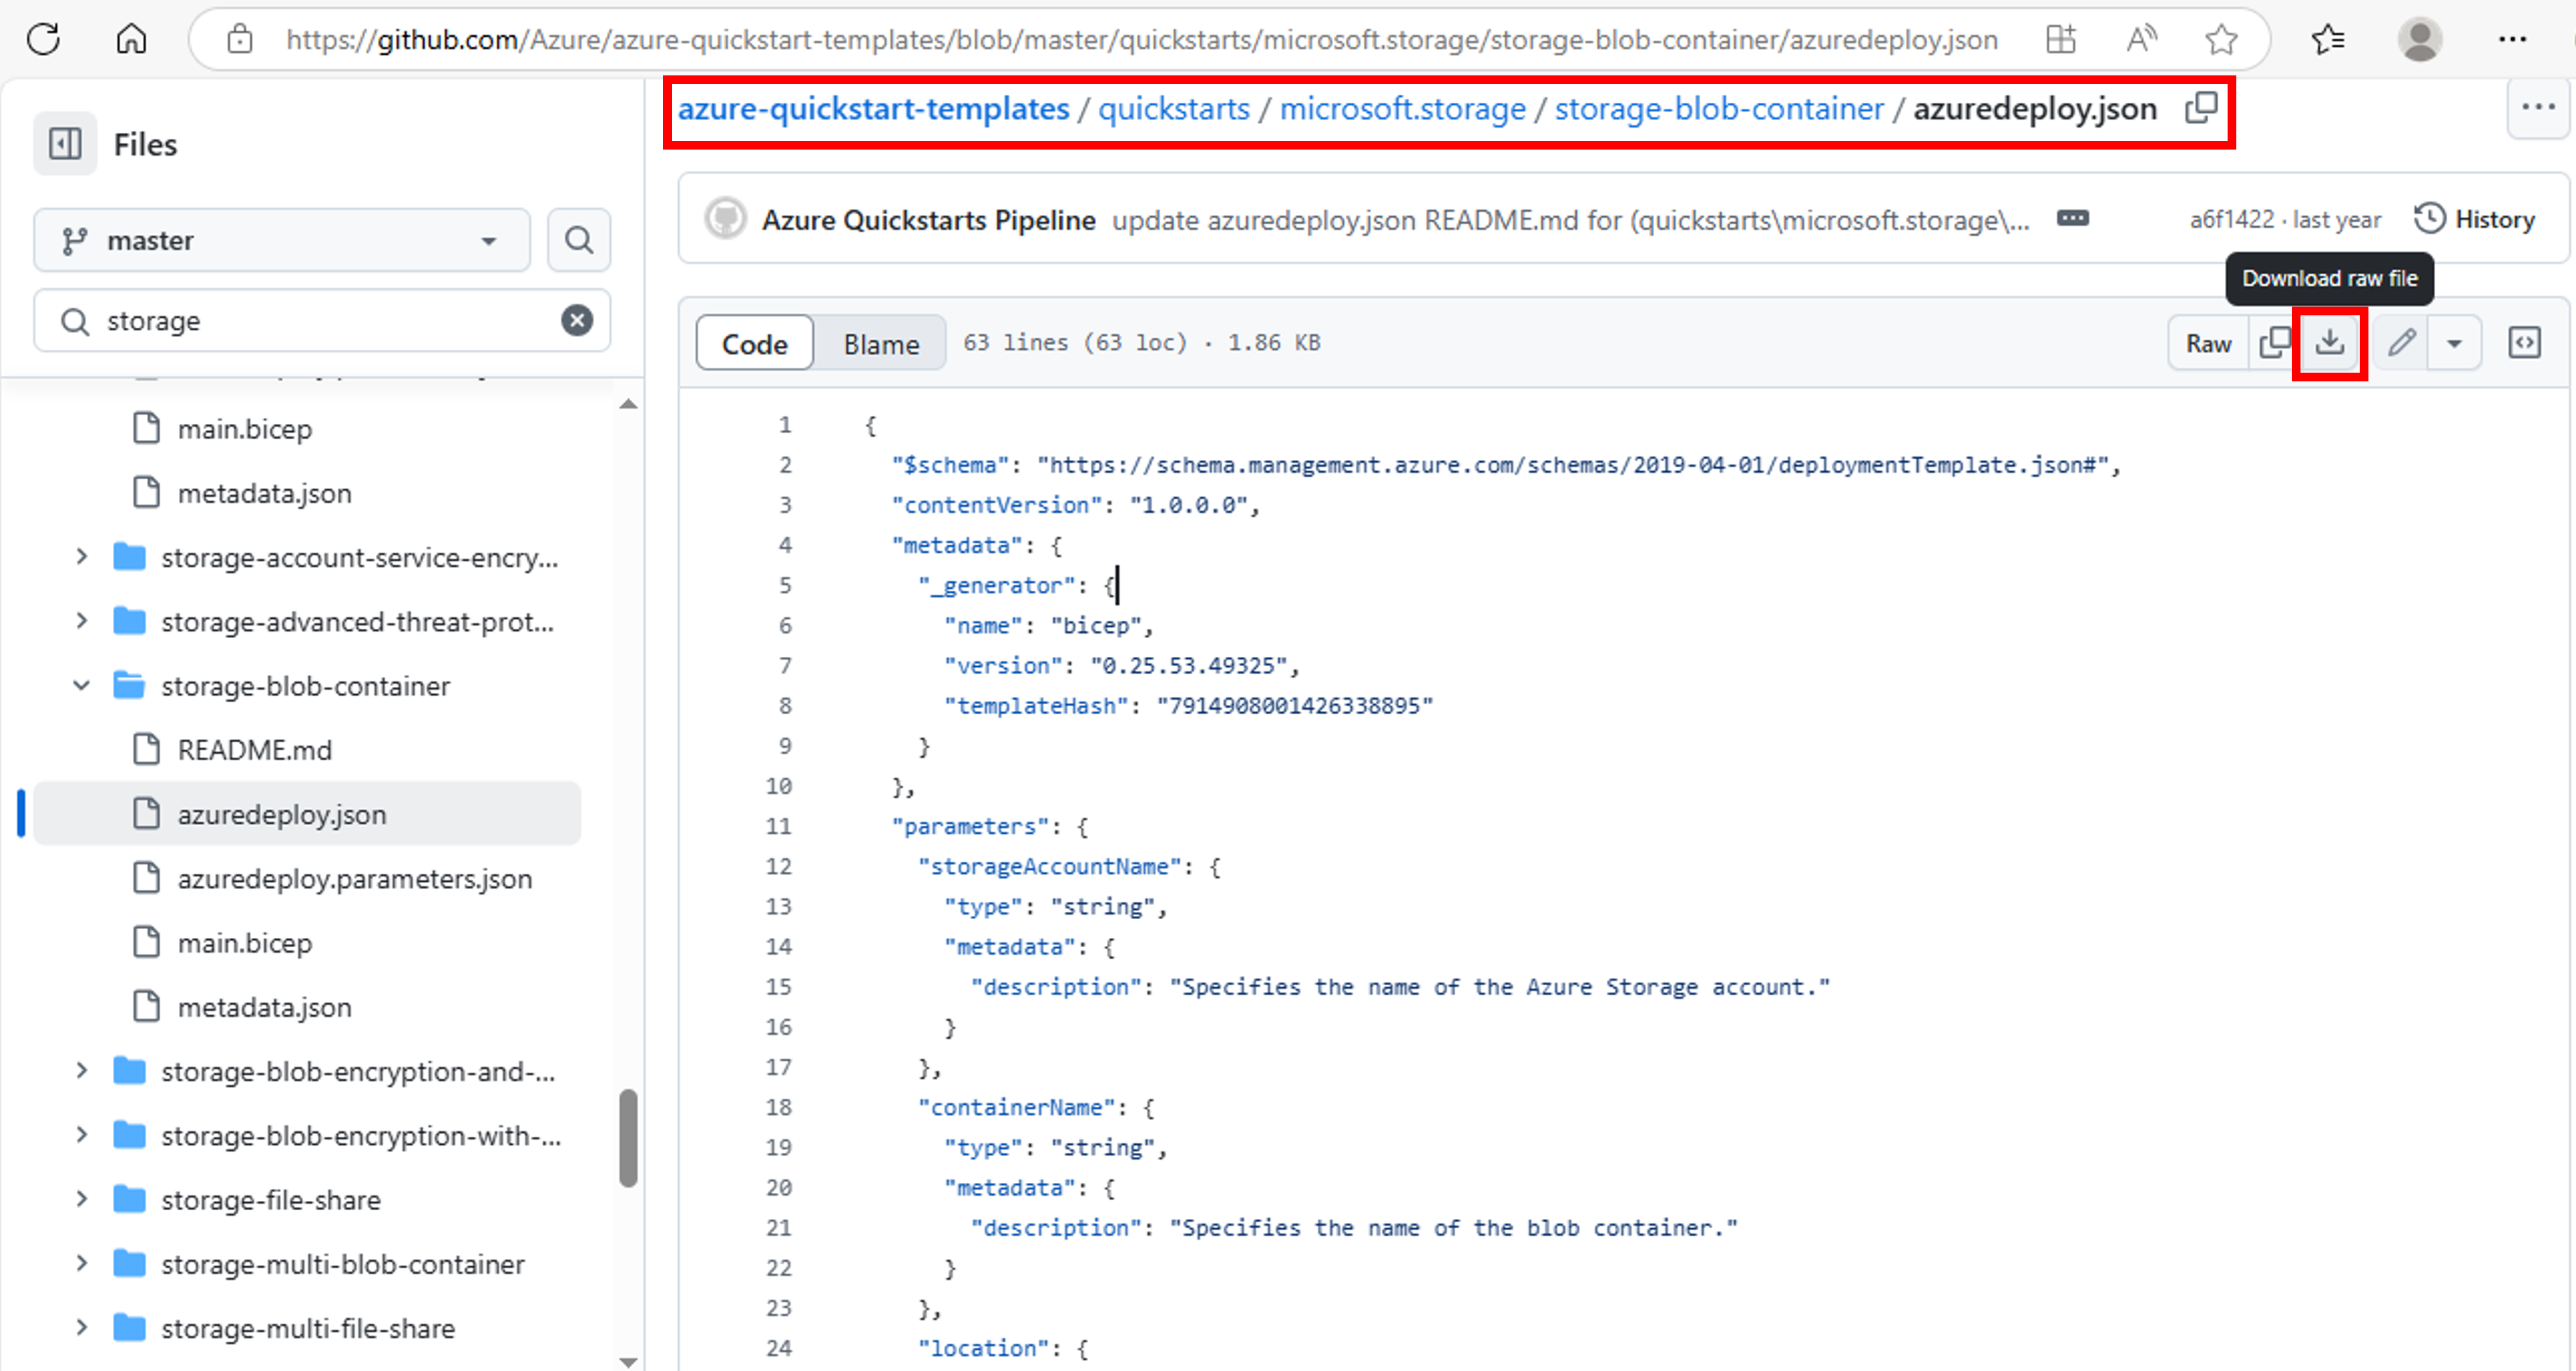
In this tutorial, we shall be deploying a new Storage Blob Container using ARM template. Instead of creating the template, we shall use Azure Quickstart Templates to download the template file. Azure Quickstart Templates is a public repository hosted on GitHub that provides access to vast array of ARM templates contributed by community.
- Download azuredeploy.json file from following location in Azure Quickstart Templates
https://github.com/Azure/azure-quickstart-templates/blob/master/quickstarts/microsoft.storage/storage-blob-container/azuredeploy.json
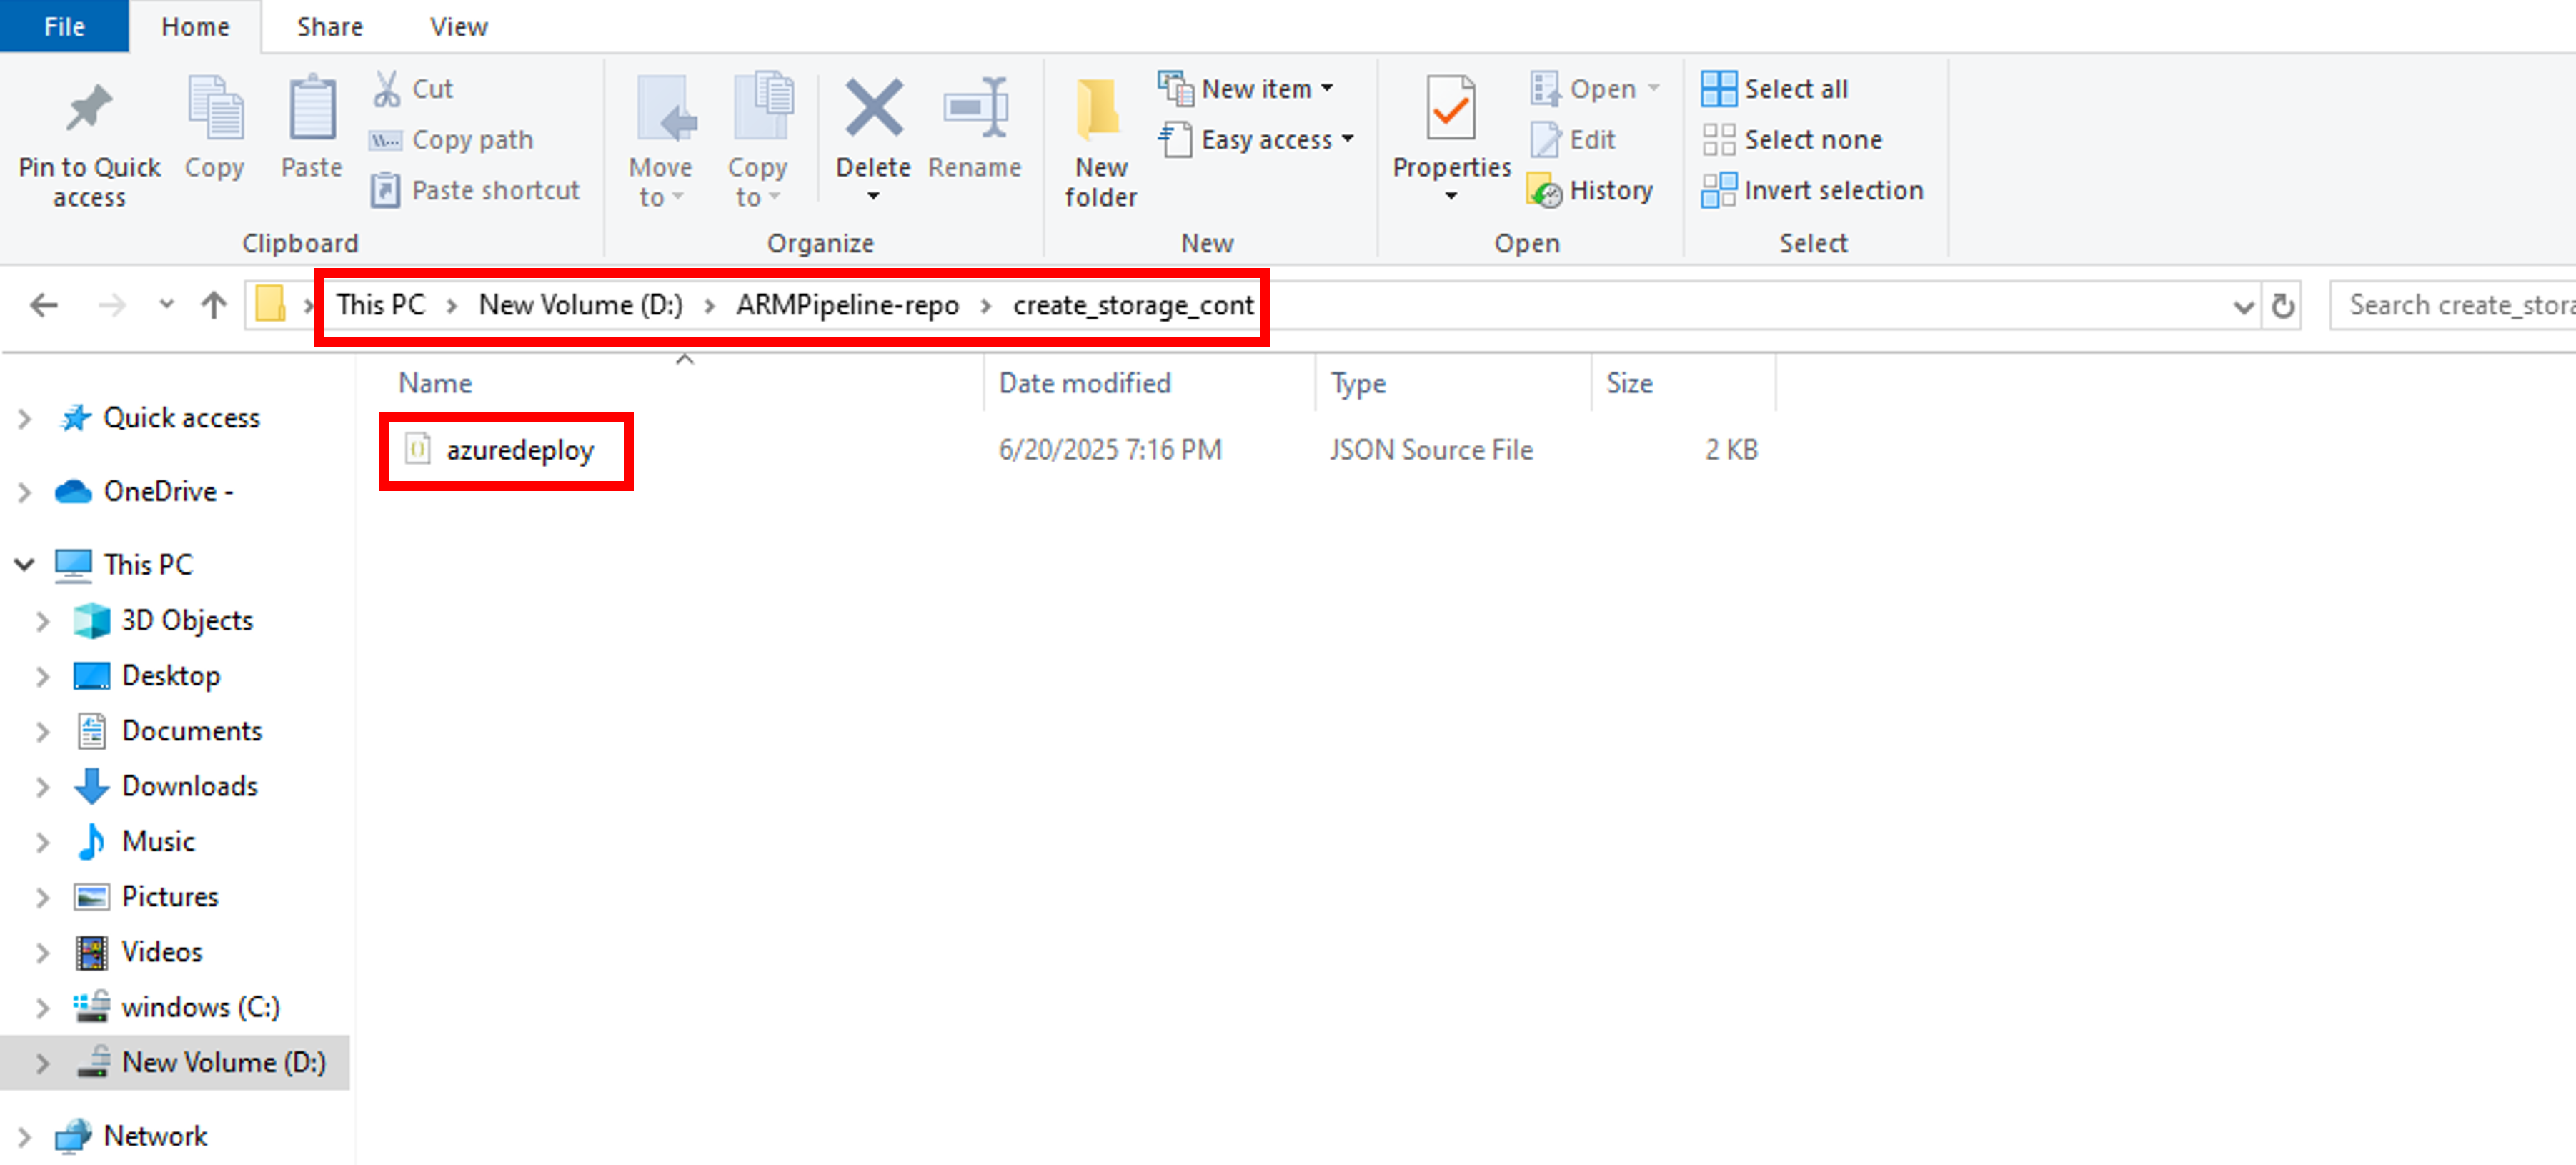
- You will see a new file azuredeploy in create_storage_cont directory within local ARMPipeline-repo directory

- Now type following commands to push changes from the local repo to remote repo
git add .
git commit -m “Add a new storage container template”
git push origin main
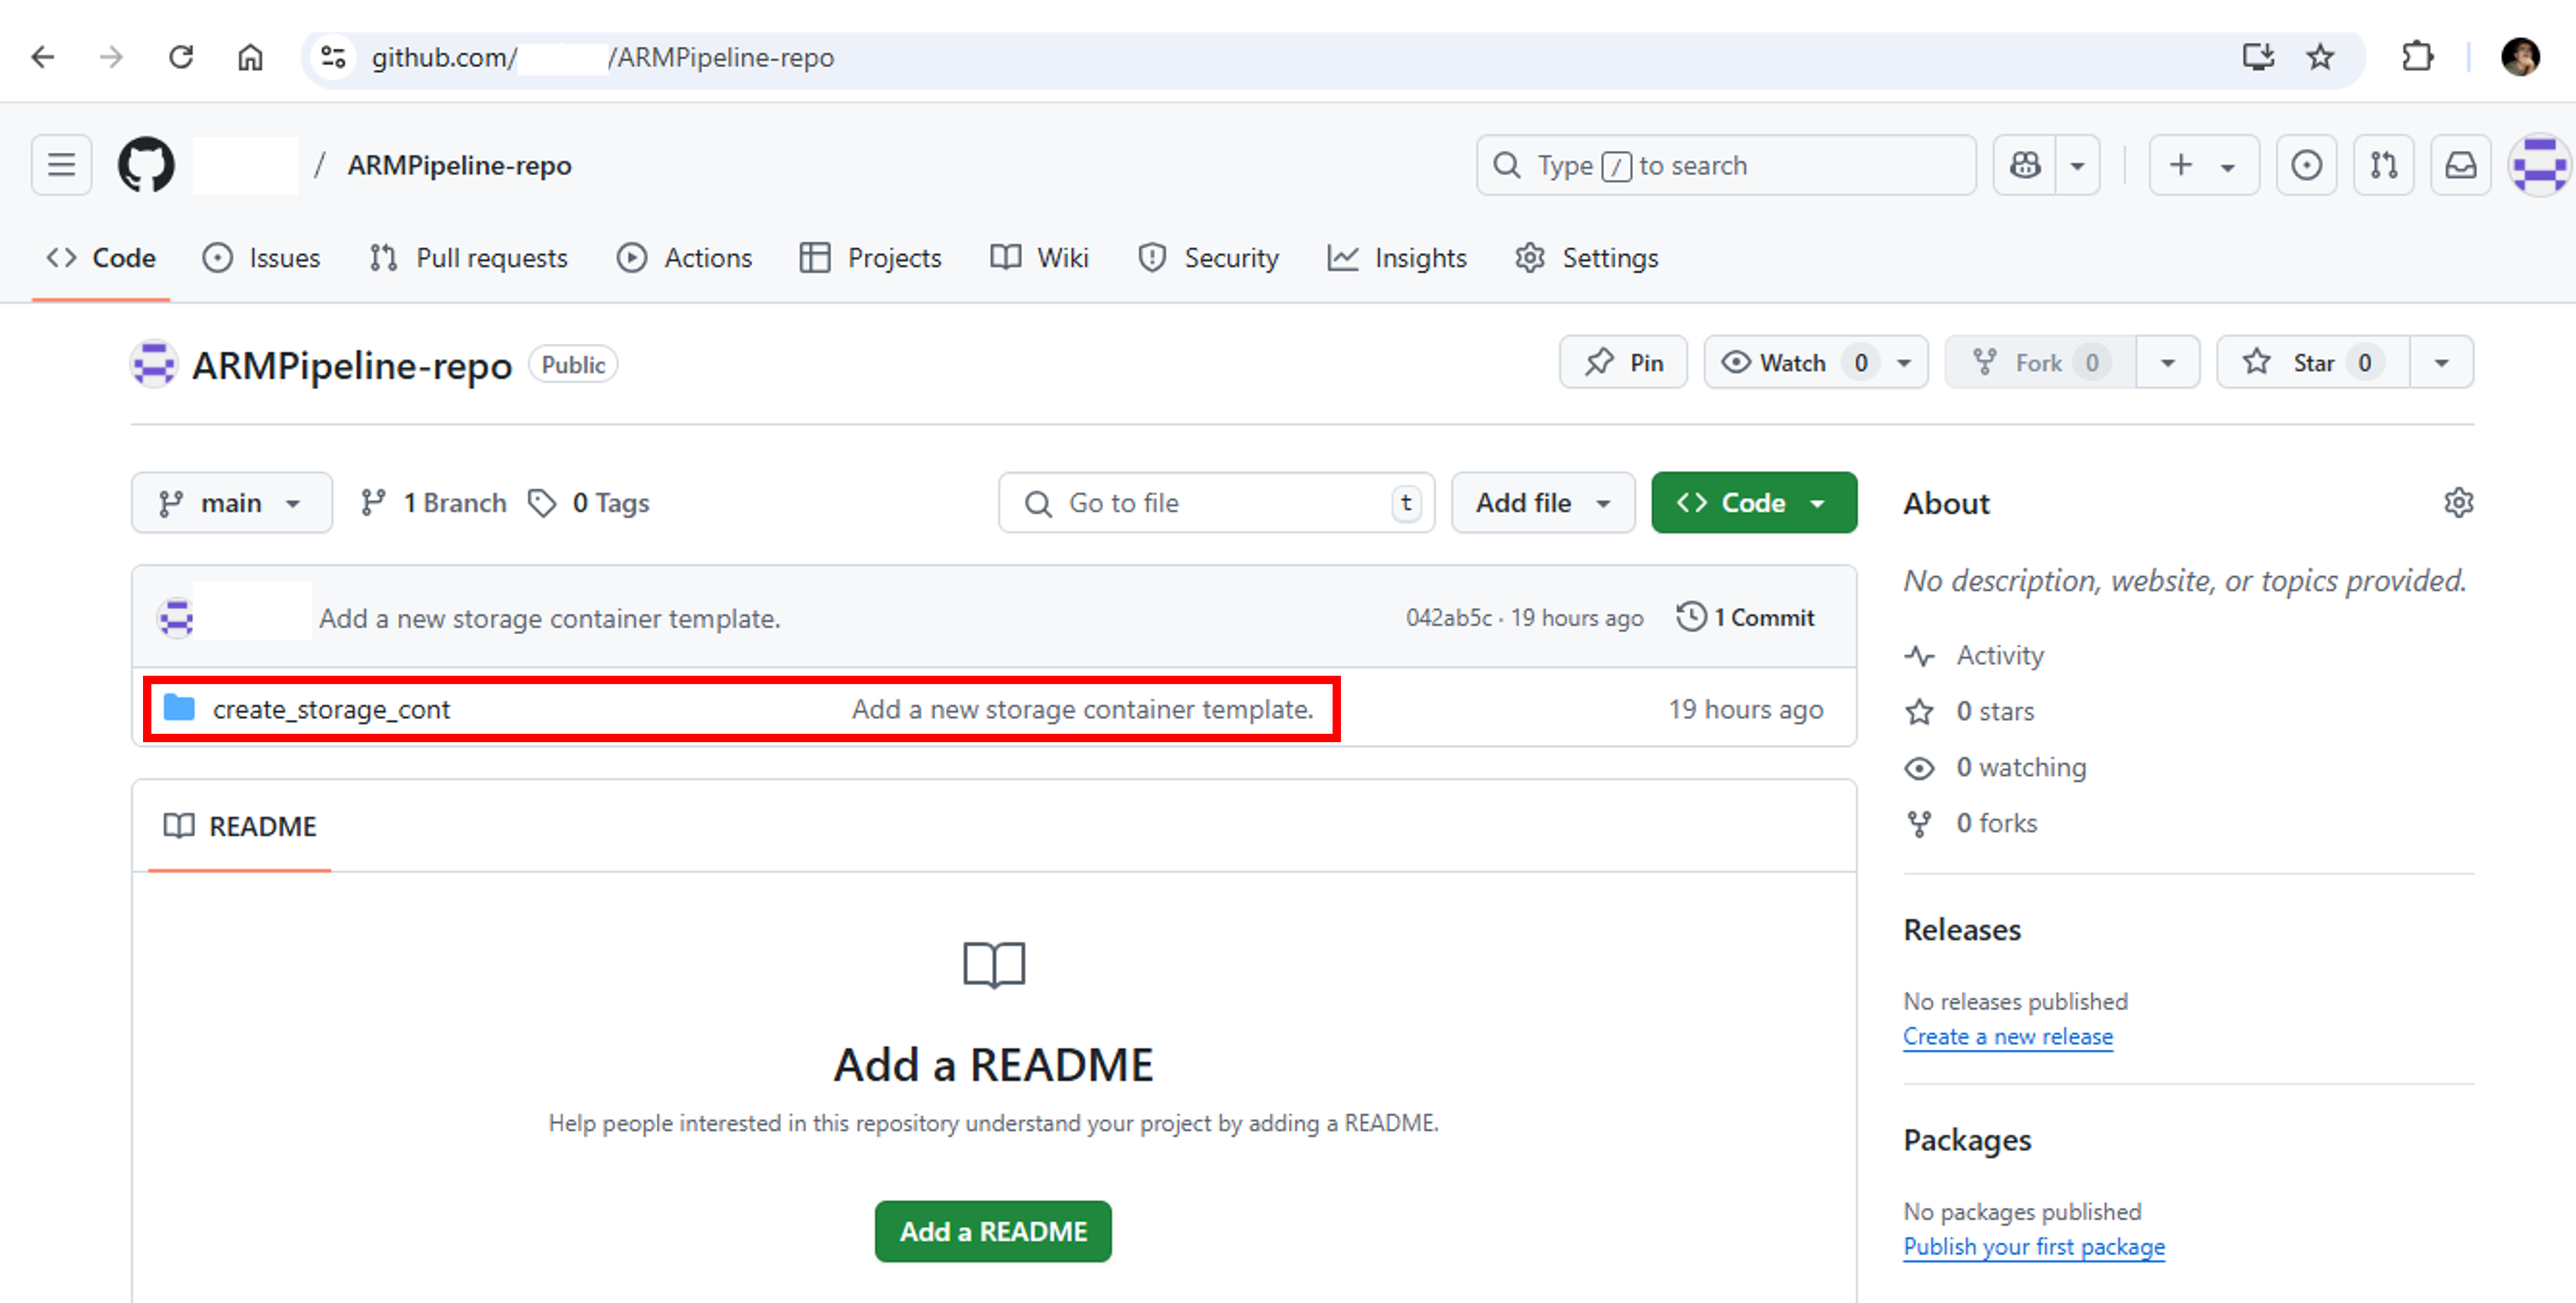
- Browse to your GitHub repository from a browser. The URL is https://github.com/[YourAccountName]/ARMPipeline-repo. You shall see the create_storage_cont folder and a file azuredeploy.json inside the folder

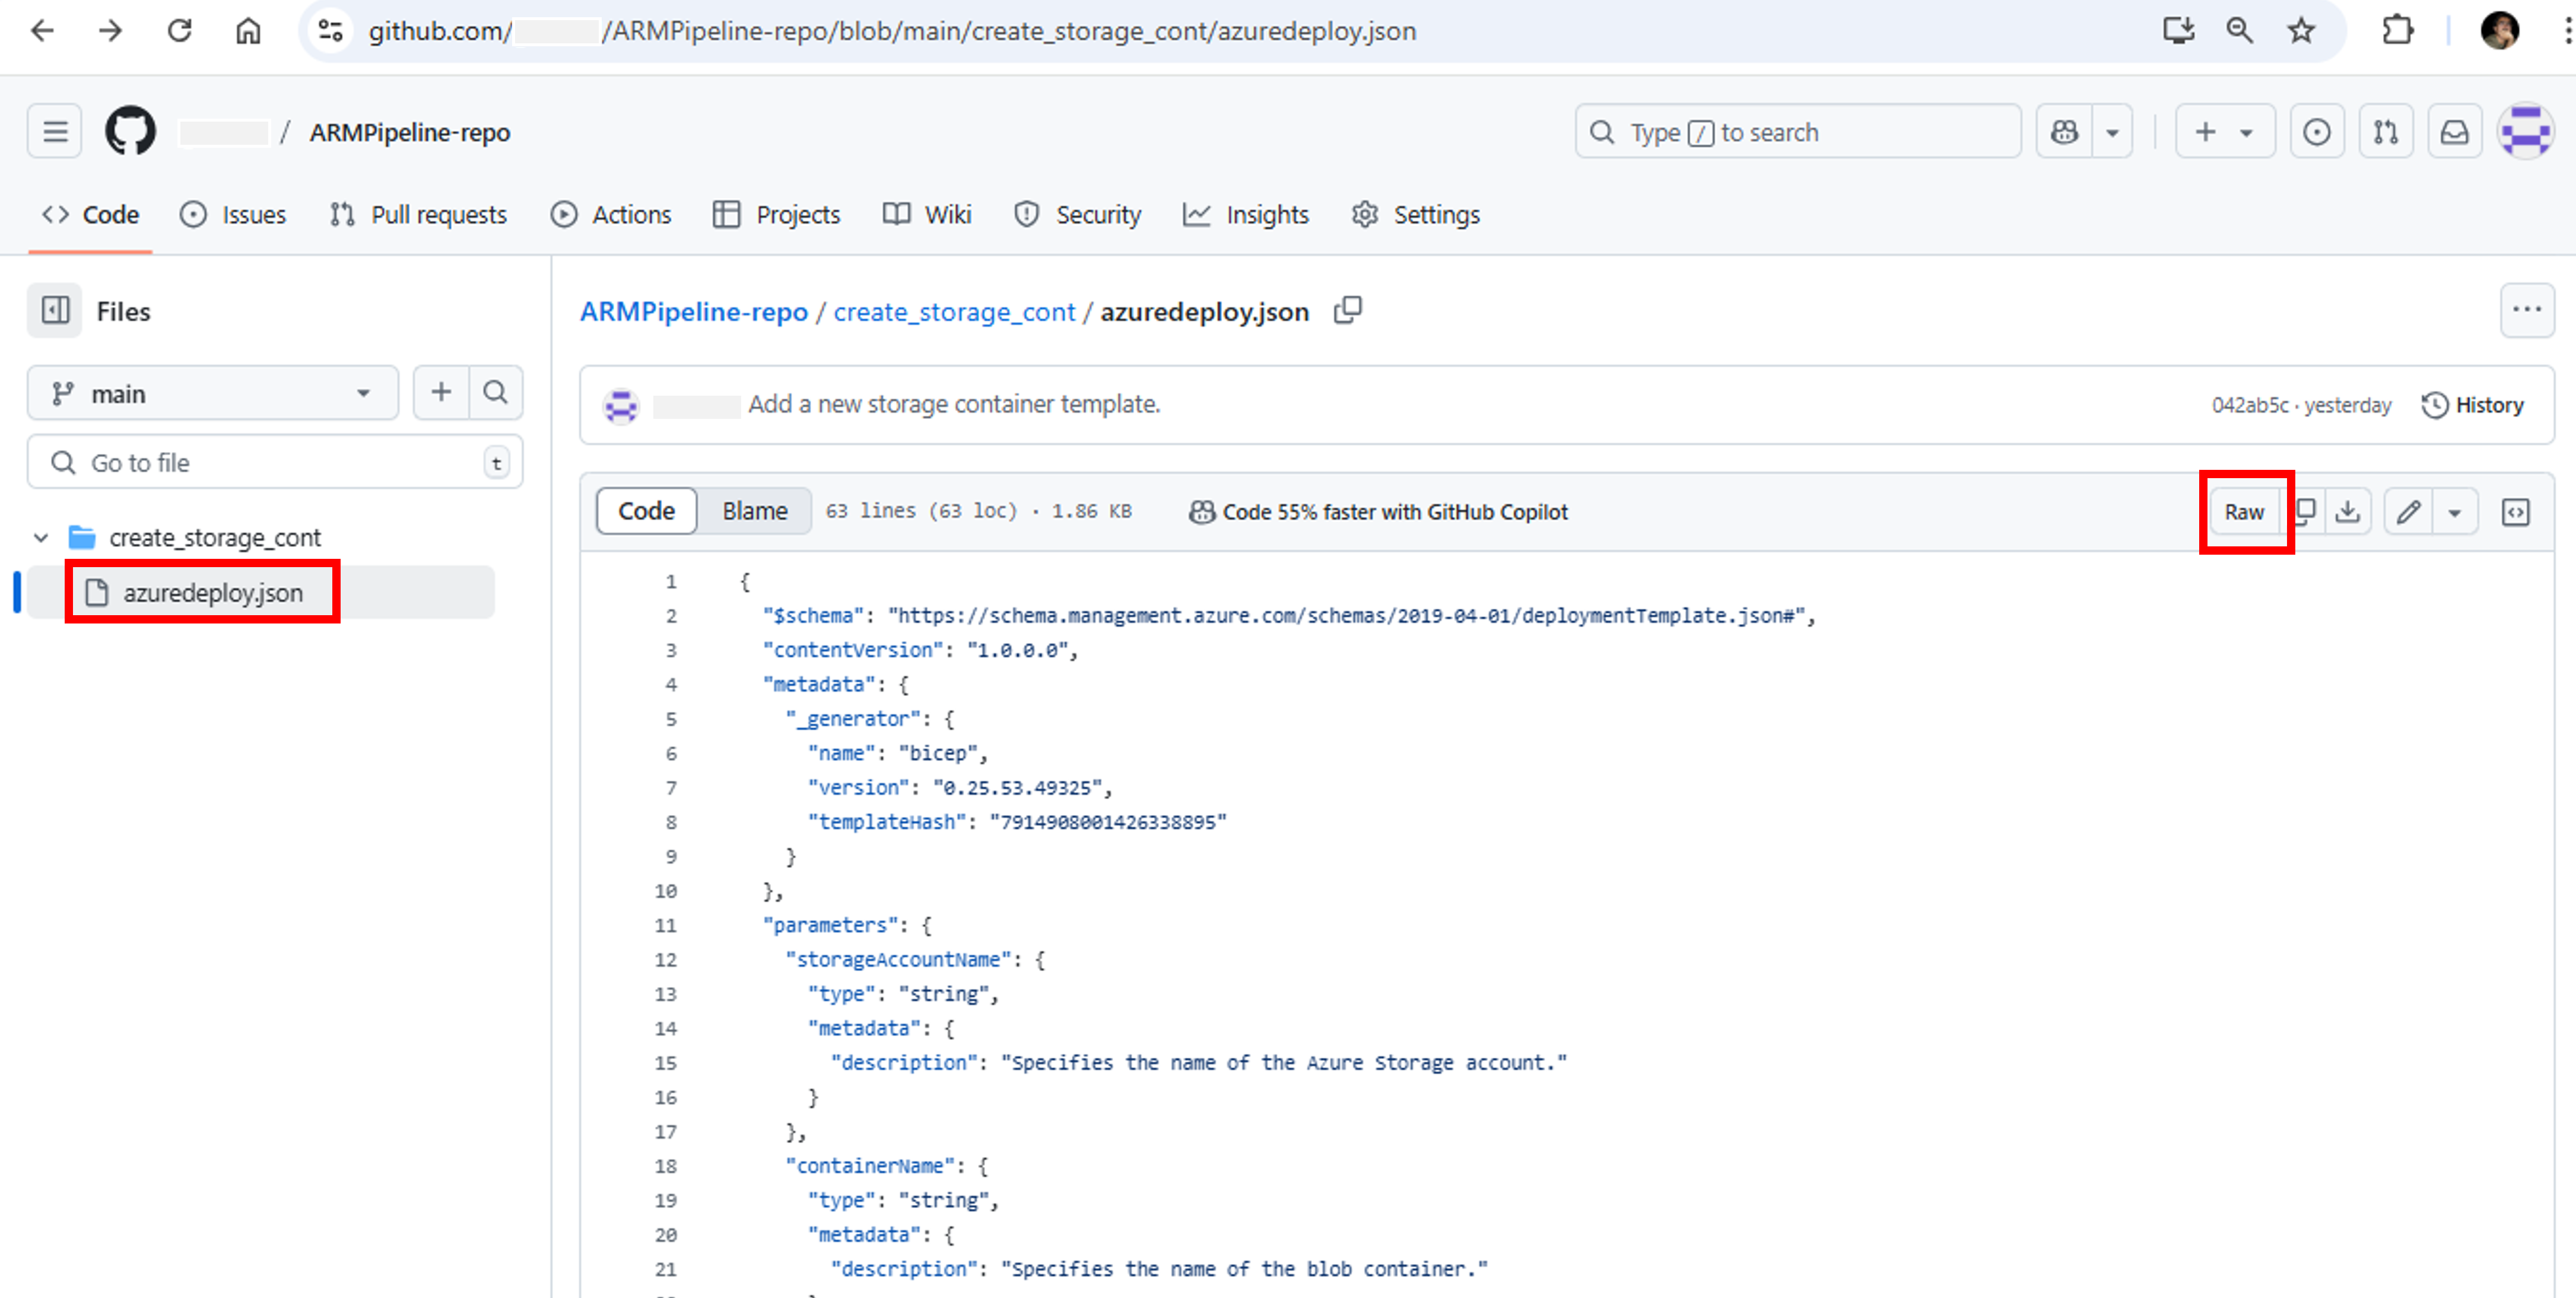
- Select azuredeploy.json to open the template. Click the Raw button

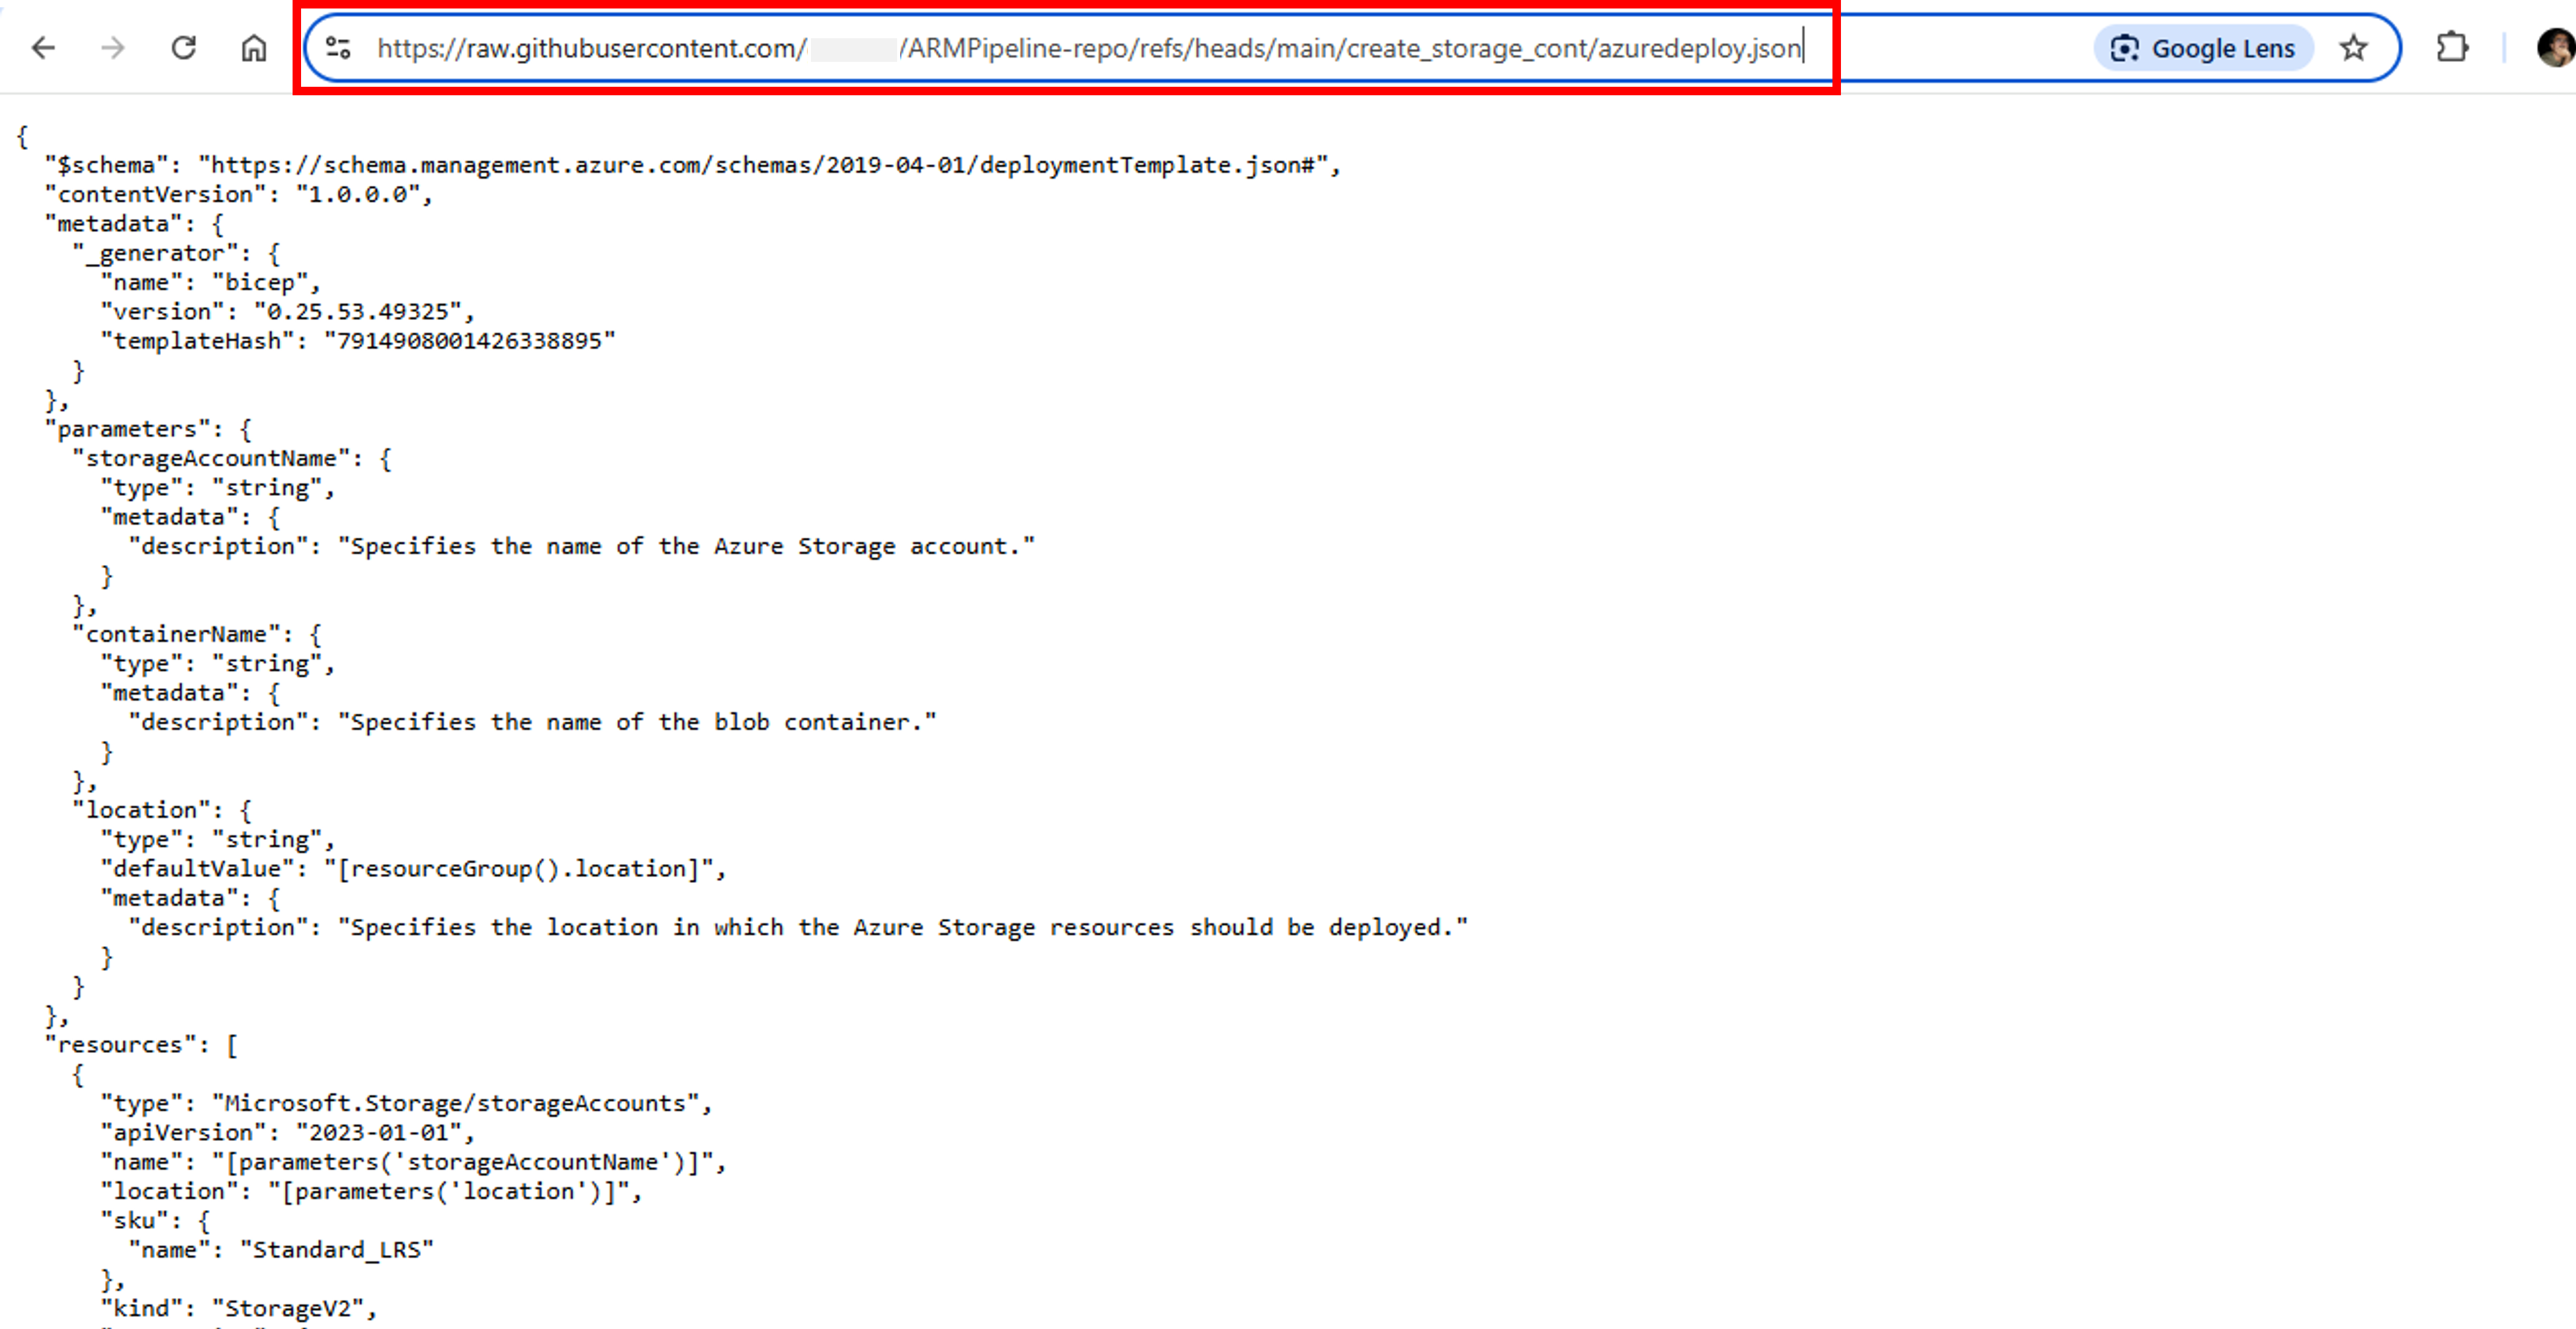
- Copy the URL of raw template. URL is https://raw.githubusercontent.com/[Your Account Name]/ARMPipeline-repo/refs/heads/main/create_storage_cont/azuredeploy.json. This link shall be required later while configuring the pipeline


Till this point, we have created a GitHub repository and uploaded our ARM template to it.
Step-2: Create a DevOps Organization and Project
In order to configure Azure Pipelines, first we need to create an organization and then a project within the organization.
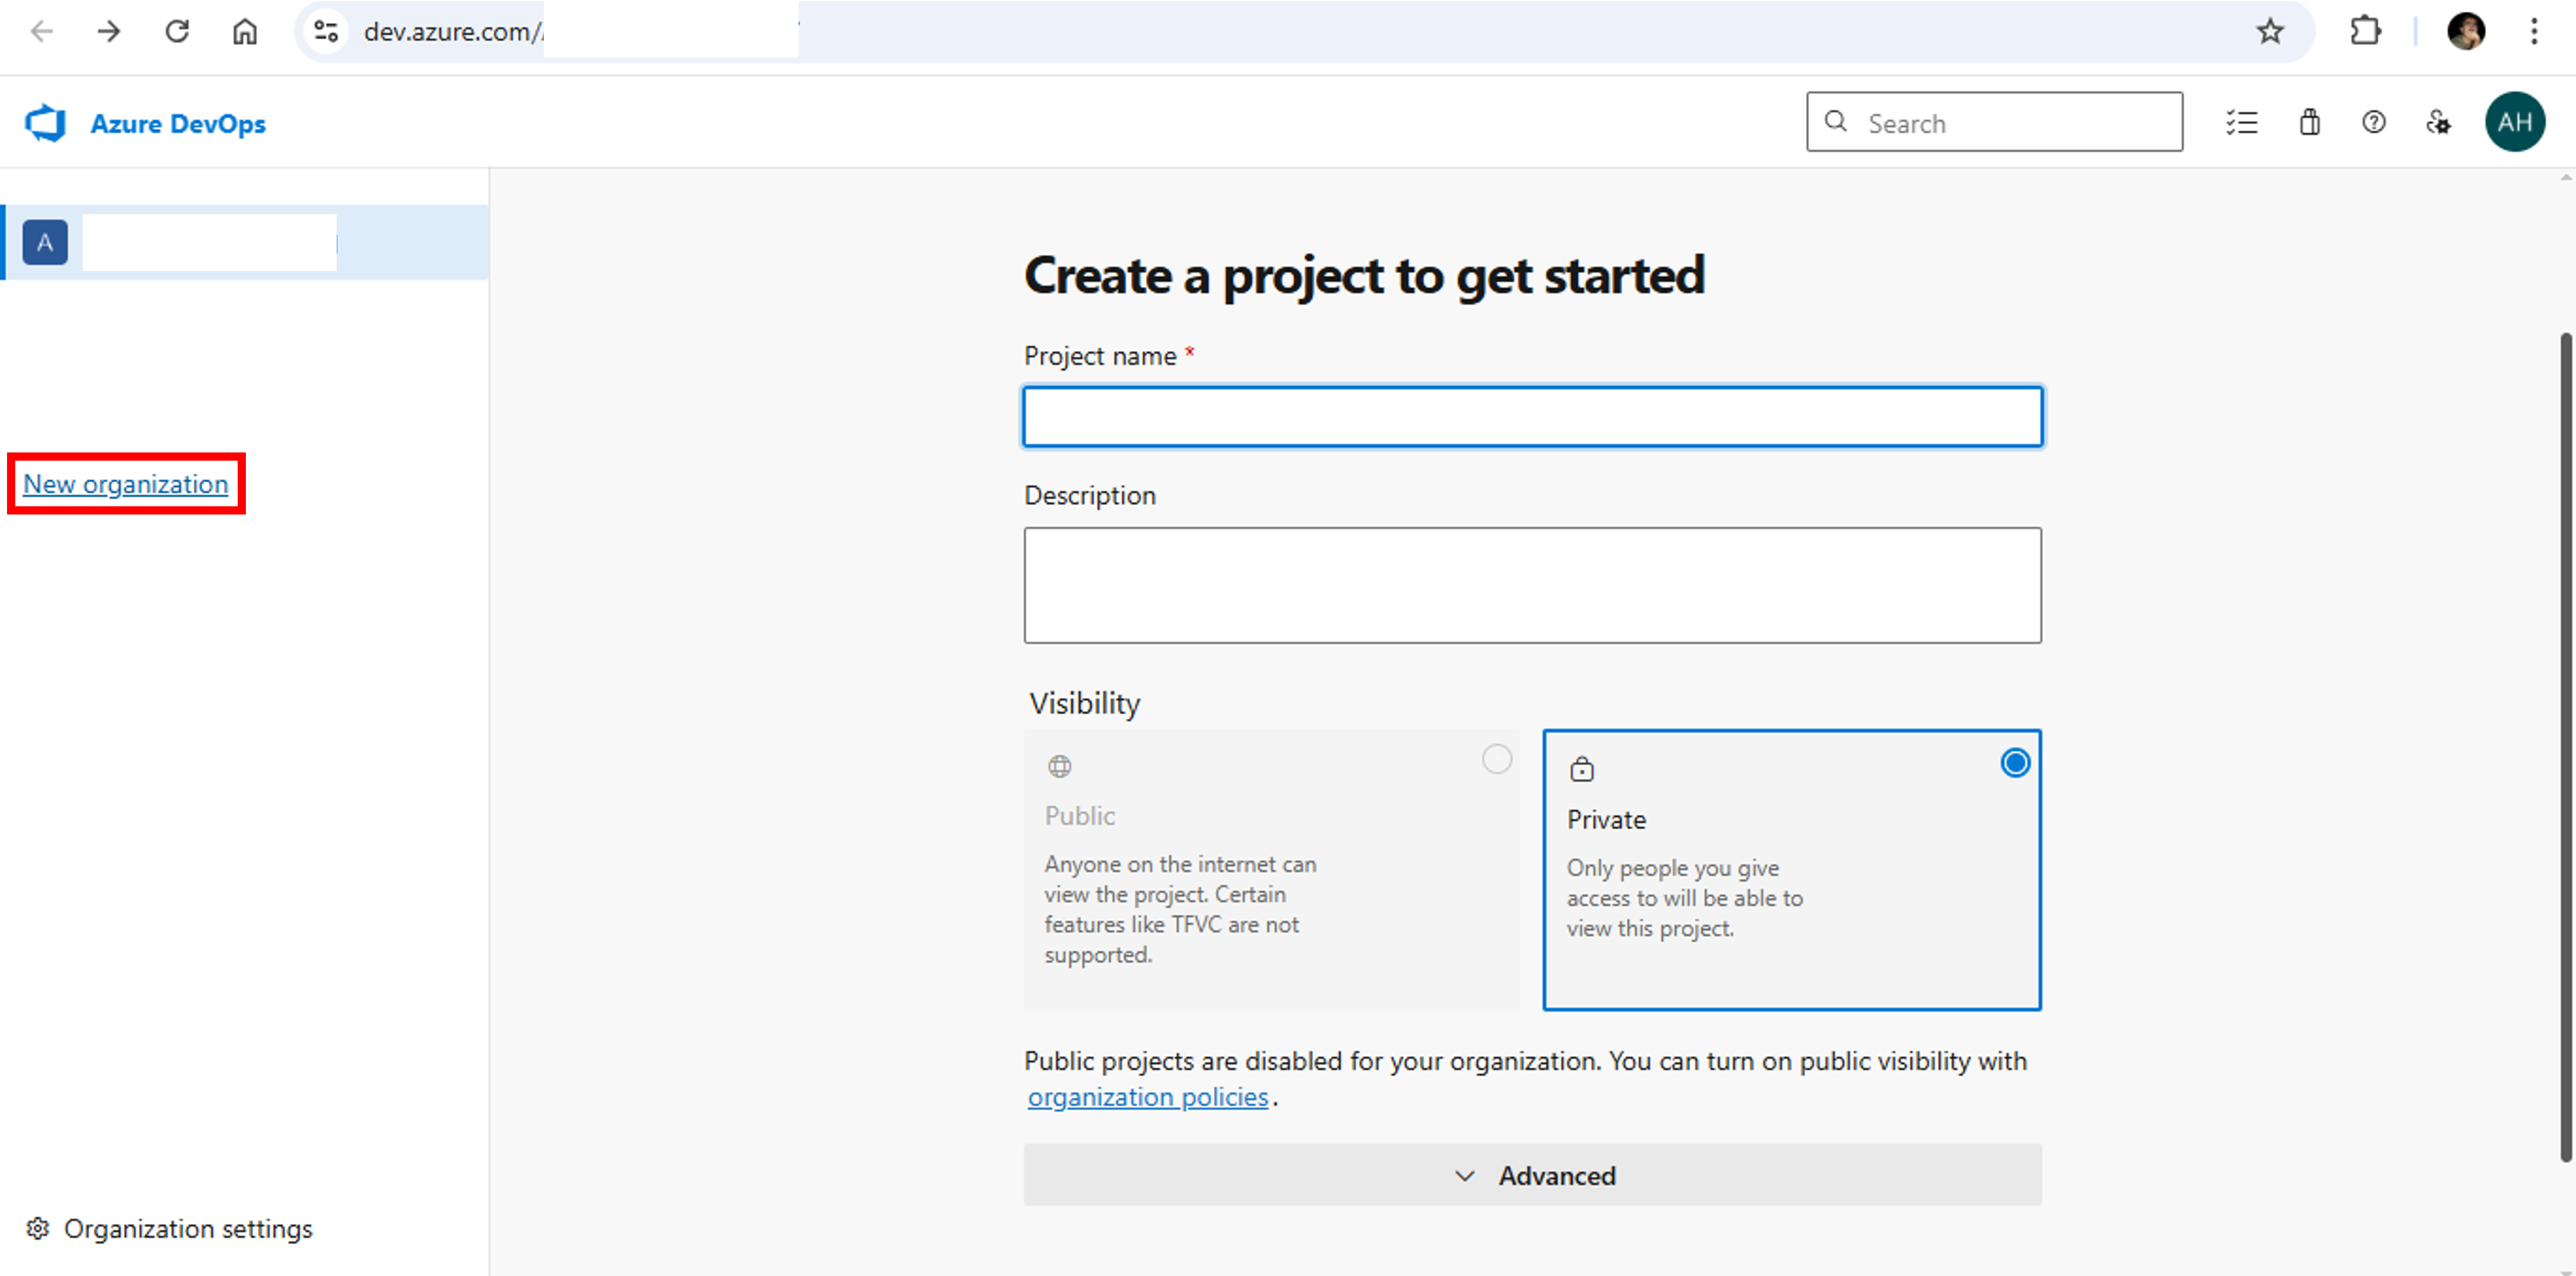
- Sign in to Azure DevOps
- If you are logging in for the first time, you will be prompted to create a new organization named after your account name. You can use the same organization or create a new one. In this tutorial, we shall create a new organization. Click on the New Organization button as depicted in below snap

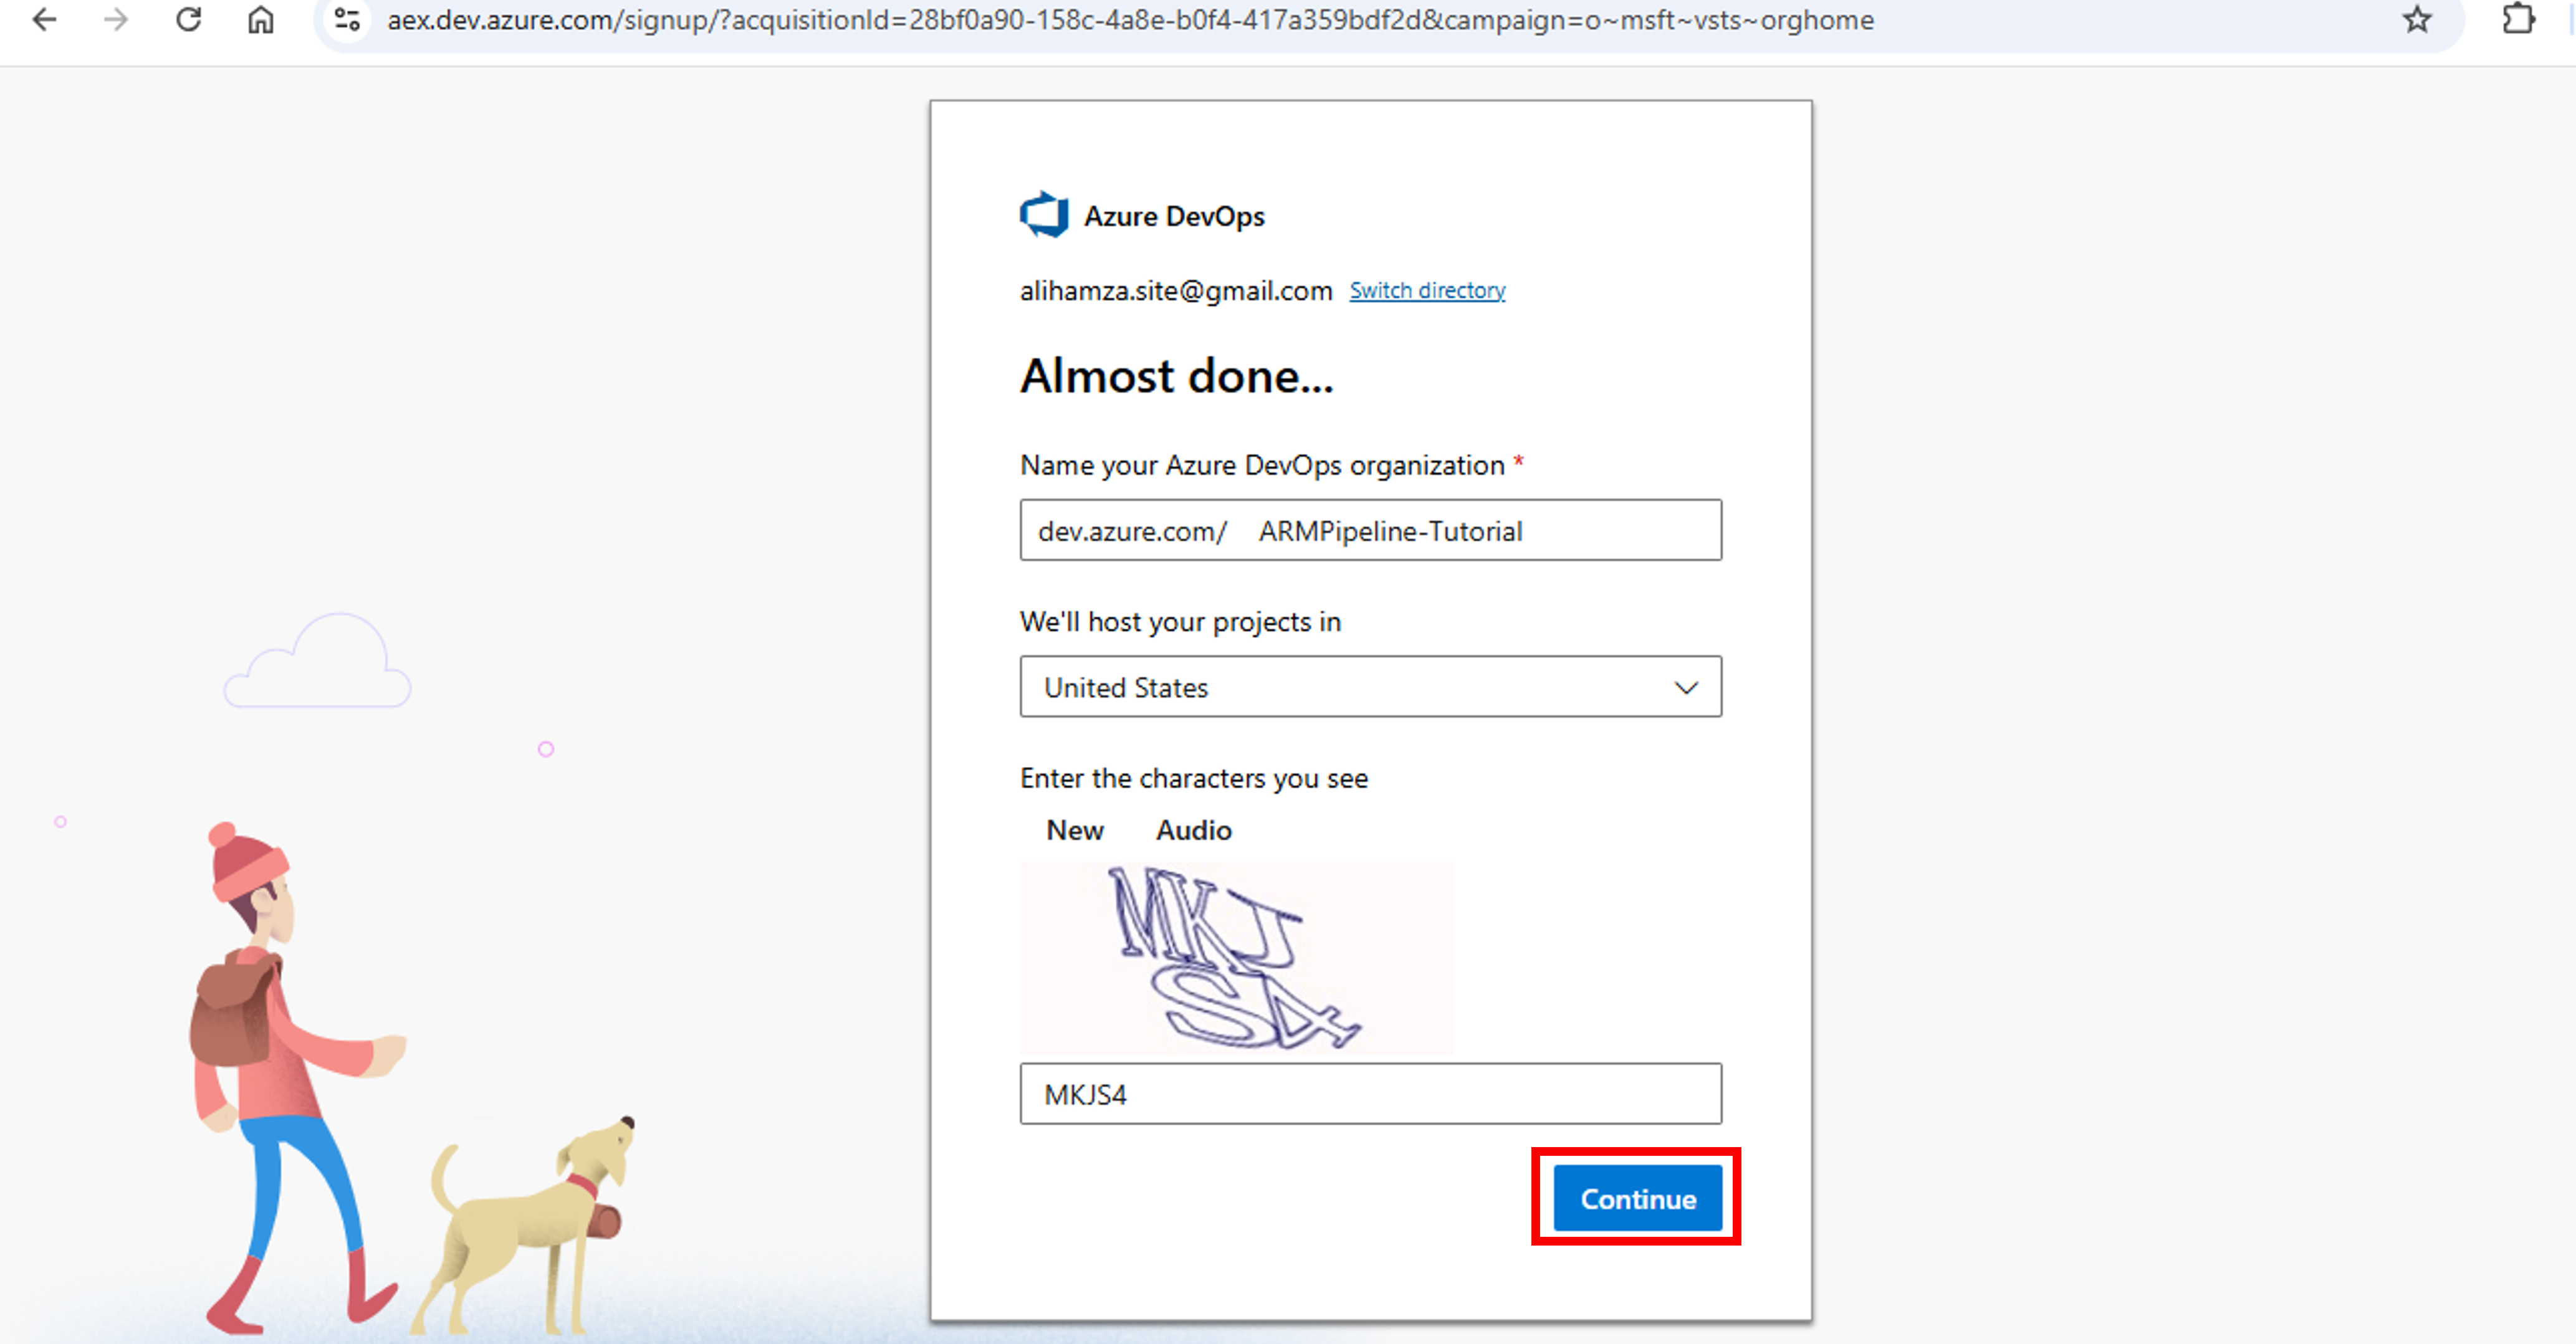
- Click Continue on the next window. Name your DevOps organization as ARMPipeline-Tutorial and select a host country. Click Continue.

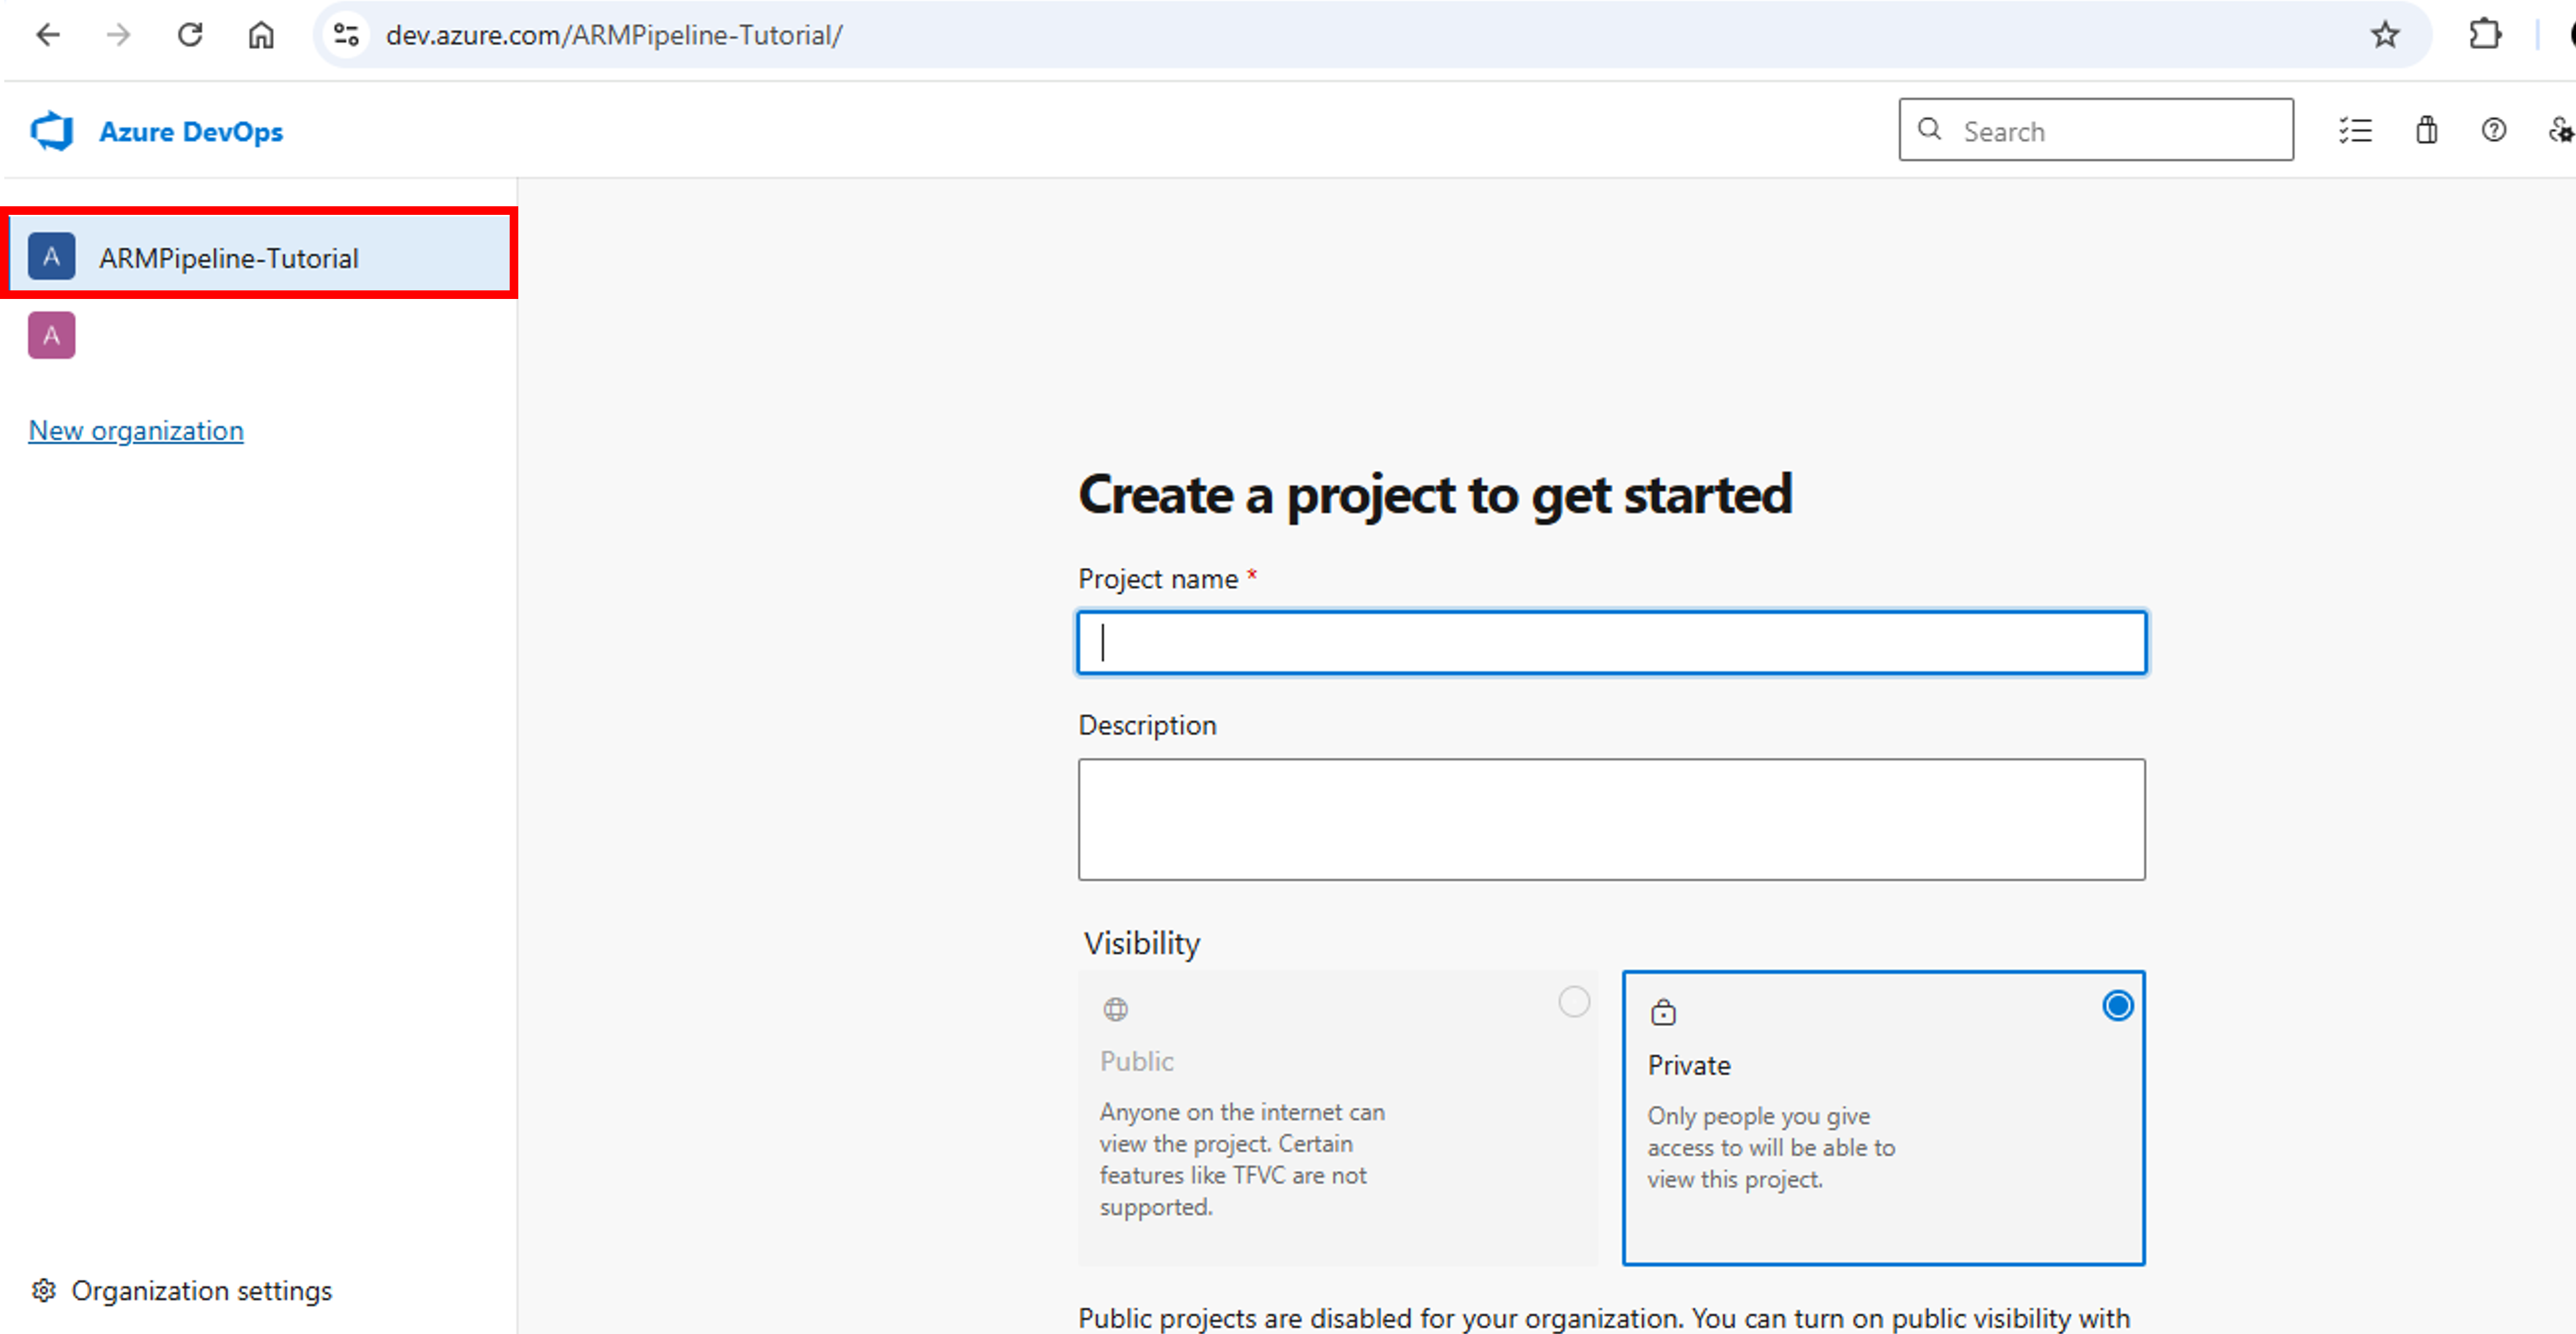
- A new DevOps organization is created.

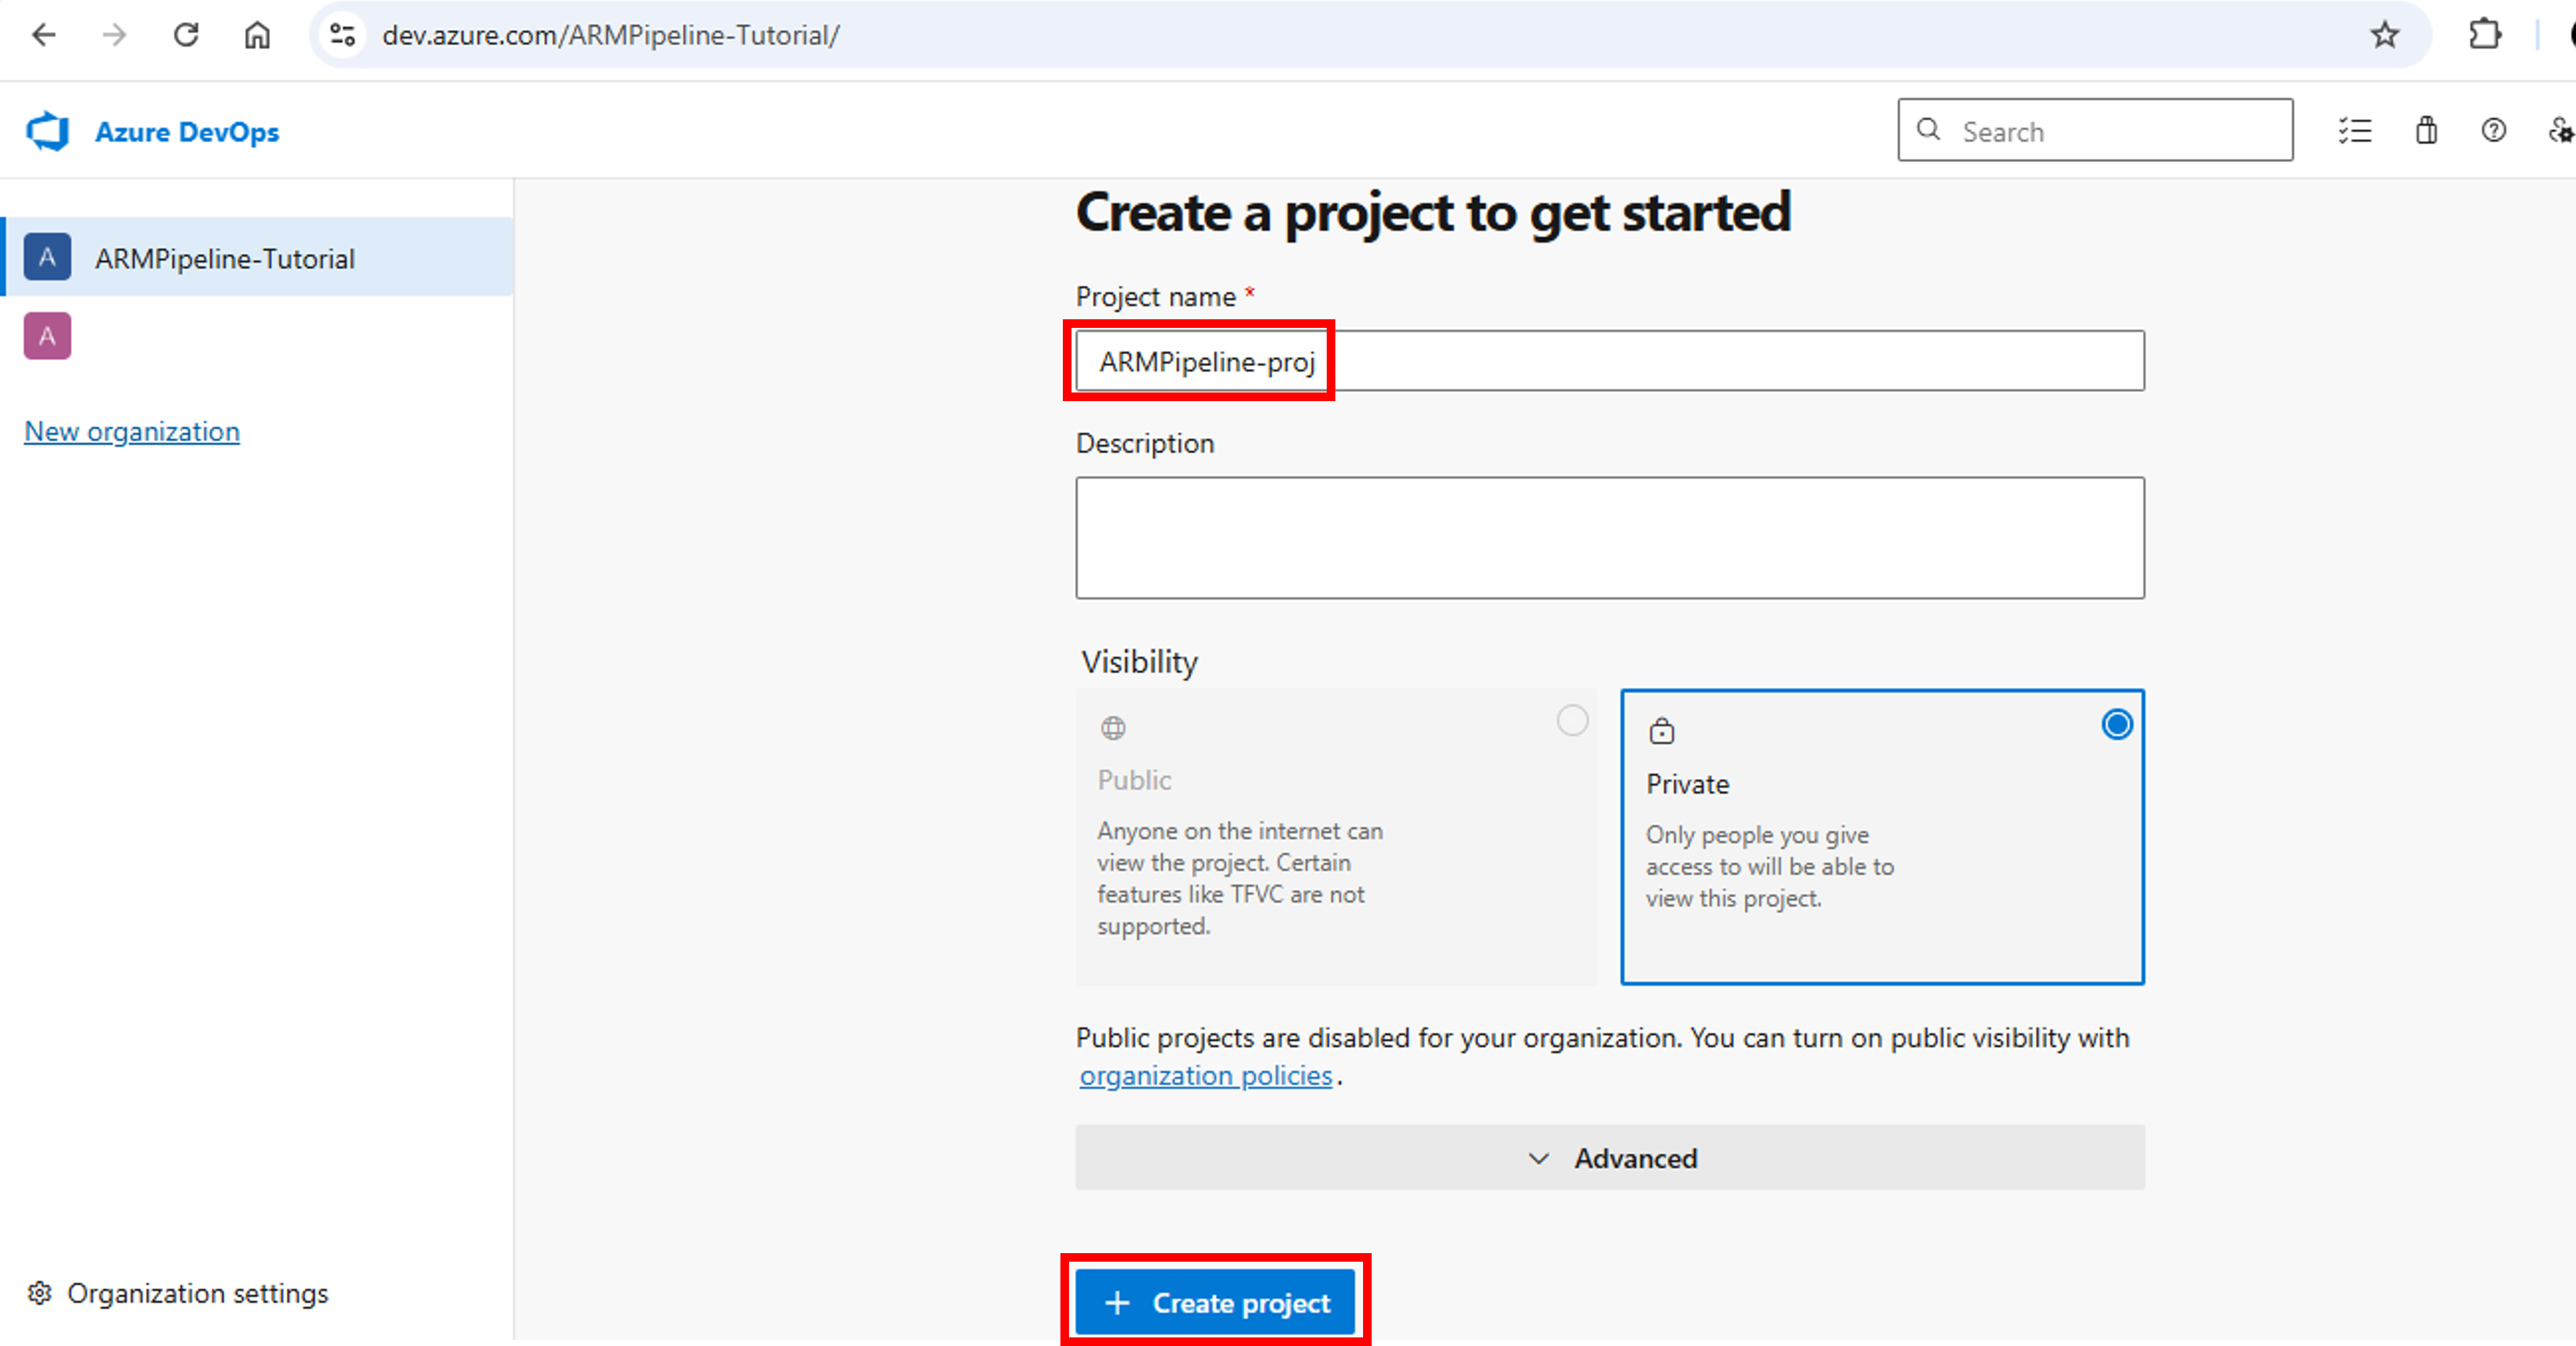
- Now, we need to create a Project within this organization. Type ARMPipeline-proj as your project name. Click Create Project. A new project will be created

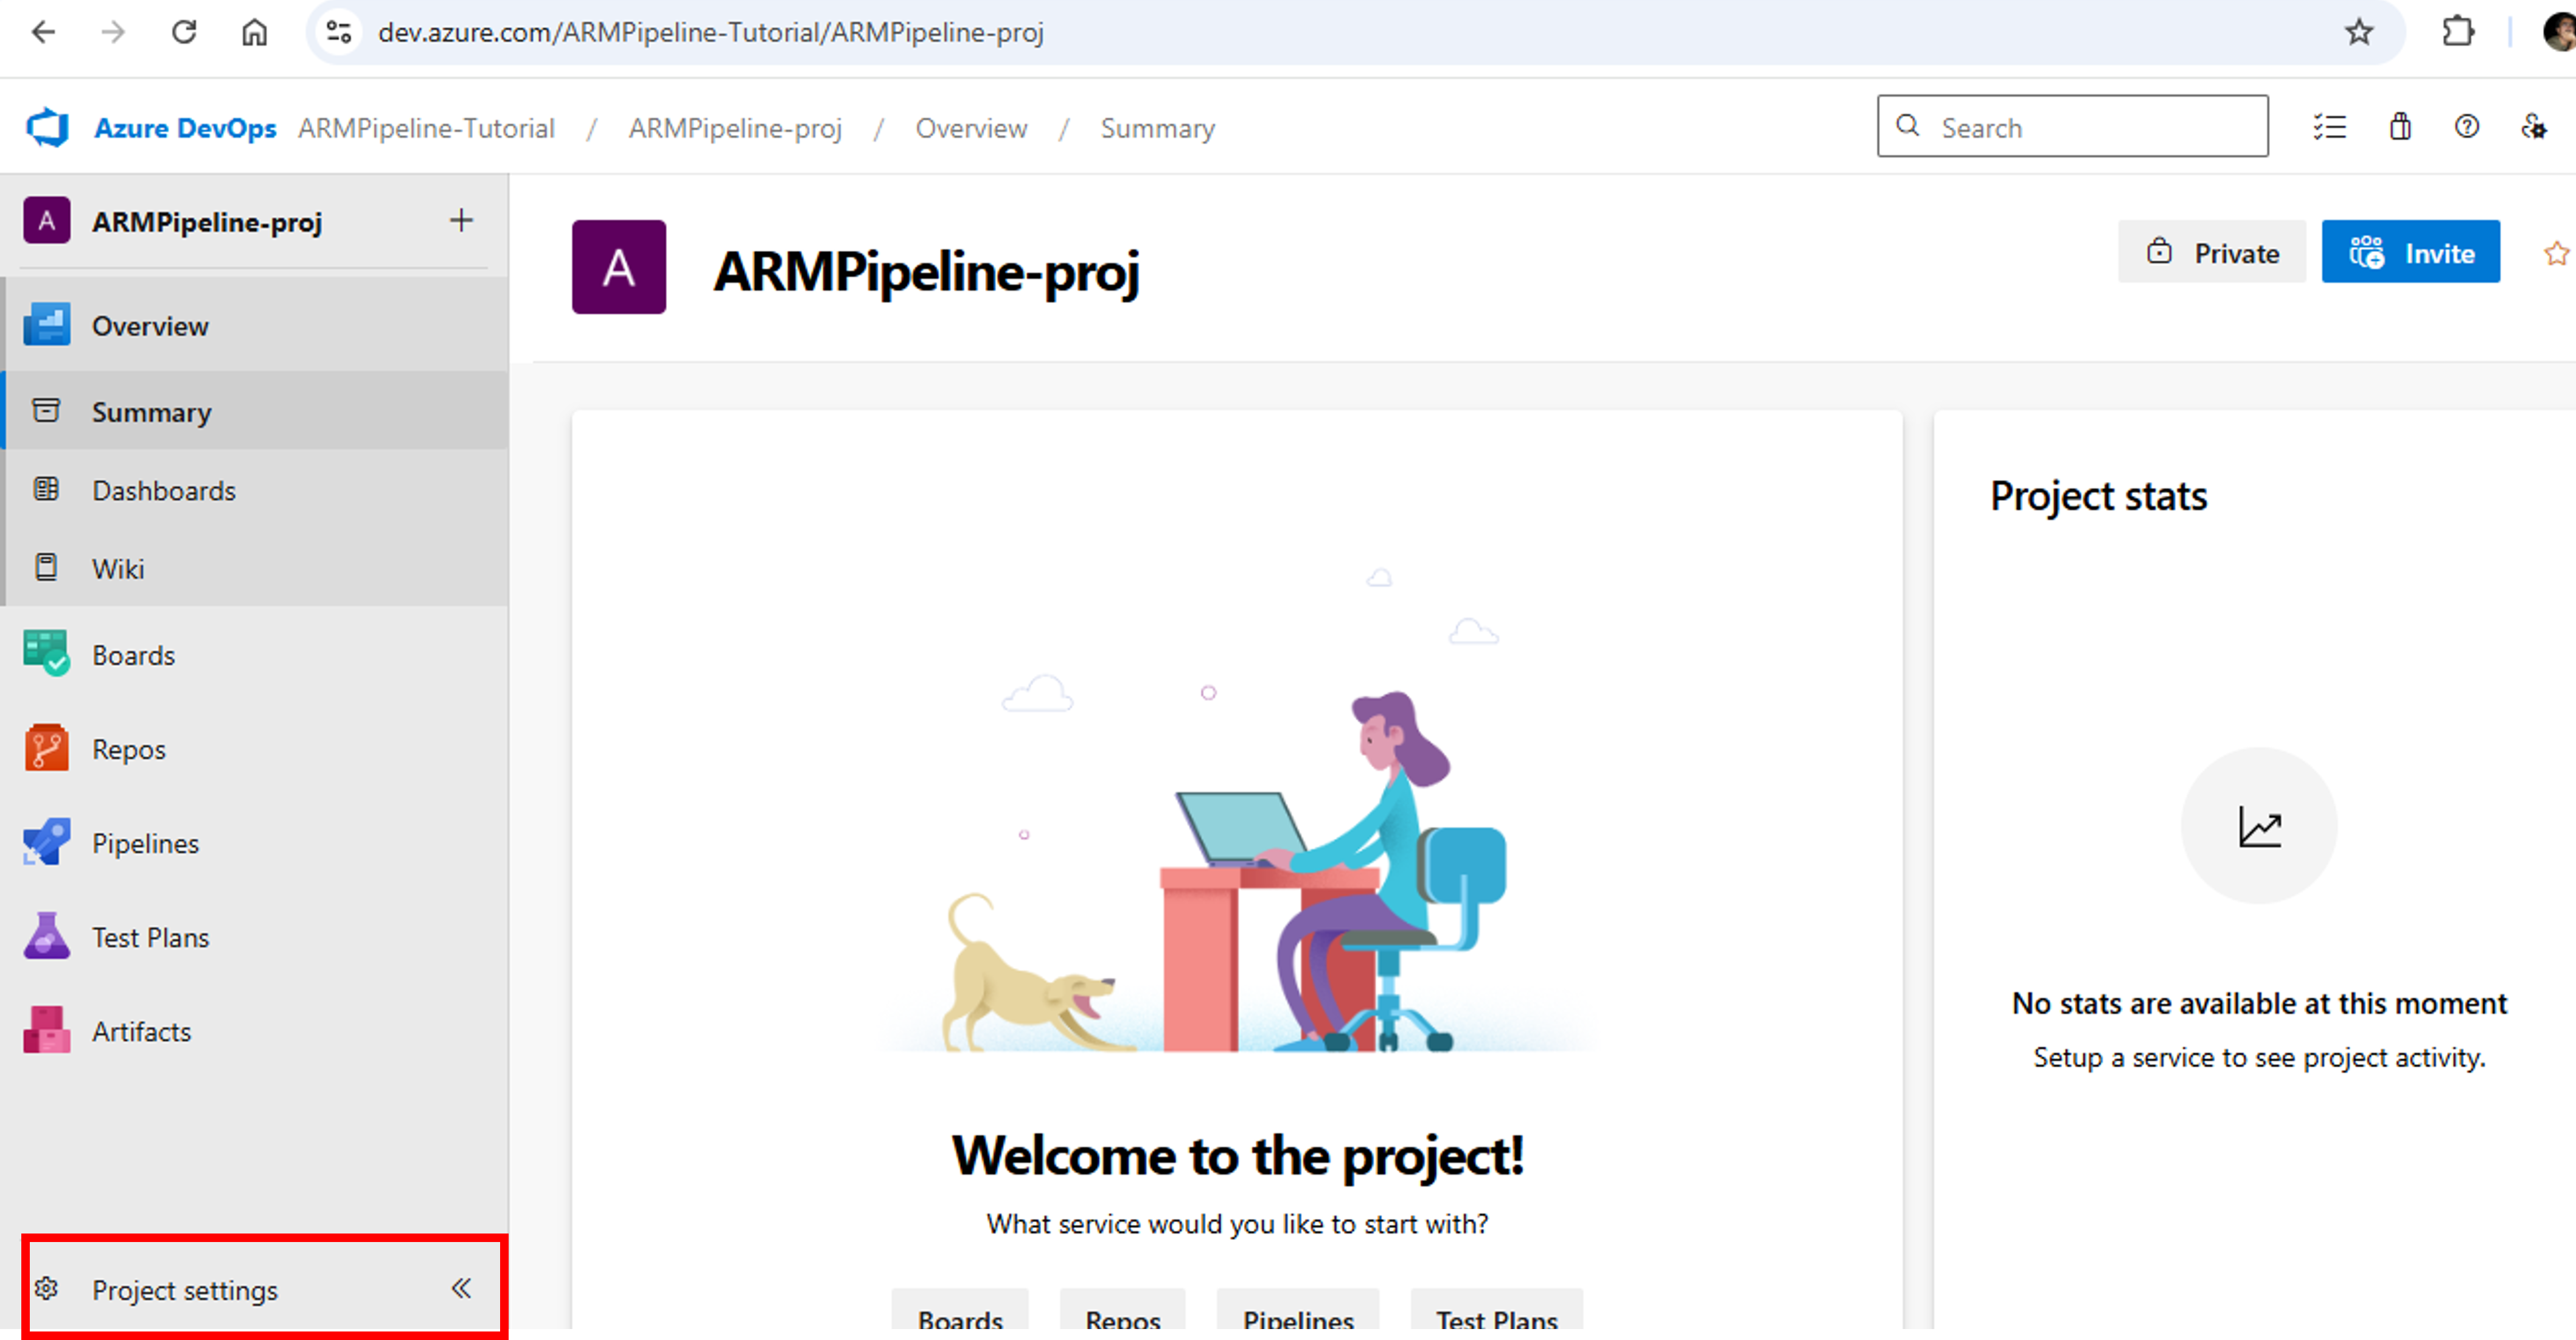
- Next, we need to create Azure Resource Manager Service Connection. An Azure Resource Manager service connection allows you to connect to Azure resources like Azure Storage Container from your pipeline. Click Project Settings

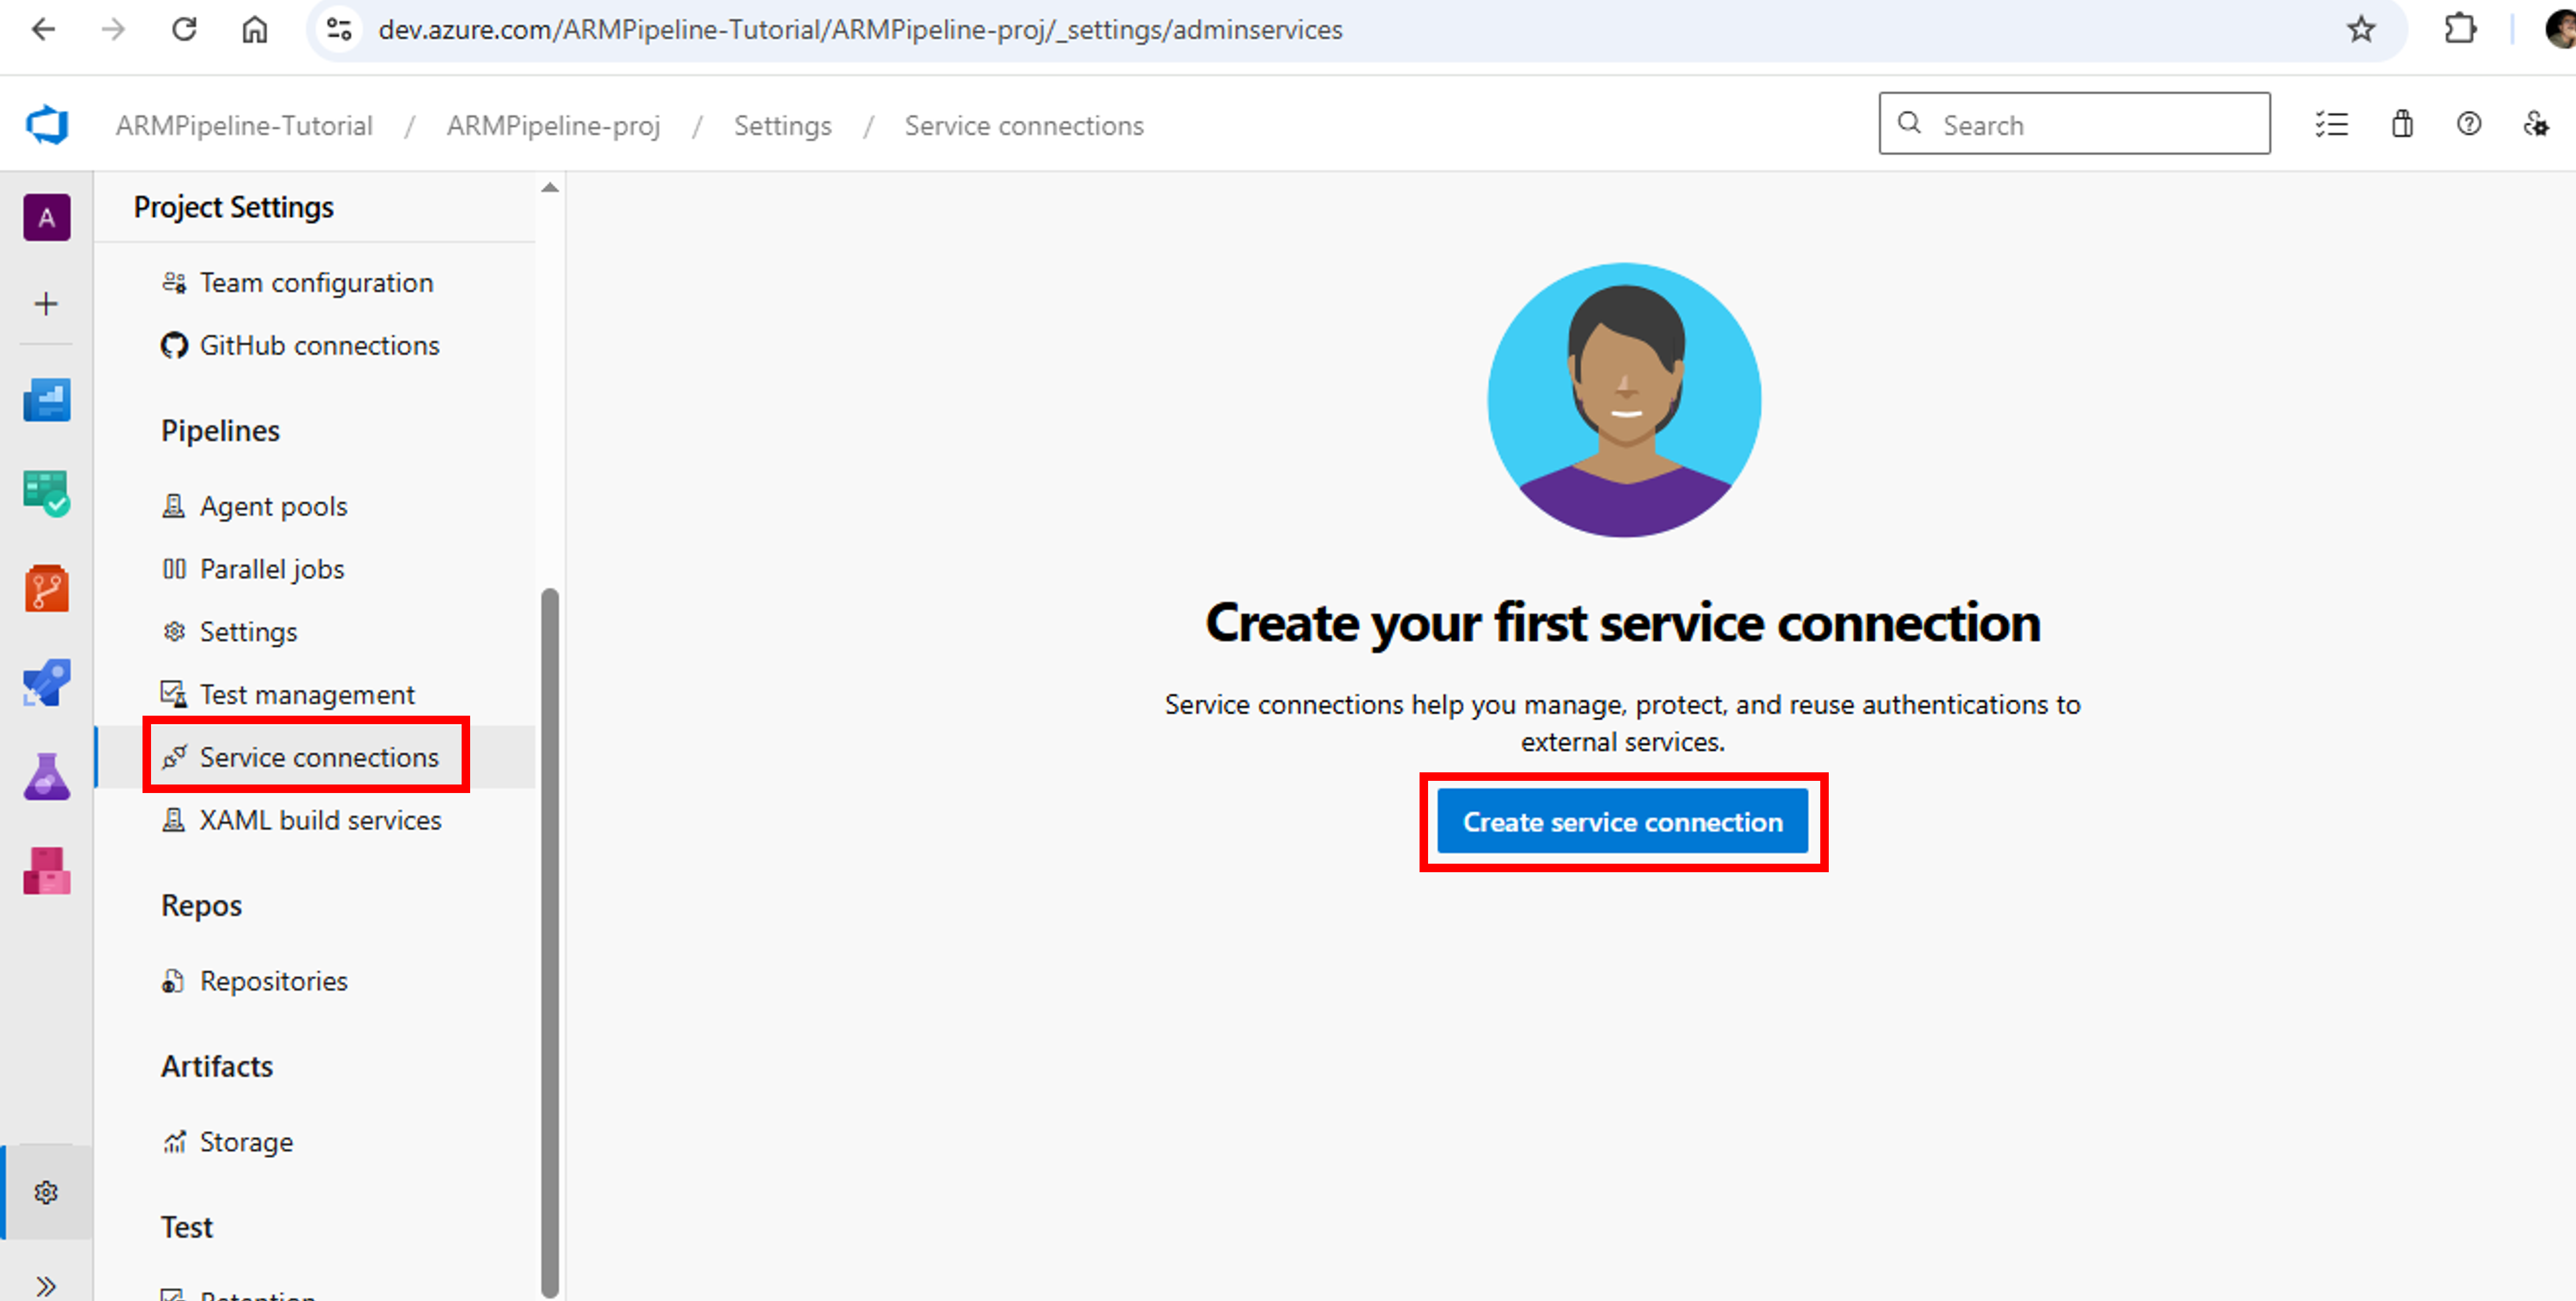
- Click Service connections -> Create service connection

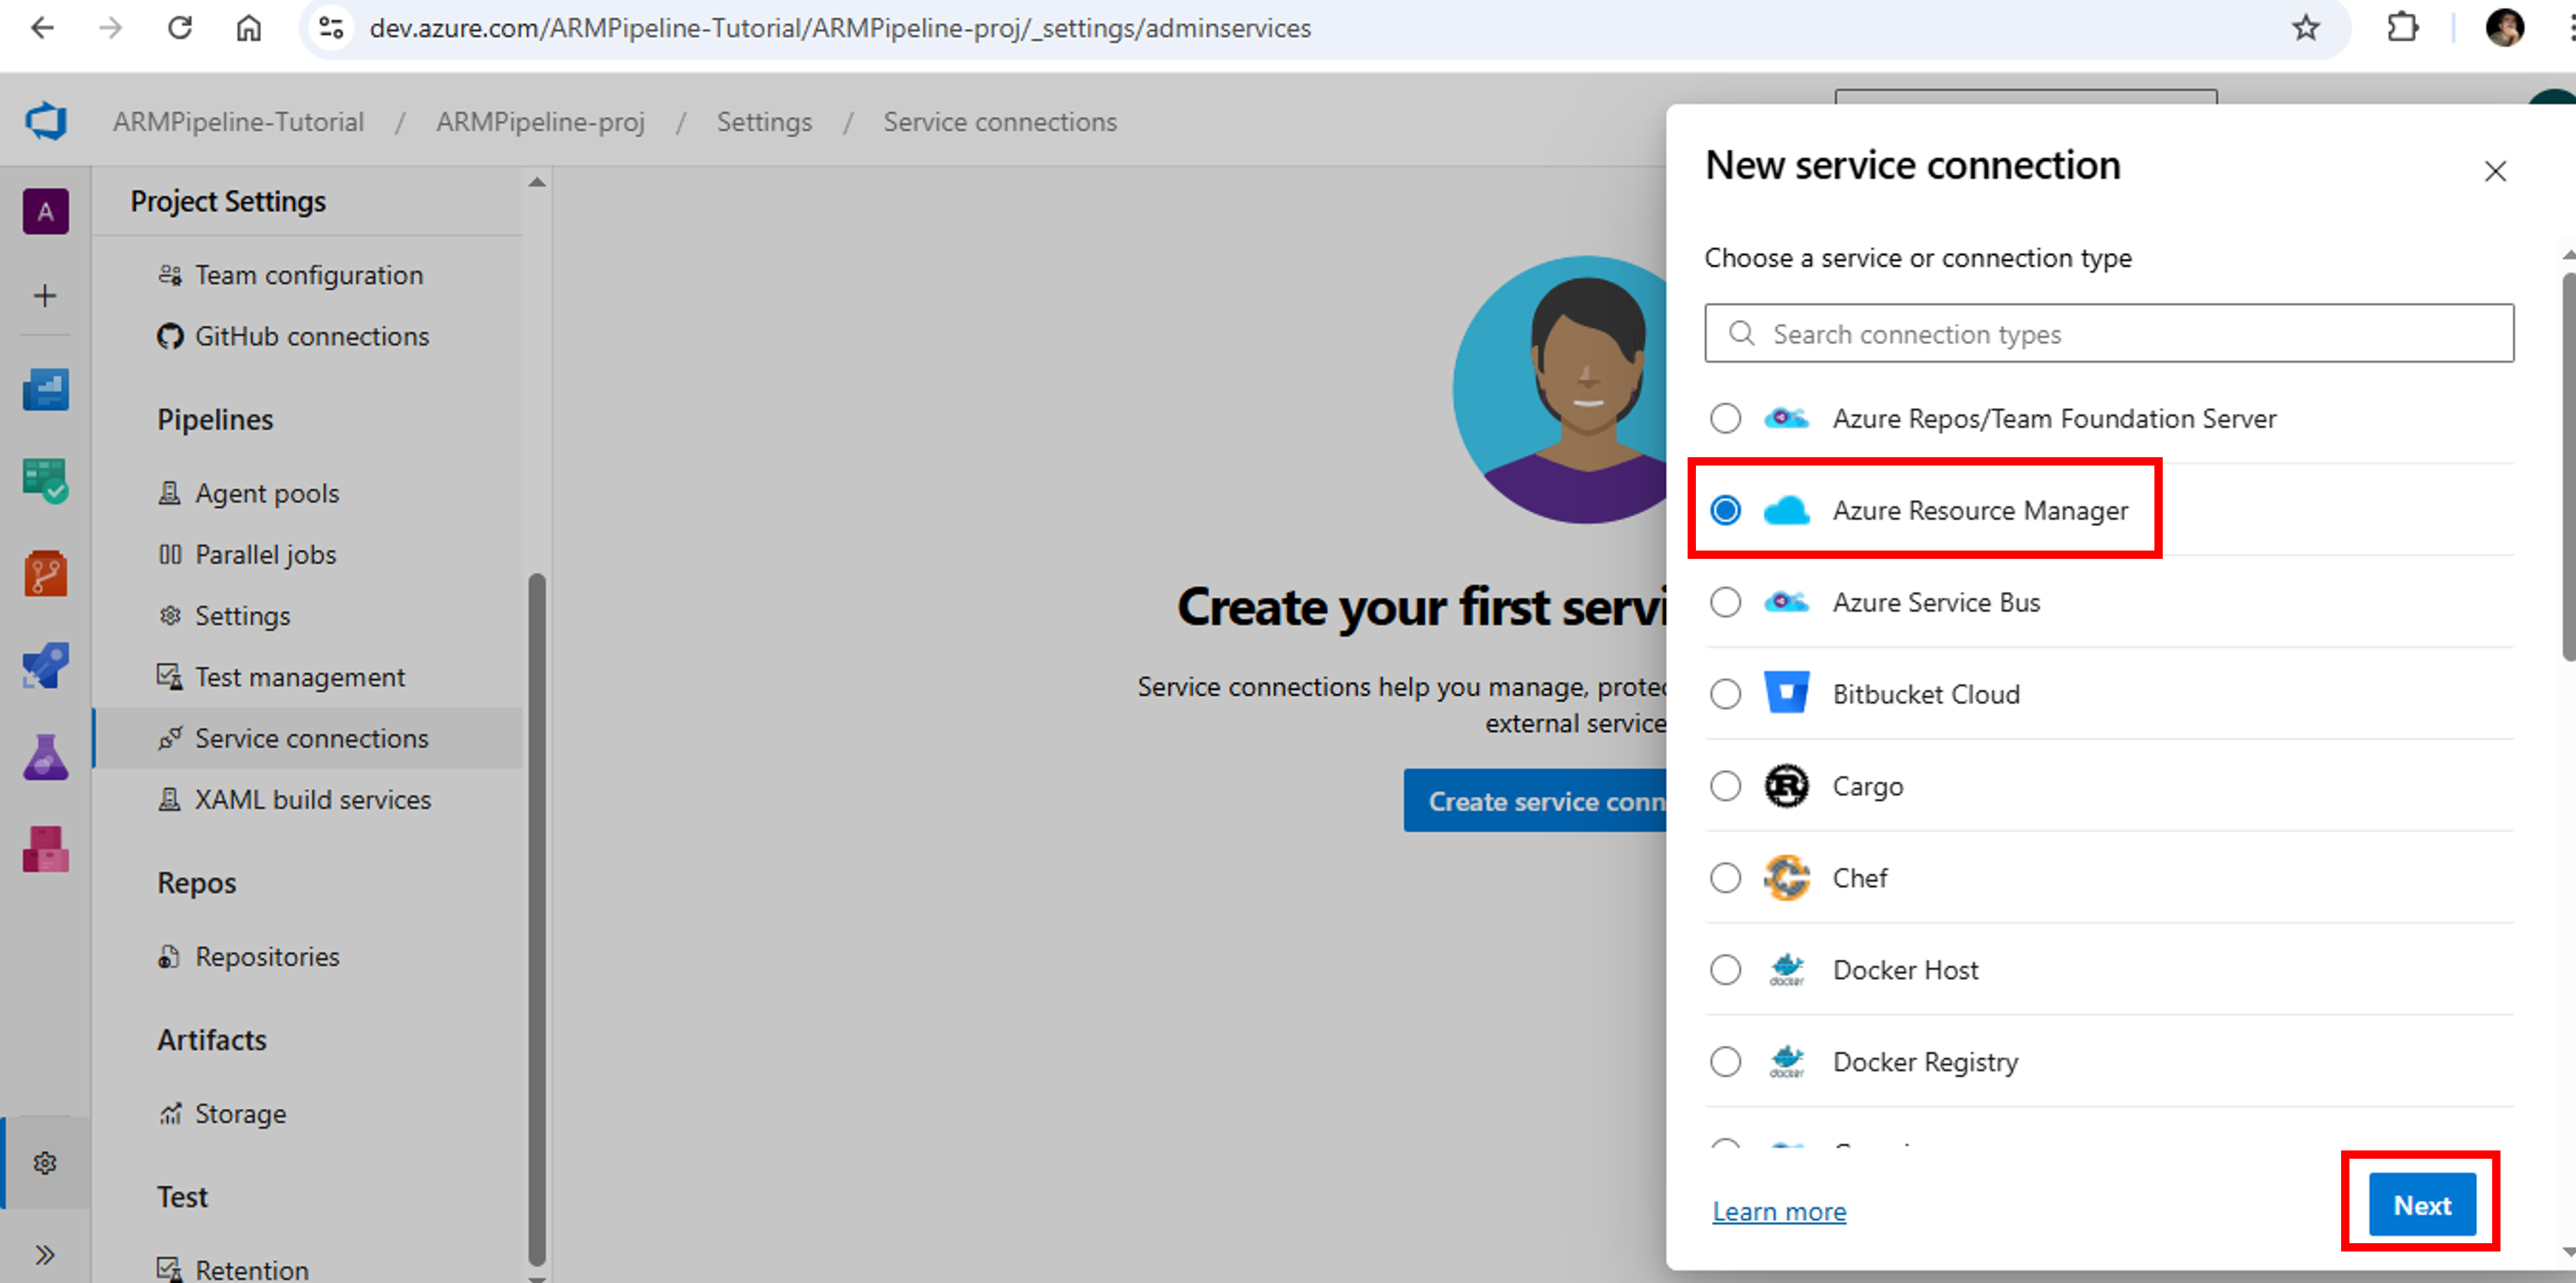
- In New service connection pane, select Azure Resource Manager as connection type. Click Next

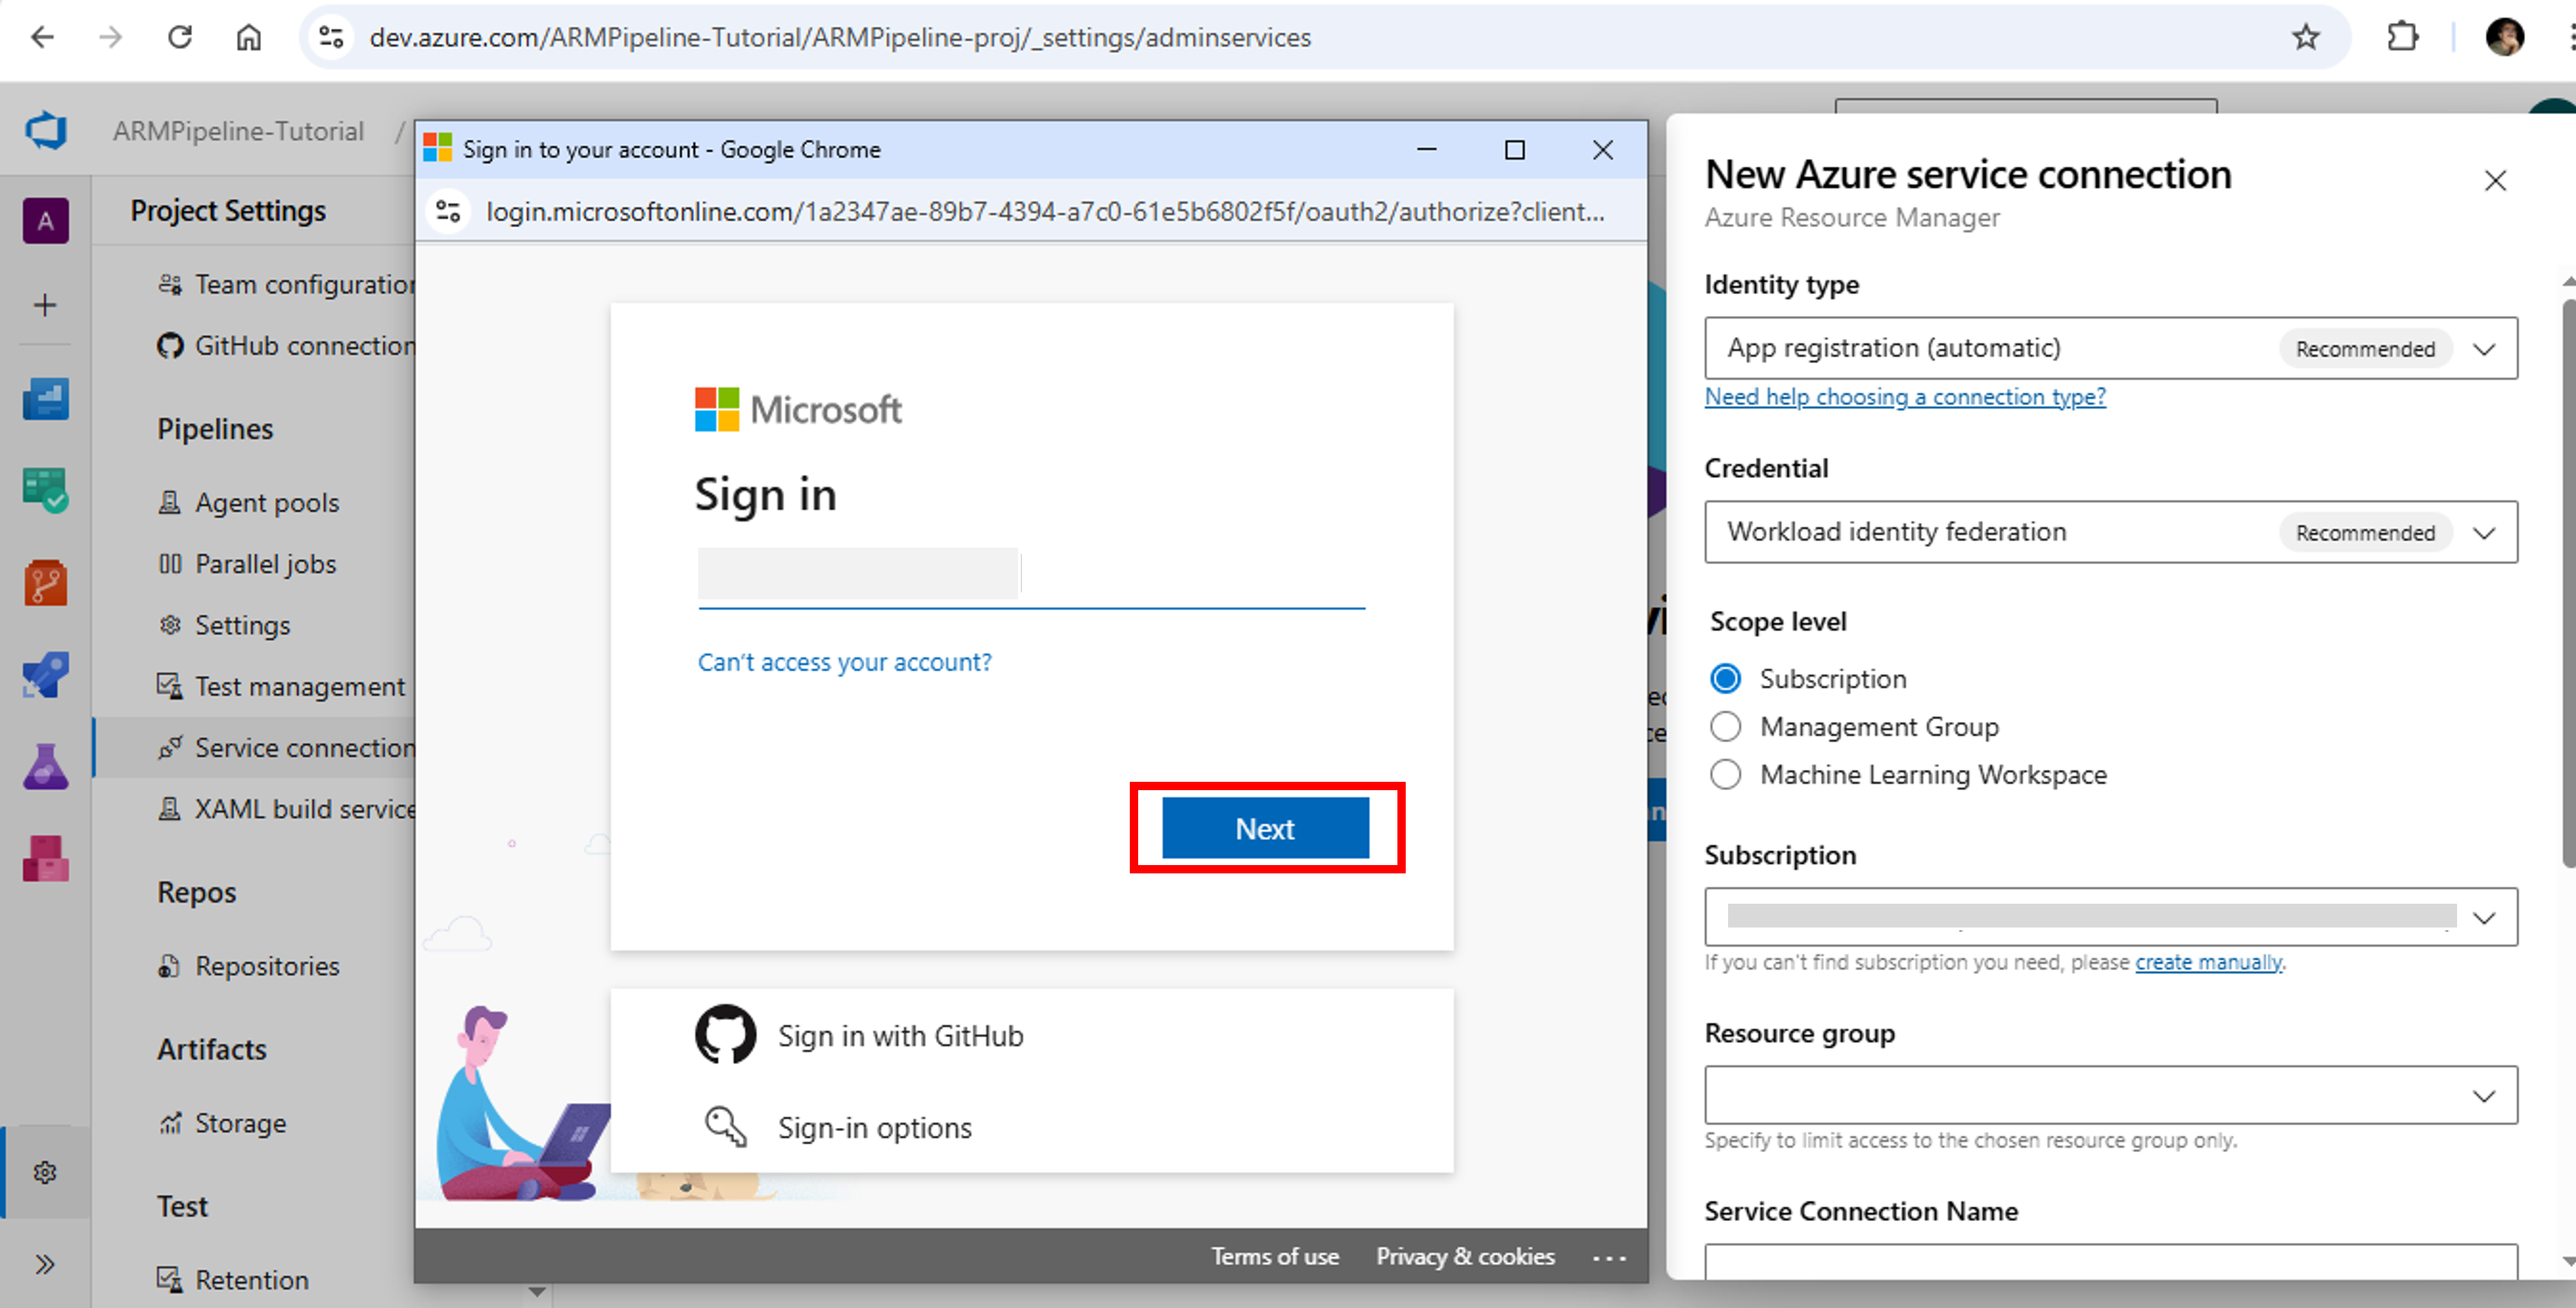
- When prompted for Sign in, use your Microsoft Azure credentials to authenticate

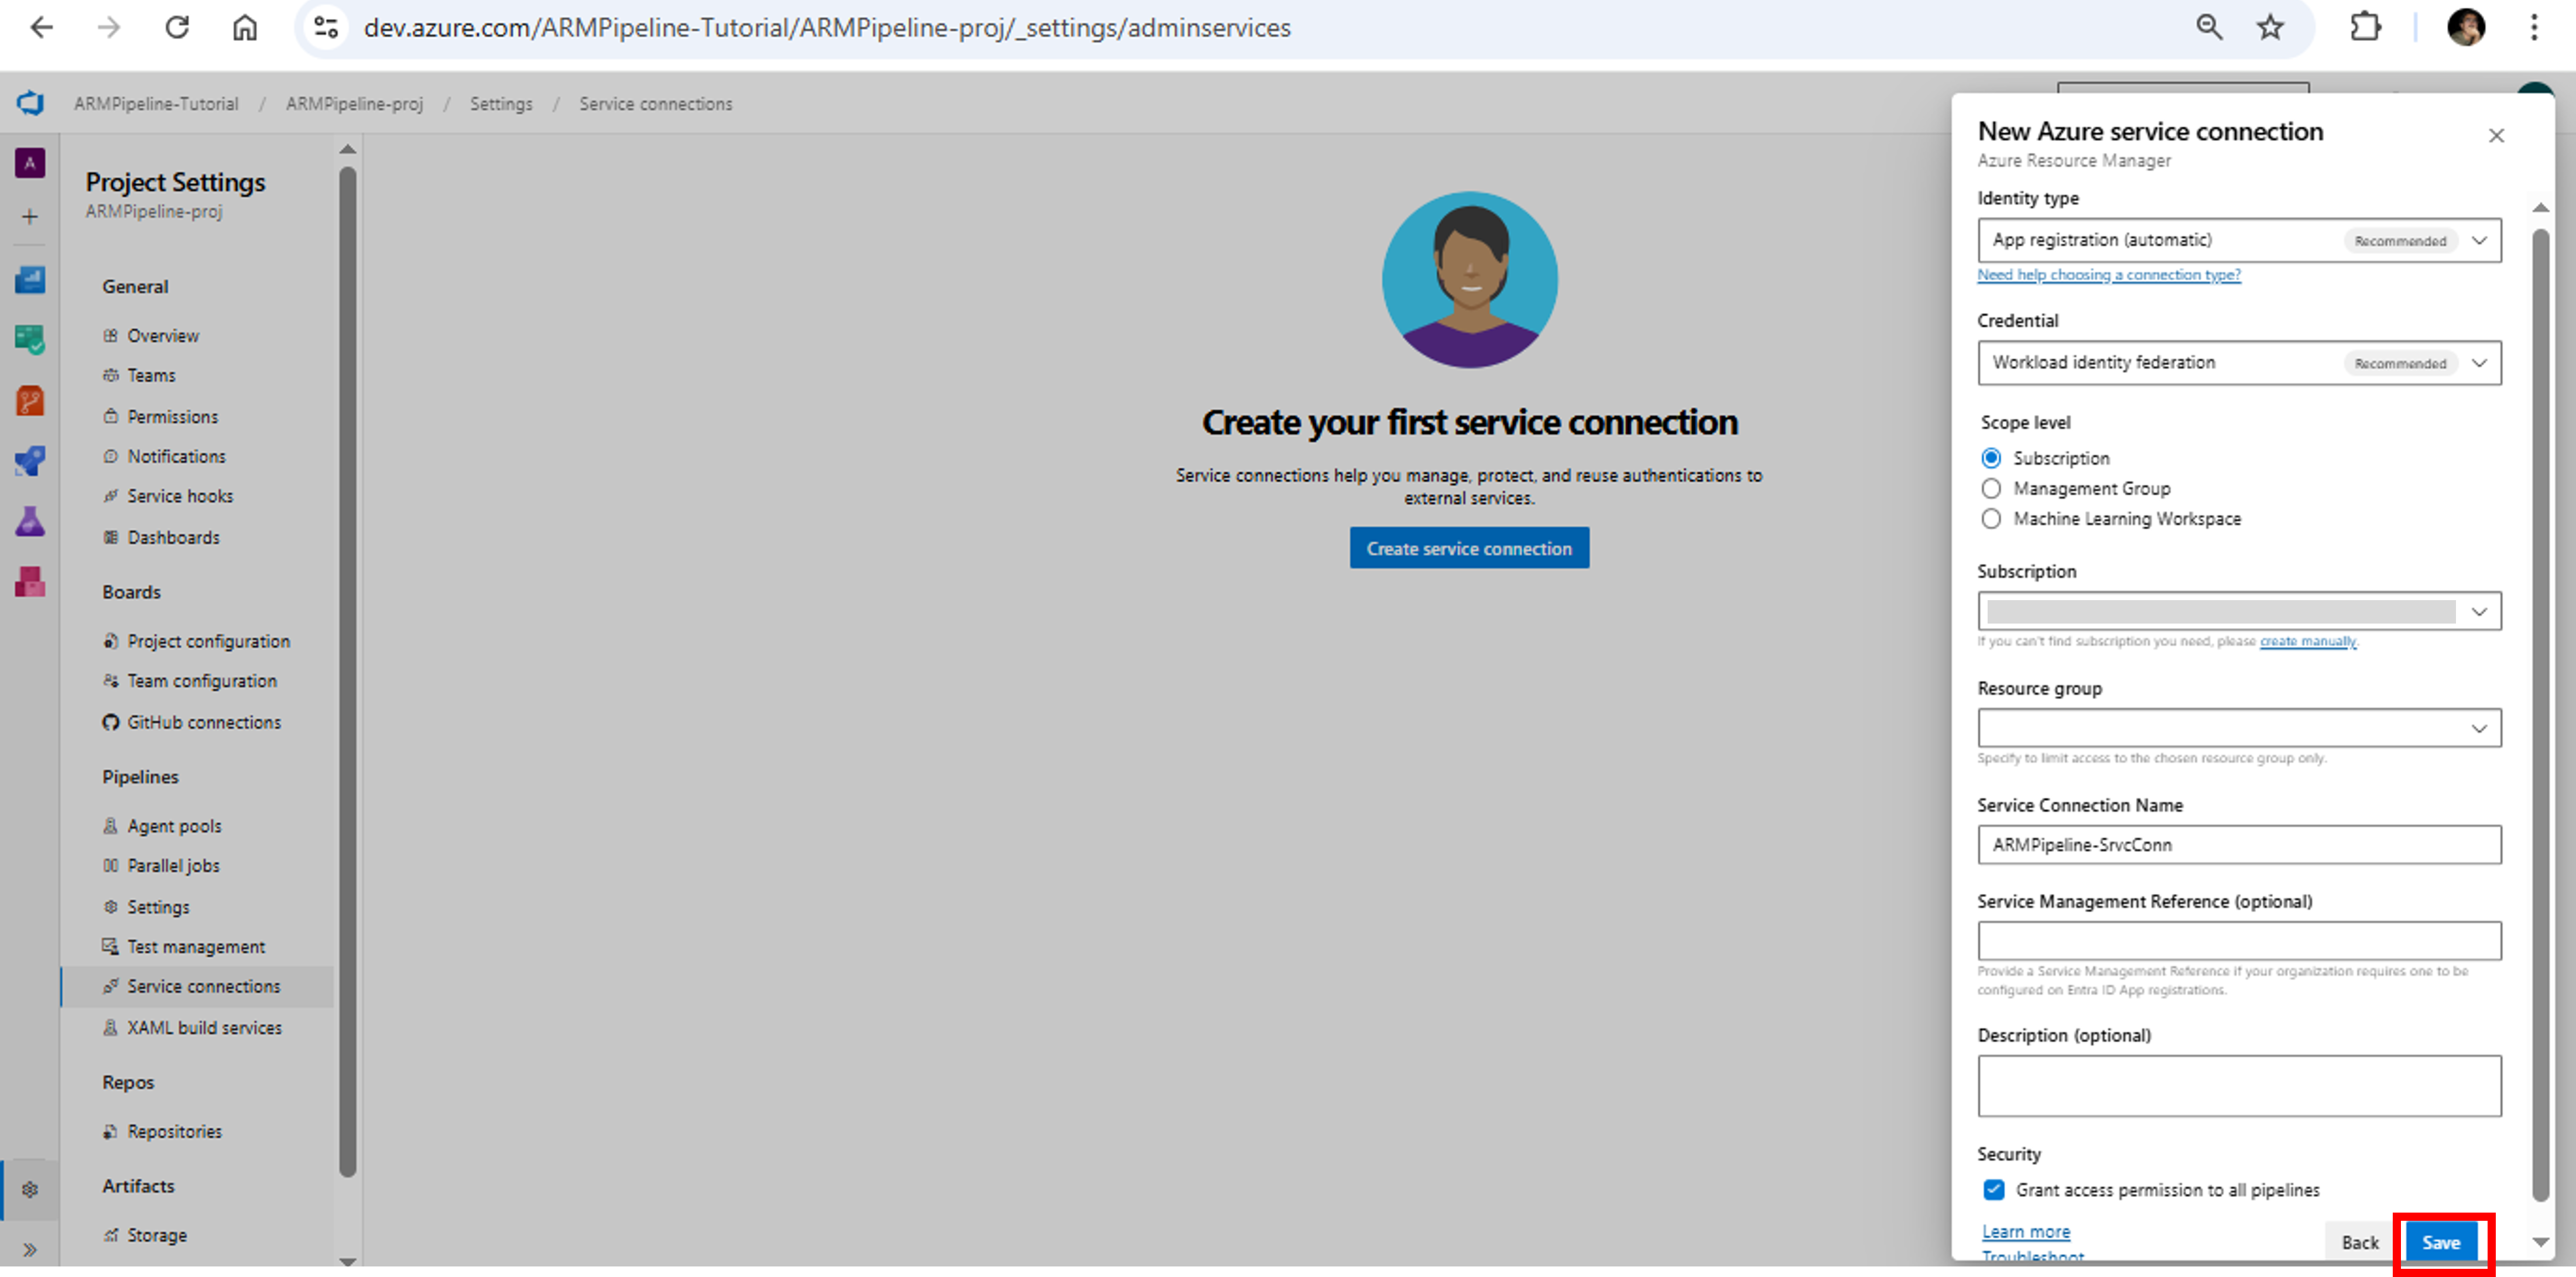
- In New Azure service connection pane, select App registration (automatic) with Workload identity federation as your authentication method. Select Subscription as your Scope level and select [your subscription] from the subscription drop down. Leave Resource group blank for now. Enter ARMPipeline-srvcConn as your Service Connection Name. Select Grant access permission to all pipelines and click Save

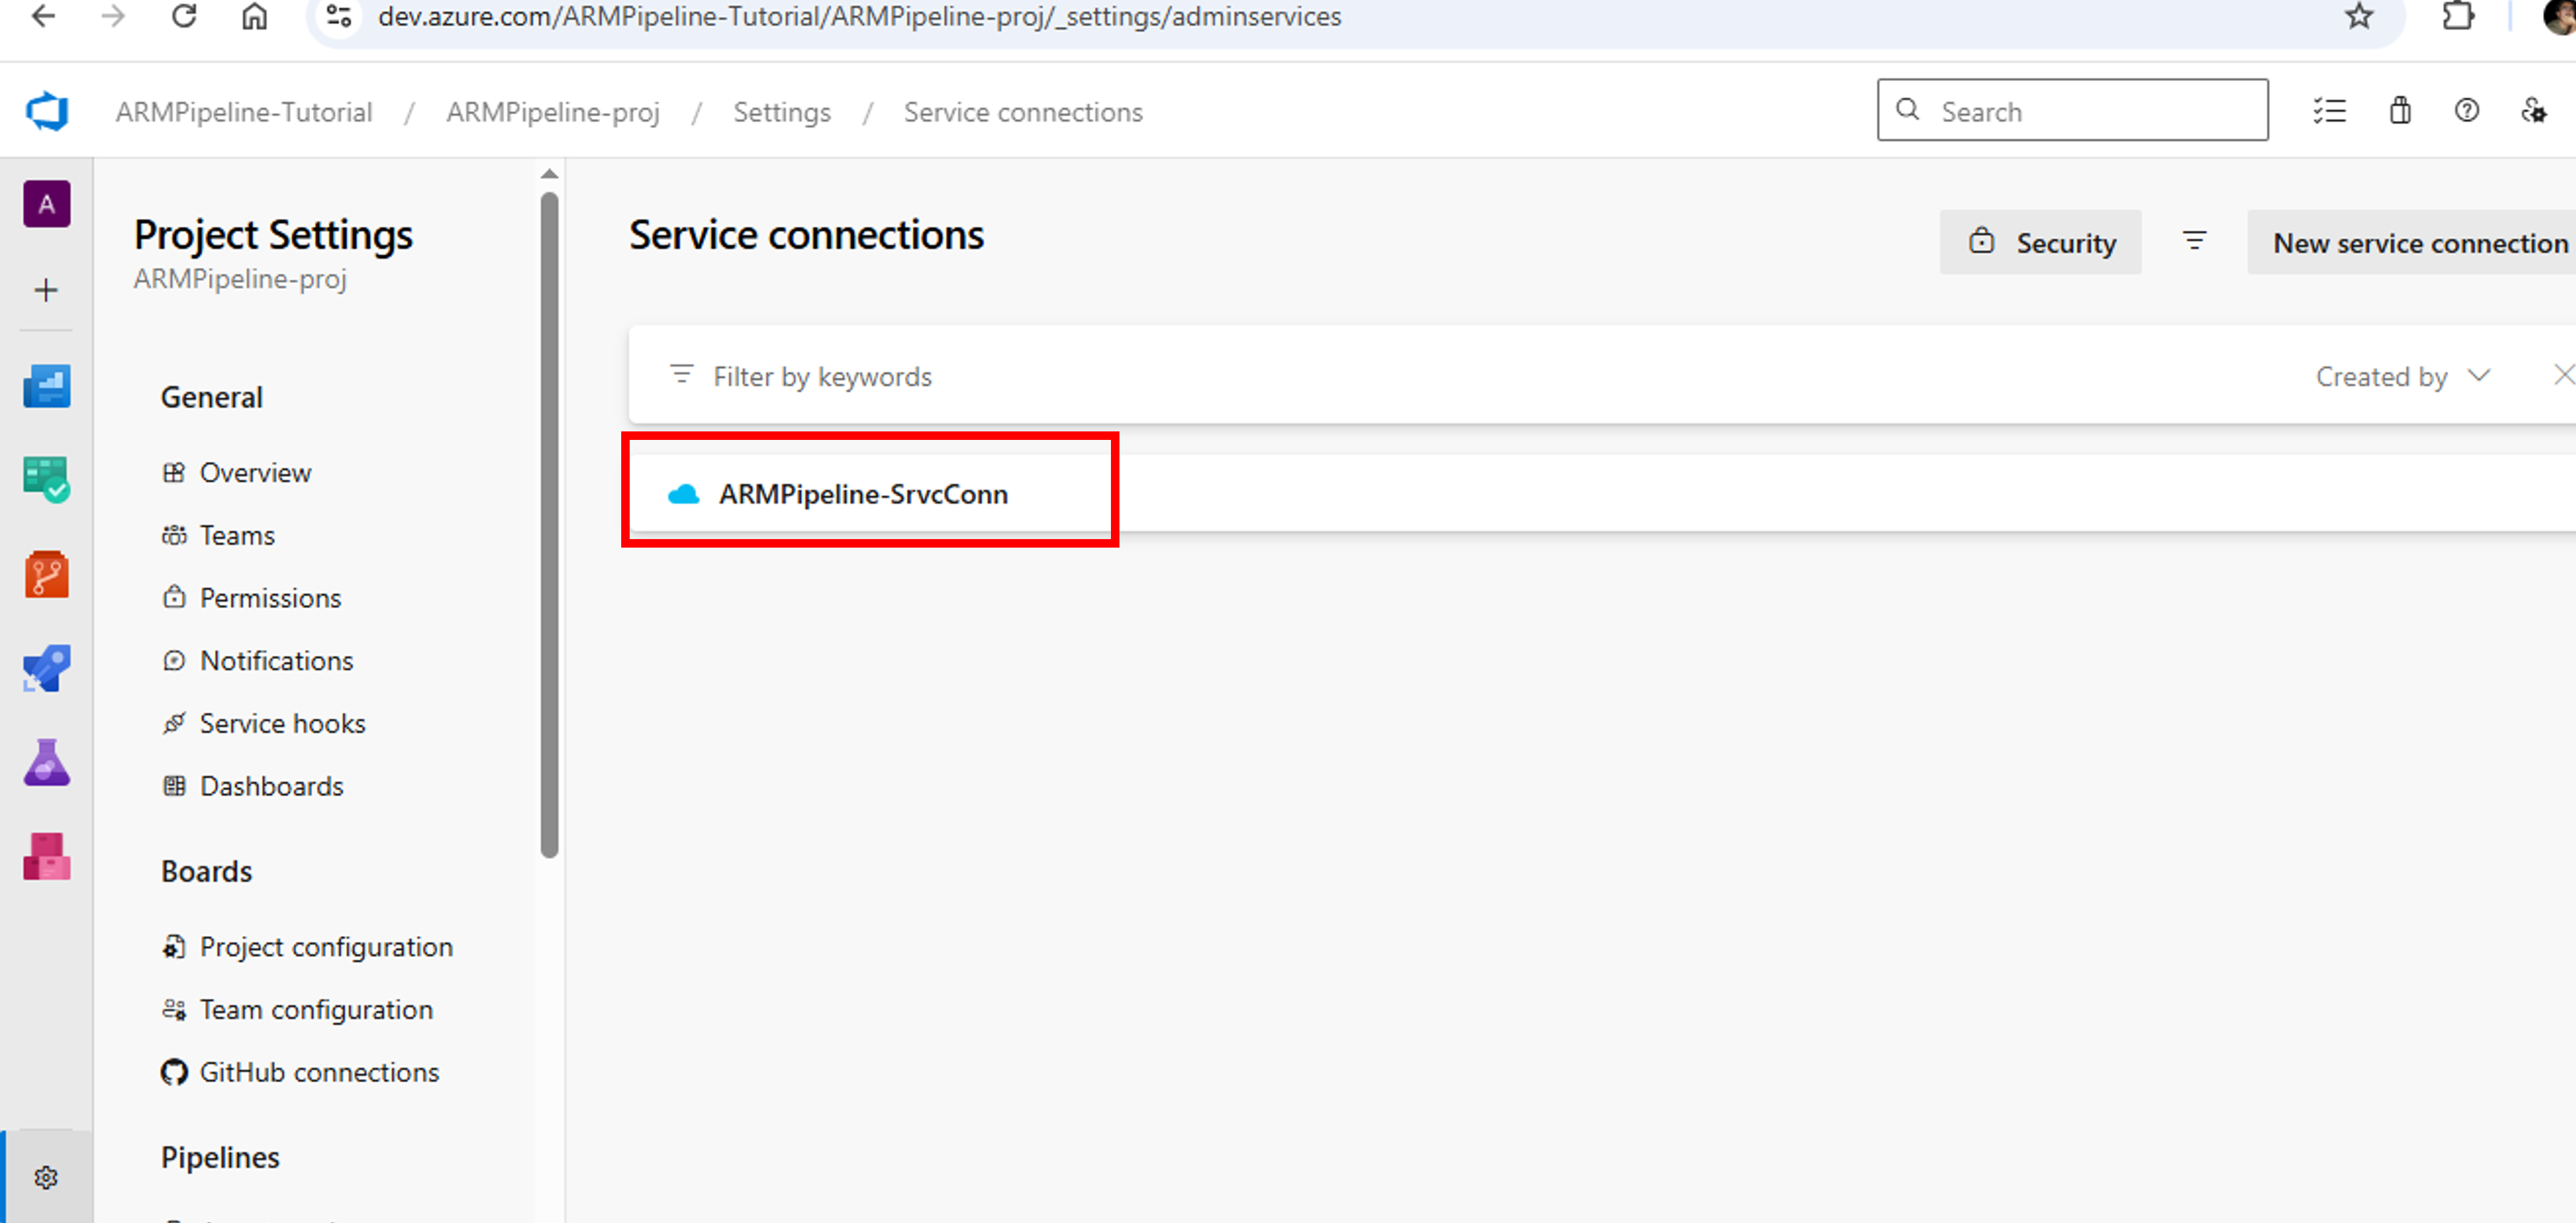
- A new Service connection ARMPipeline-srvcConn shall be created

Step-3: Create a Pipeline & Deploy ARM Template
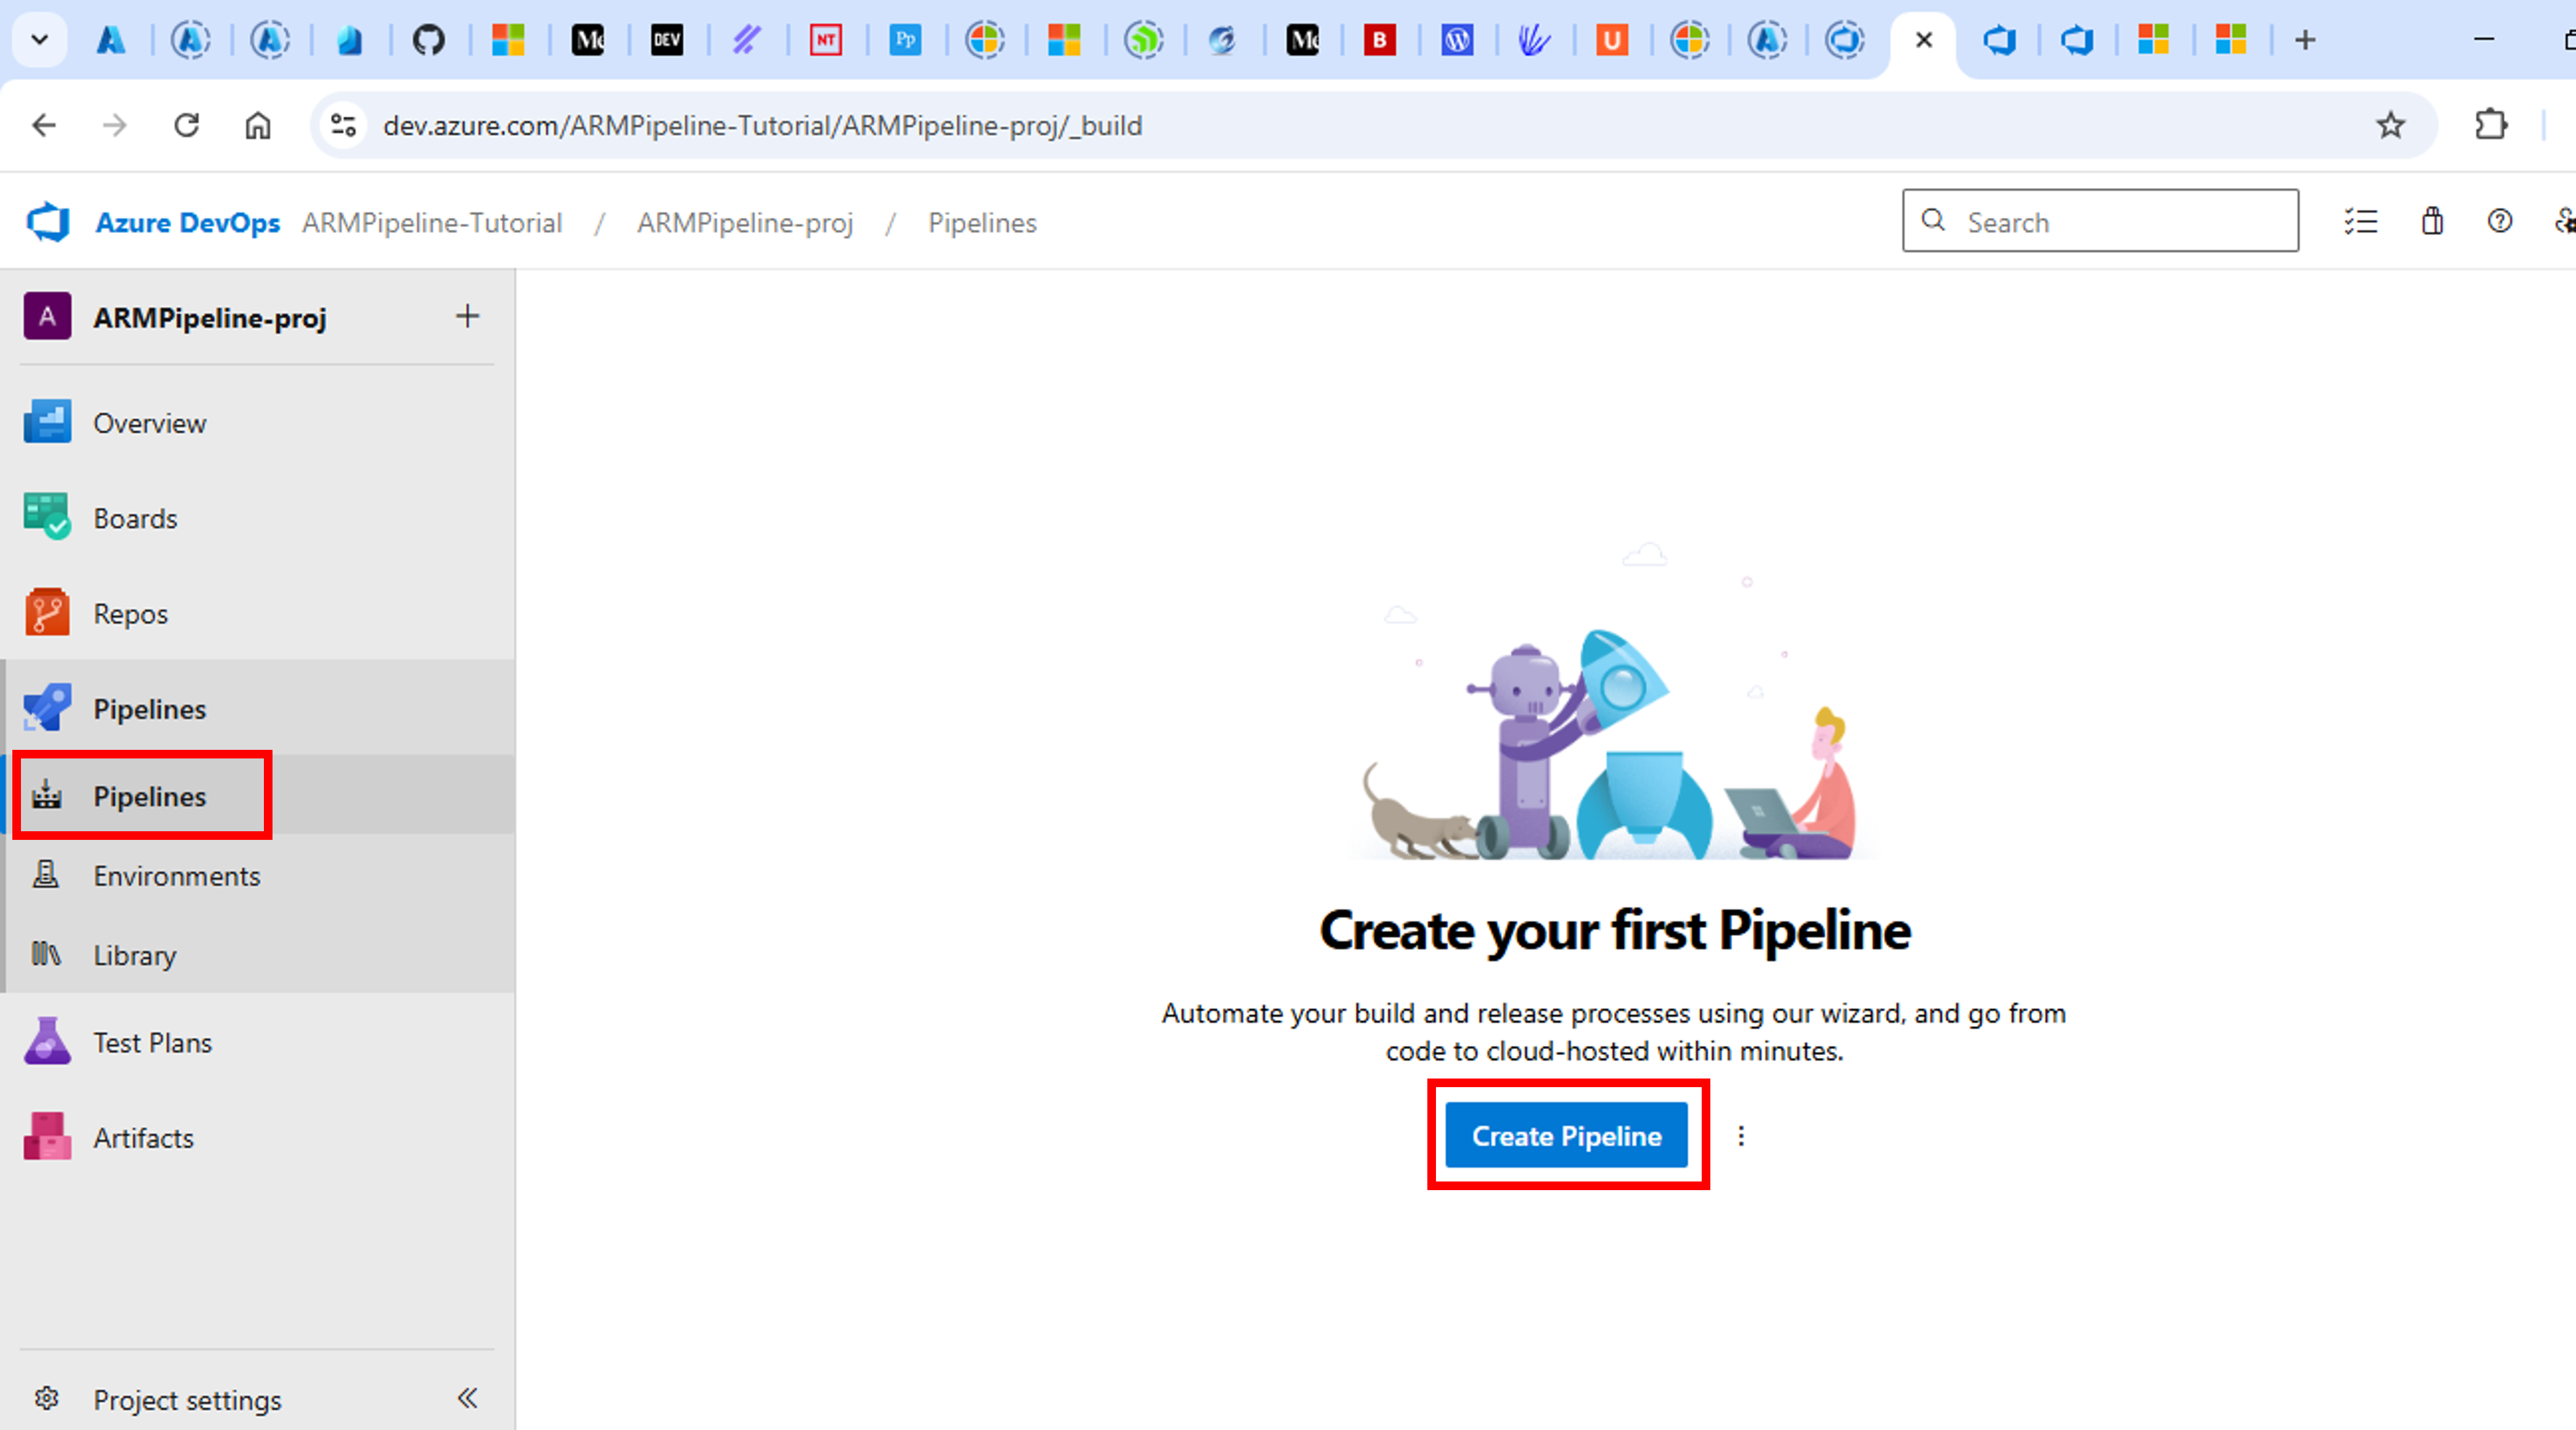
- Next, we need to create a pipeline. Under the ARMPipeline-proj project, click on Pipelines -> Create Pipeline

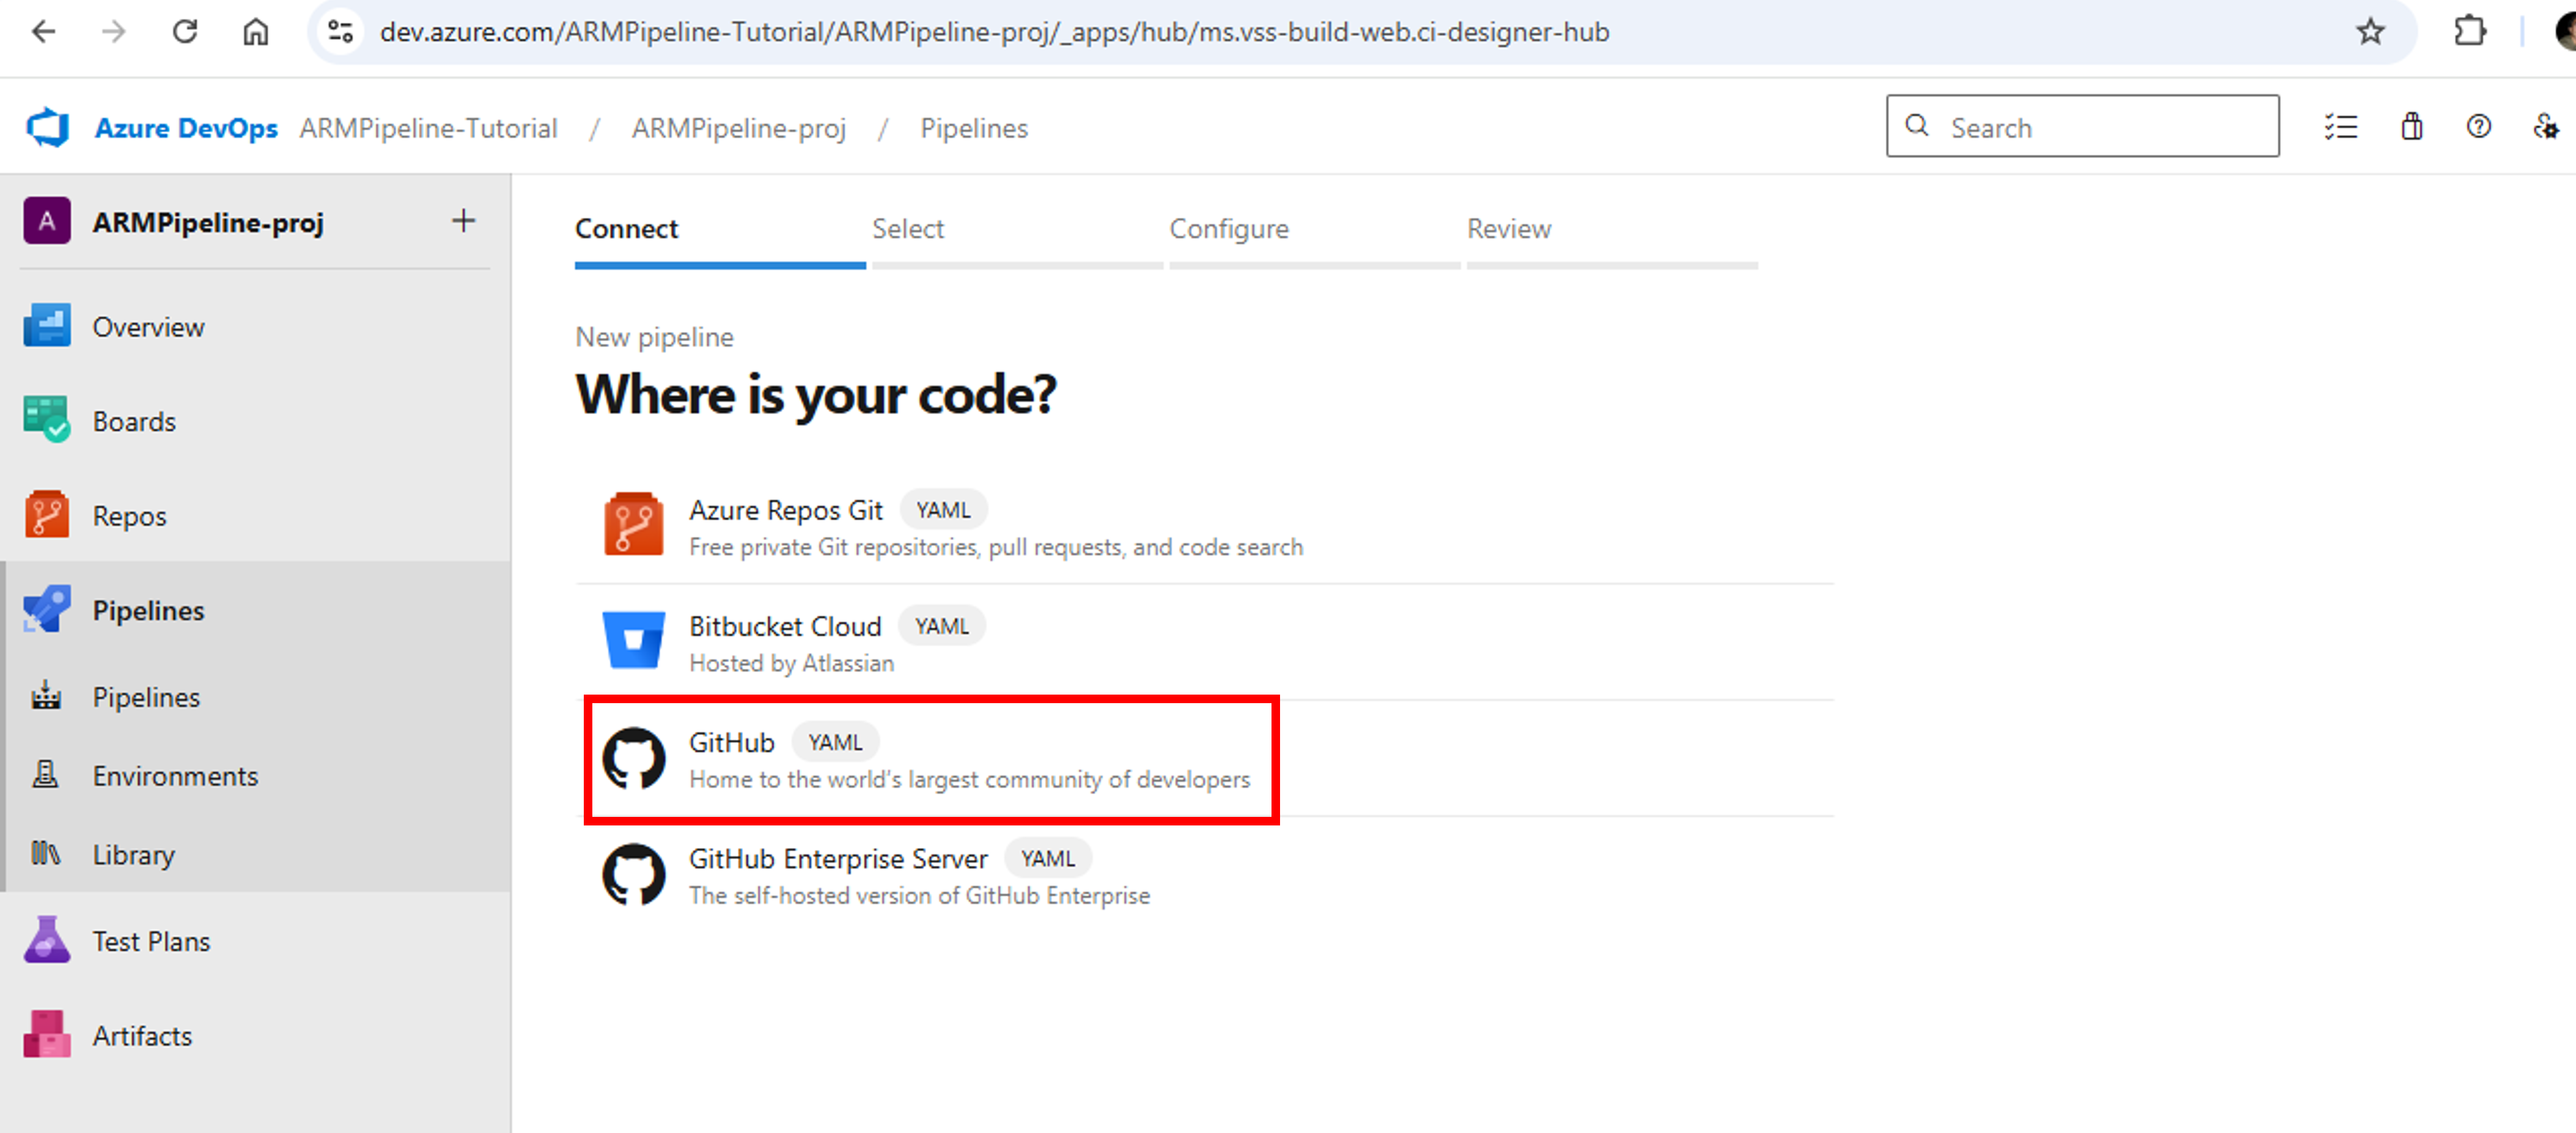
- From Connect tab, select GitHub as your version control system

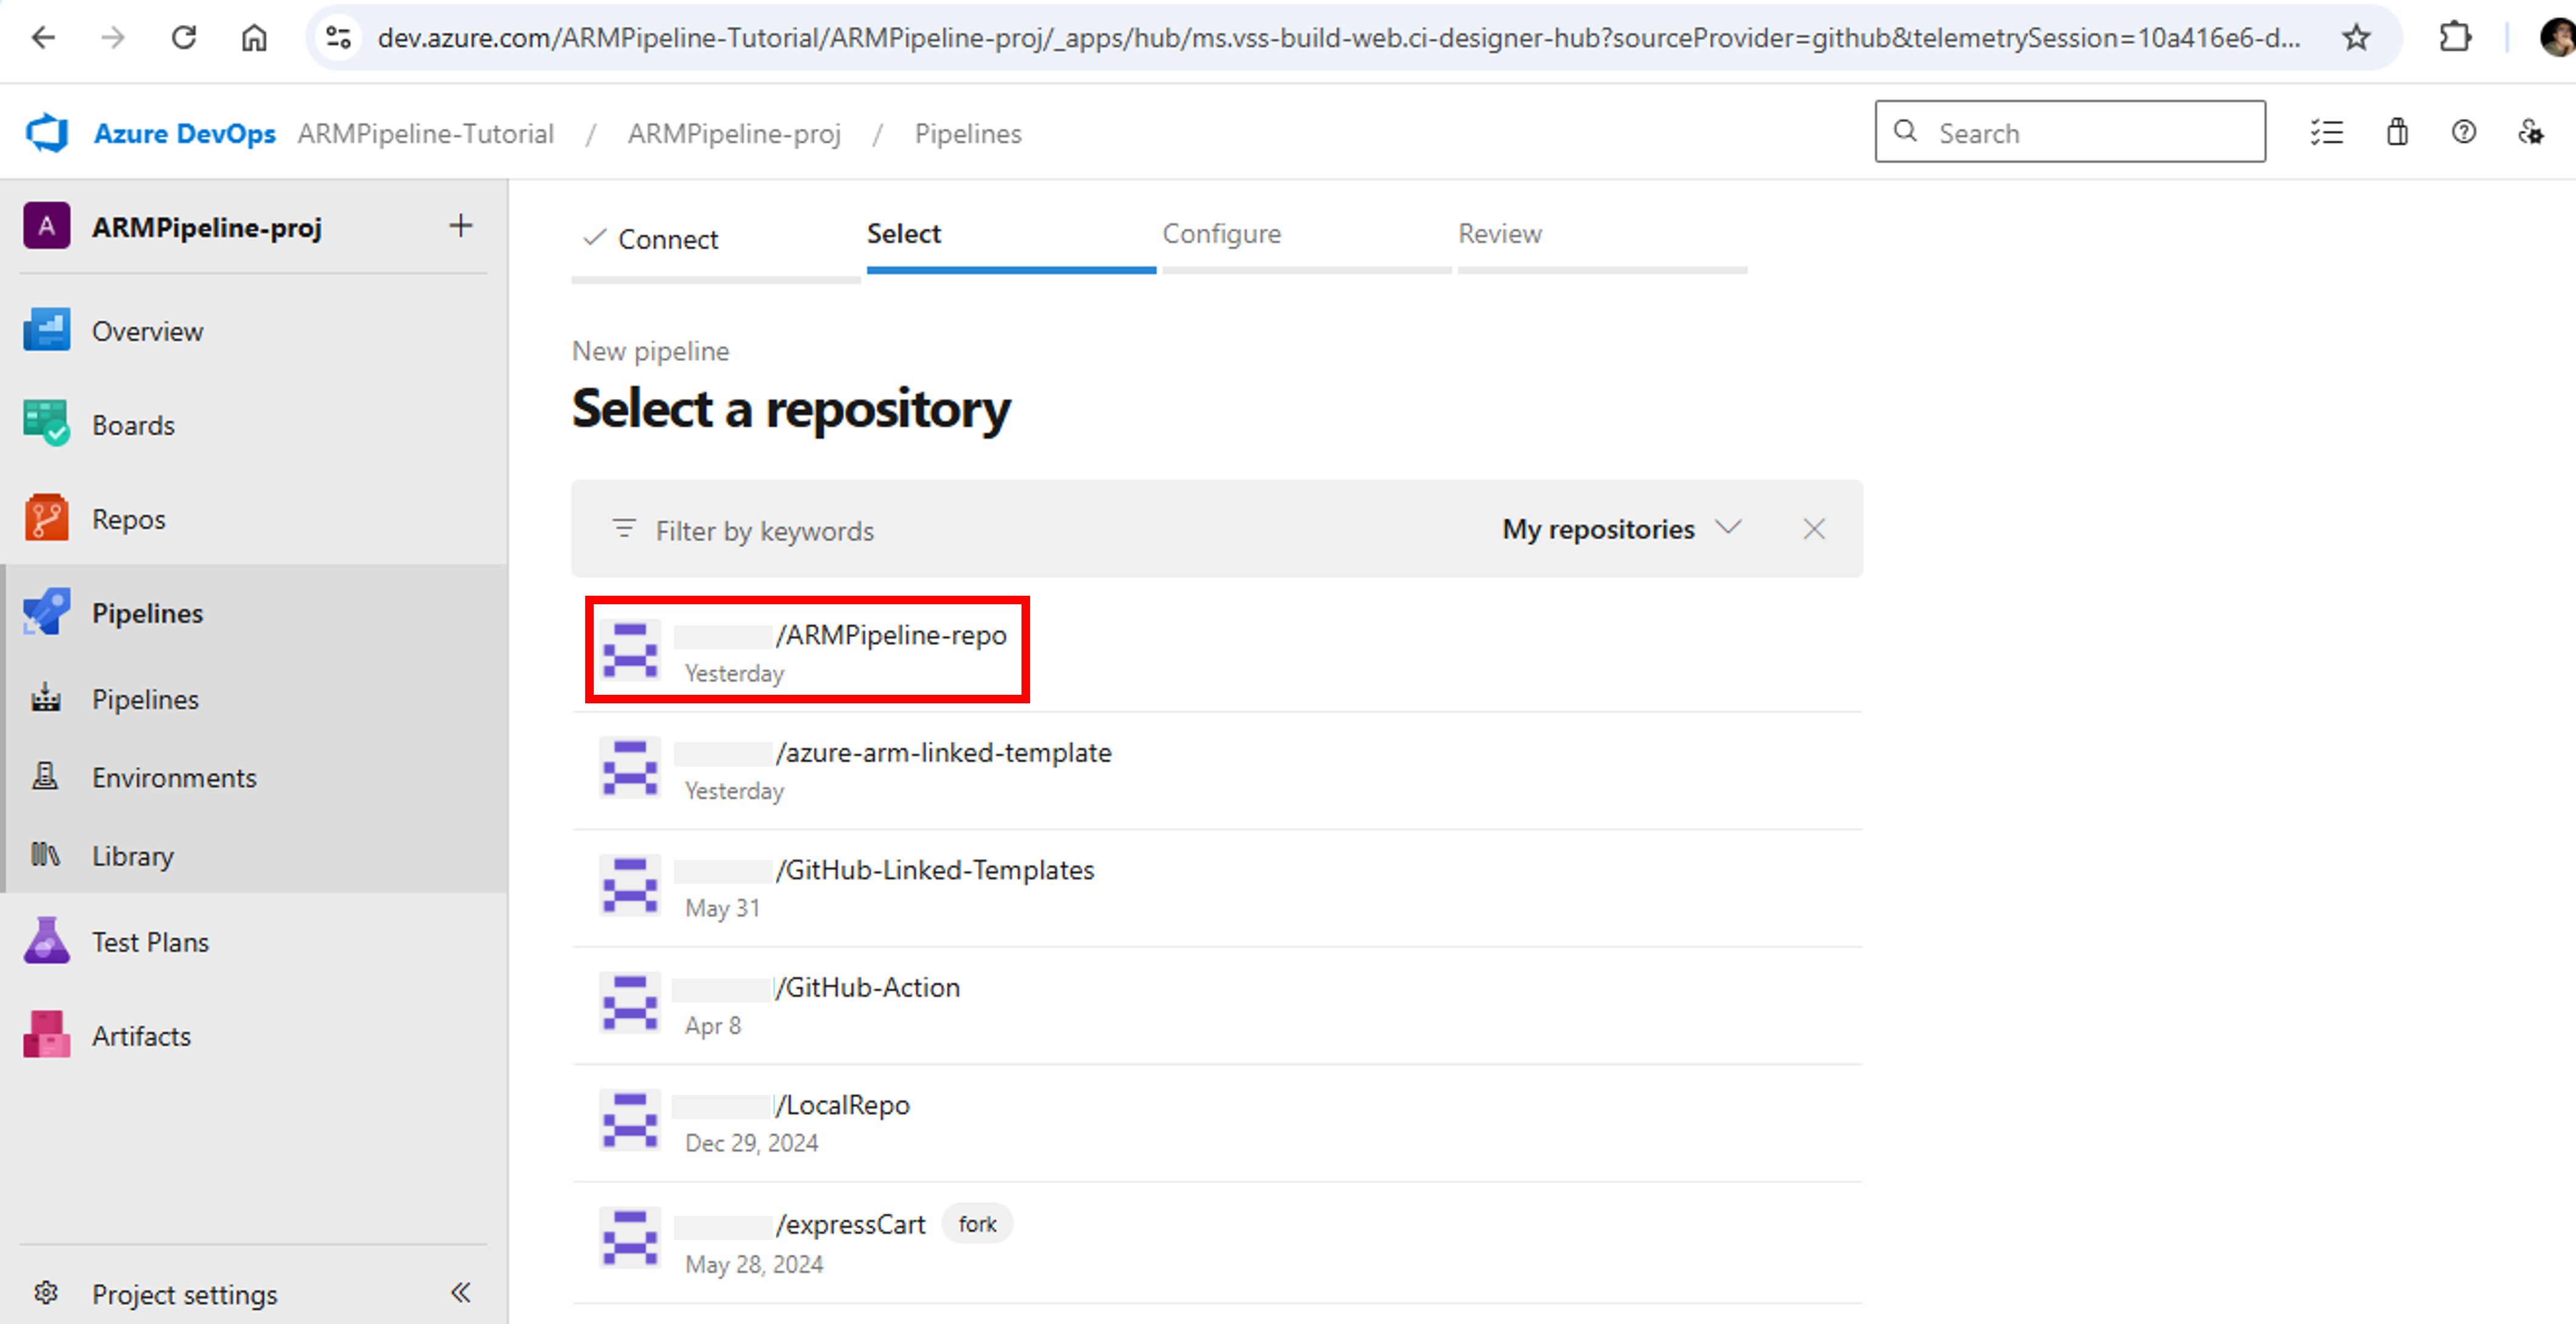
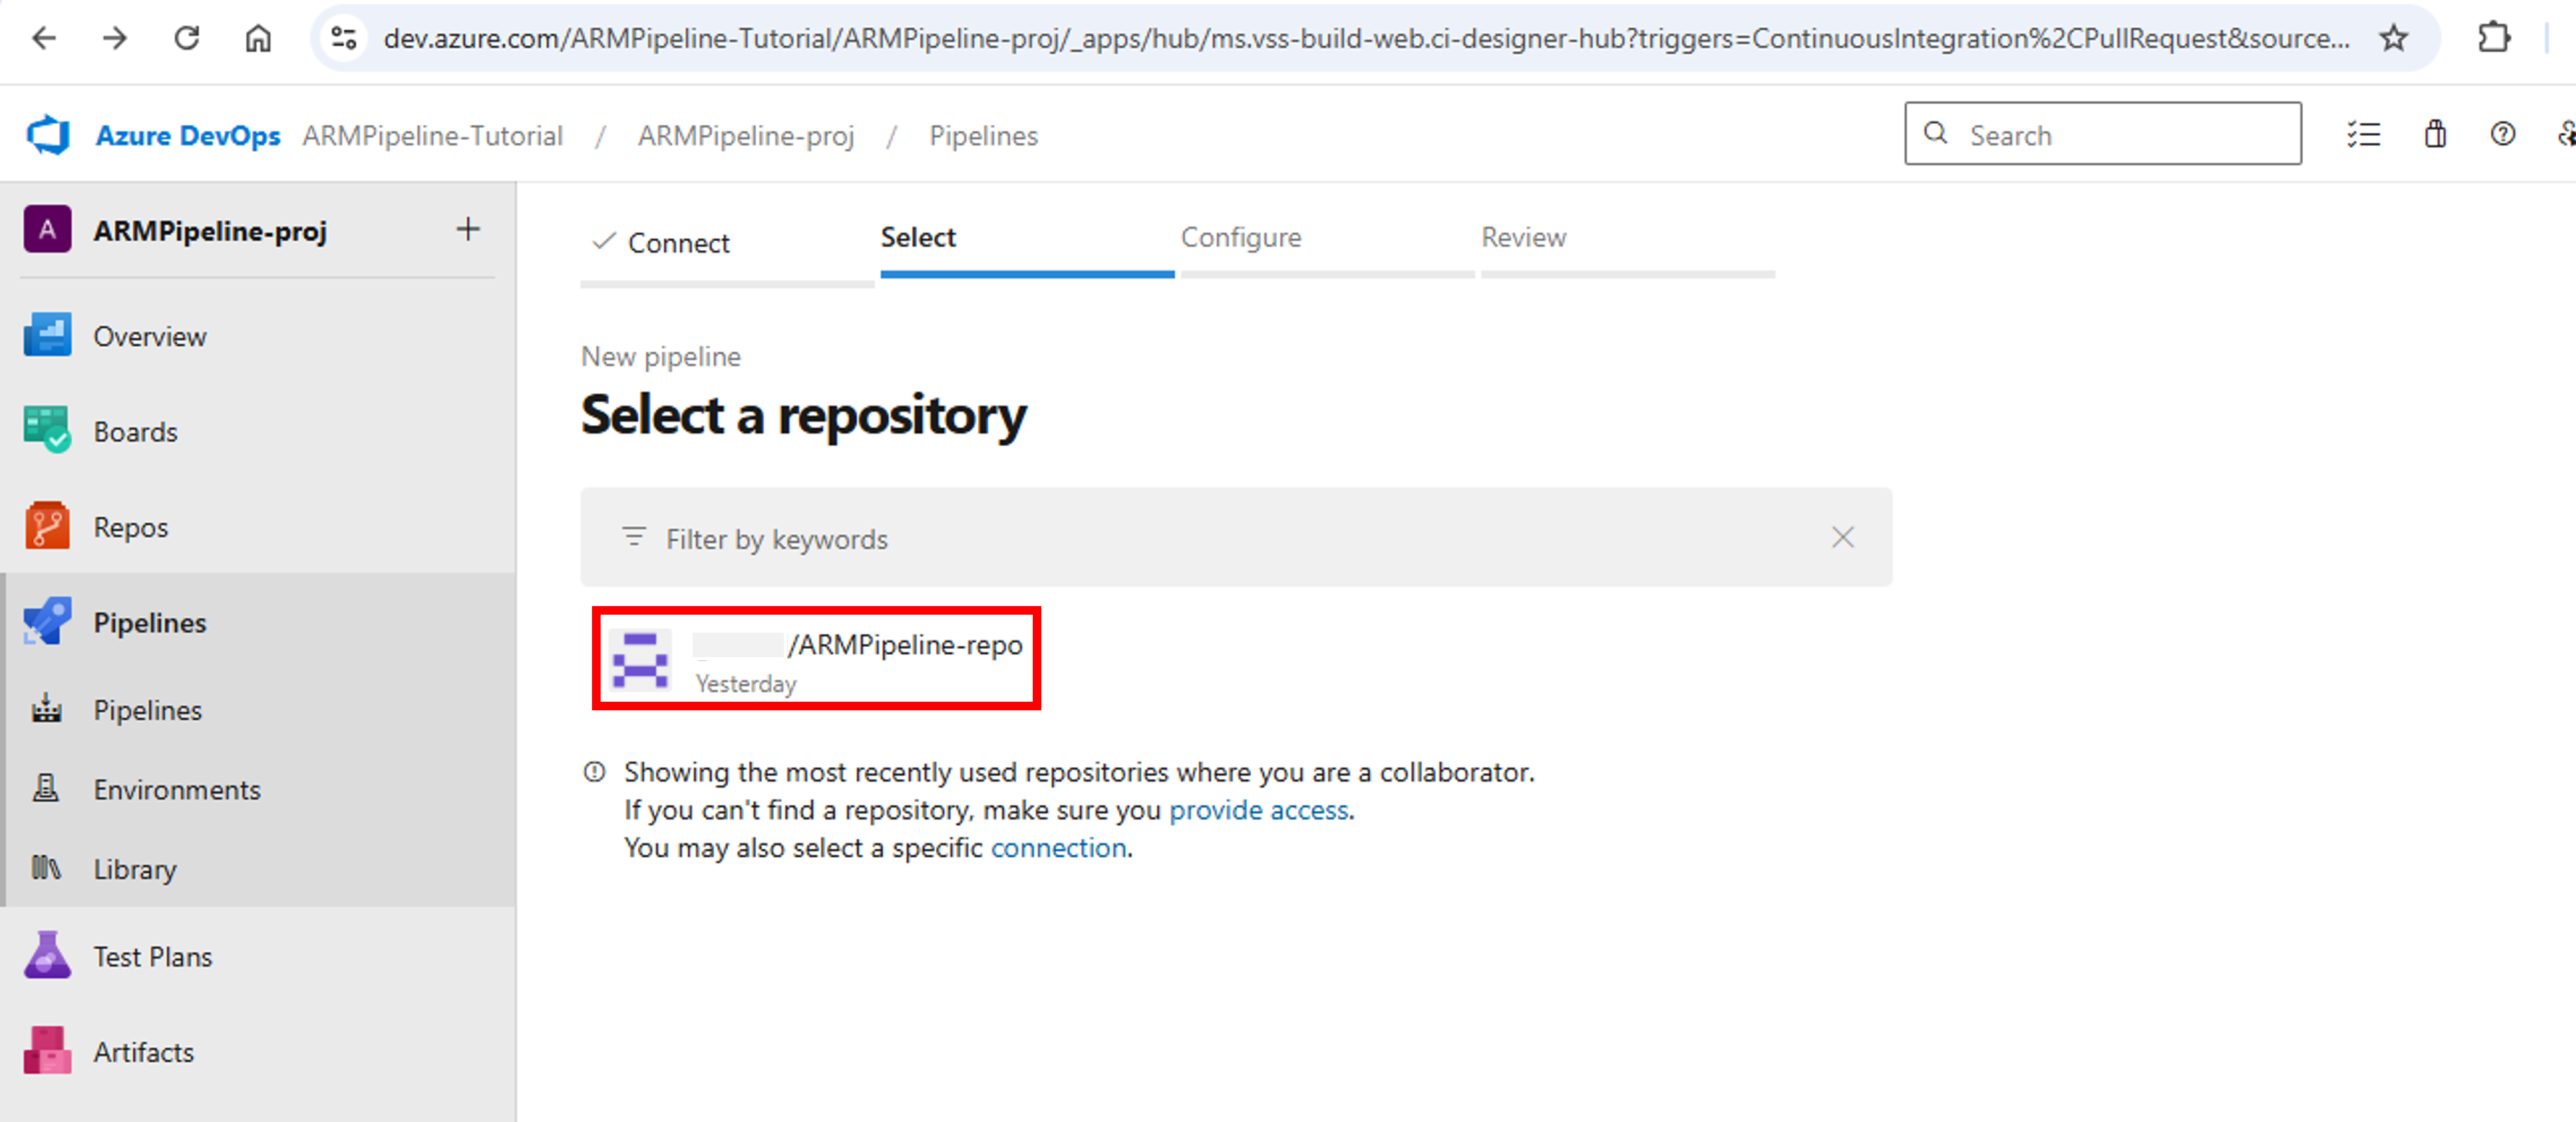
- From Select tab, select [your Account Name]/ARMPipeline-repo as your repository

- If you’re prompted for authentication, Sign in using your GitHub credentials. Select option Only select repositories, select [your Account Name]/ARMPipeline-repo repository and click approve and install. This will give Azure DevOps access to your GitHub account and install Azure Pipelines app on your designated repository

- Select [your Account Name]/ARMPipeline-repo repository

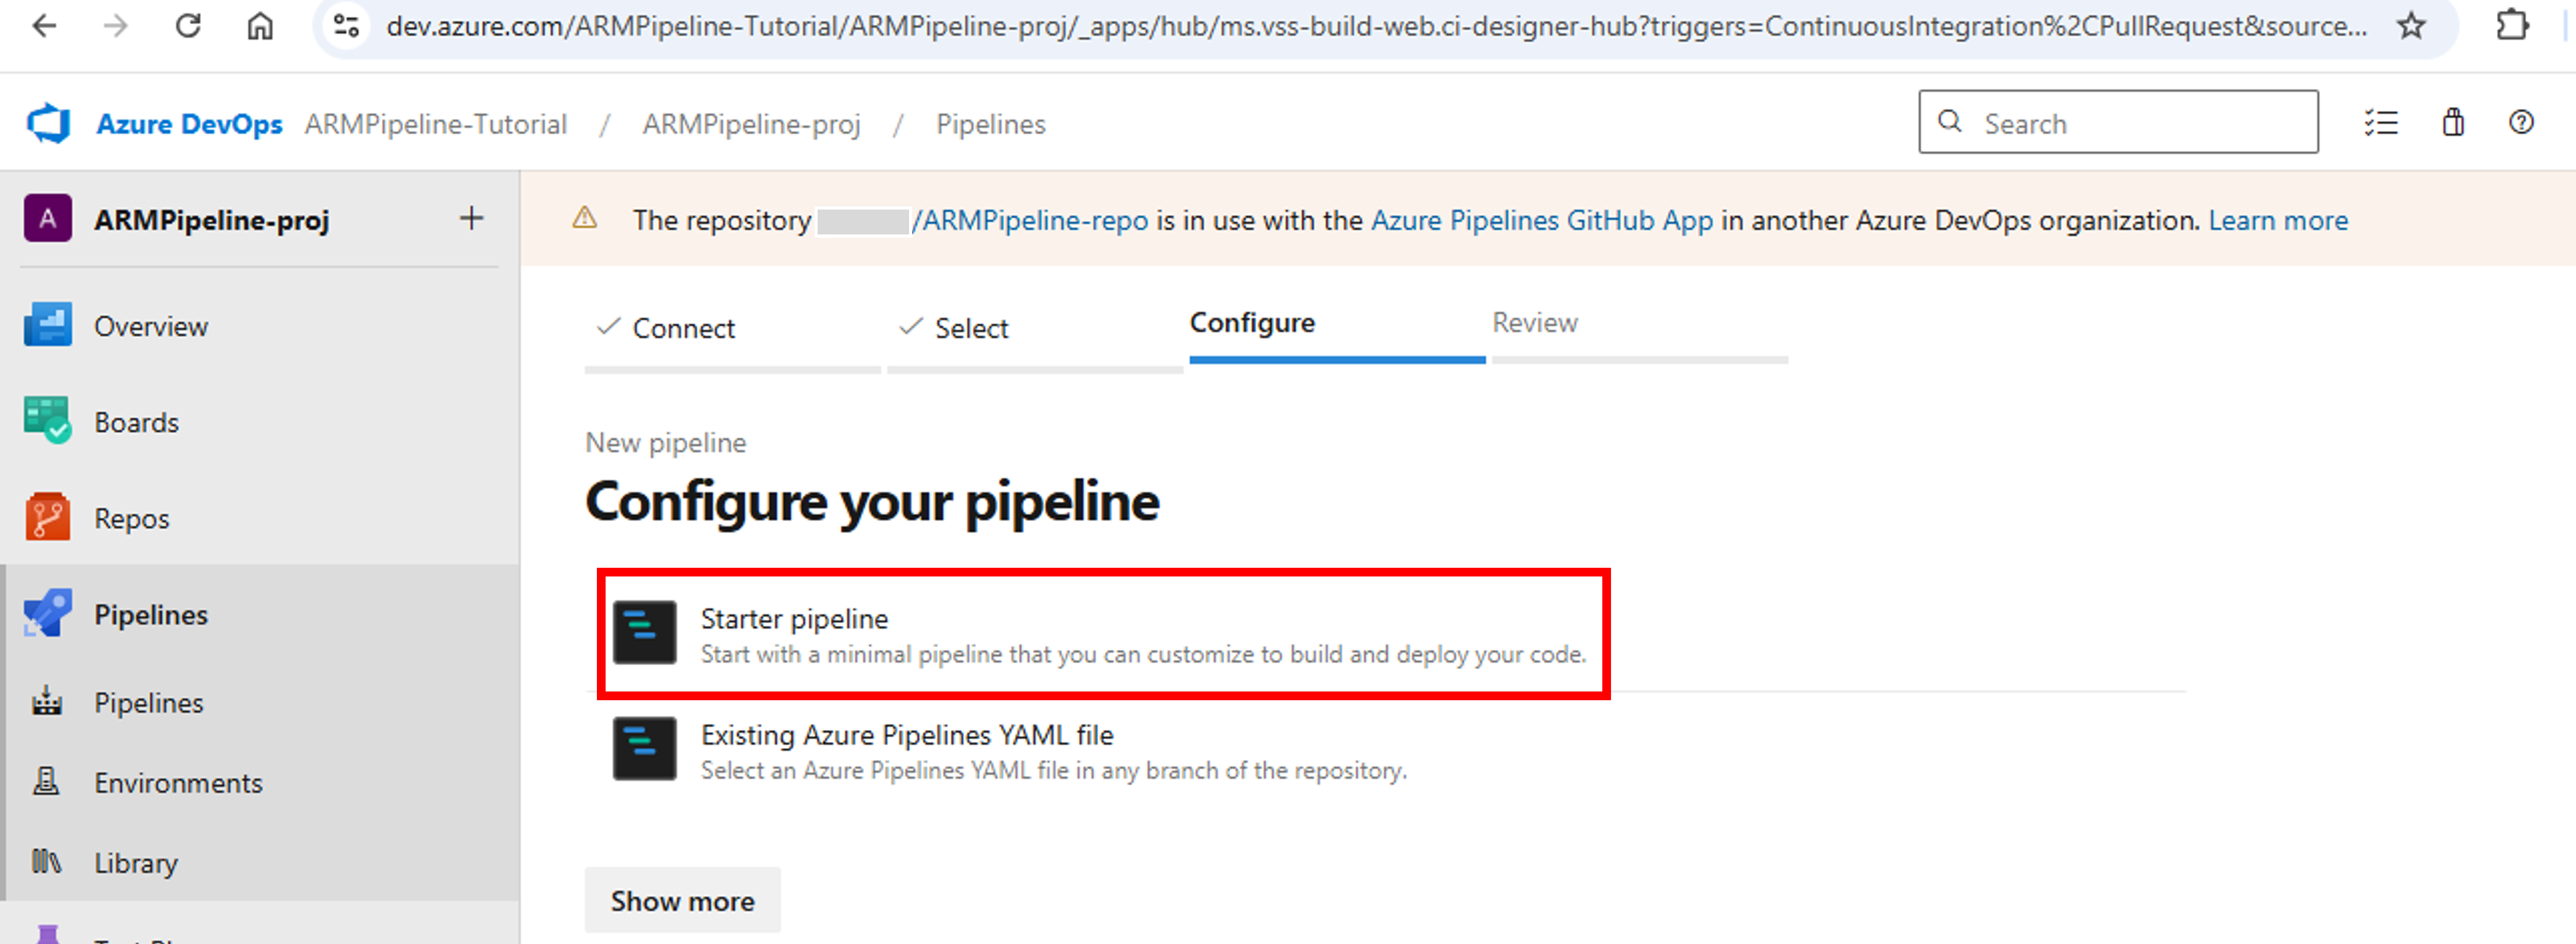
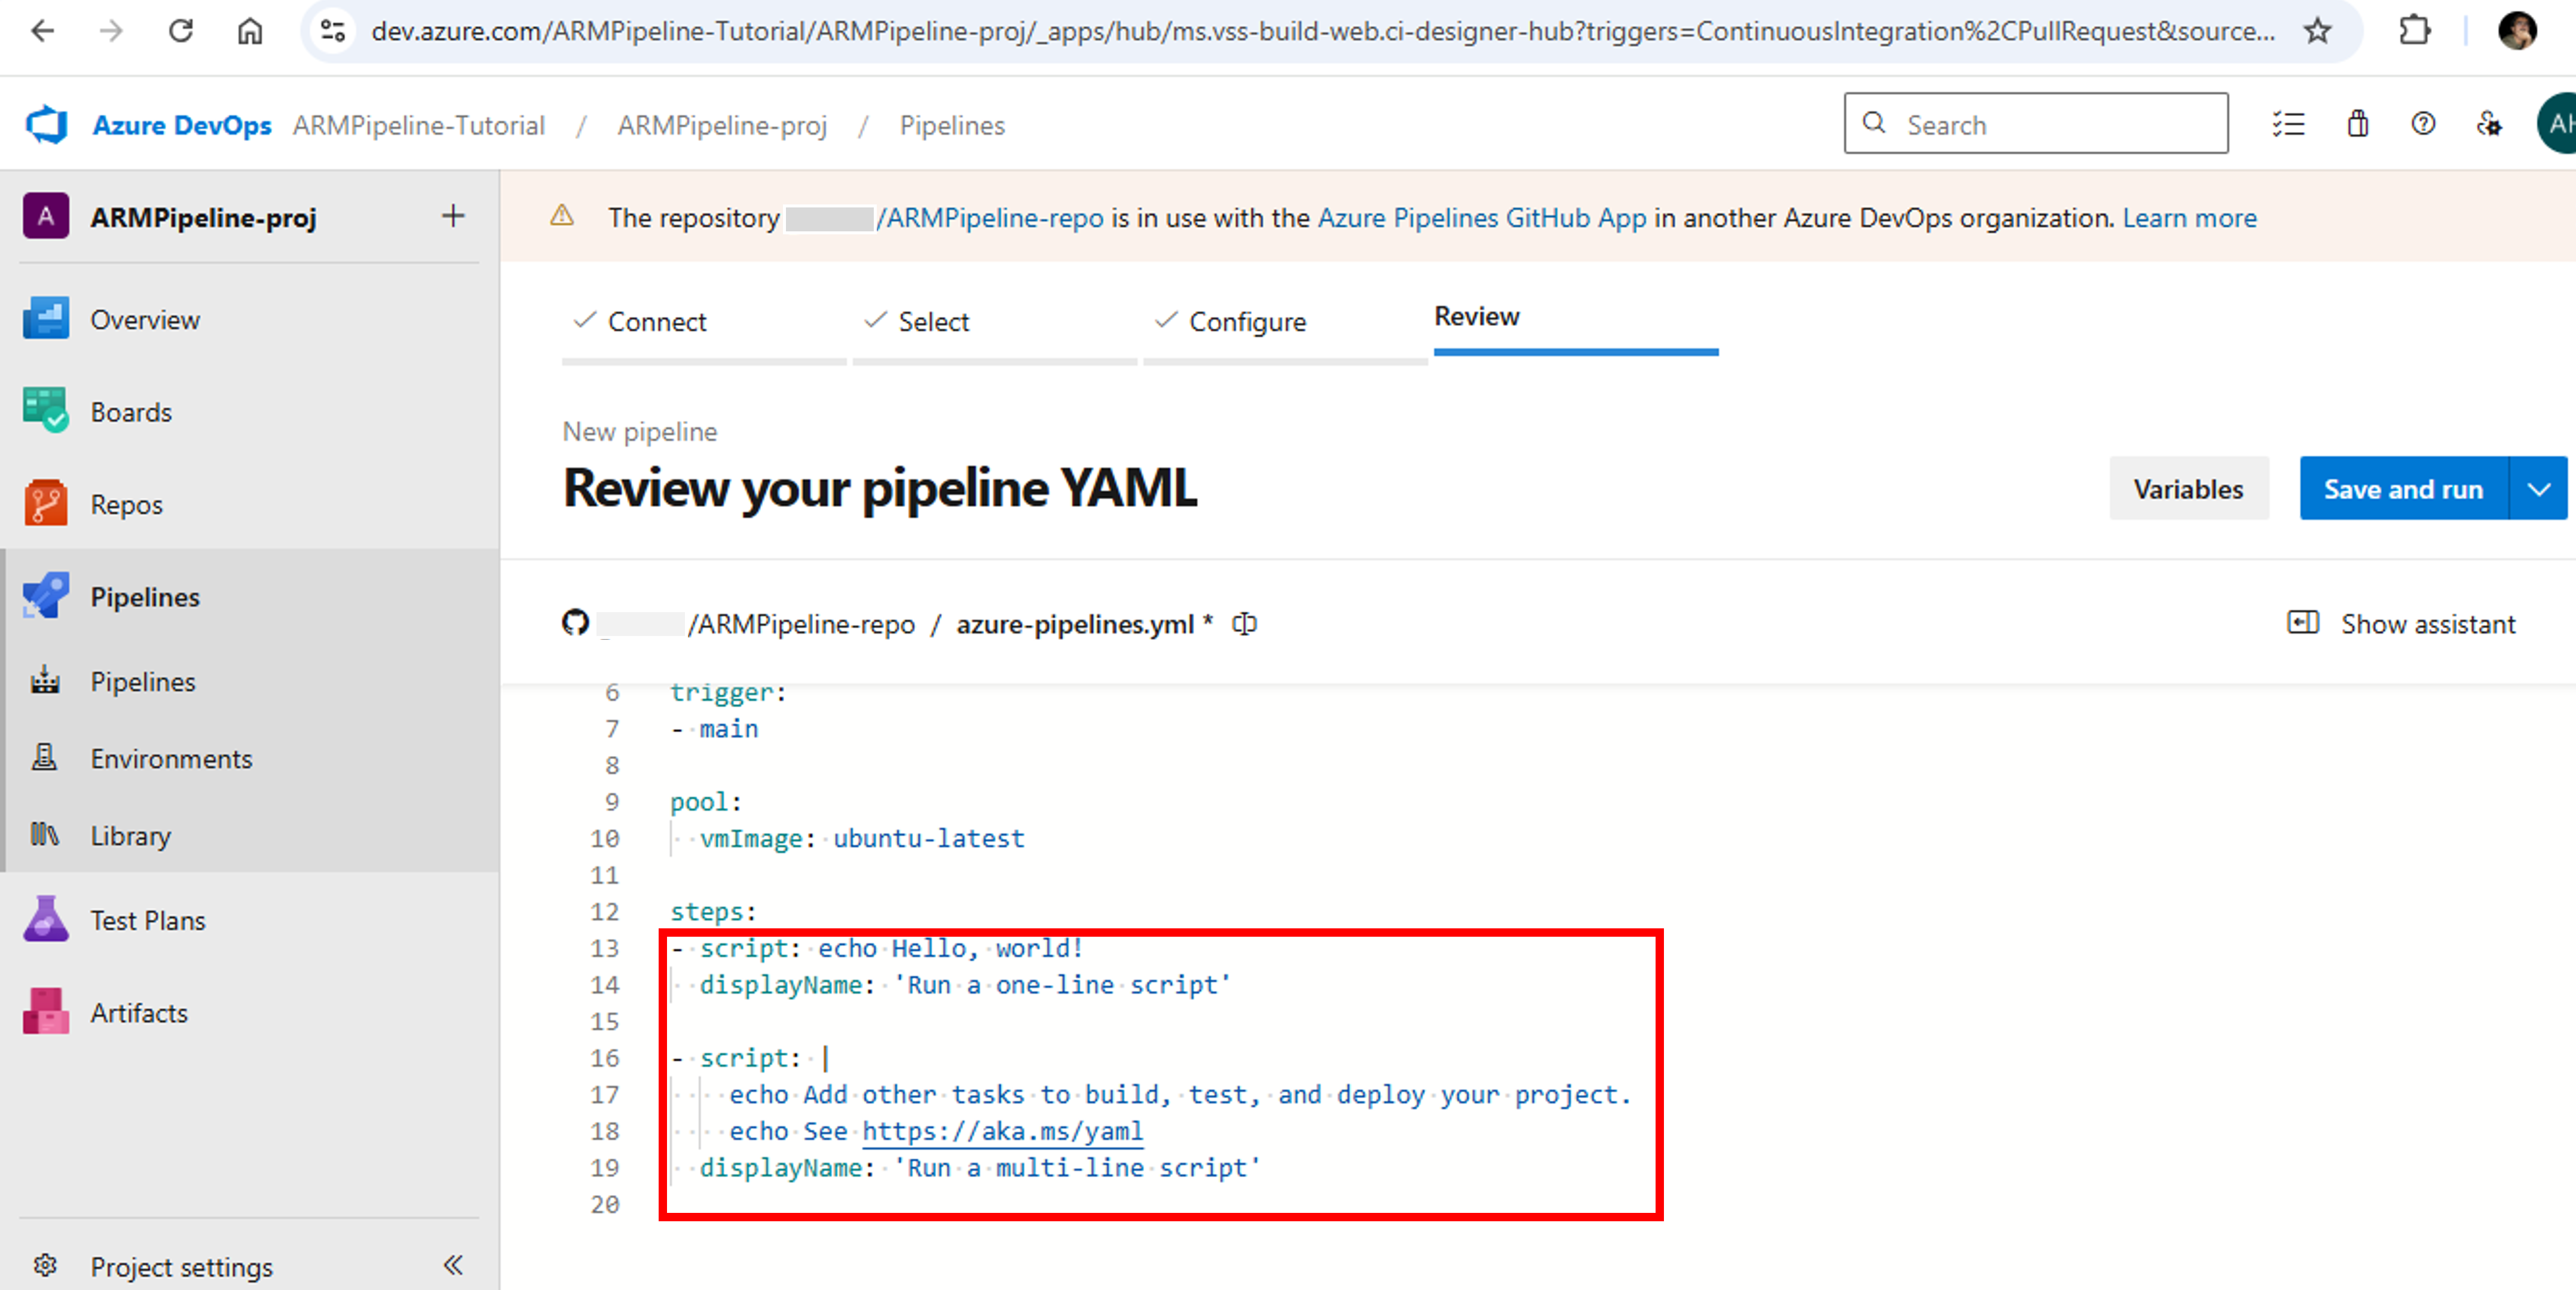
- From Configure tab, select Starter pipeline. It creates the azure-pipelines.yml pipeline file with two script steps

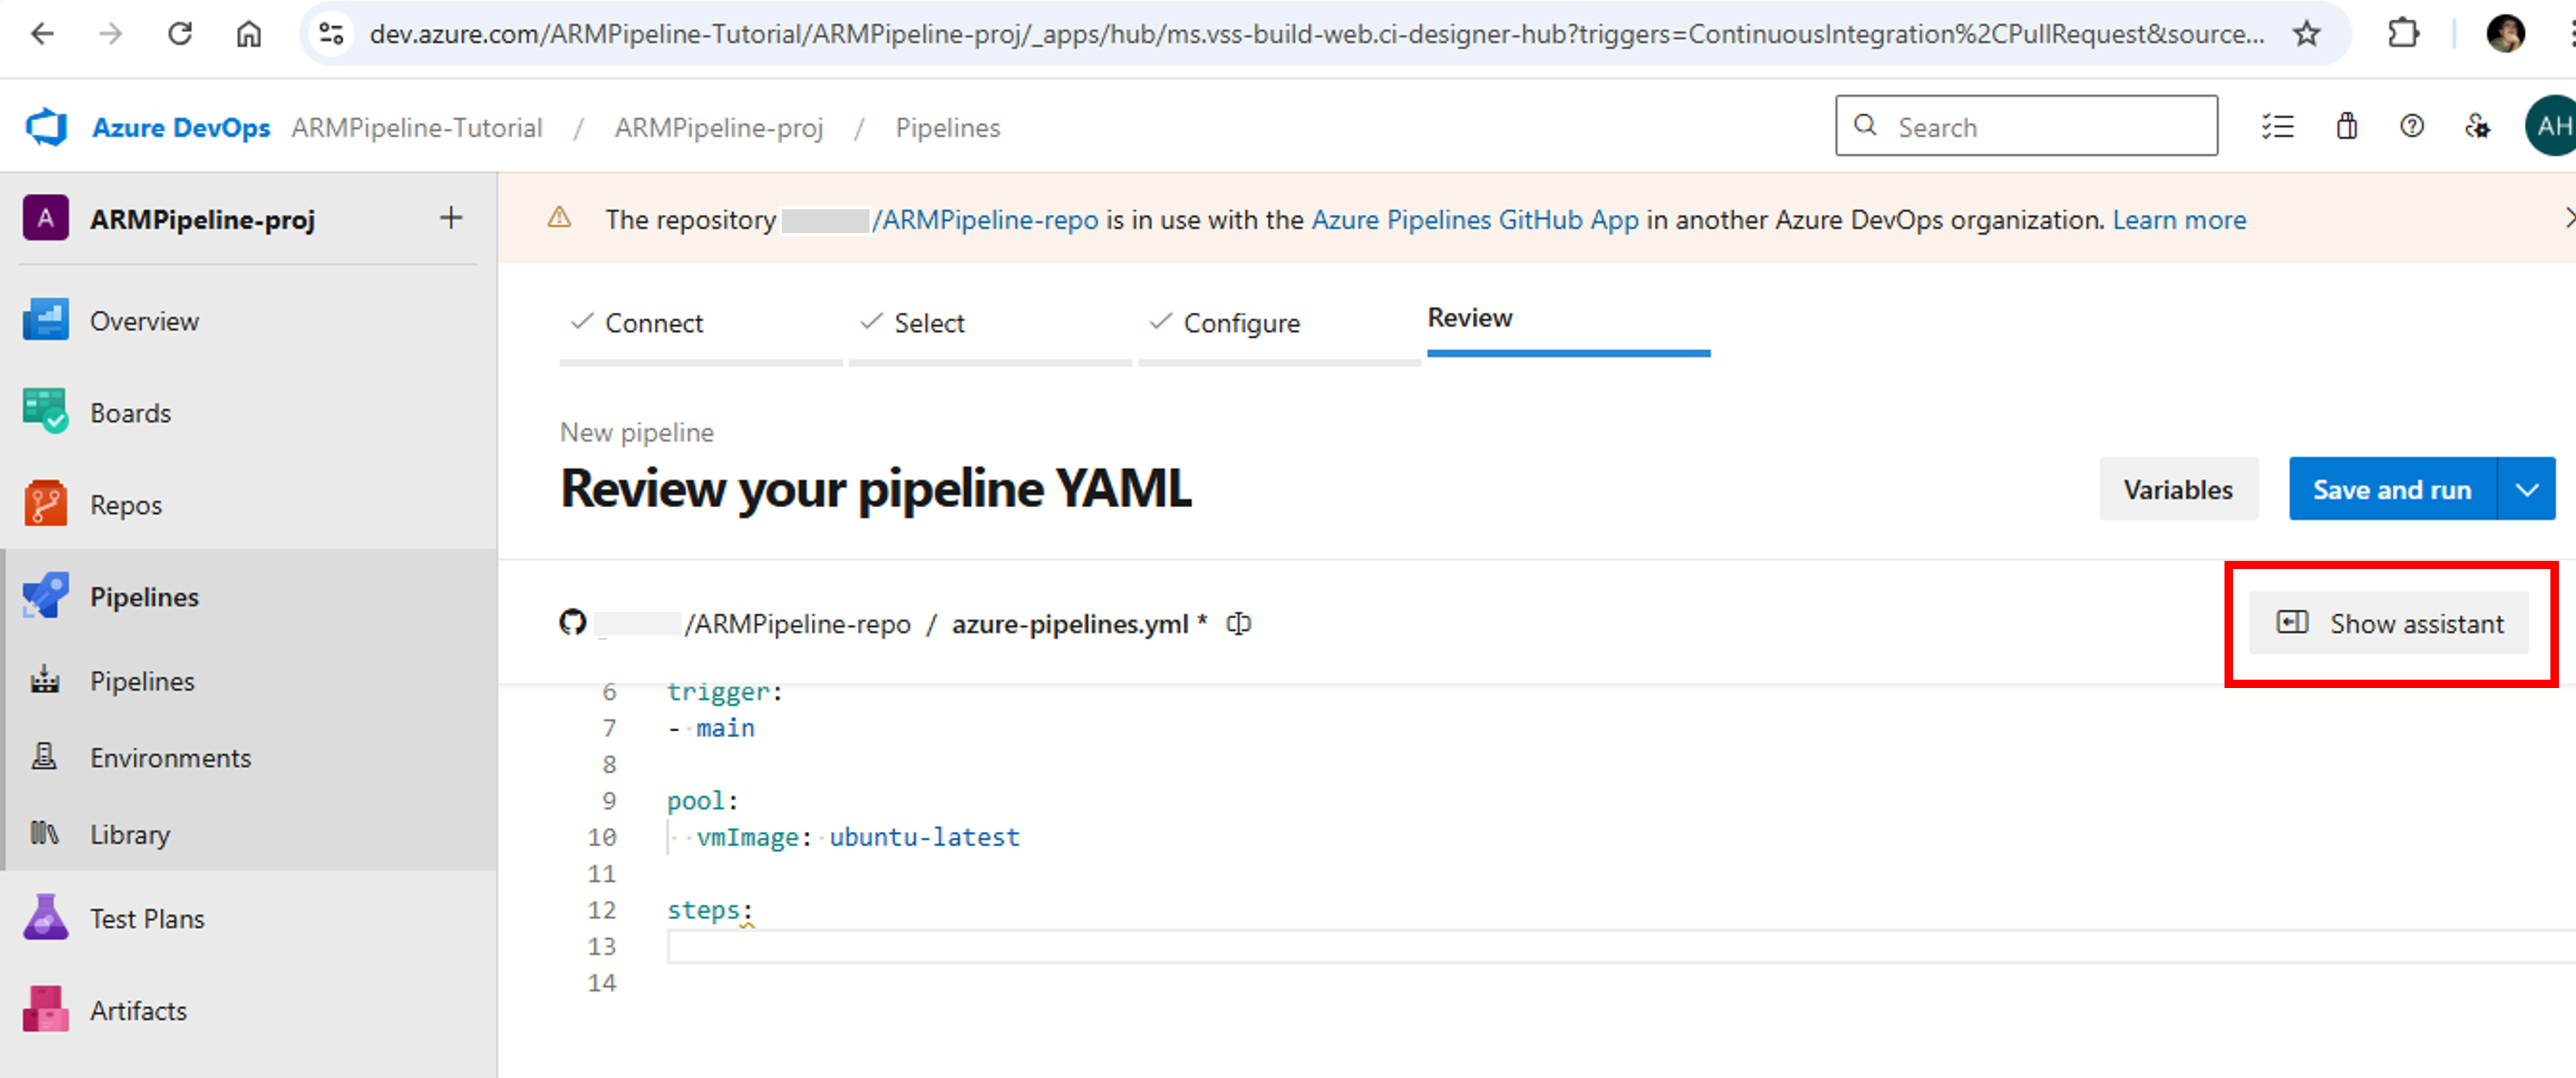
- Delete the two script steps from the azure-pipelines.yml file and move your cursor to the line after steps

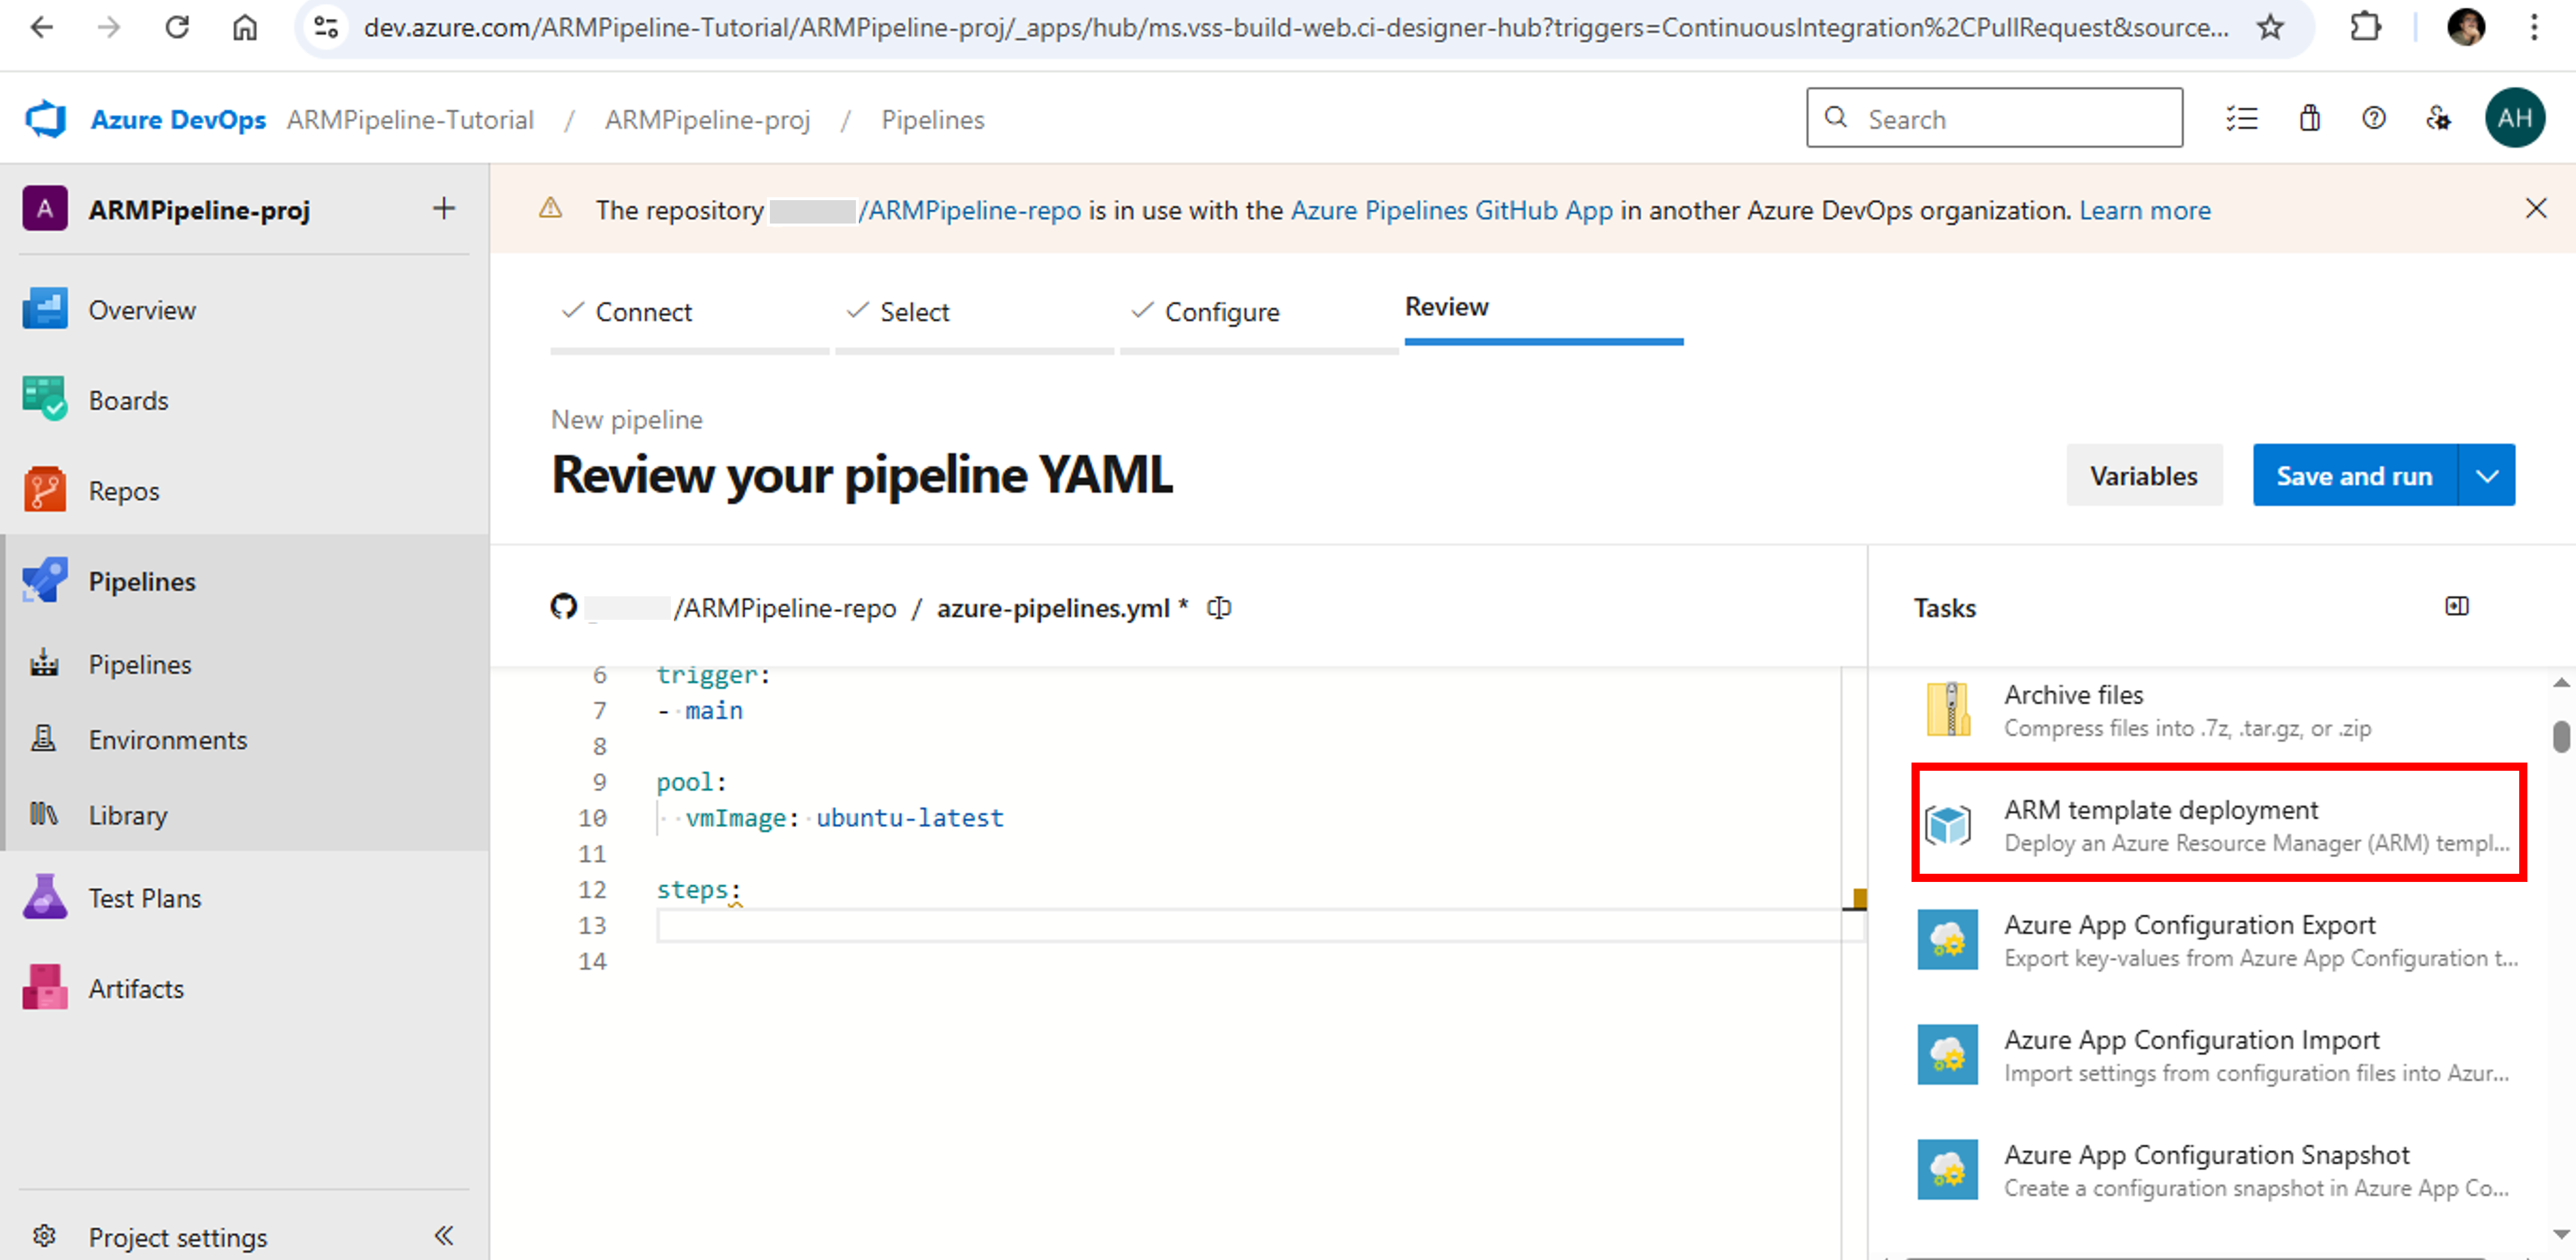
- Select Show assistant on the right of the screen to open Tasks pane. The task assistant provides a method for adding tasks to your YAML pipeline

- Select ARM template deployment

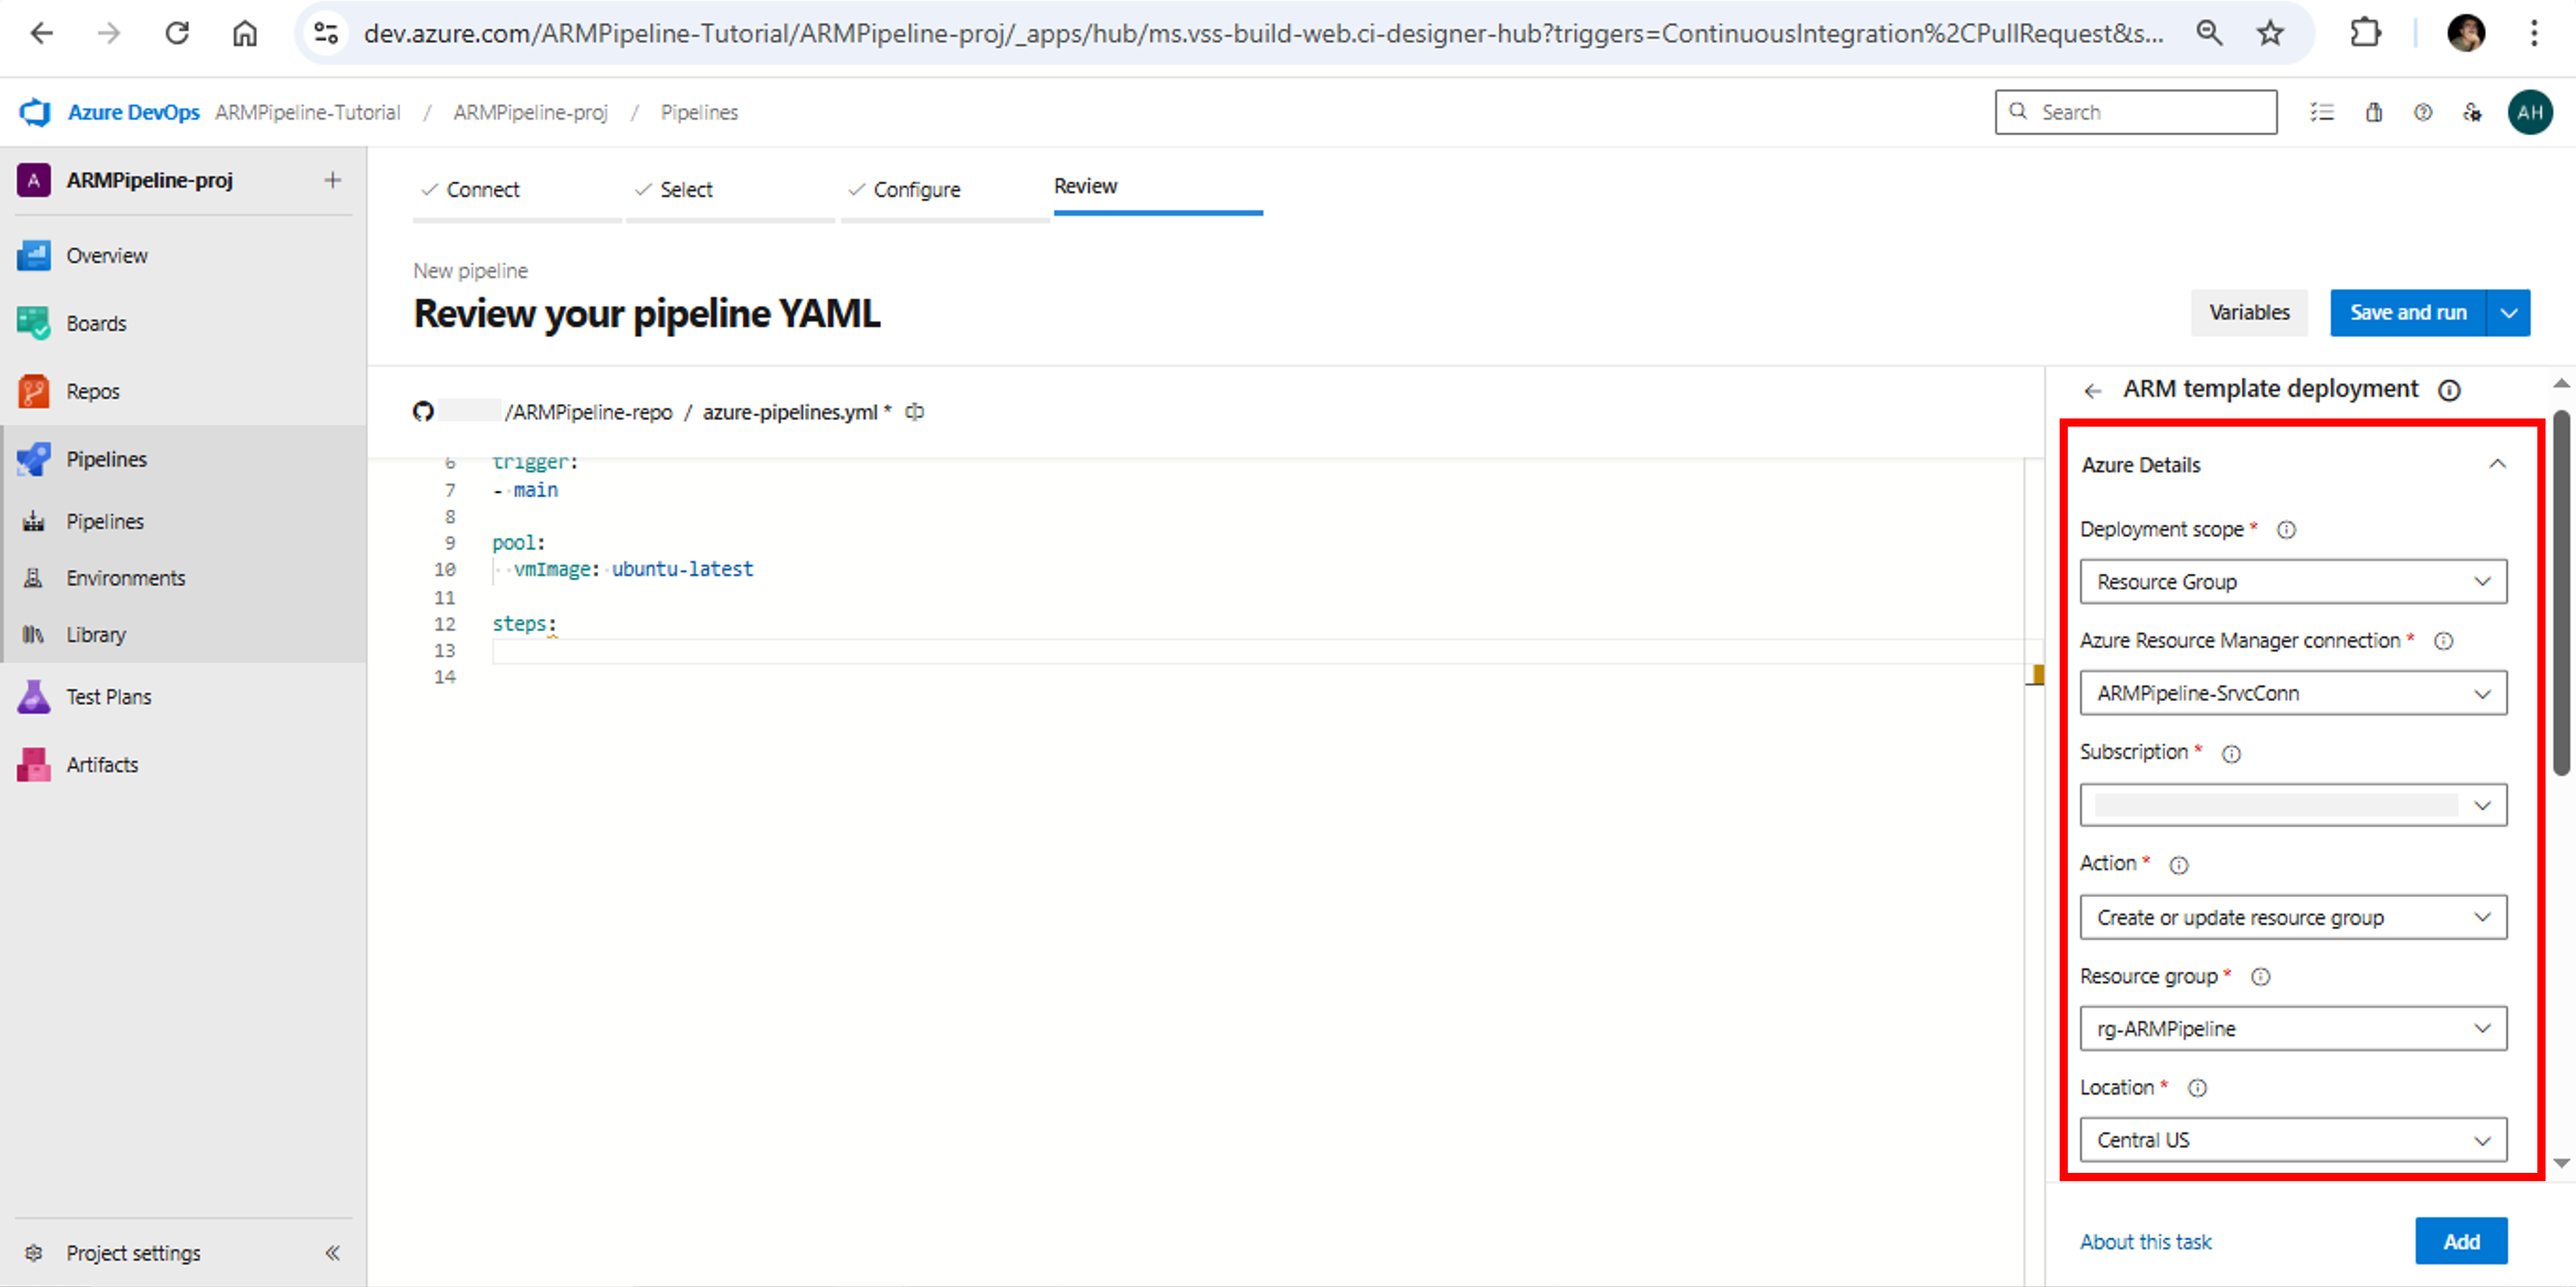
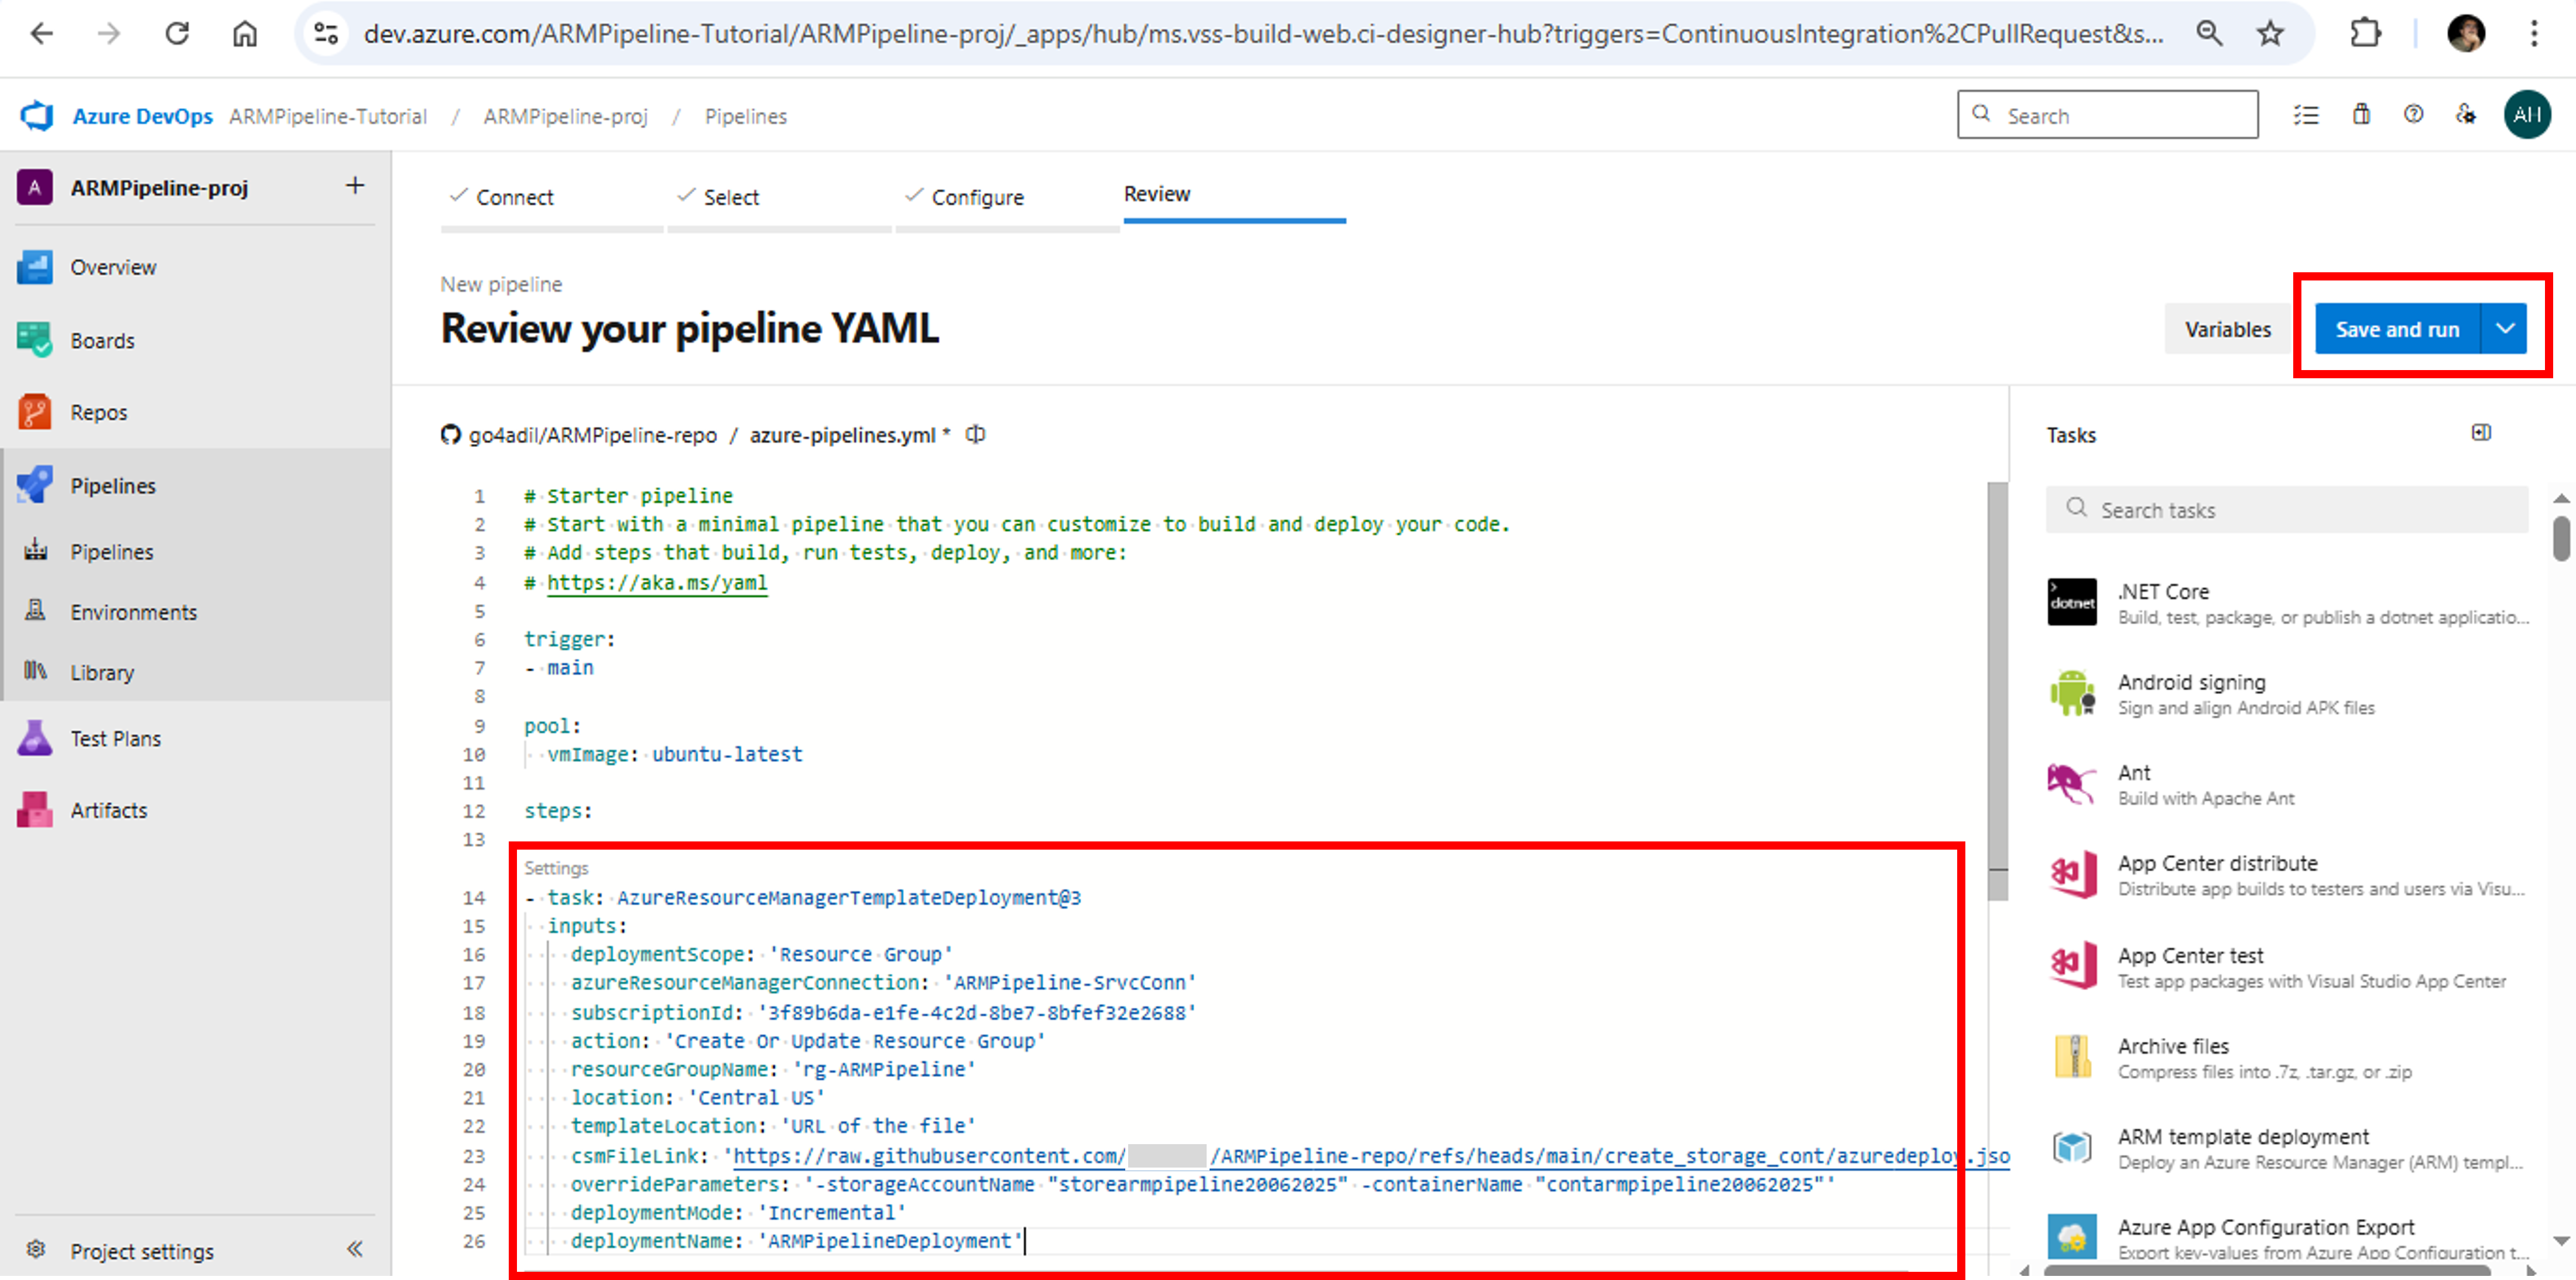
- Under Azure details, enter data as per below snap. In Subscription, enter your subscription details

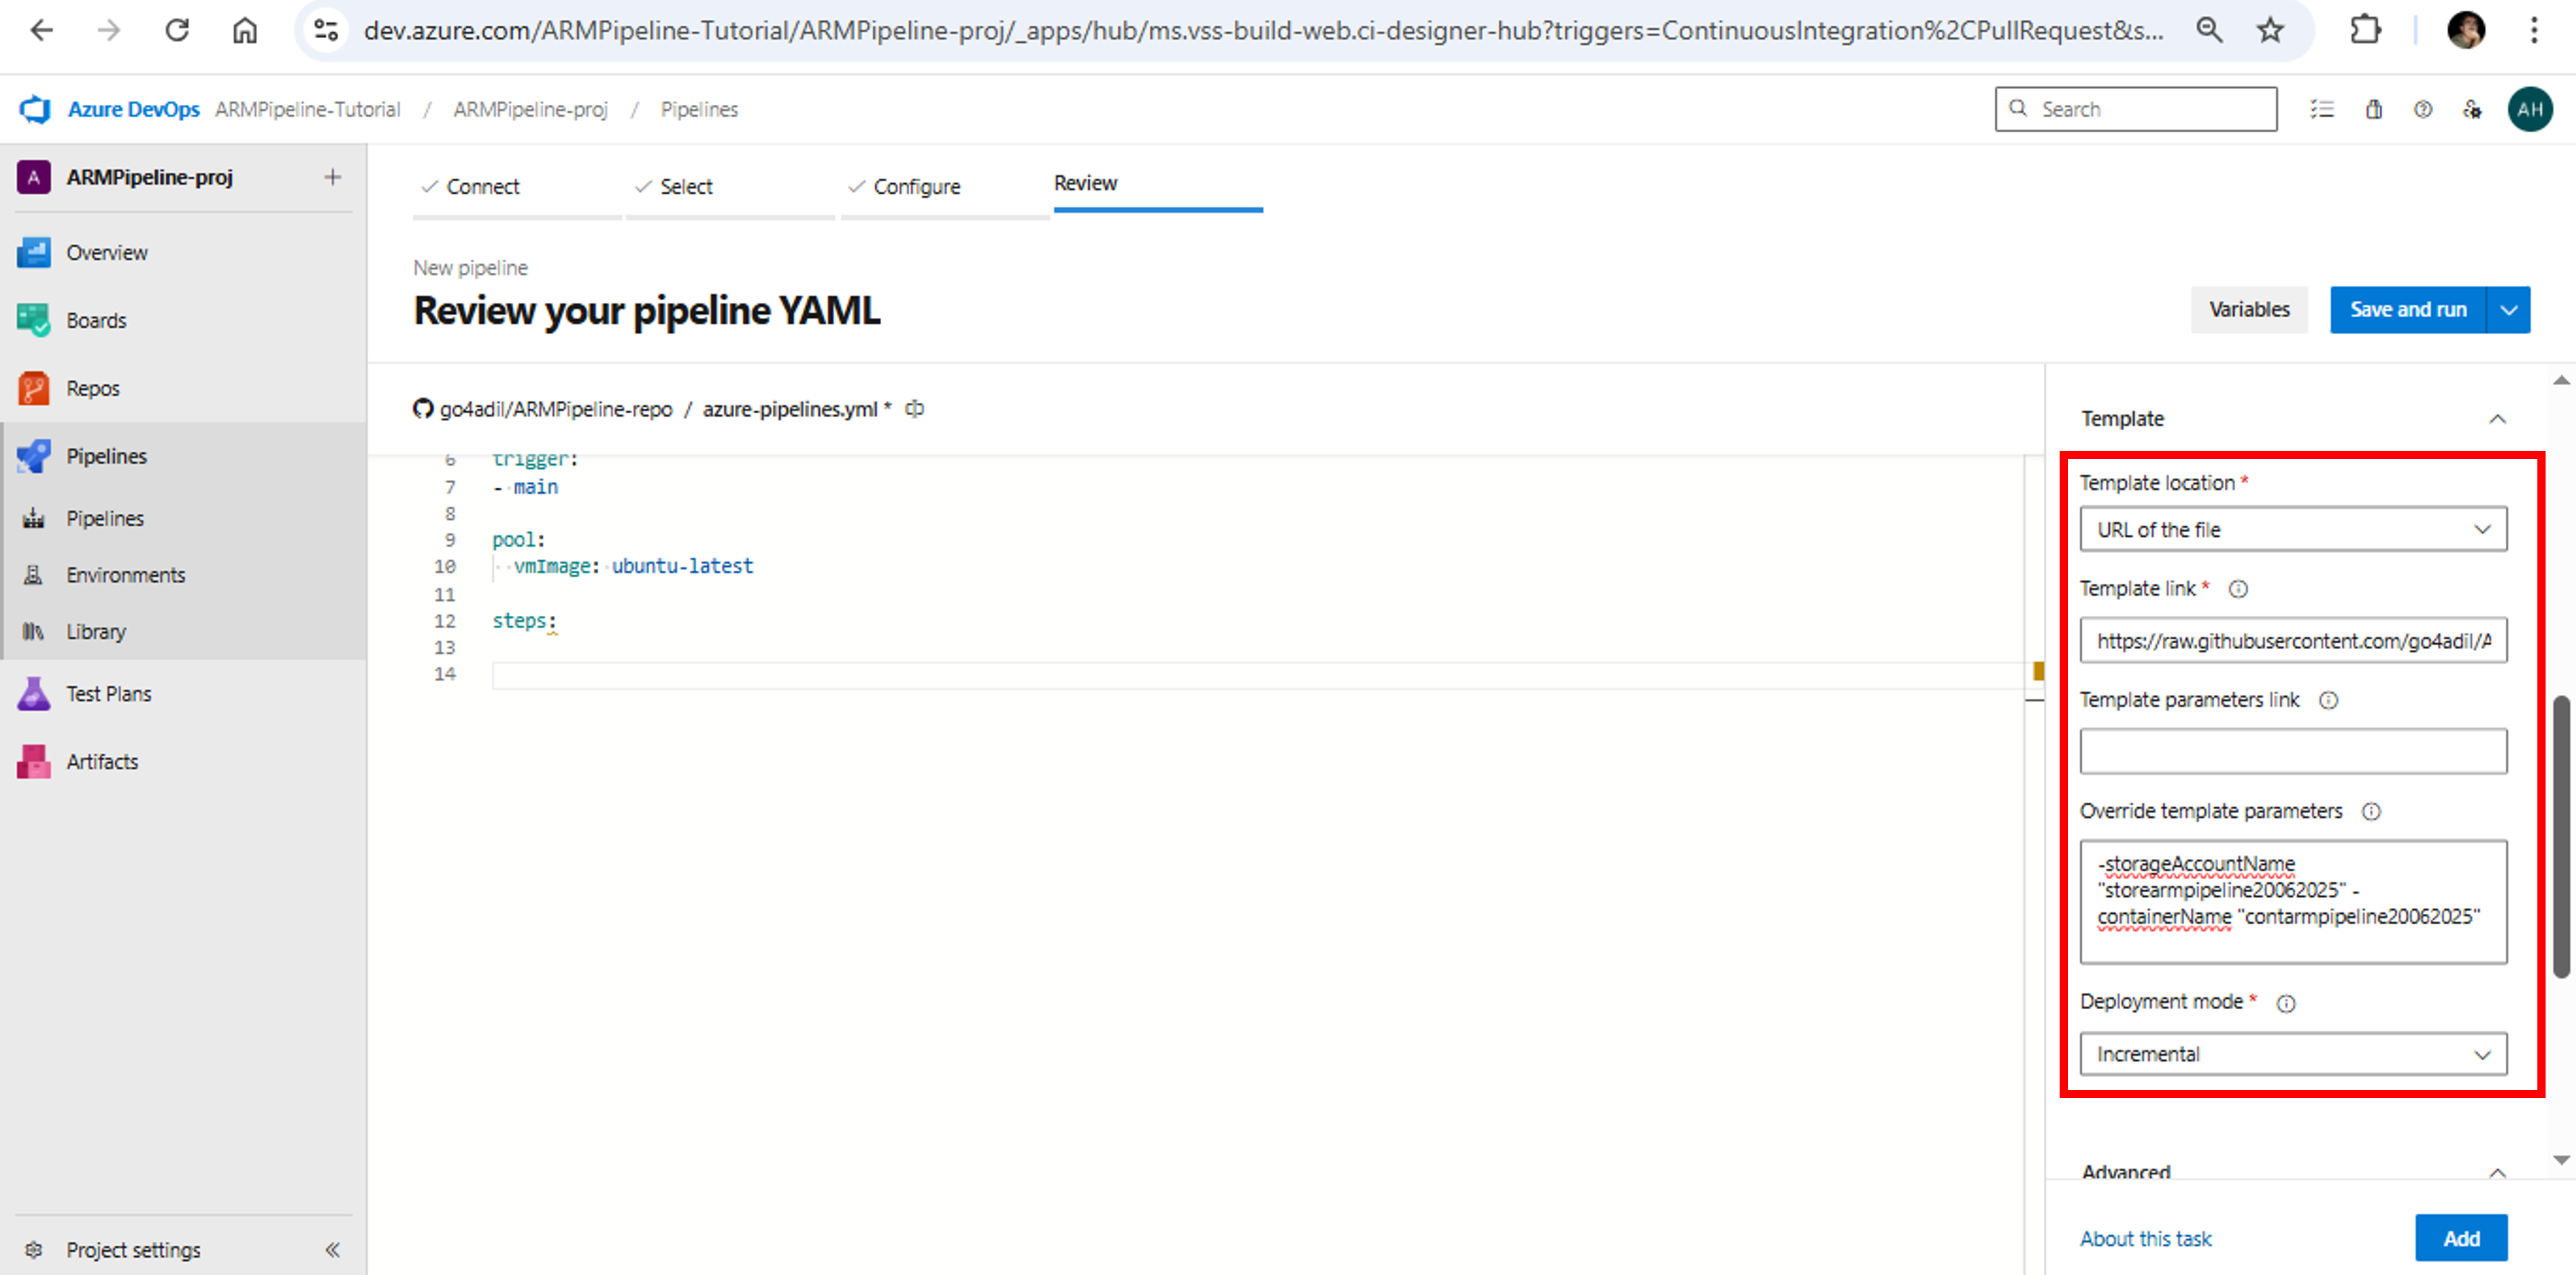
- Under Template details, enter data as per below snap. Template link is the link we copied at the end of the “Download a Quickstart Template” section. Since our template requires input against two parameters storageAccountName and containerName, enter following in the Override template parameters box
-storageAccountName “storearmpipeline20062025” -containerName “contarmpipeline20062025”
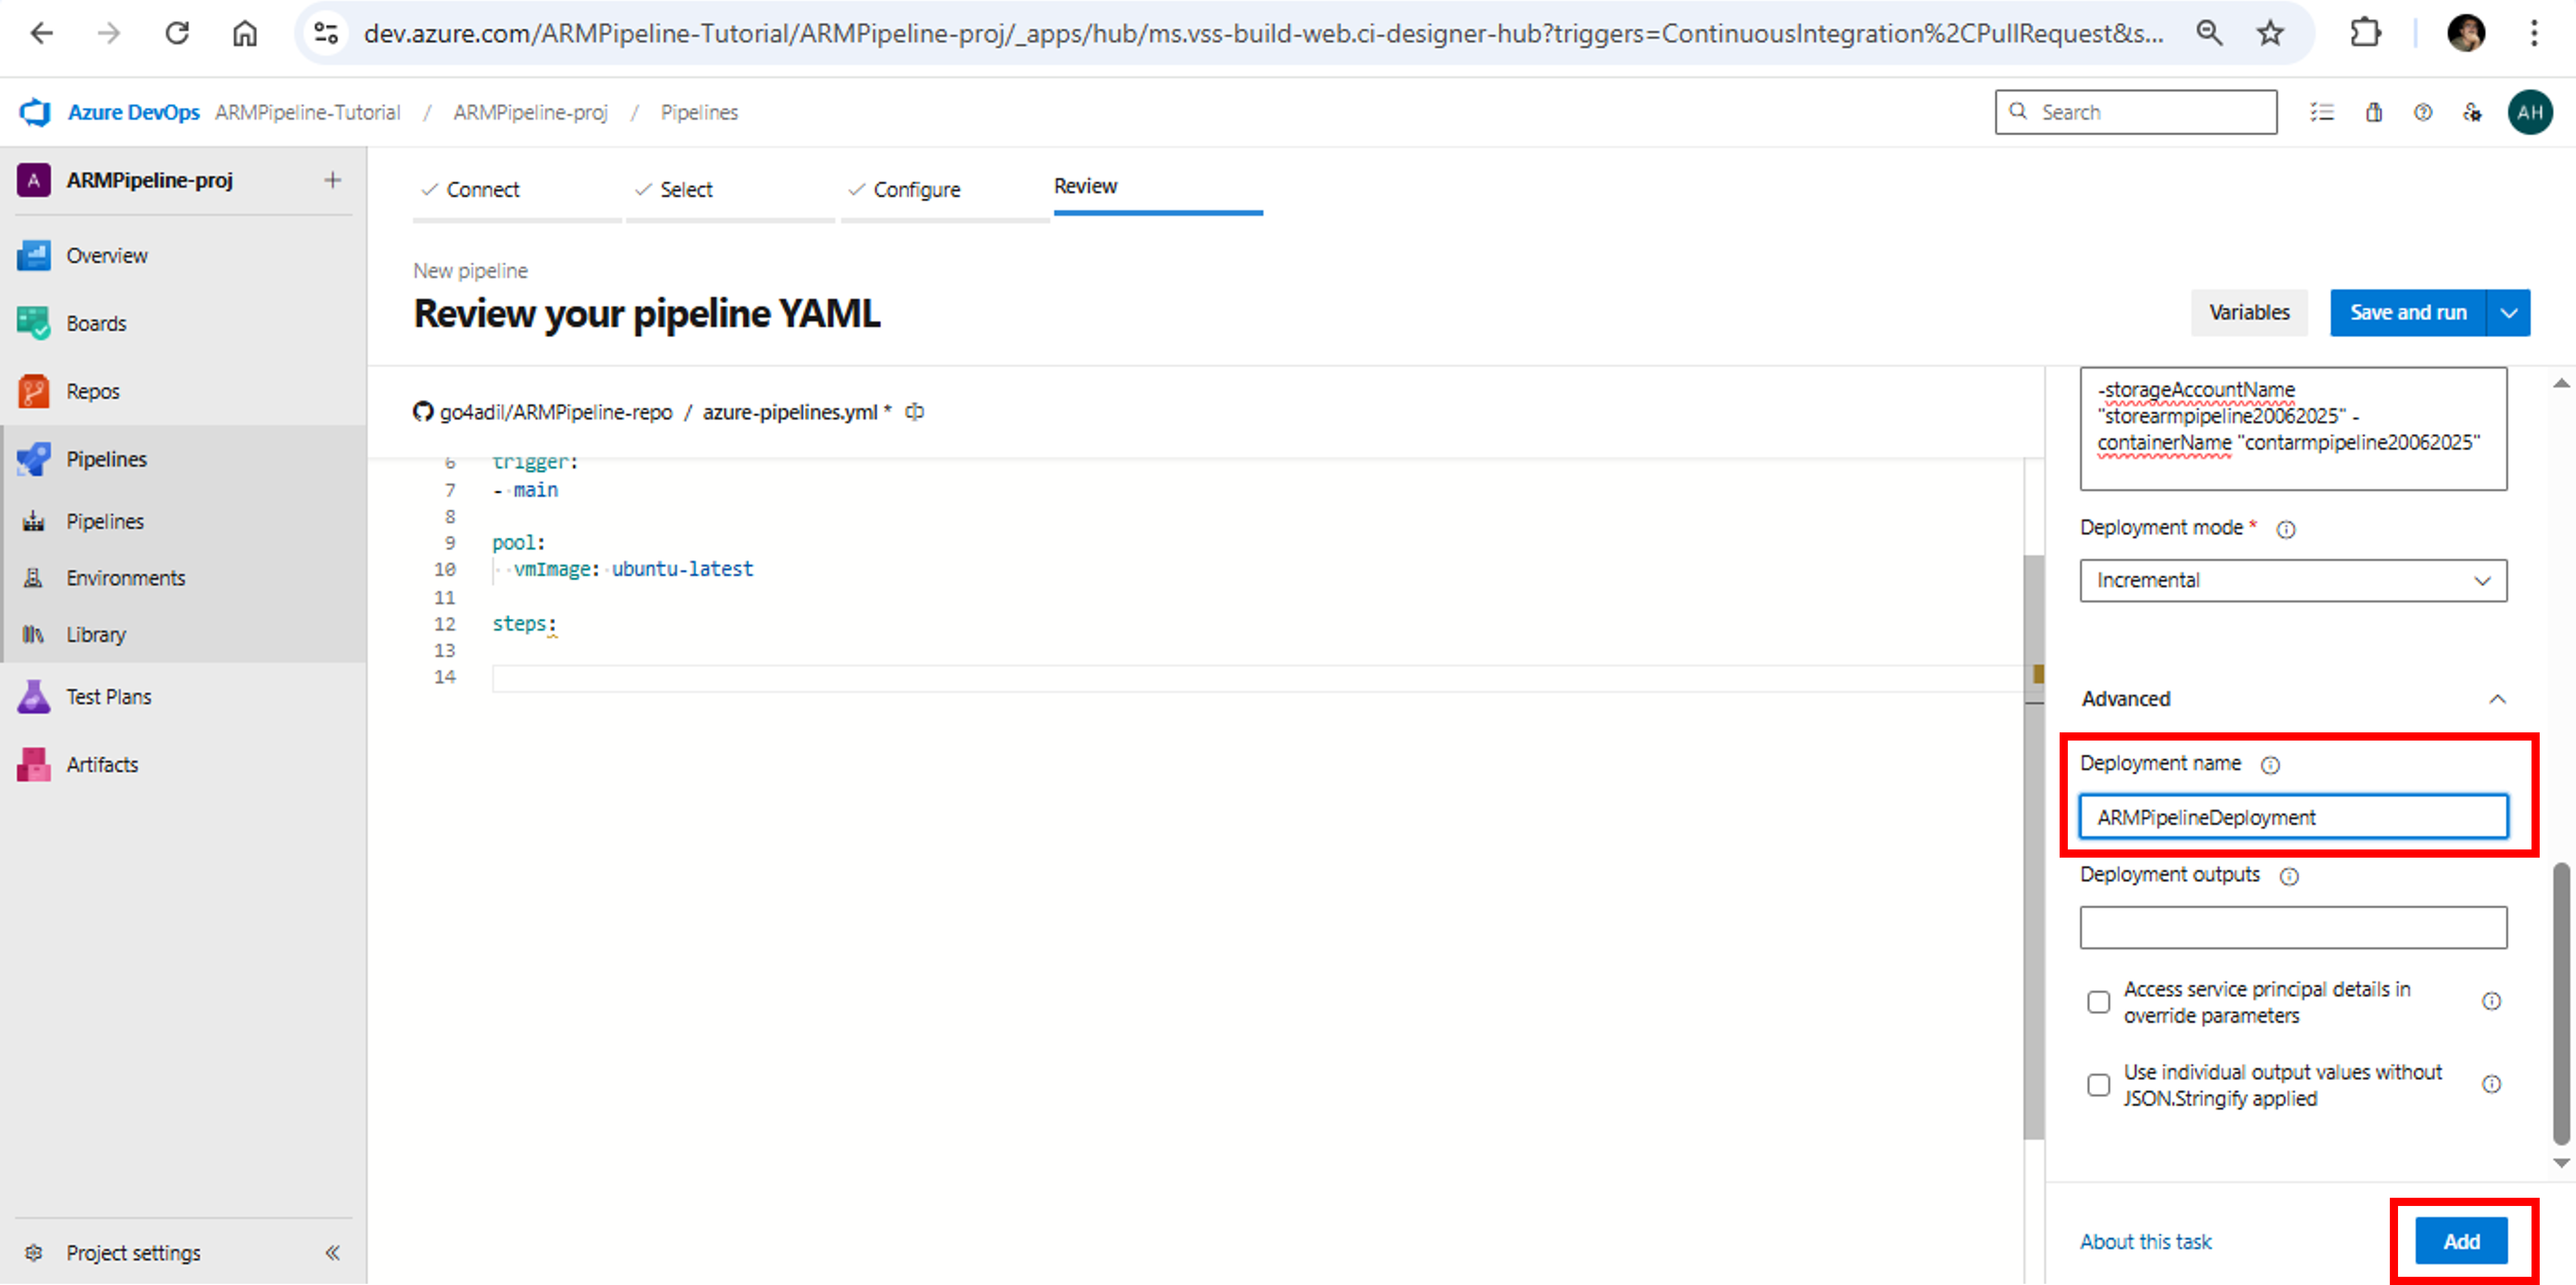
- Next, under Advanced details, enter data as per below snap and click Add

- The azure-pipelines.yml file will be updated as shown in below snap. Click Save and run

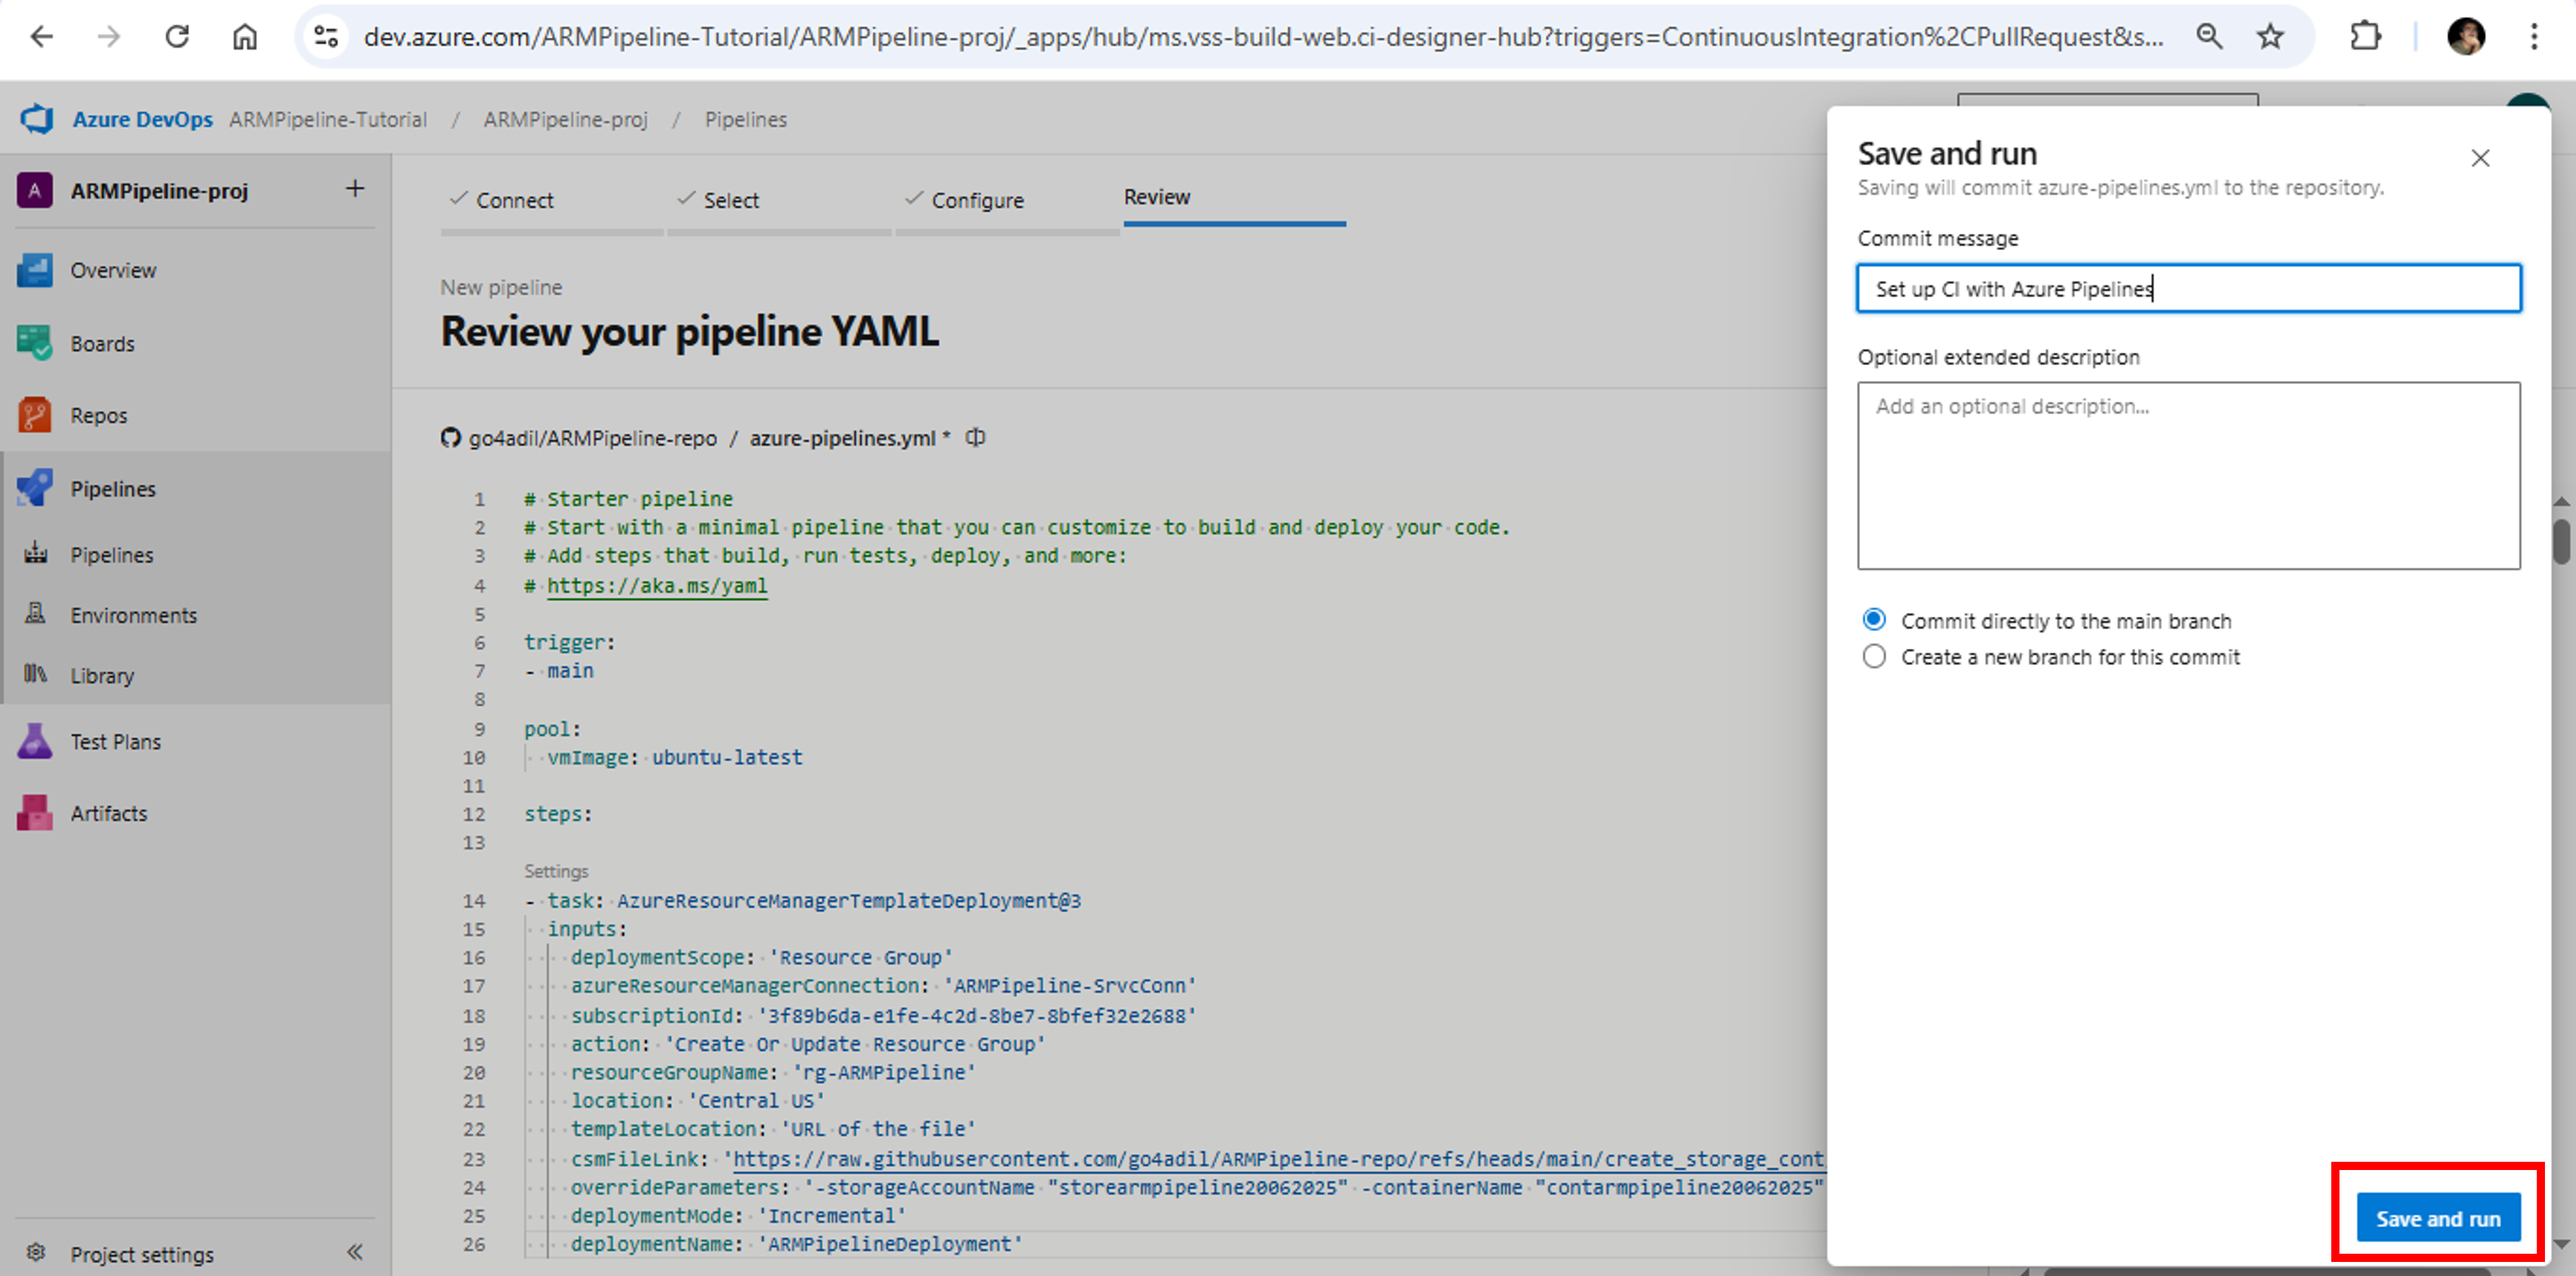
- You can modify Commit message. Click Save and run again. A copy of the YAML file is saved into the connected repository

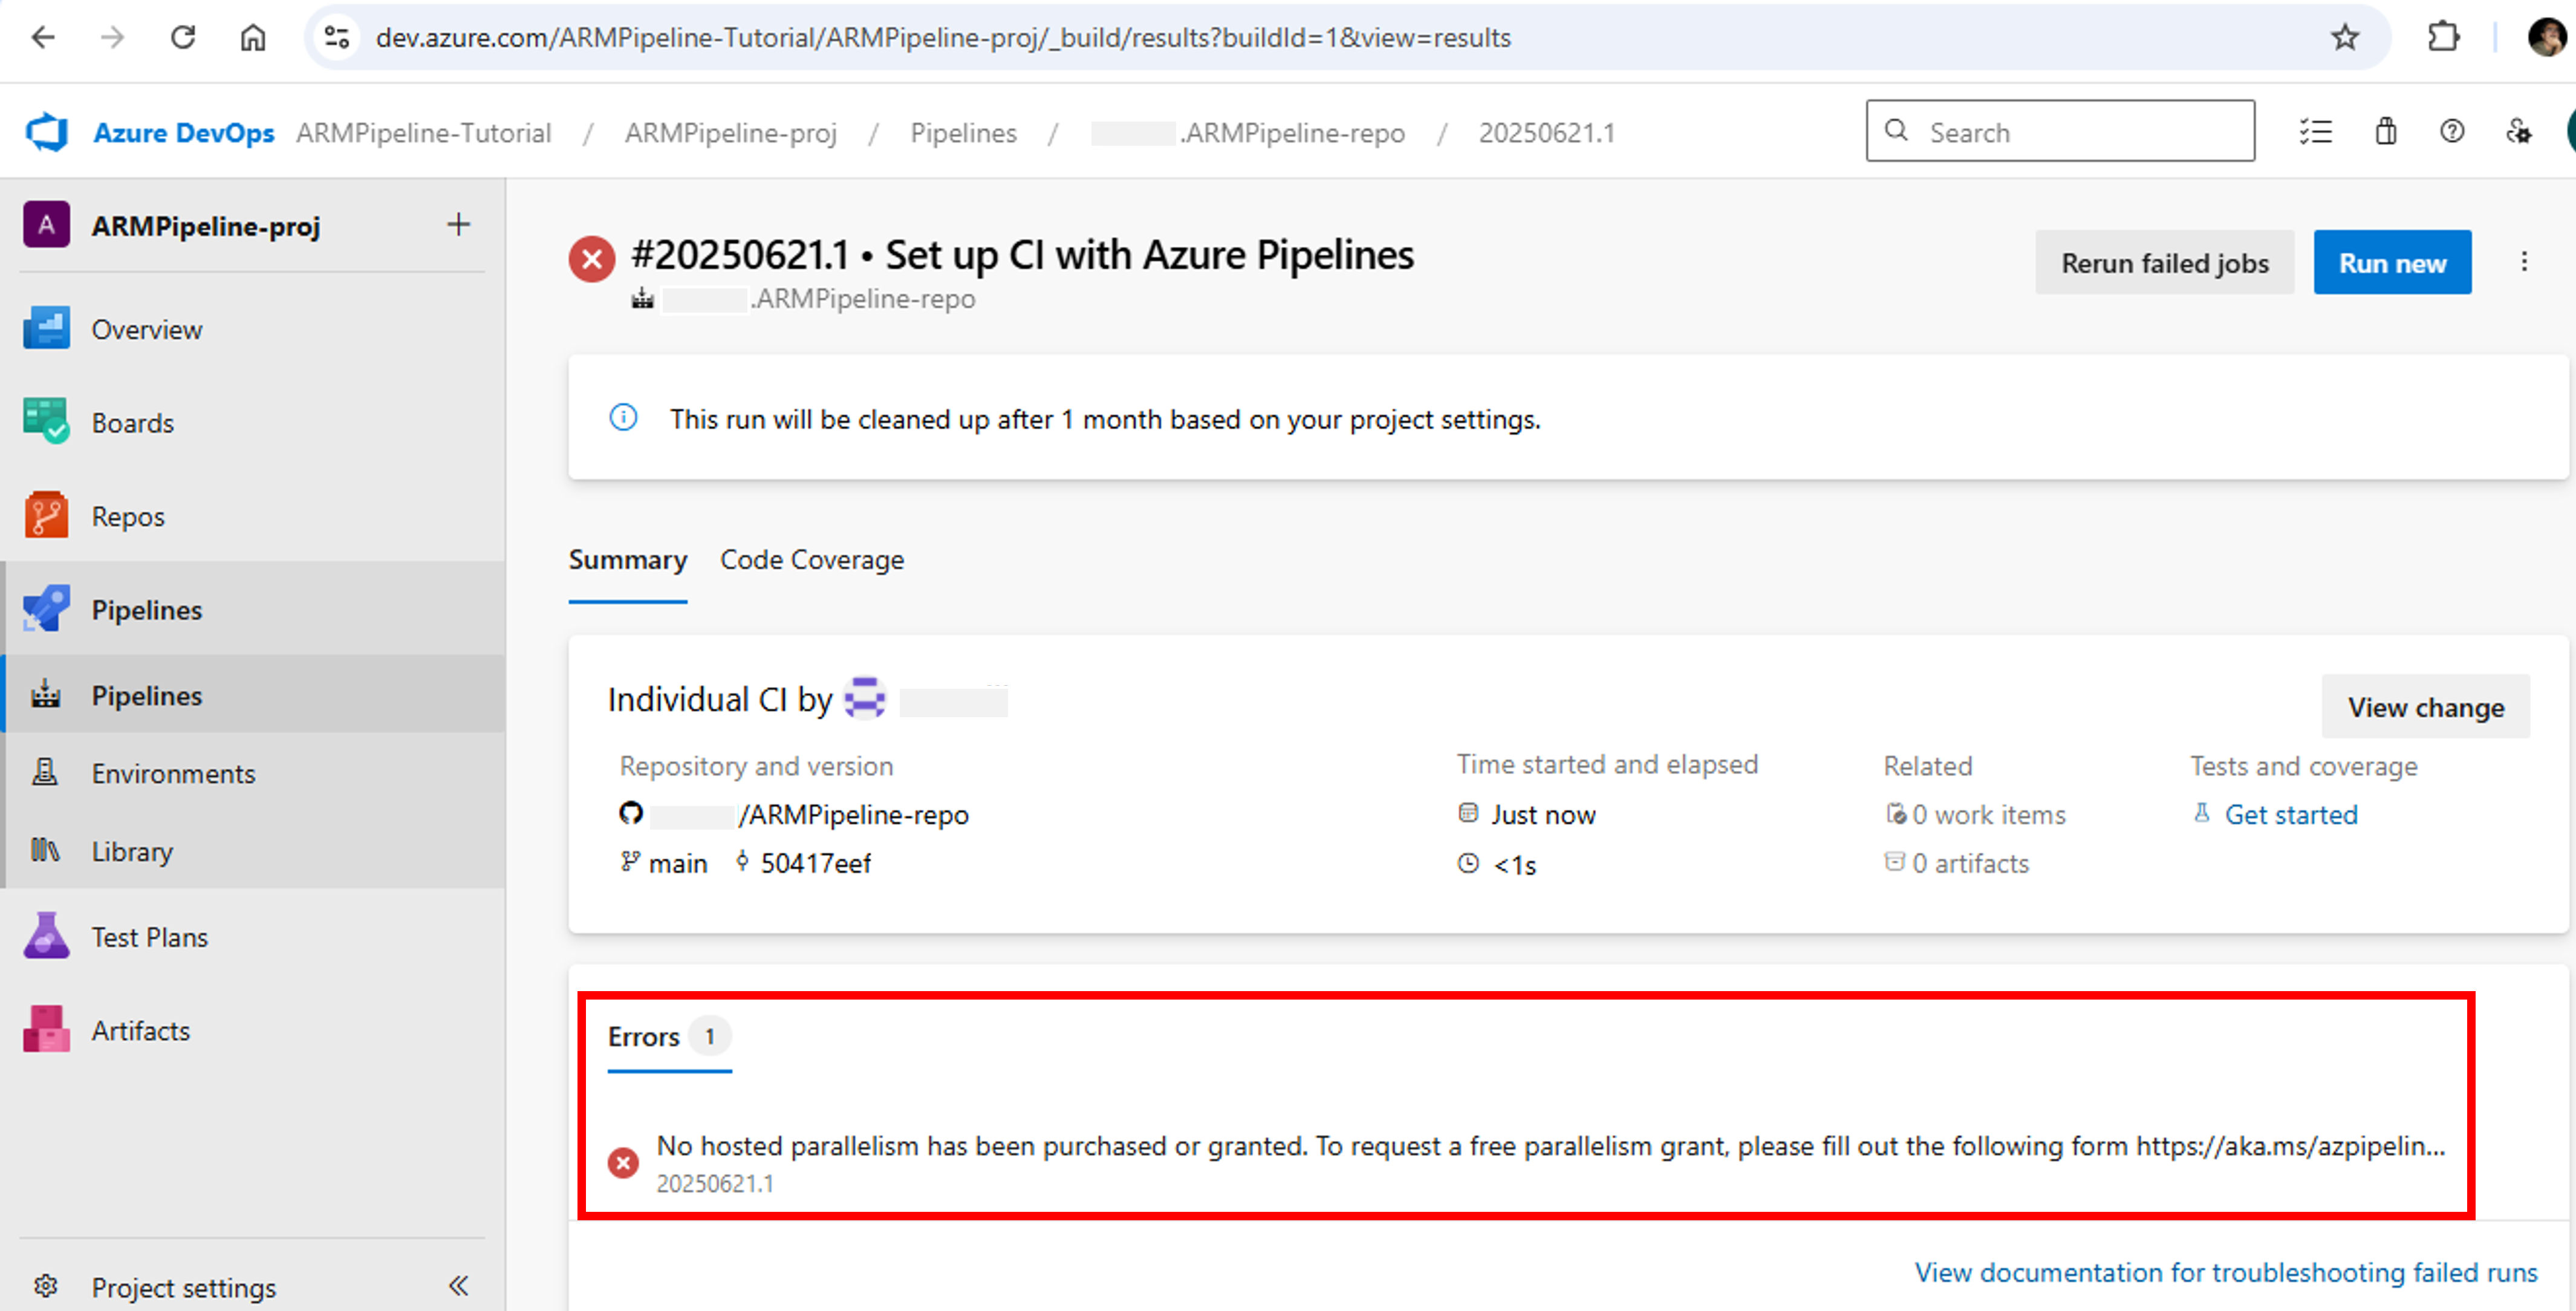
- If your pipeline fail with the following error: [error]No hosted parallelism has been purchased or granted, you don’t have enough parallel jobs to run this pipeline.
Note: Azure Pipelines has temporarily disabled the automatic free grant of Microsoft-hosted parallel jobs in new organizations for public projects and for certain private projects. To request a free parallelism grant, please fill out the following form https://aka.ms/azpipelines-parallelism-request
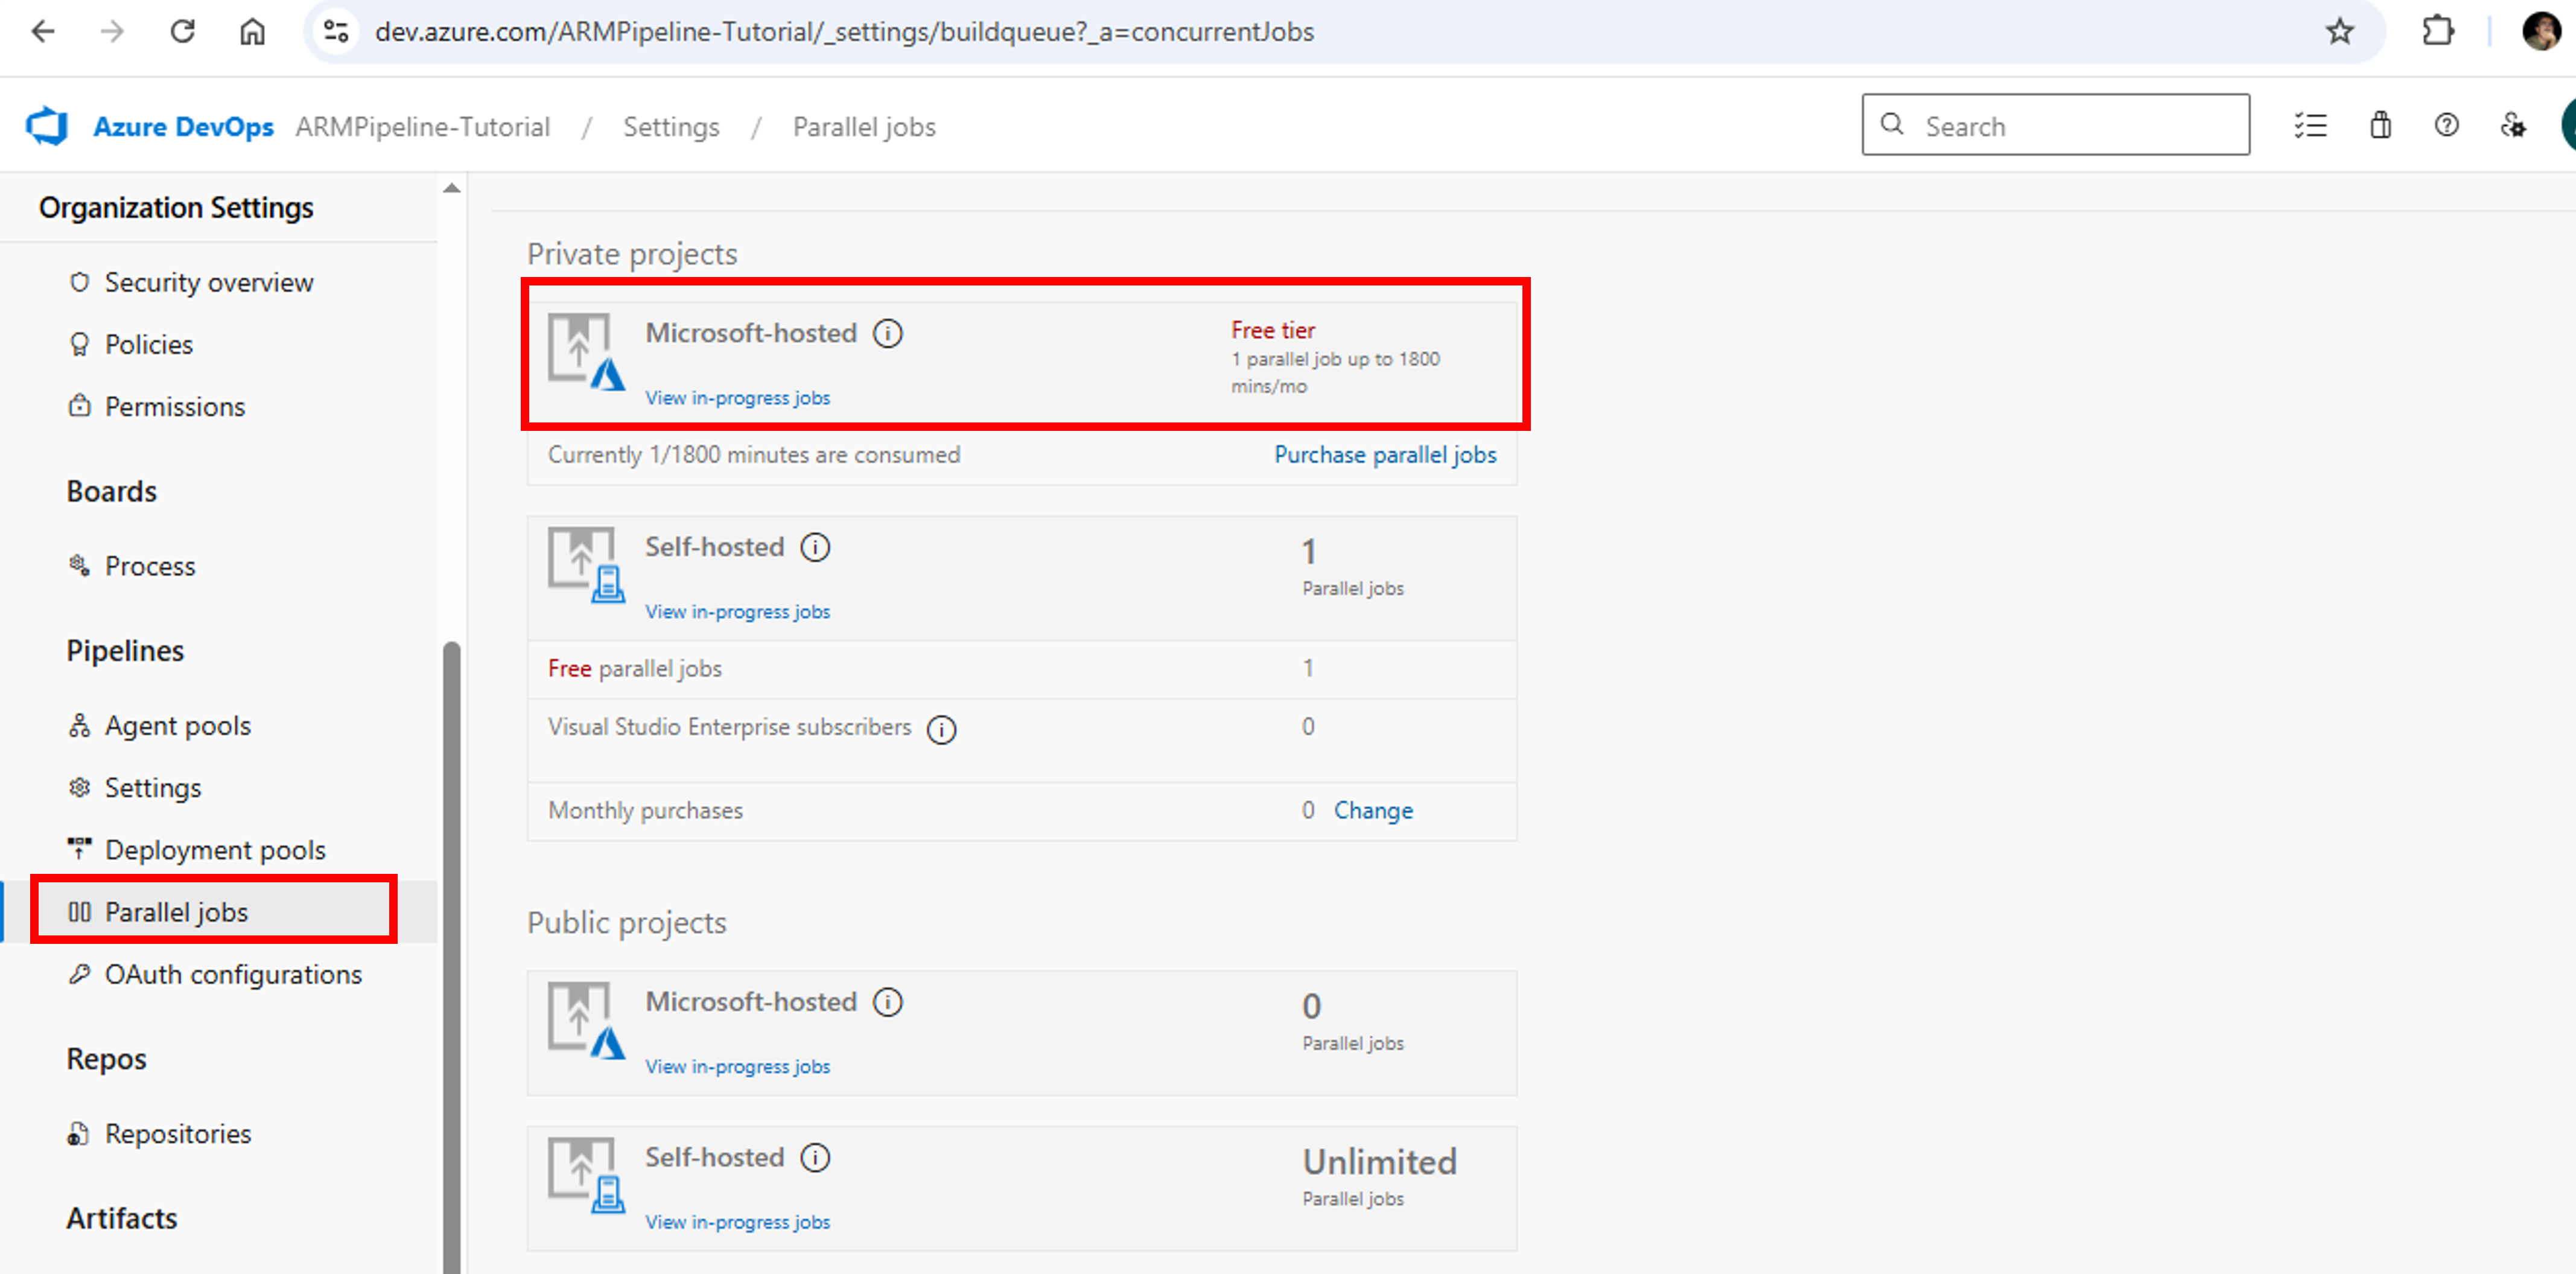
- Microsoft may take 4-5 days to grant you parallel jobs. To check if parallelism has been granted, click on ARMPipeline-Tutorial -> Settings -> Parallel. Once granted, you will find a Free tier job against Microsoft-hosted private projects

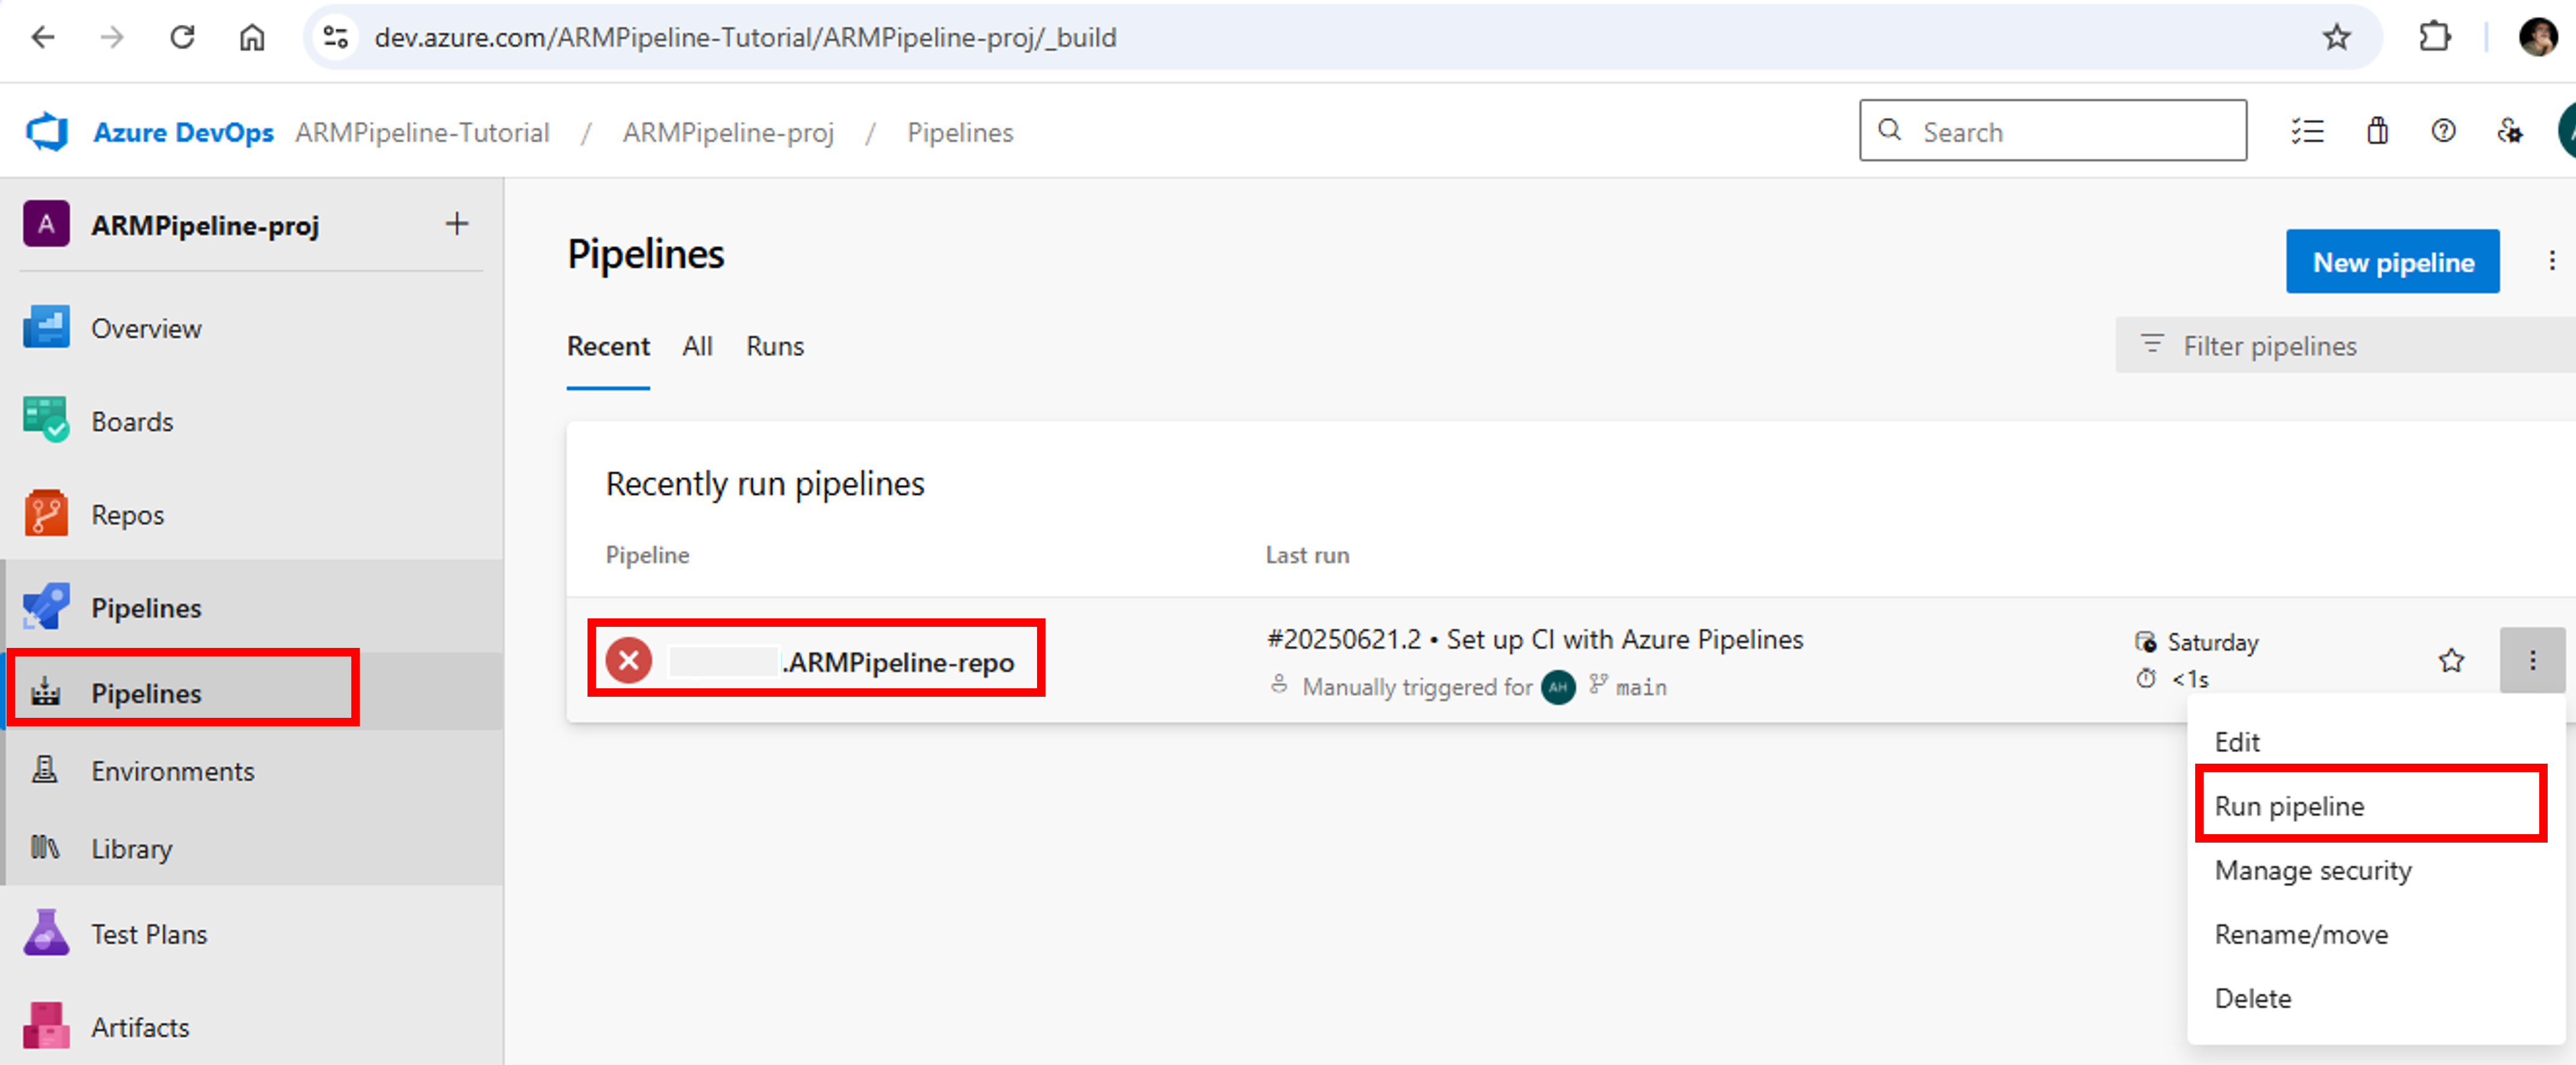
- Now let’s try to run our pipeline again. Click on ARMPipeline-proj -> Pipelines -> [your Account Name].ARMPipeline-repo. Click on three dots at the right hand side and click Run pipeline

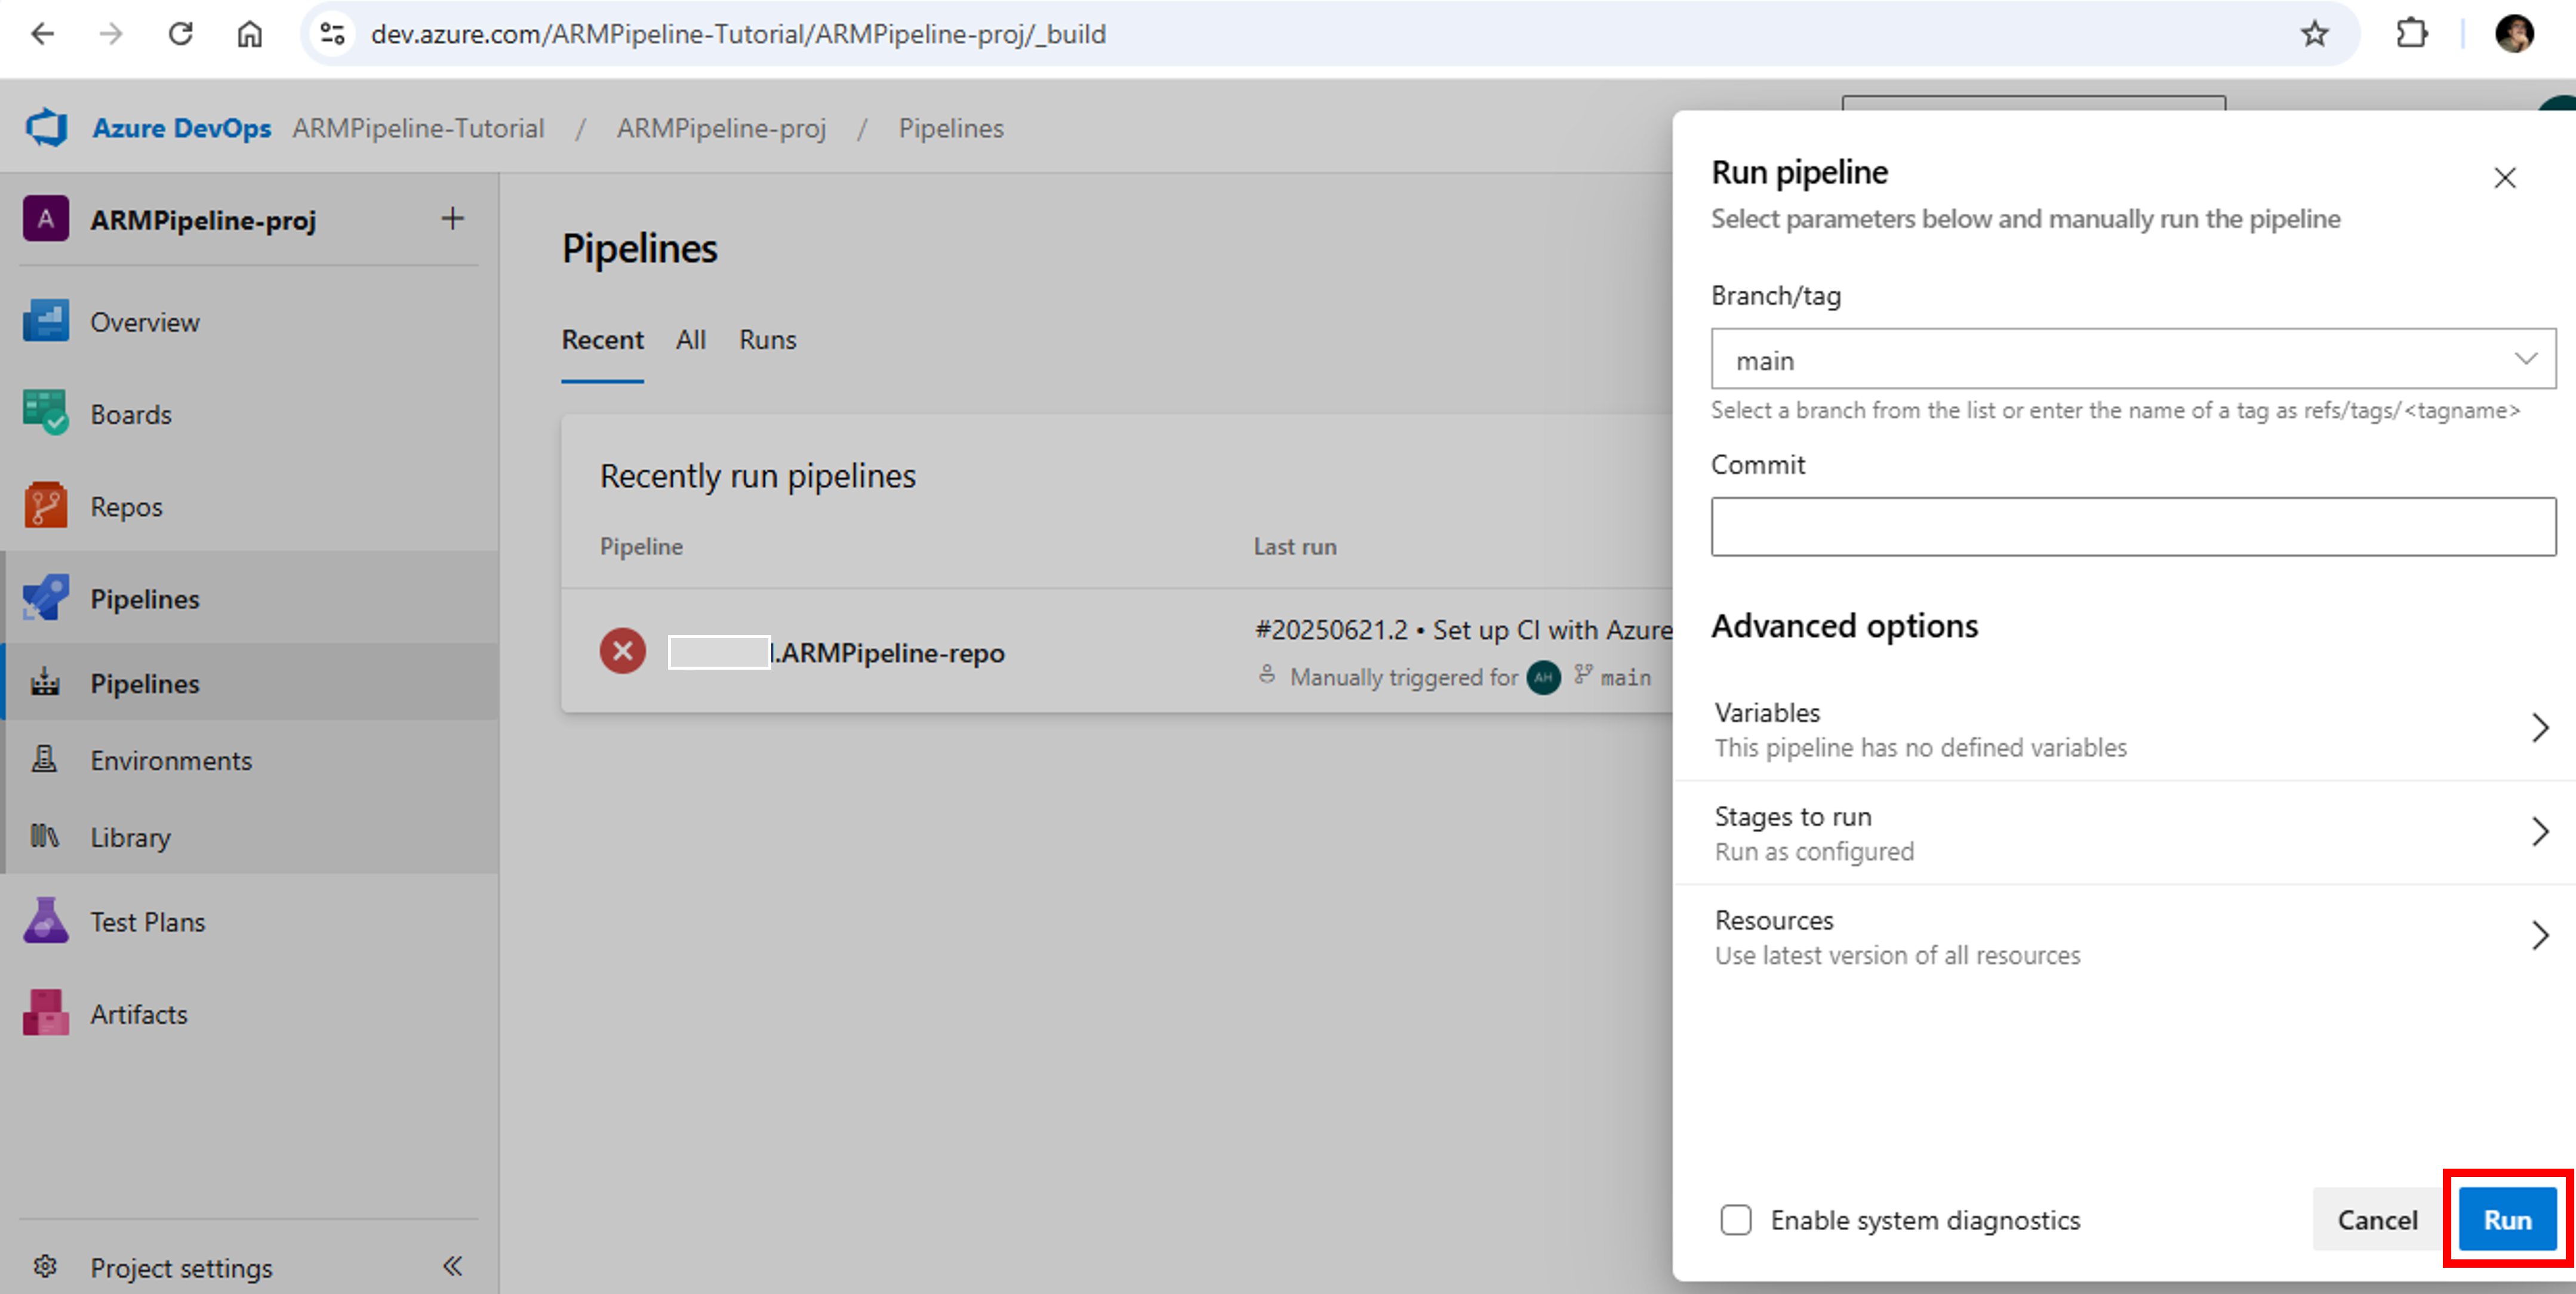
- Click Run again

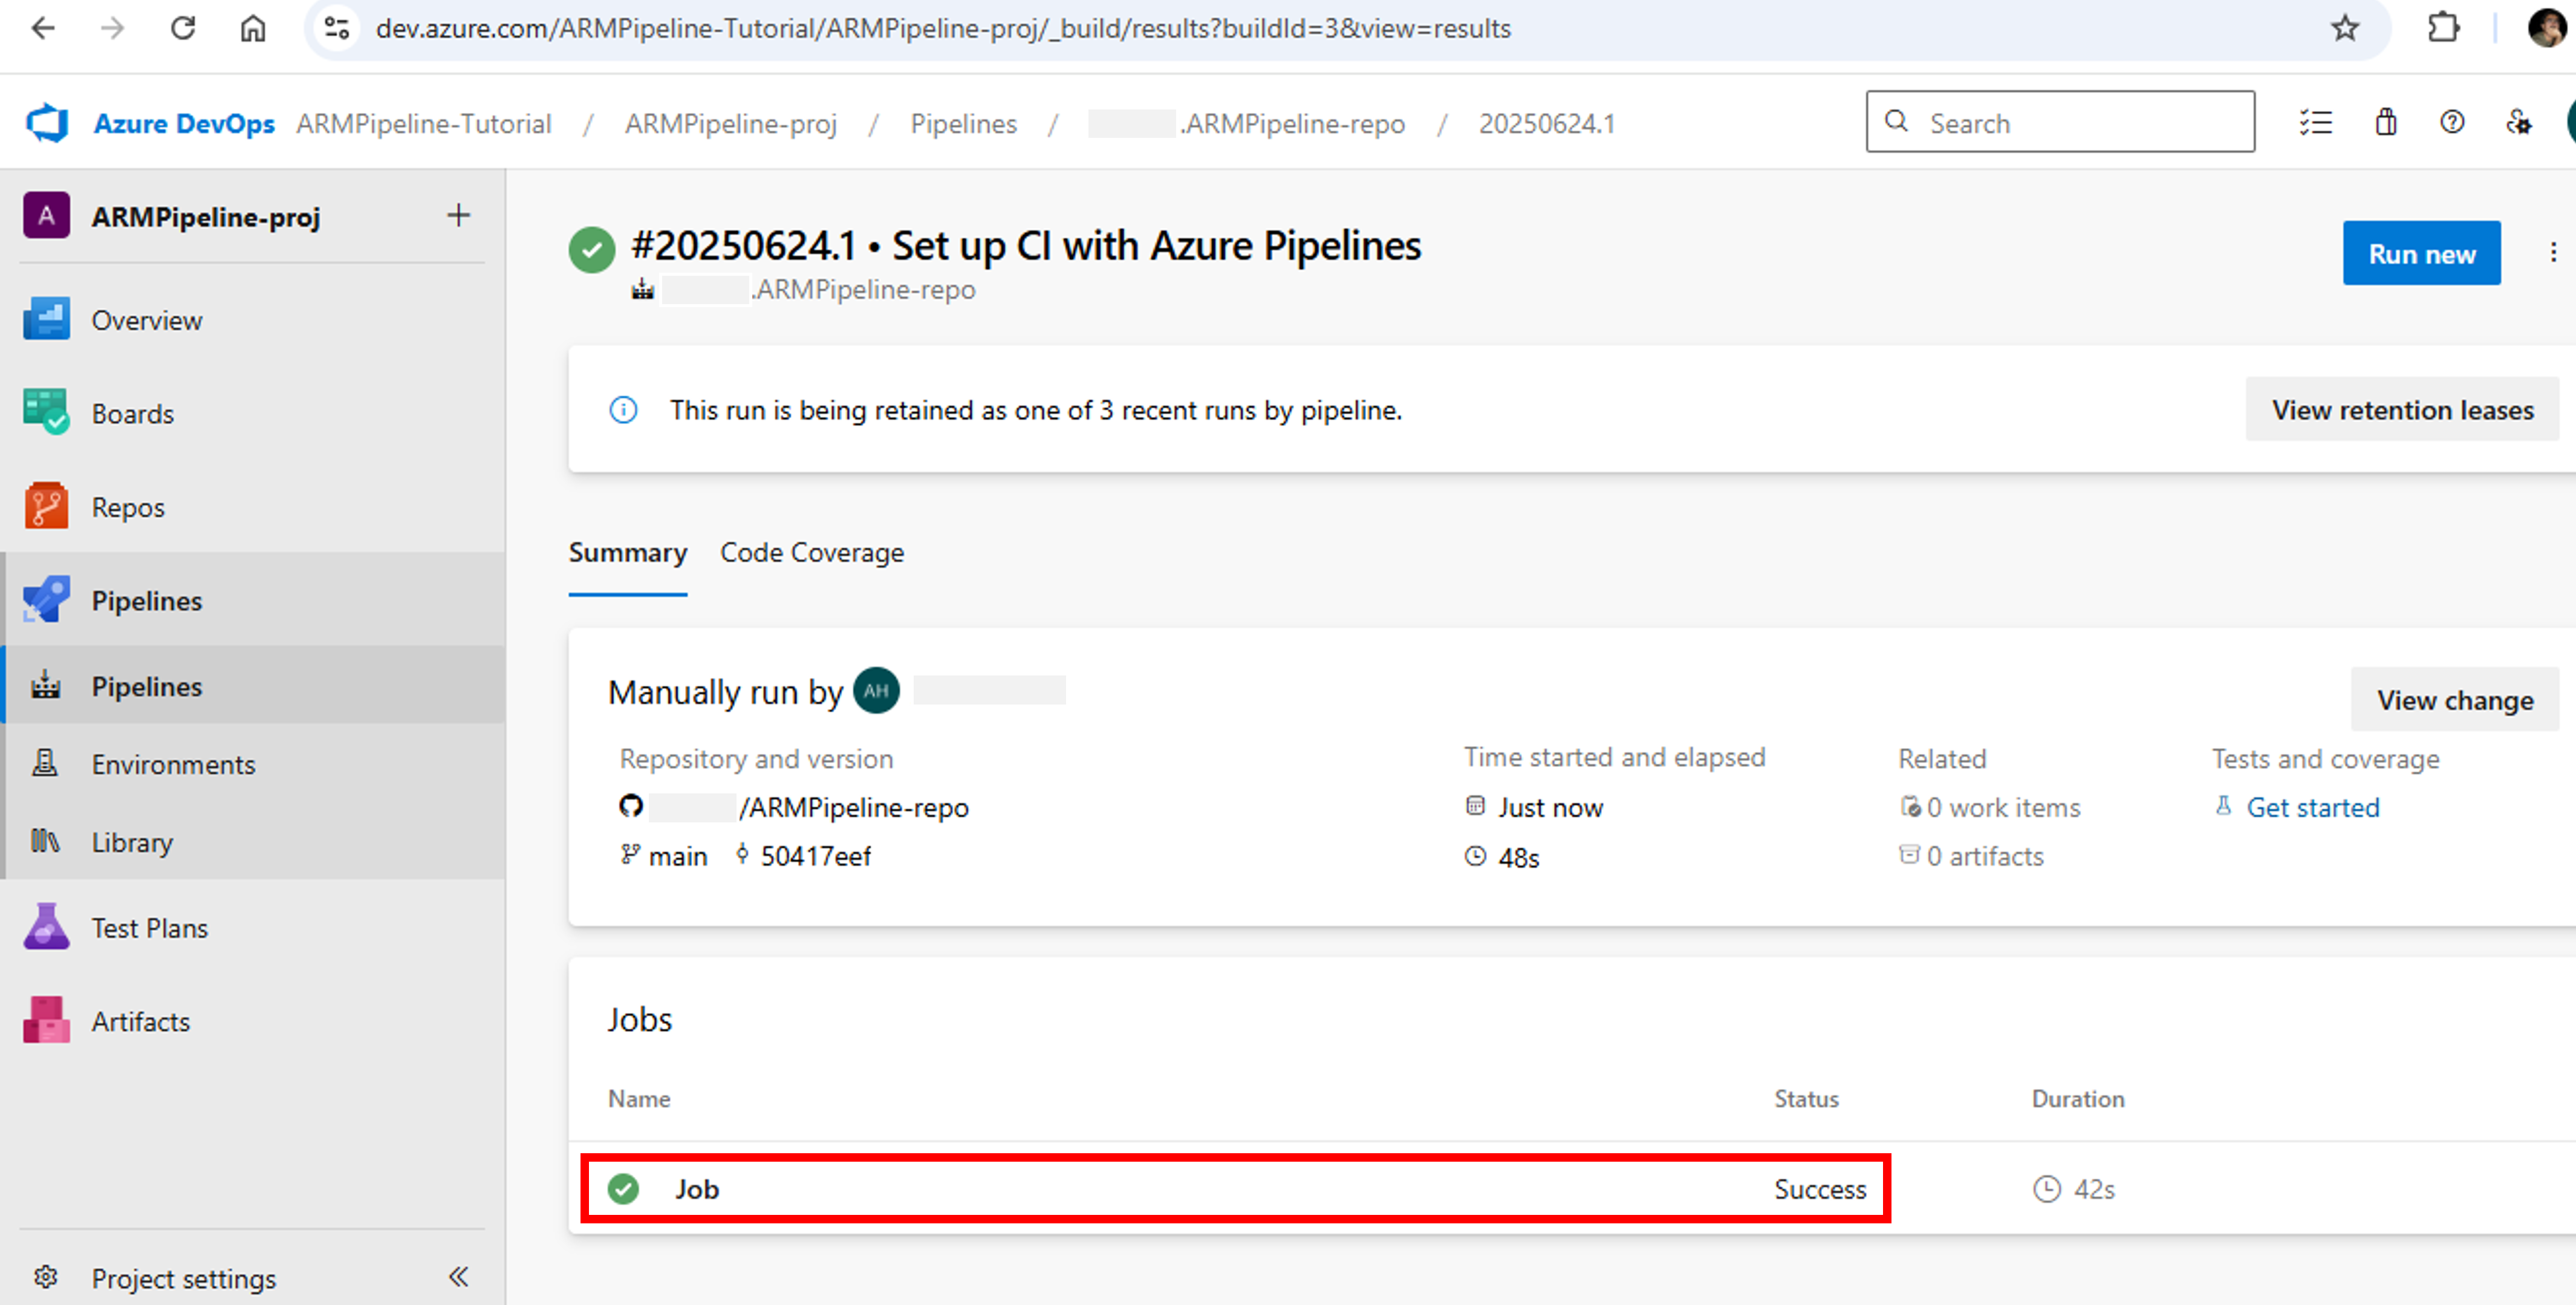
- Great job! You can see that this time it’s a success. Azure pipelines has been successfully run


Step-4: Verify the Deployment
- Sign in to Azure Portal
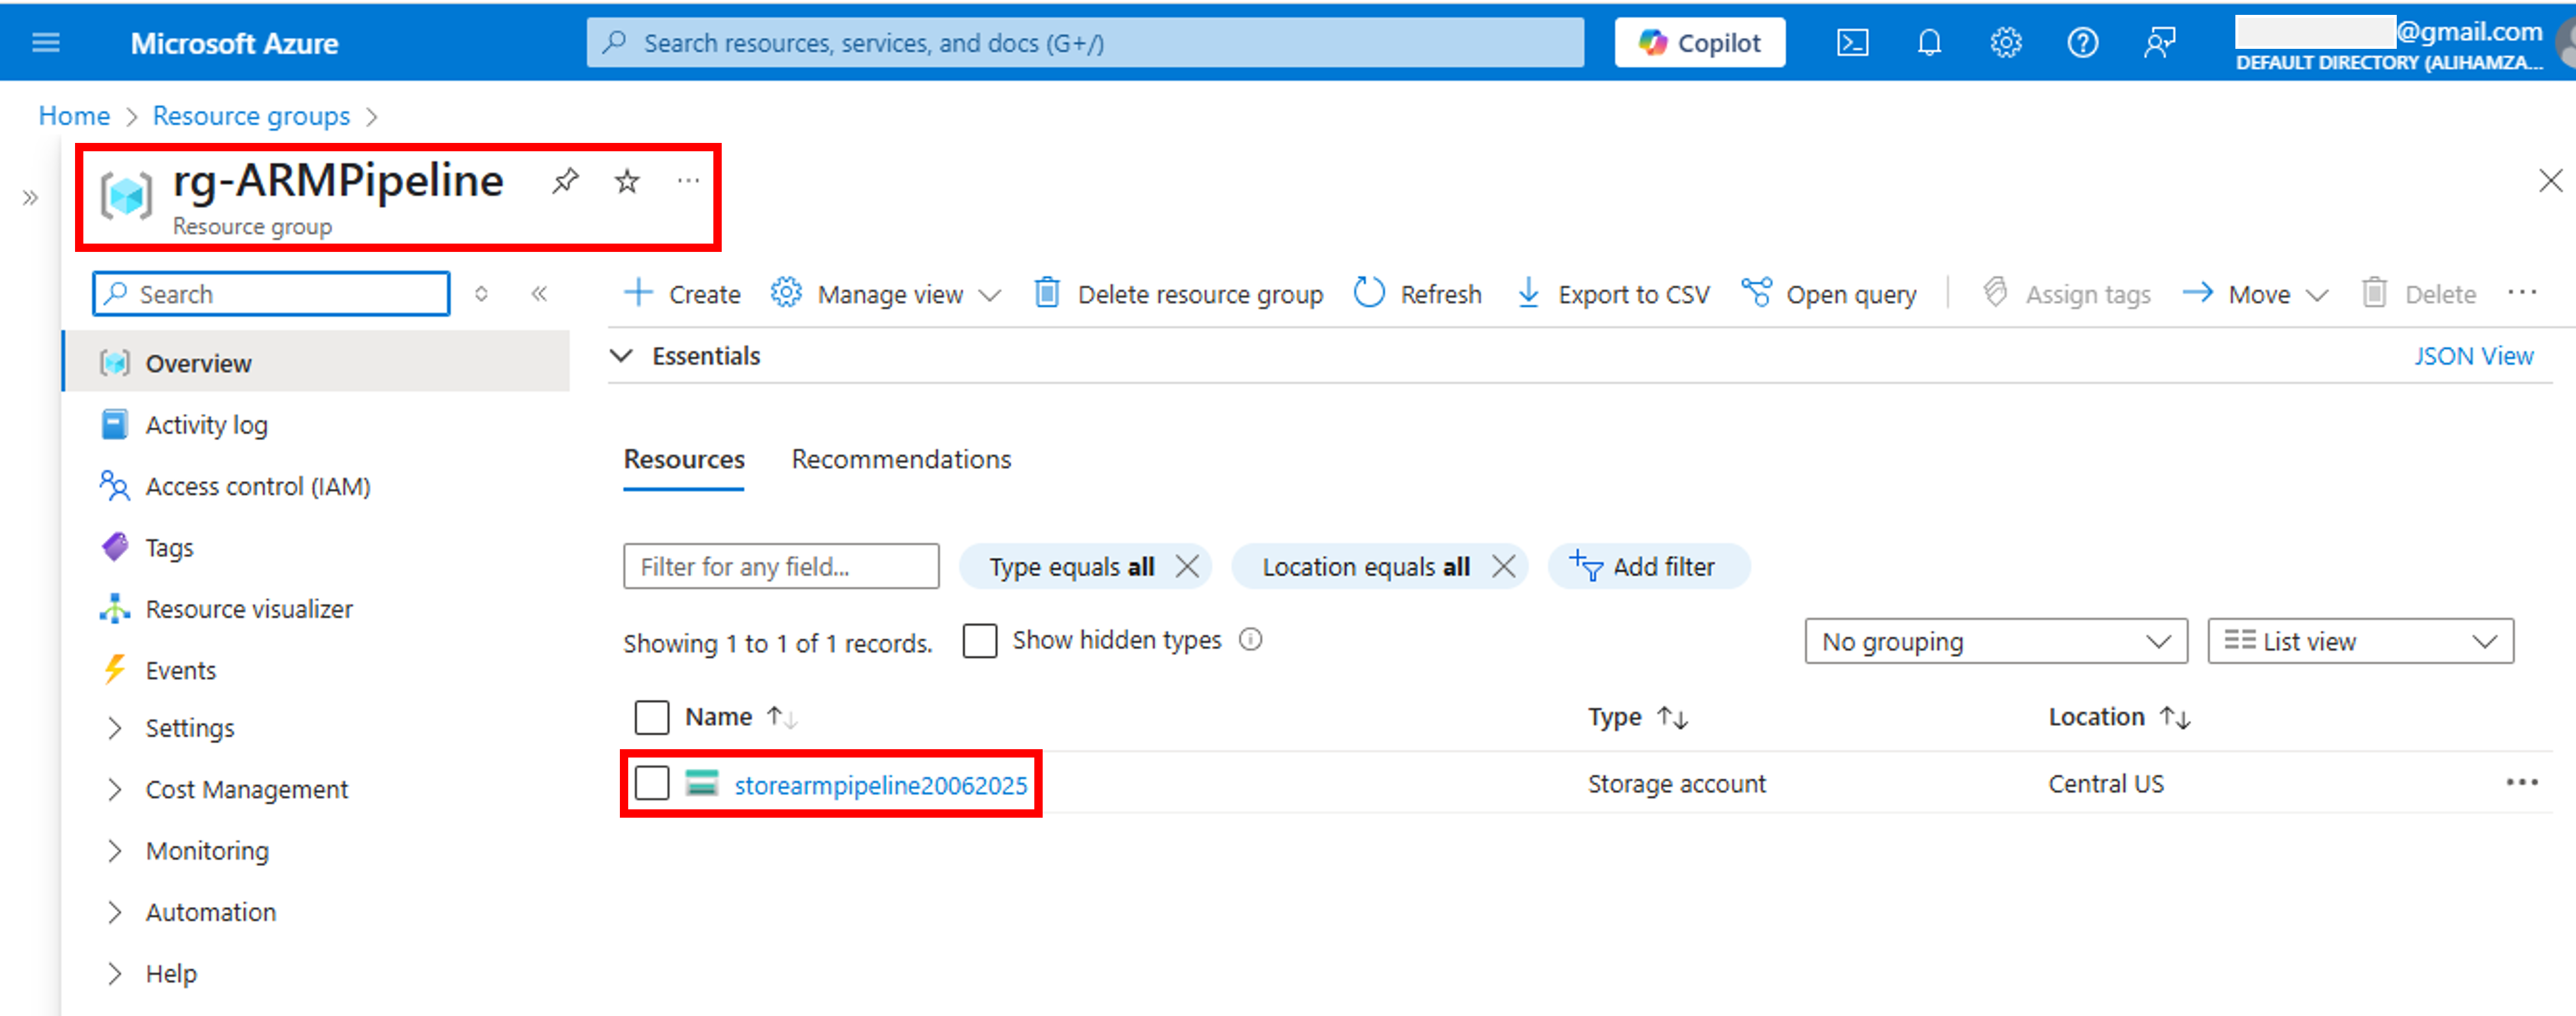
- Open the Resource Groups. You should be able to find rg-ARMPipeline resource group created by the pipeline. Open this resource group. It shall contain storearmpipeline20062025 storage account

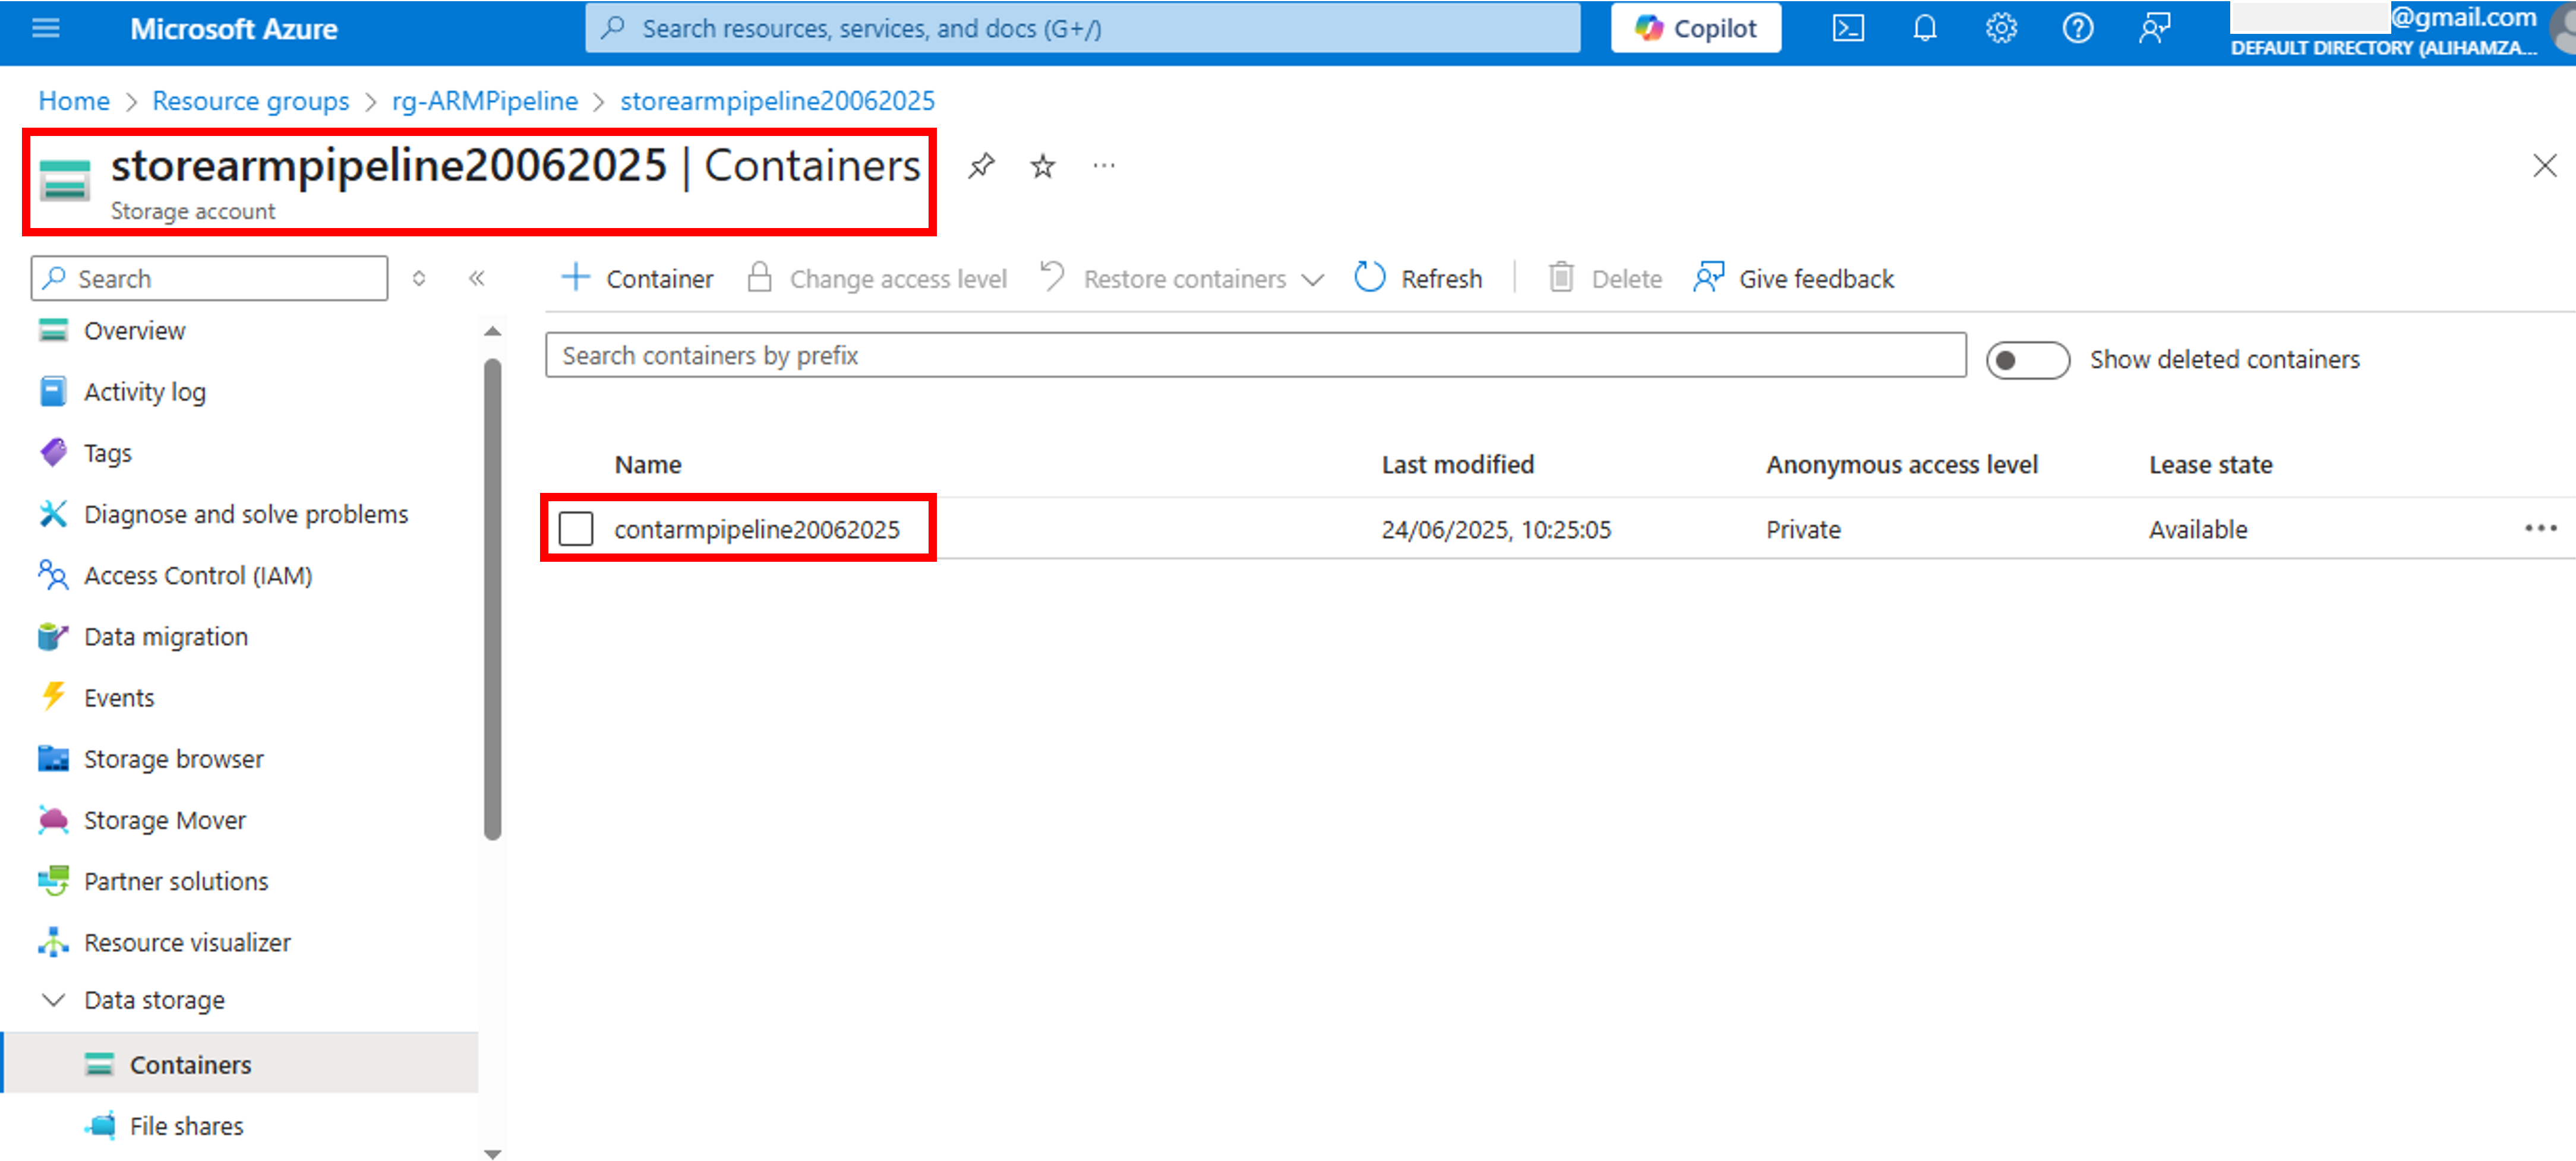
- Click on your storage account. You will find contarmpipeline20062025 container deployed in the storage account

Conclusion
Azure Pipelines is a great CI/CD tool to deploy Azure Resource Manager (ARM) templates. It not only automates the build and deploy process, but also provides great flexibility and agility to push changes in a convenient way.