In programming paradigm, complex application code is broken into small, more manageable modules for better visibility, manageability and re-usability. Similarly, as complexity of Azure Infrastructure code increases, you might want to split the code into multiple modules which are easy to comprehend, more manageable and re-usable in future.
Azure Resource Manager (ARM) Linked and Nested Templates render this capability to break down your code into many related templates and then deploy them together through a main template.
There are three different ways through which you can deploy Azure Resource Manager Templates.
- First method is to deploy a Local ARM Template.
- Second method is making use of Linked ARM Templates
- Third method is to use CI/CD tool Azure Pipelines
In this beginner-friendly article, I shall be discussing following key areas to help you create and deploy ARM Linked templates:
- What is Azure Resource Manager Linked Template
- ARM Linked Template Deployment Methods
- How to Use ARM Linked Template
- When to Use ARM Linked Template
- ARM Linked Template Example – Create a Storage Account and Virtual Network
- How to Deploy an ARM Linked Template
- Deployment Result
- Conclusion
What is Azure Resource Manager (ARM) Linked Template
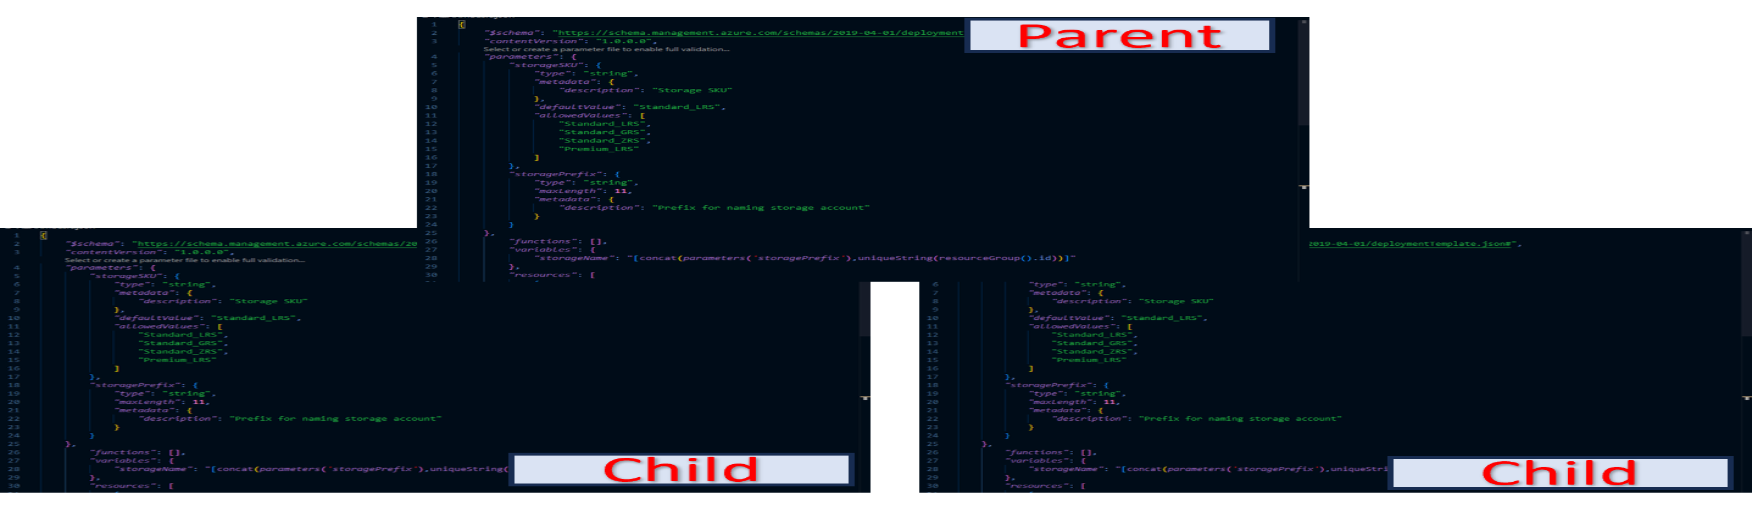
Azure Resource Manager (ARM) Linked Template refers to the methodology of connecting separate template files via links referenced to each individual template in a main template. Linked templates consist of a main template (parent) and several other templates (child) referenced in the main template via a reference link or a relative path.
ARM Linked Template Deployment Methods
The linked template cannot be stored as a local file or as a file that is only accessible on your local network. Instead, linked template must be accessible over the internet. Depending on how a linked template is accessed from main template, ARM Linked templates can be deployed in two different ways:
- Using TemplateLink URI Method
By using this method, you must provide a URI (Uniform Resource Identifier) value for the linked template that is accessible over HTTP or HTTPS, in order to reference a linked template from main template. For context, URI is a sequence of characters that identify a physical or logical resource, usually on internet.
For this purpose, you must place your child or linked template on a publicly accessible endpoint such as GitHub or Azure Storage account.
- Using TemplateLink RelativePath Method
To use this method, you must place remote linked template at a location relative to the parent template. One option is to place both the main and linked template in an Azure storage account.
In this tutorial, I shall be using TemplateLink URI method to deploy linked templates. Main template will be stored locally on my PC while Linked templates will be stored in a GitHub repository and accessed via internet.
Two separate linked templates will be created; one for deploying storage account and other for deploying virtual network. Both these templates will be linked to main template using a URI path.
How to Use ARM Linked Template
To use linked templates, you need to add a Microsoft.Resources/deployment resource to your main template and configure templateLink property with the location of your linked template using either URI or RelativePath property.
When to Use ARM Linked Template
For simple solution, a single ARM template is easier to understand and maintain. However, for complex solution, ARM Linked templates should be used to break down the infrastructure code into several modules. Each module will usually contain code for one or more related resources. These individual modules can easily be re-used in future deployments.
ARM Linked Template Example – Create a Storage Account and Virtual Network
Let’s take an example of creating a storage account and virtual network using linked templates.
In case you find difficulty in understanding the basics of ARM template or create / deploy new ARM template, refer to my blog on below link:
https://cloudpulse.blog/a-step-by-step-guide-to-azure-resource-manager-arm-templates/
- Create a new folder on your computer for saving ARM template files. I have created D:\AZ-Linked-Temp in my case.
- Now open VS Code -> Open Folder from File menu -> Select D:\AZ-Linked-Temp. This will select D:\AZ-Linked-Temp folder as your Workspace where you could save all your JSON files for this project.
Create Main (Parent) Template
First, we need to create a main template.
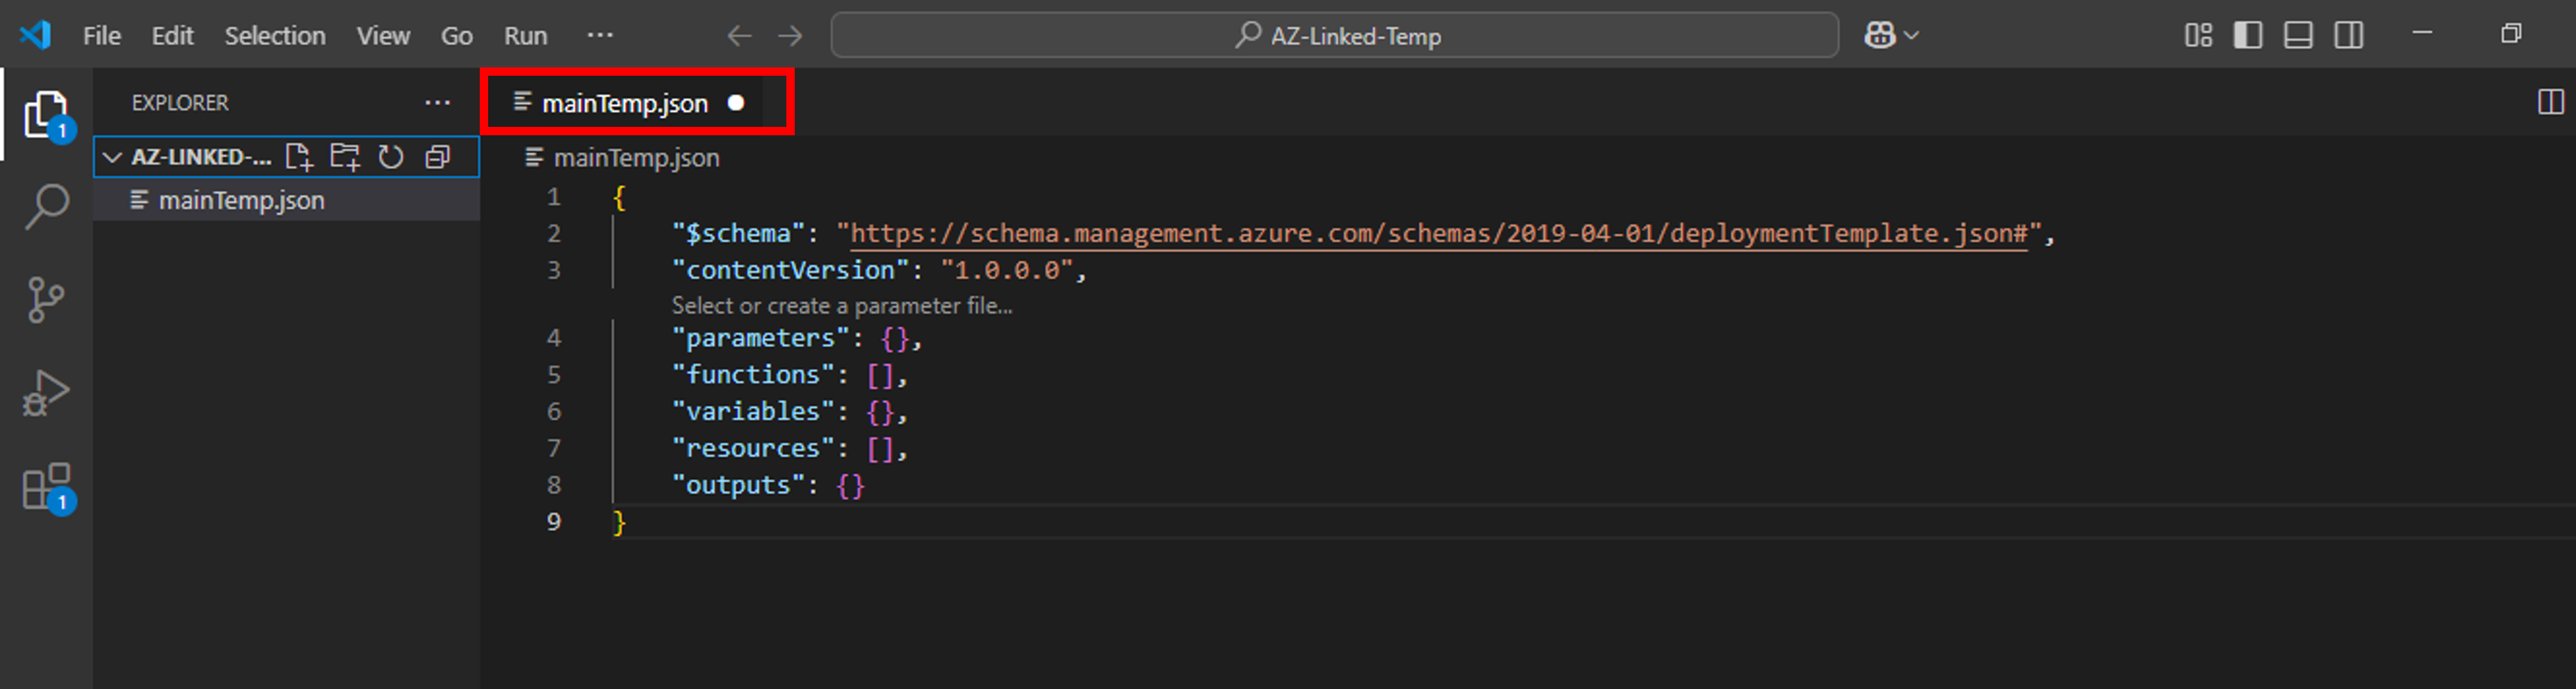
- Open New File from File menu and name it as mainTemp.json. Press enter -> Create File. This will create a blank JSON file with the mentioned name.

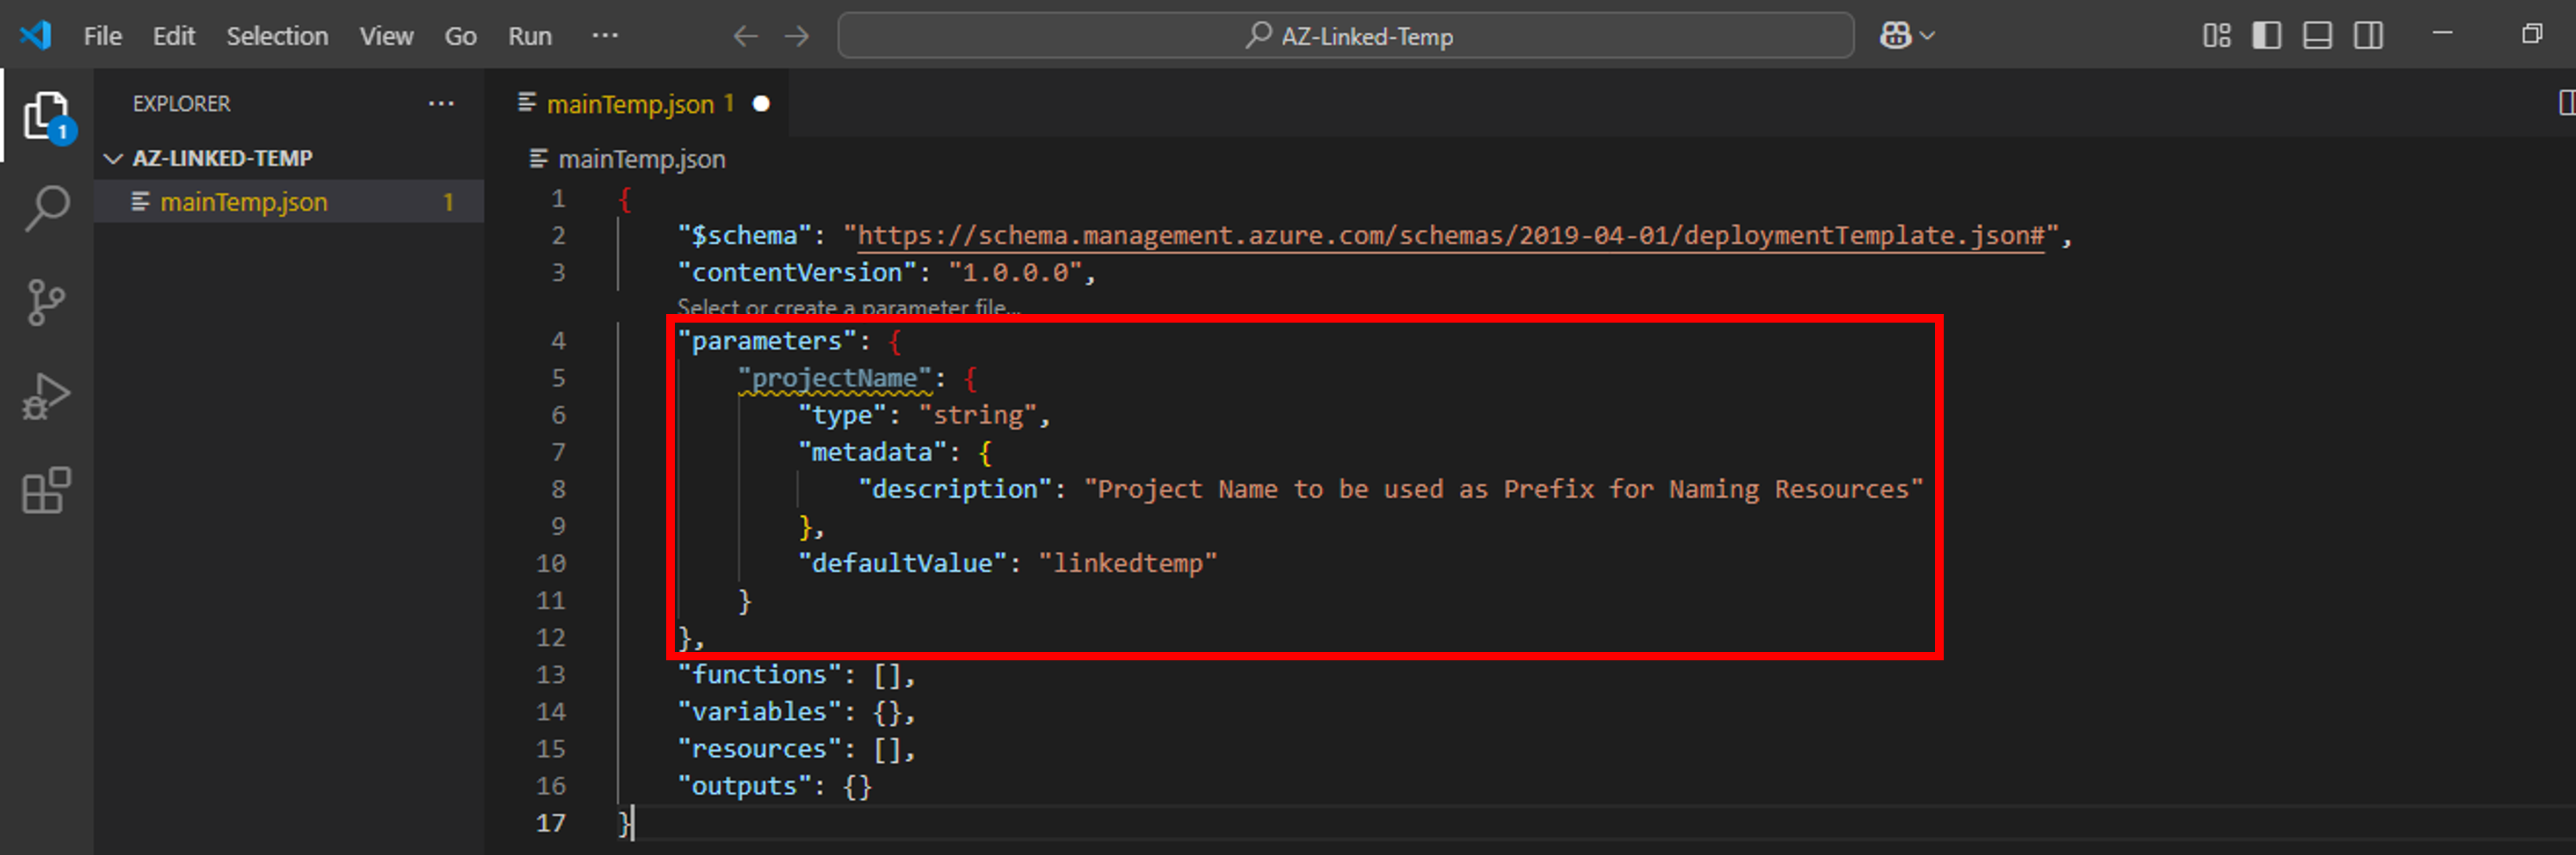
- Next, create a parameter named projectName. This parameter will be used as a prefix to name storage account and virtual network.

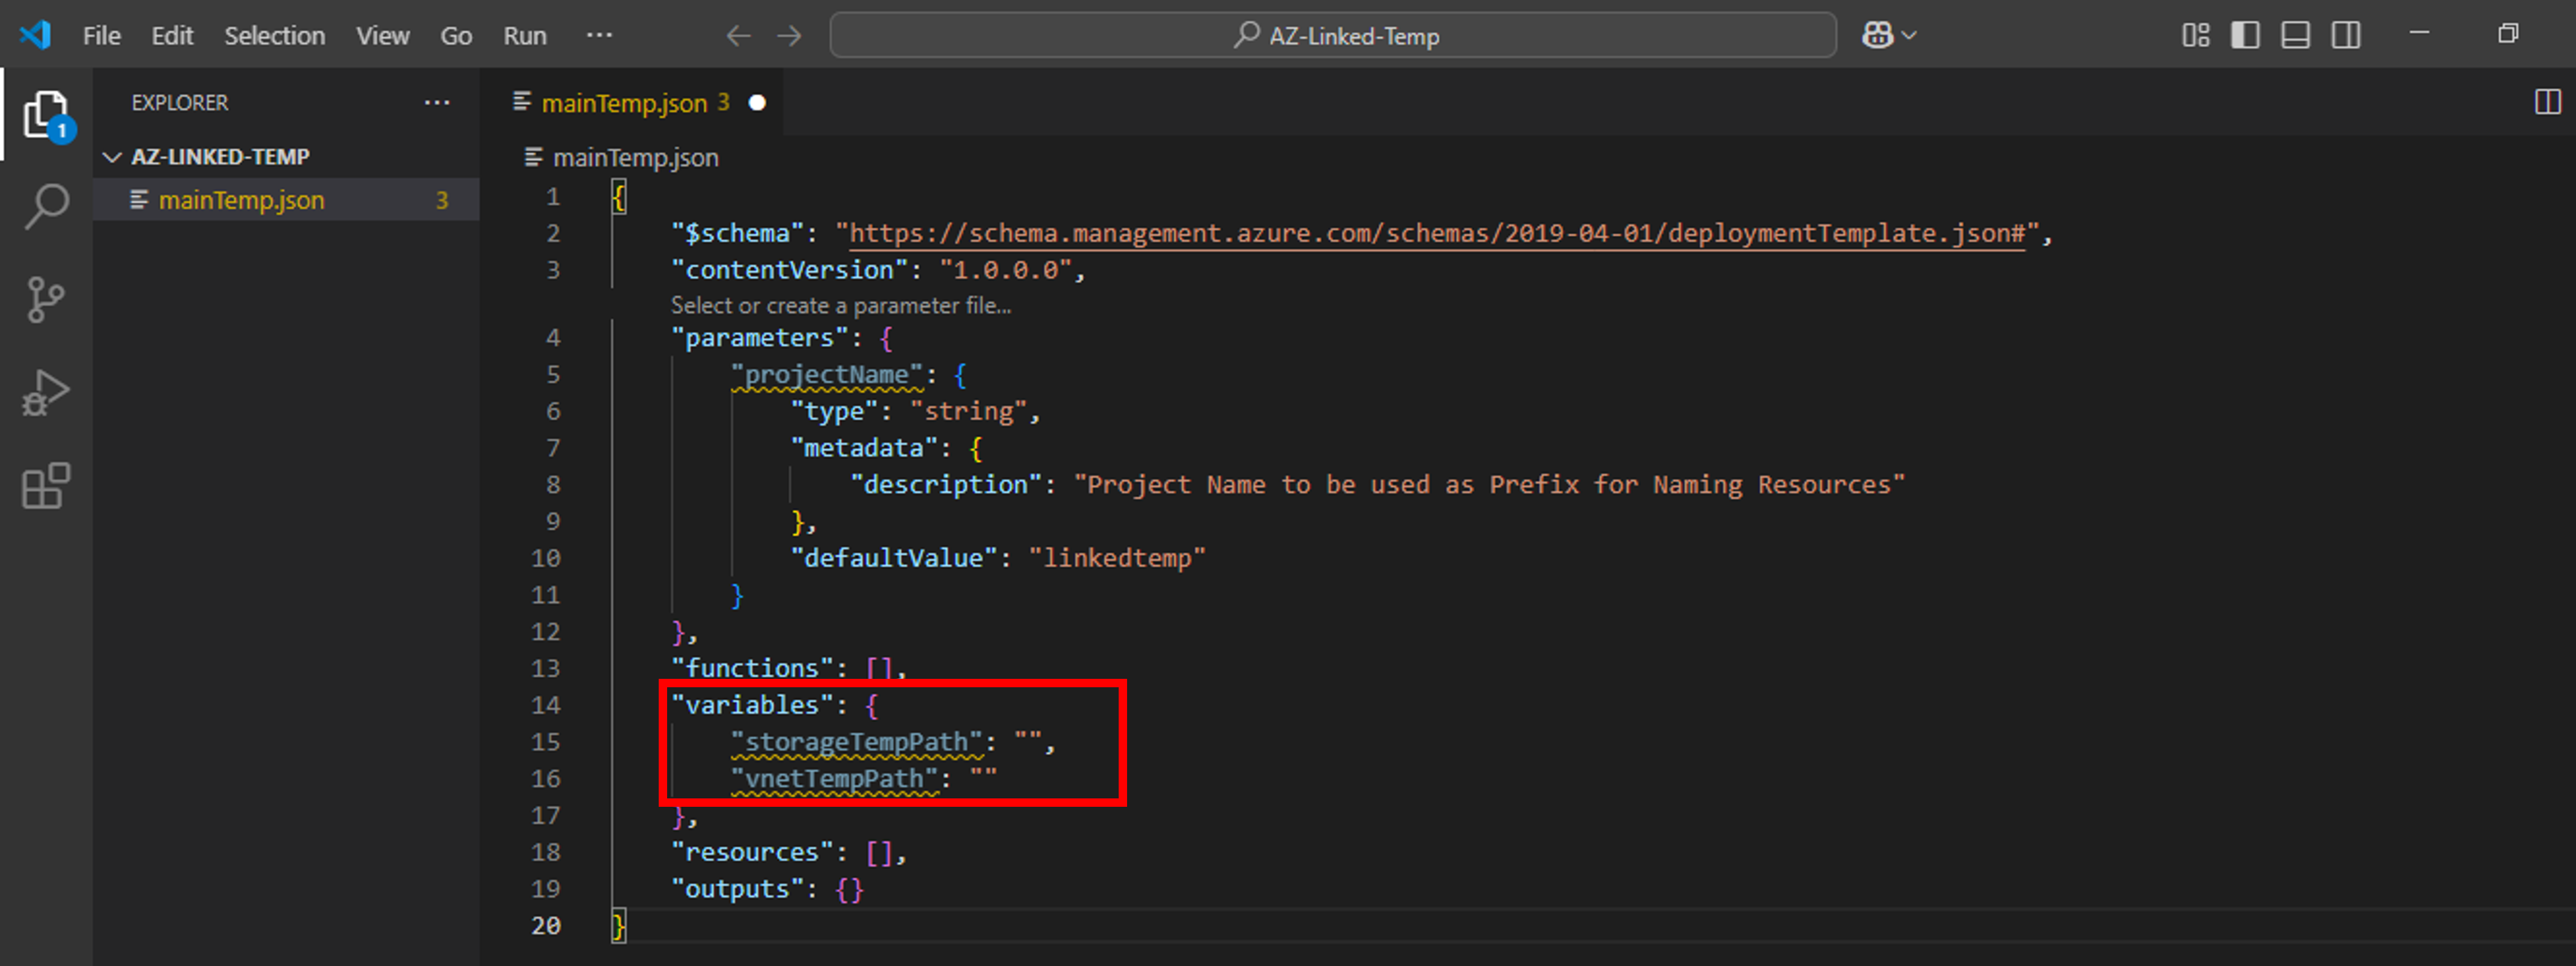
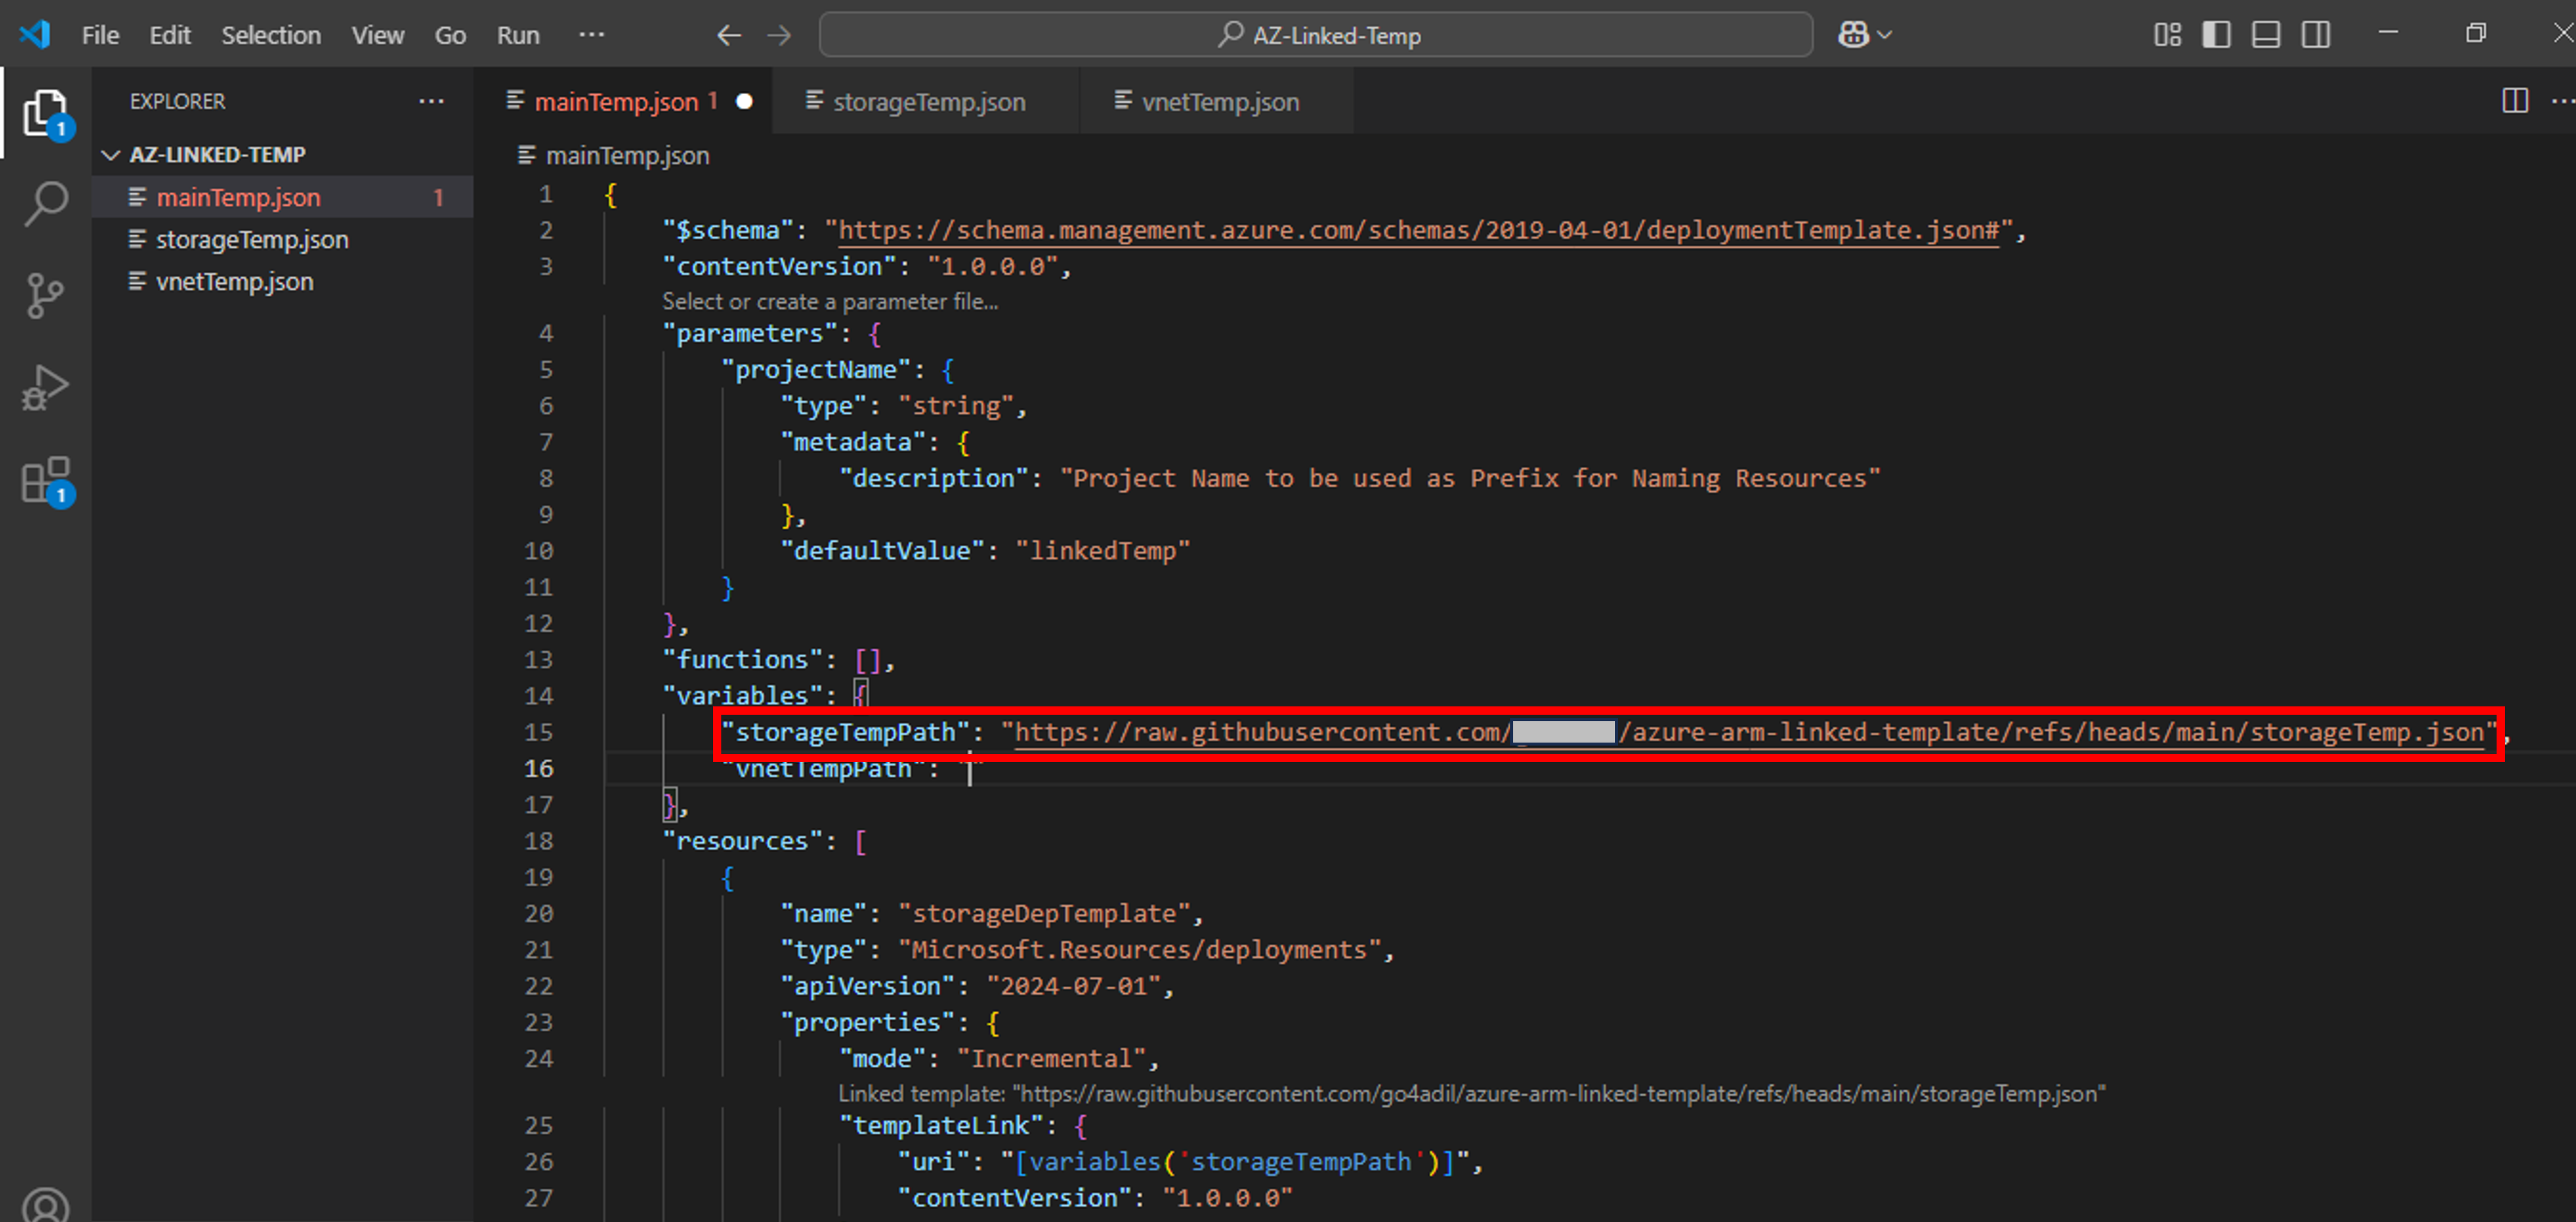
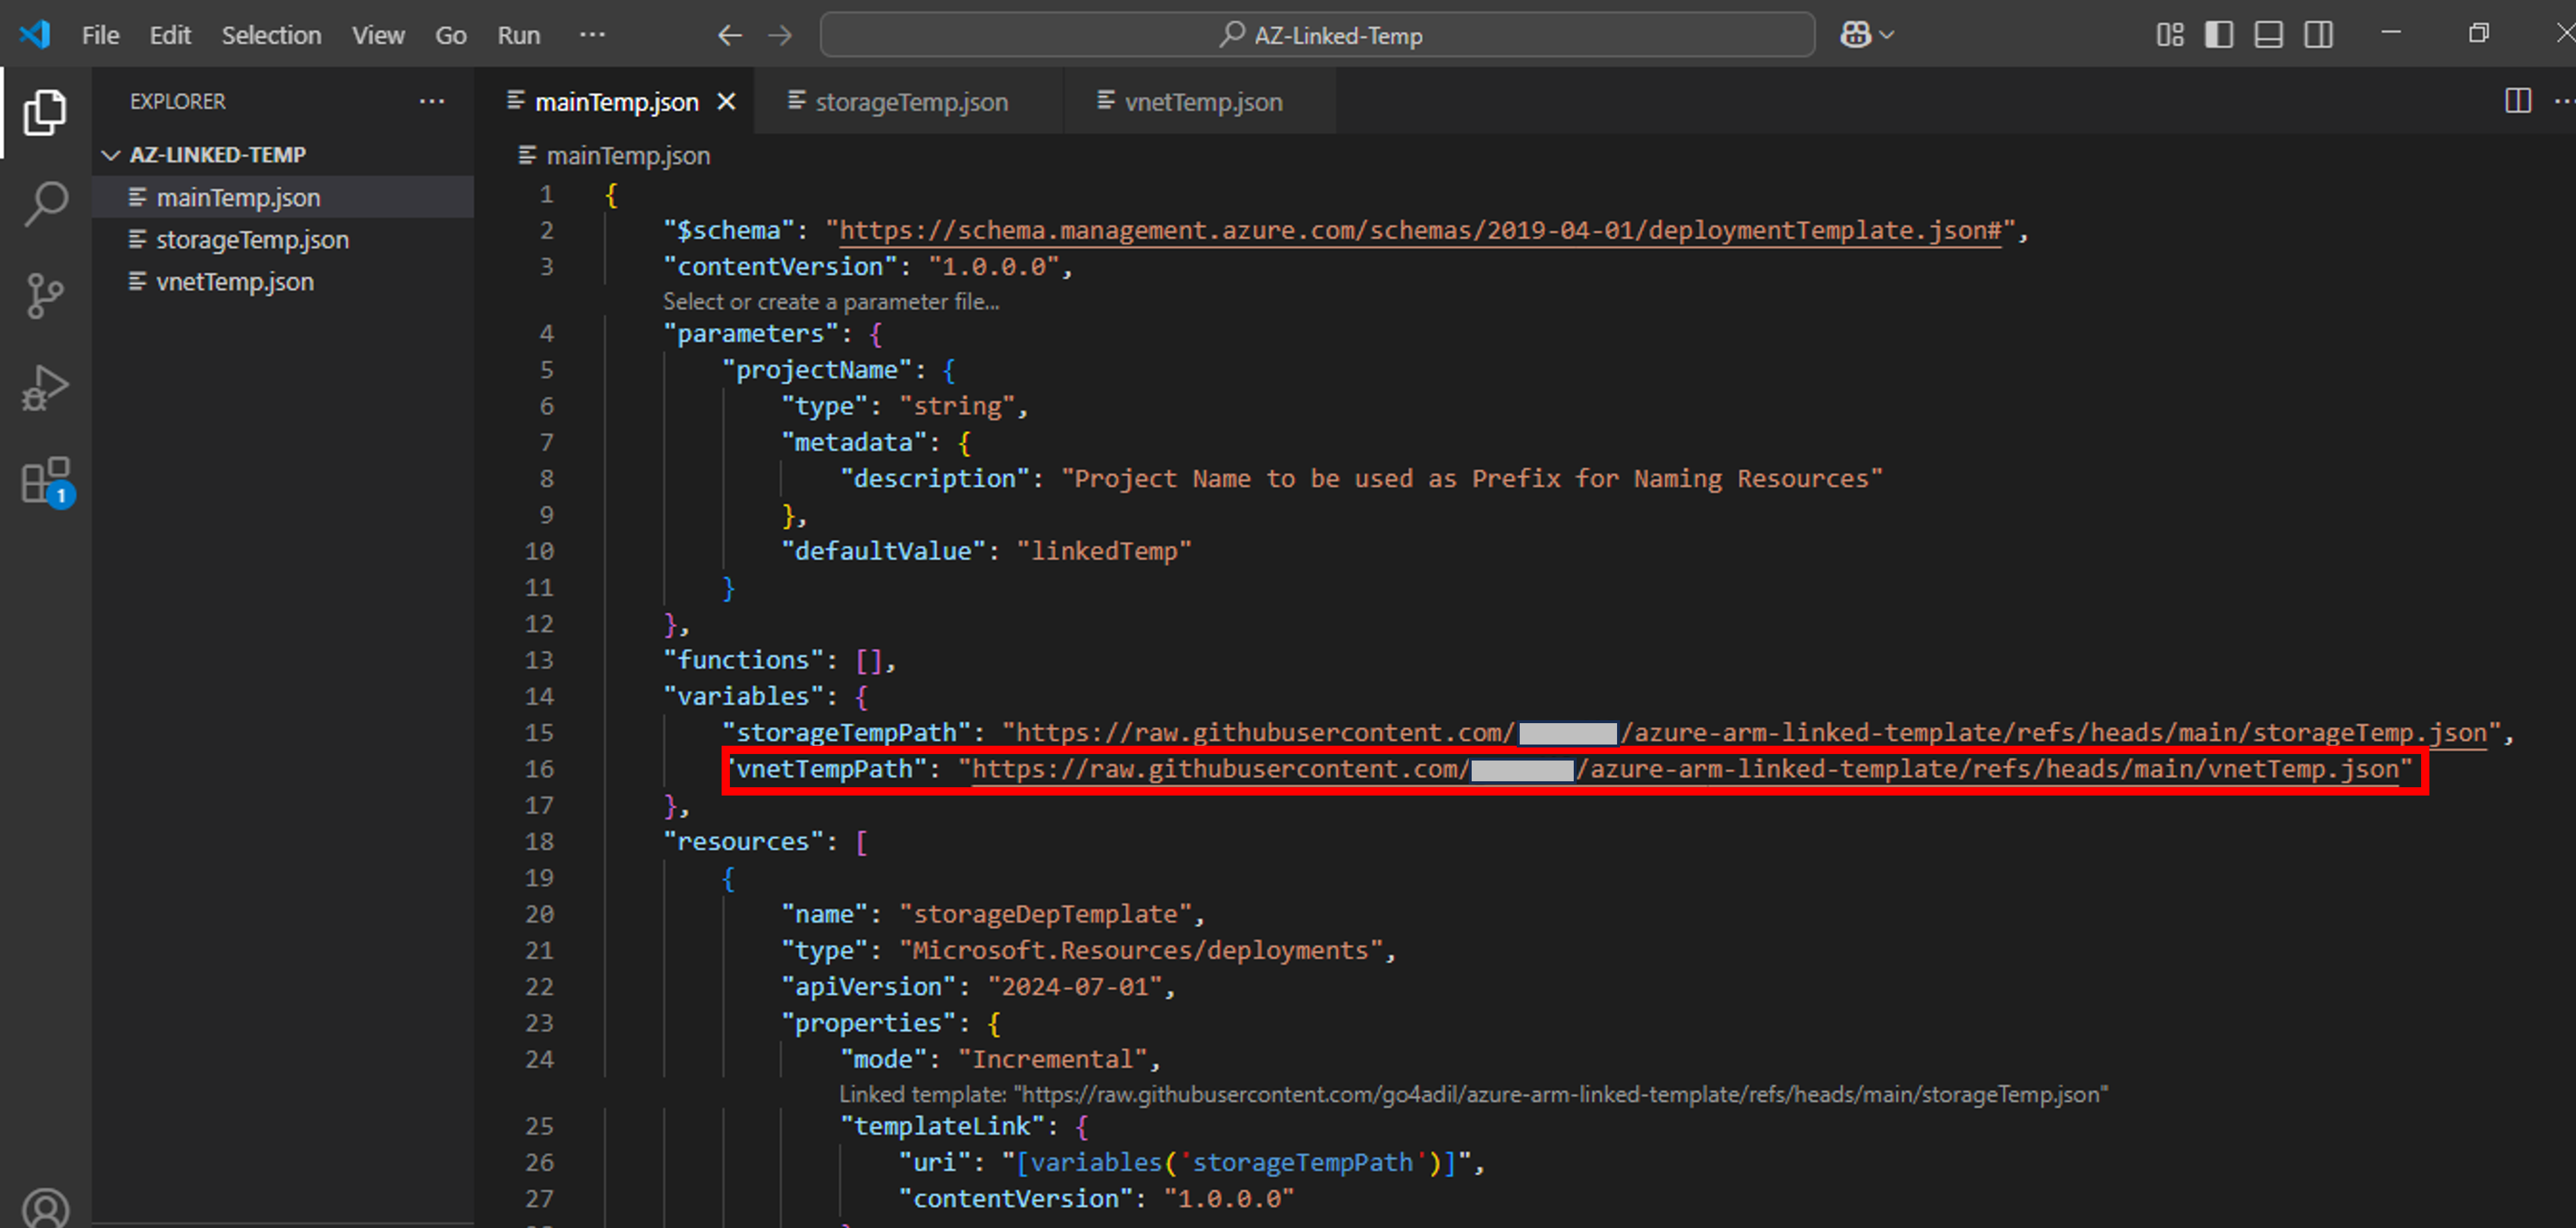
- Now we need to create two variables named storageTempPath and vnetTempPath. These variables will store URI path to our storage account template and vnet template respectively. For now, keep value of these variables blank. We will assign them values later.

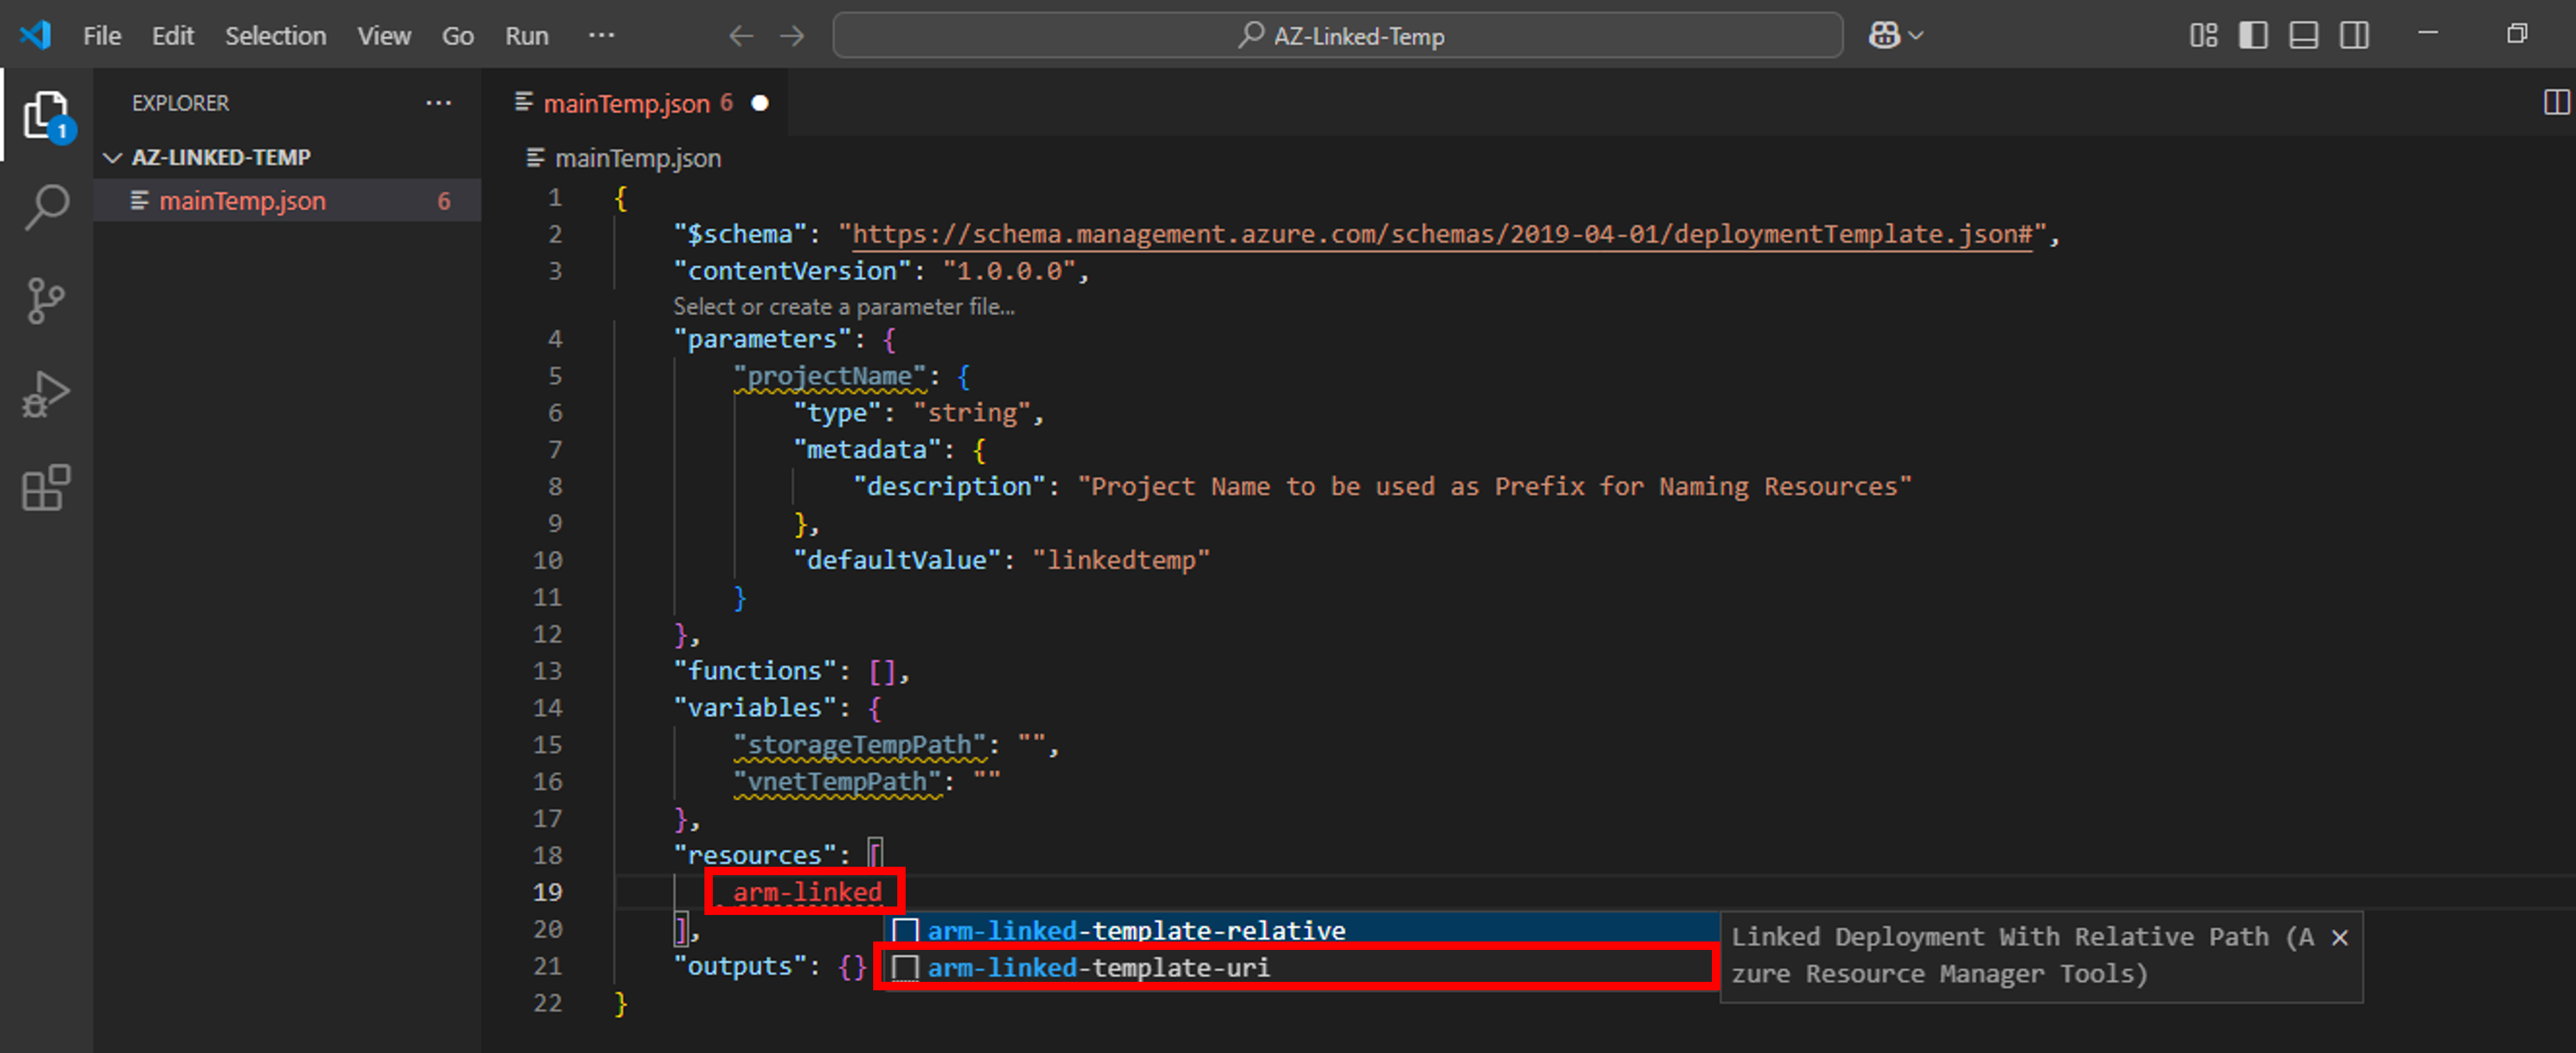
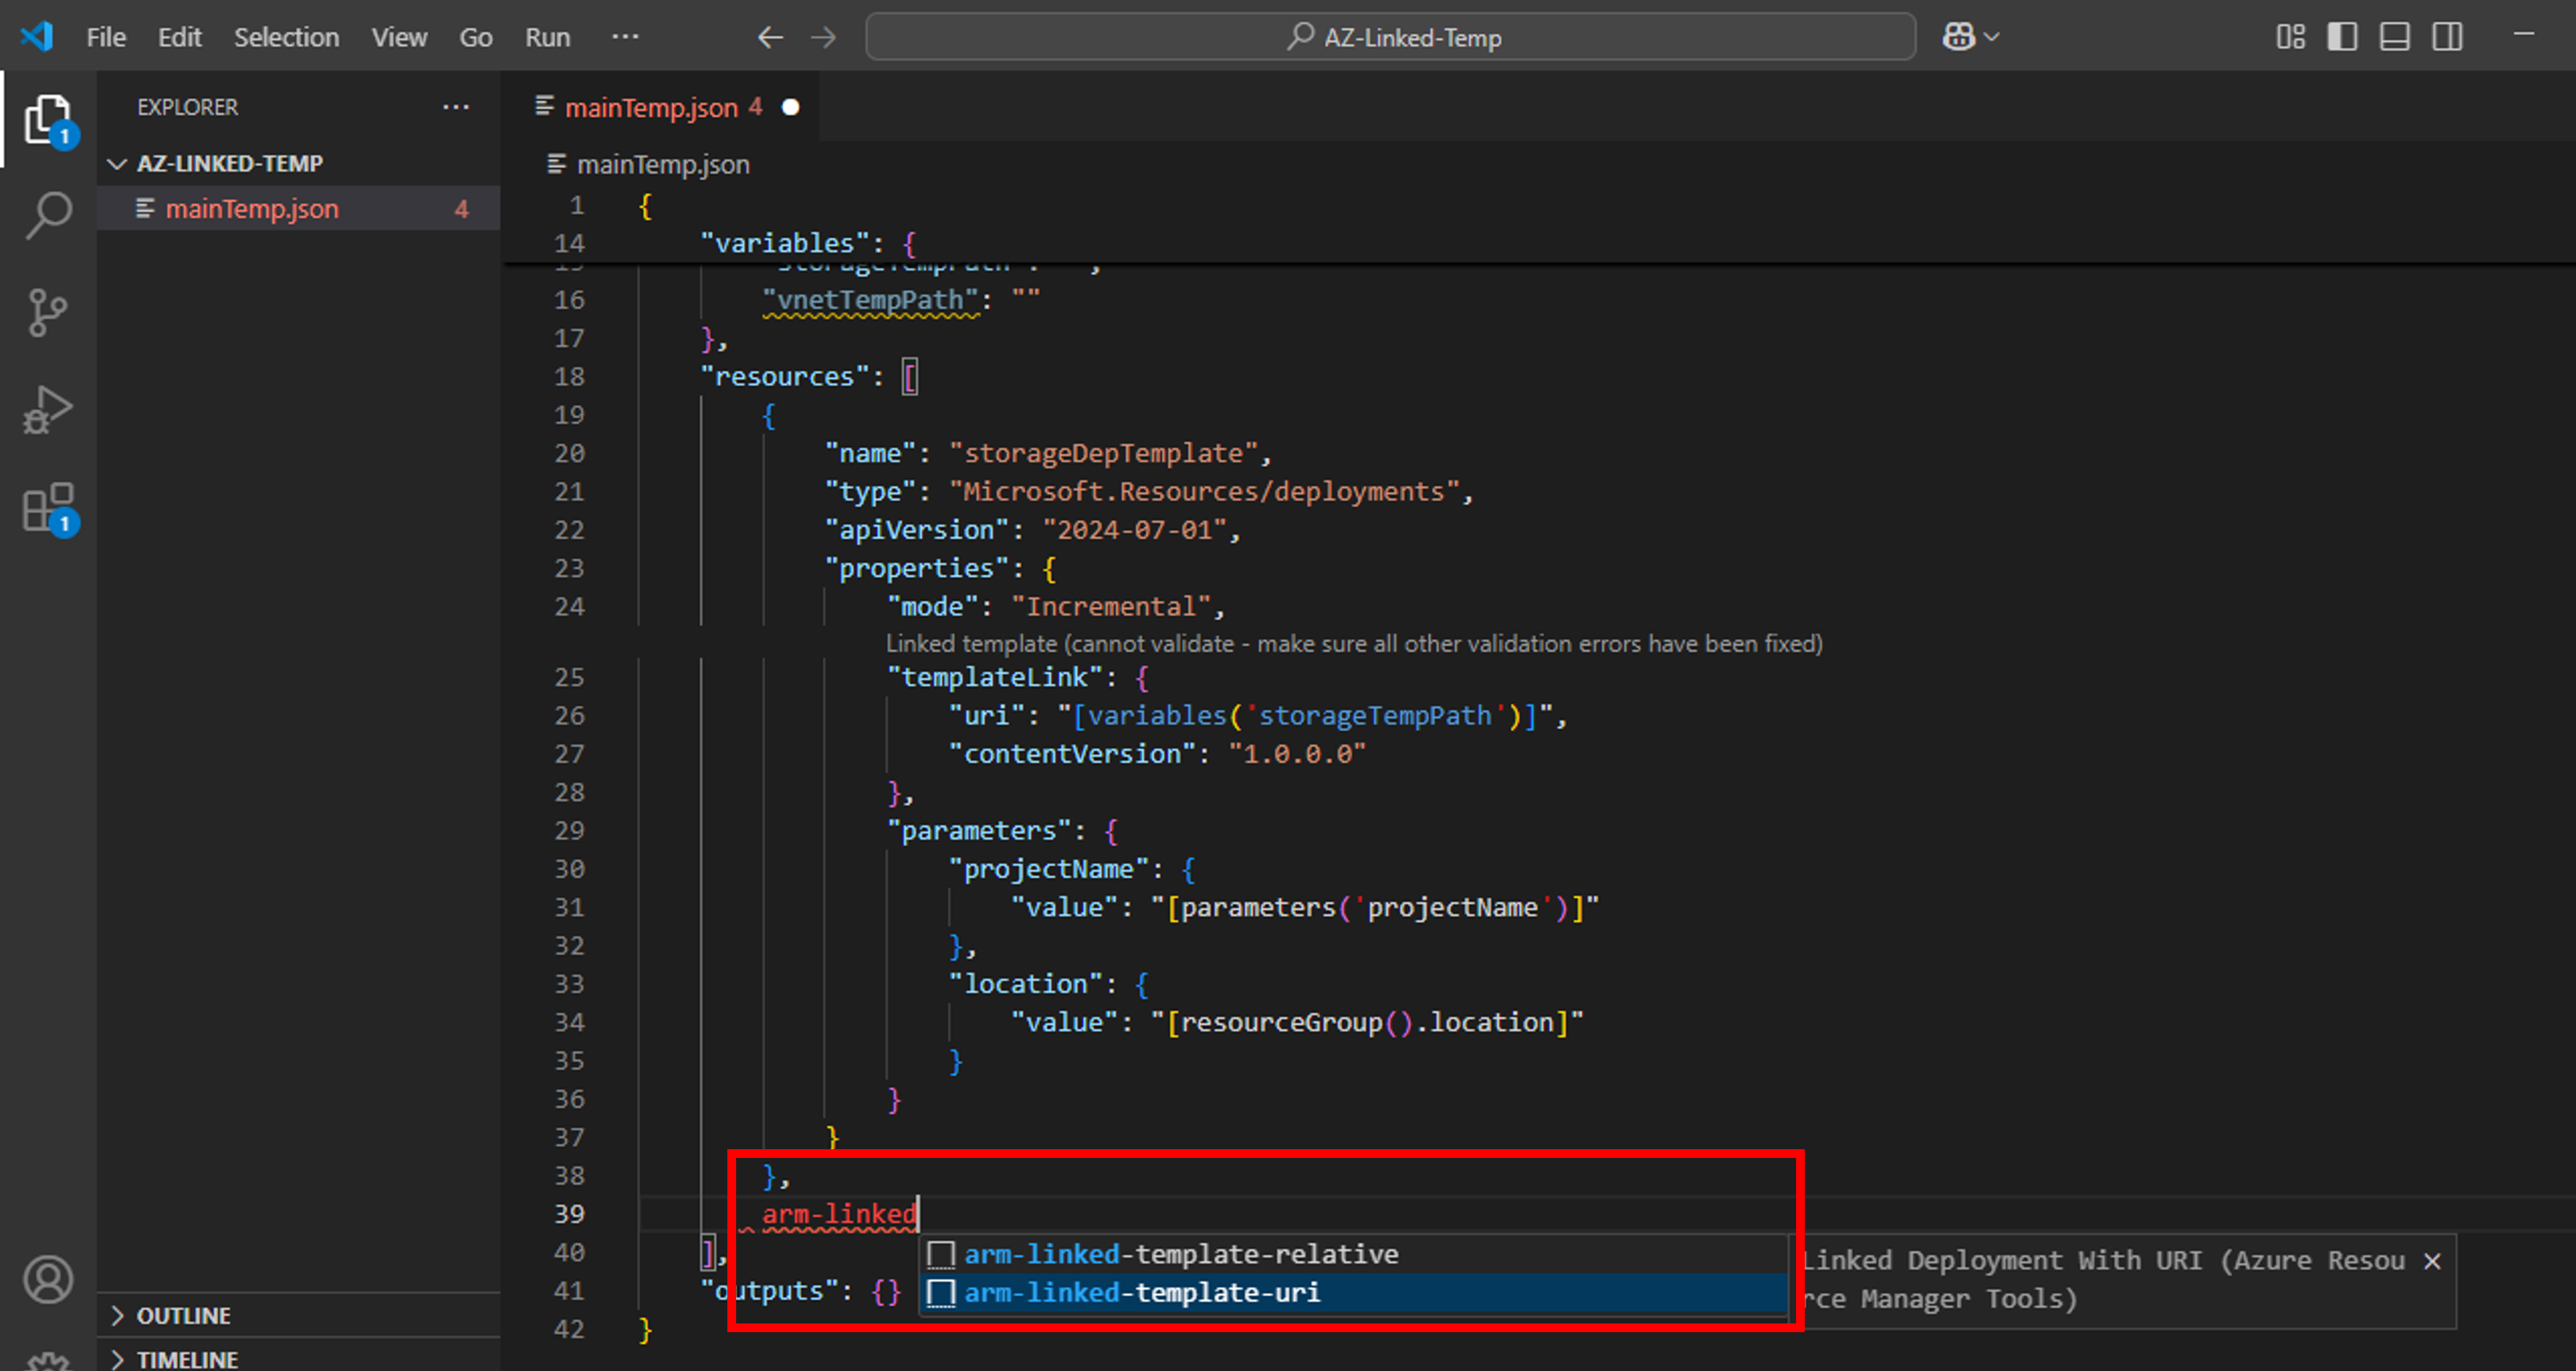
- Next, we need to create a deployment resource for storage account template. Place your cursor in the template resources block, type arm-linked, and select arm-linked-template-uri snippet

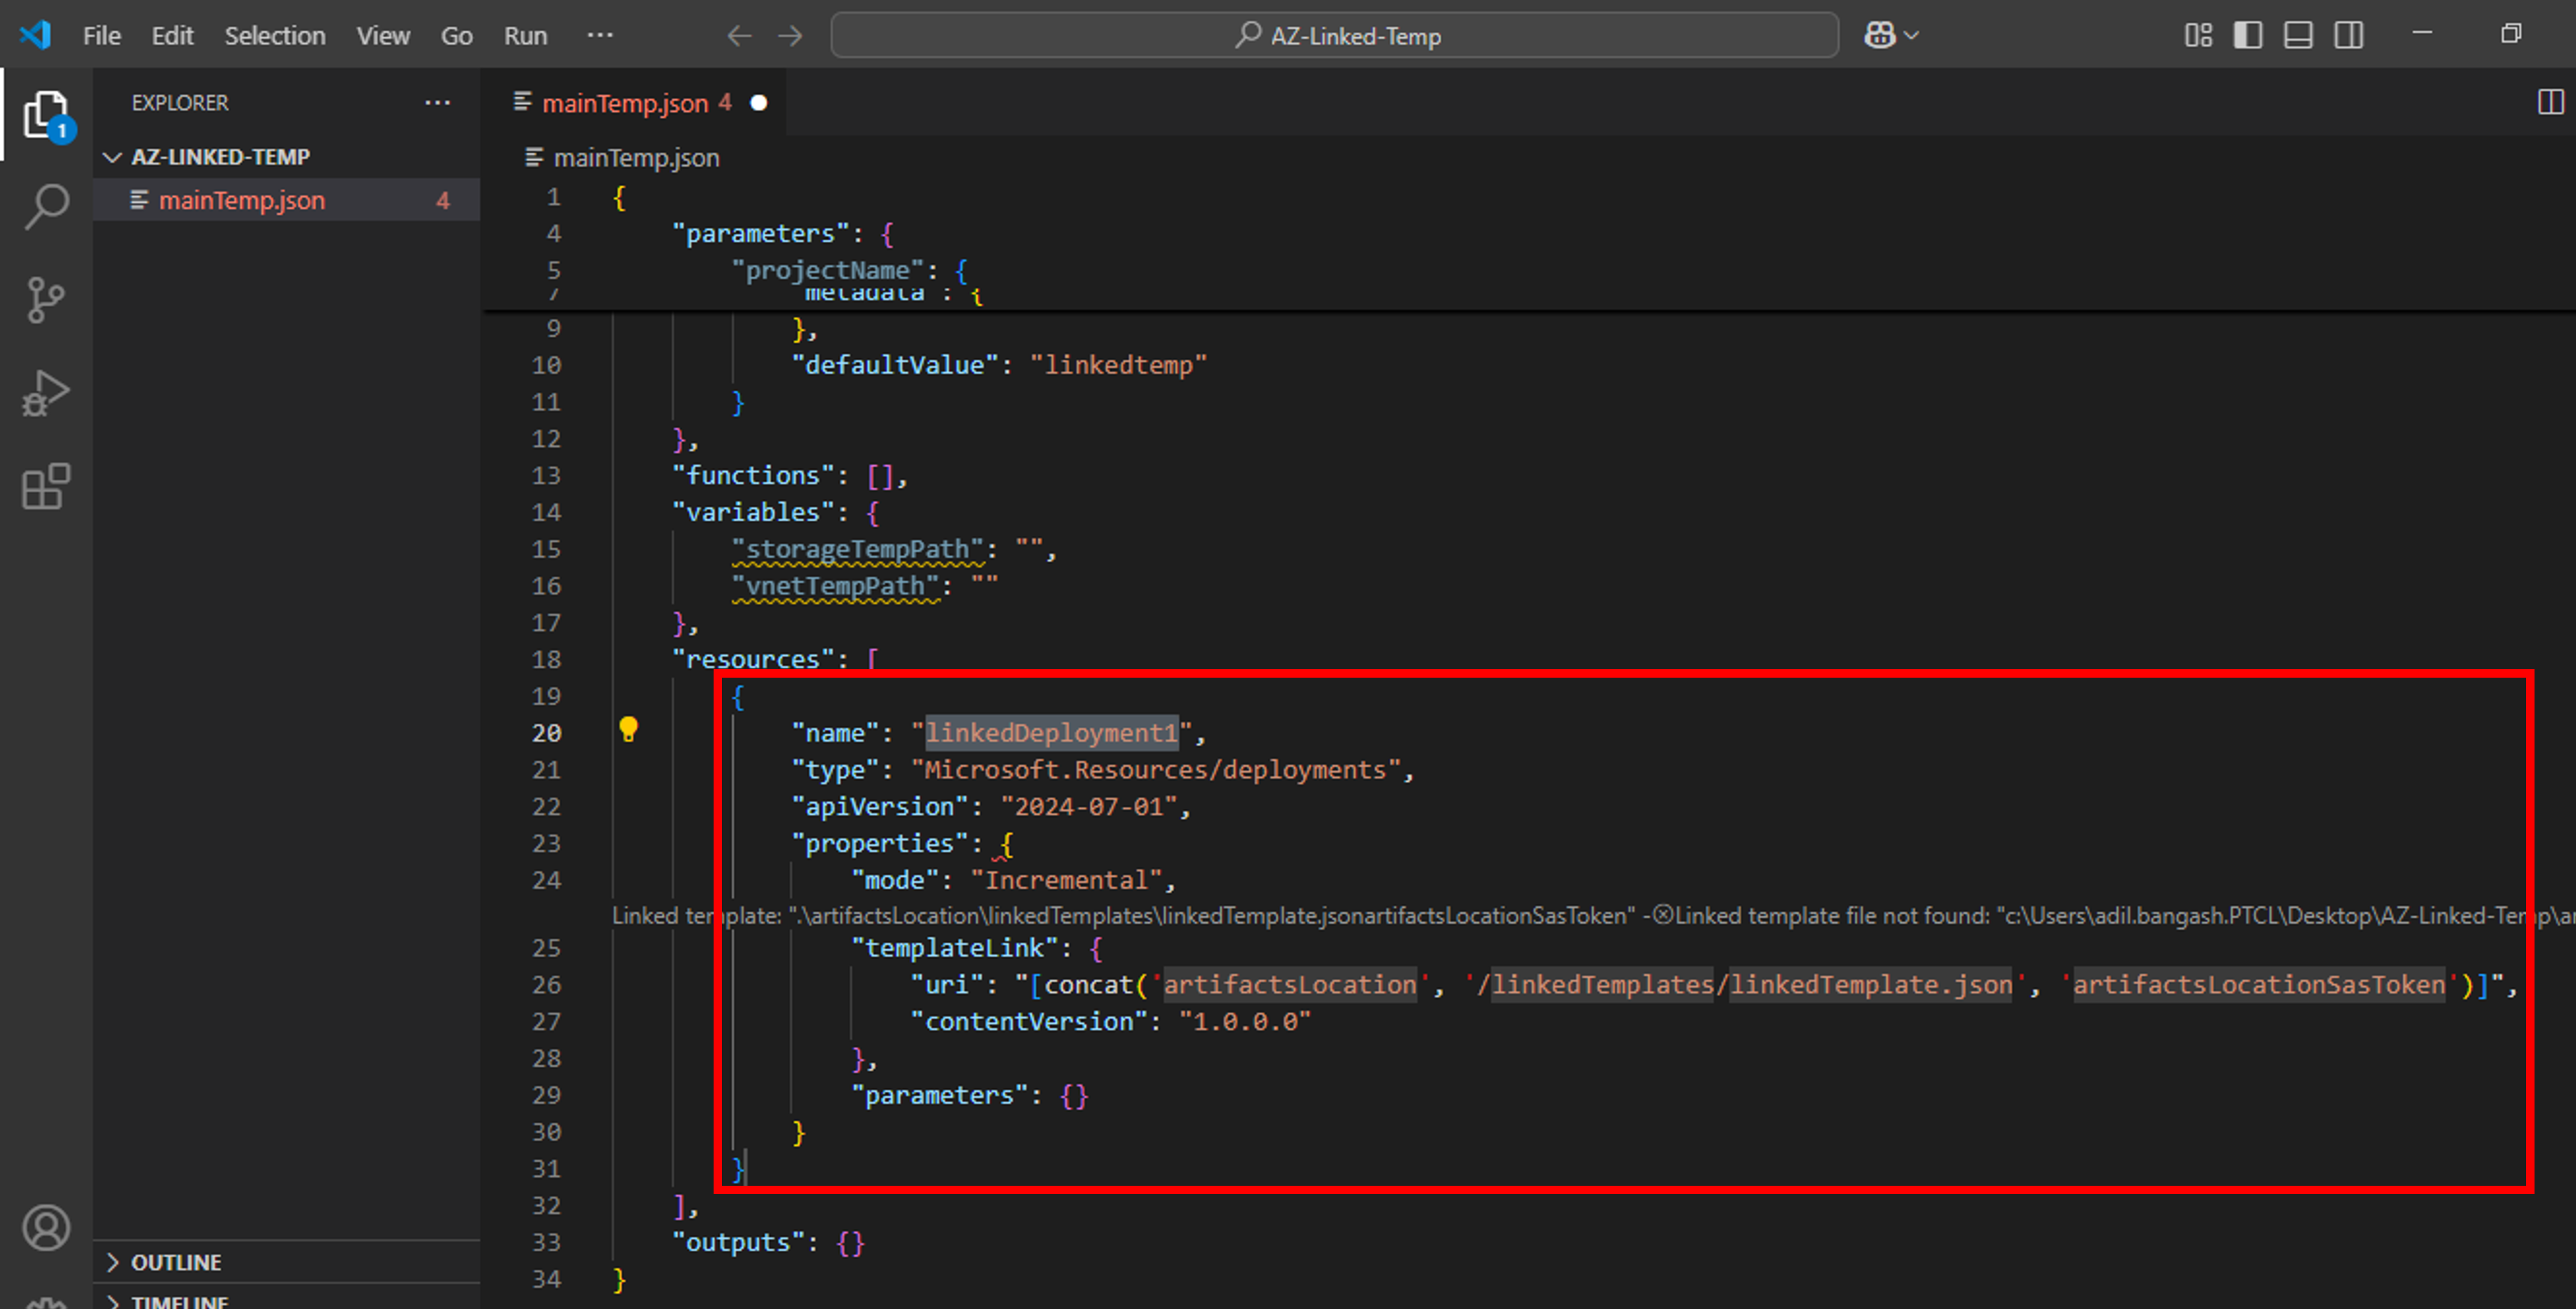
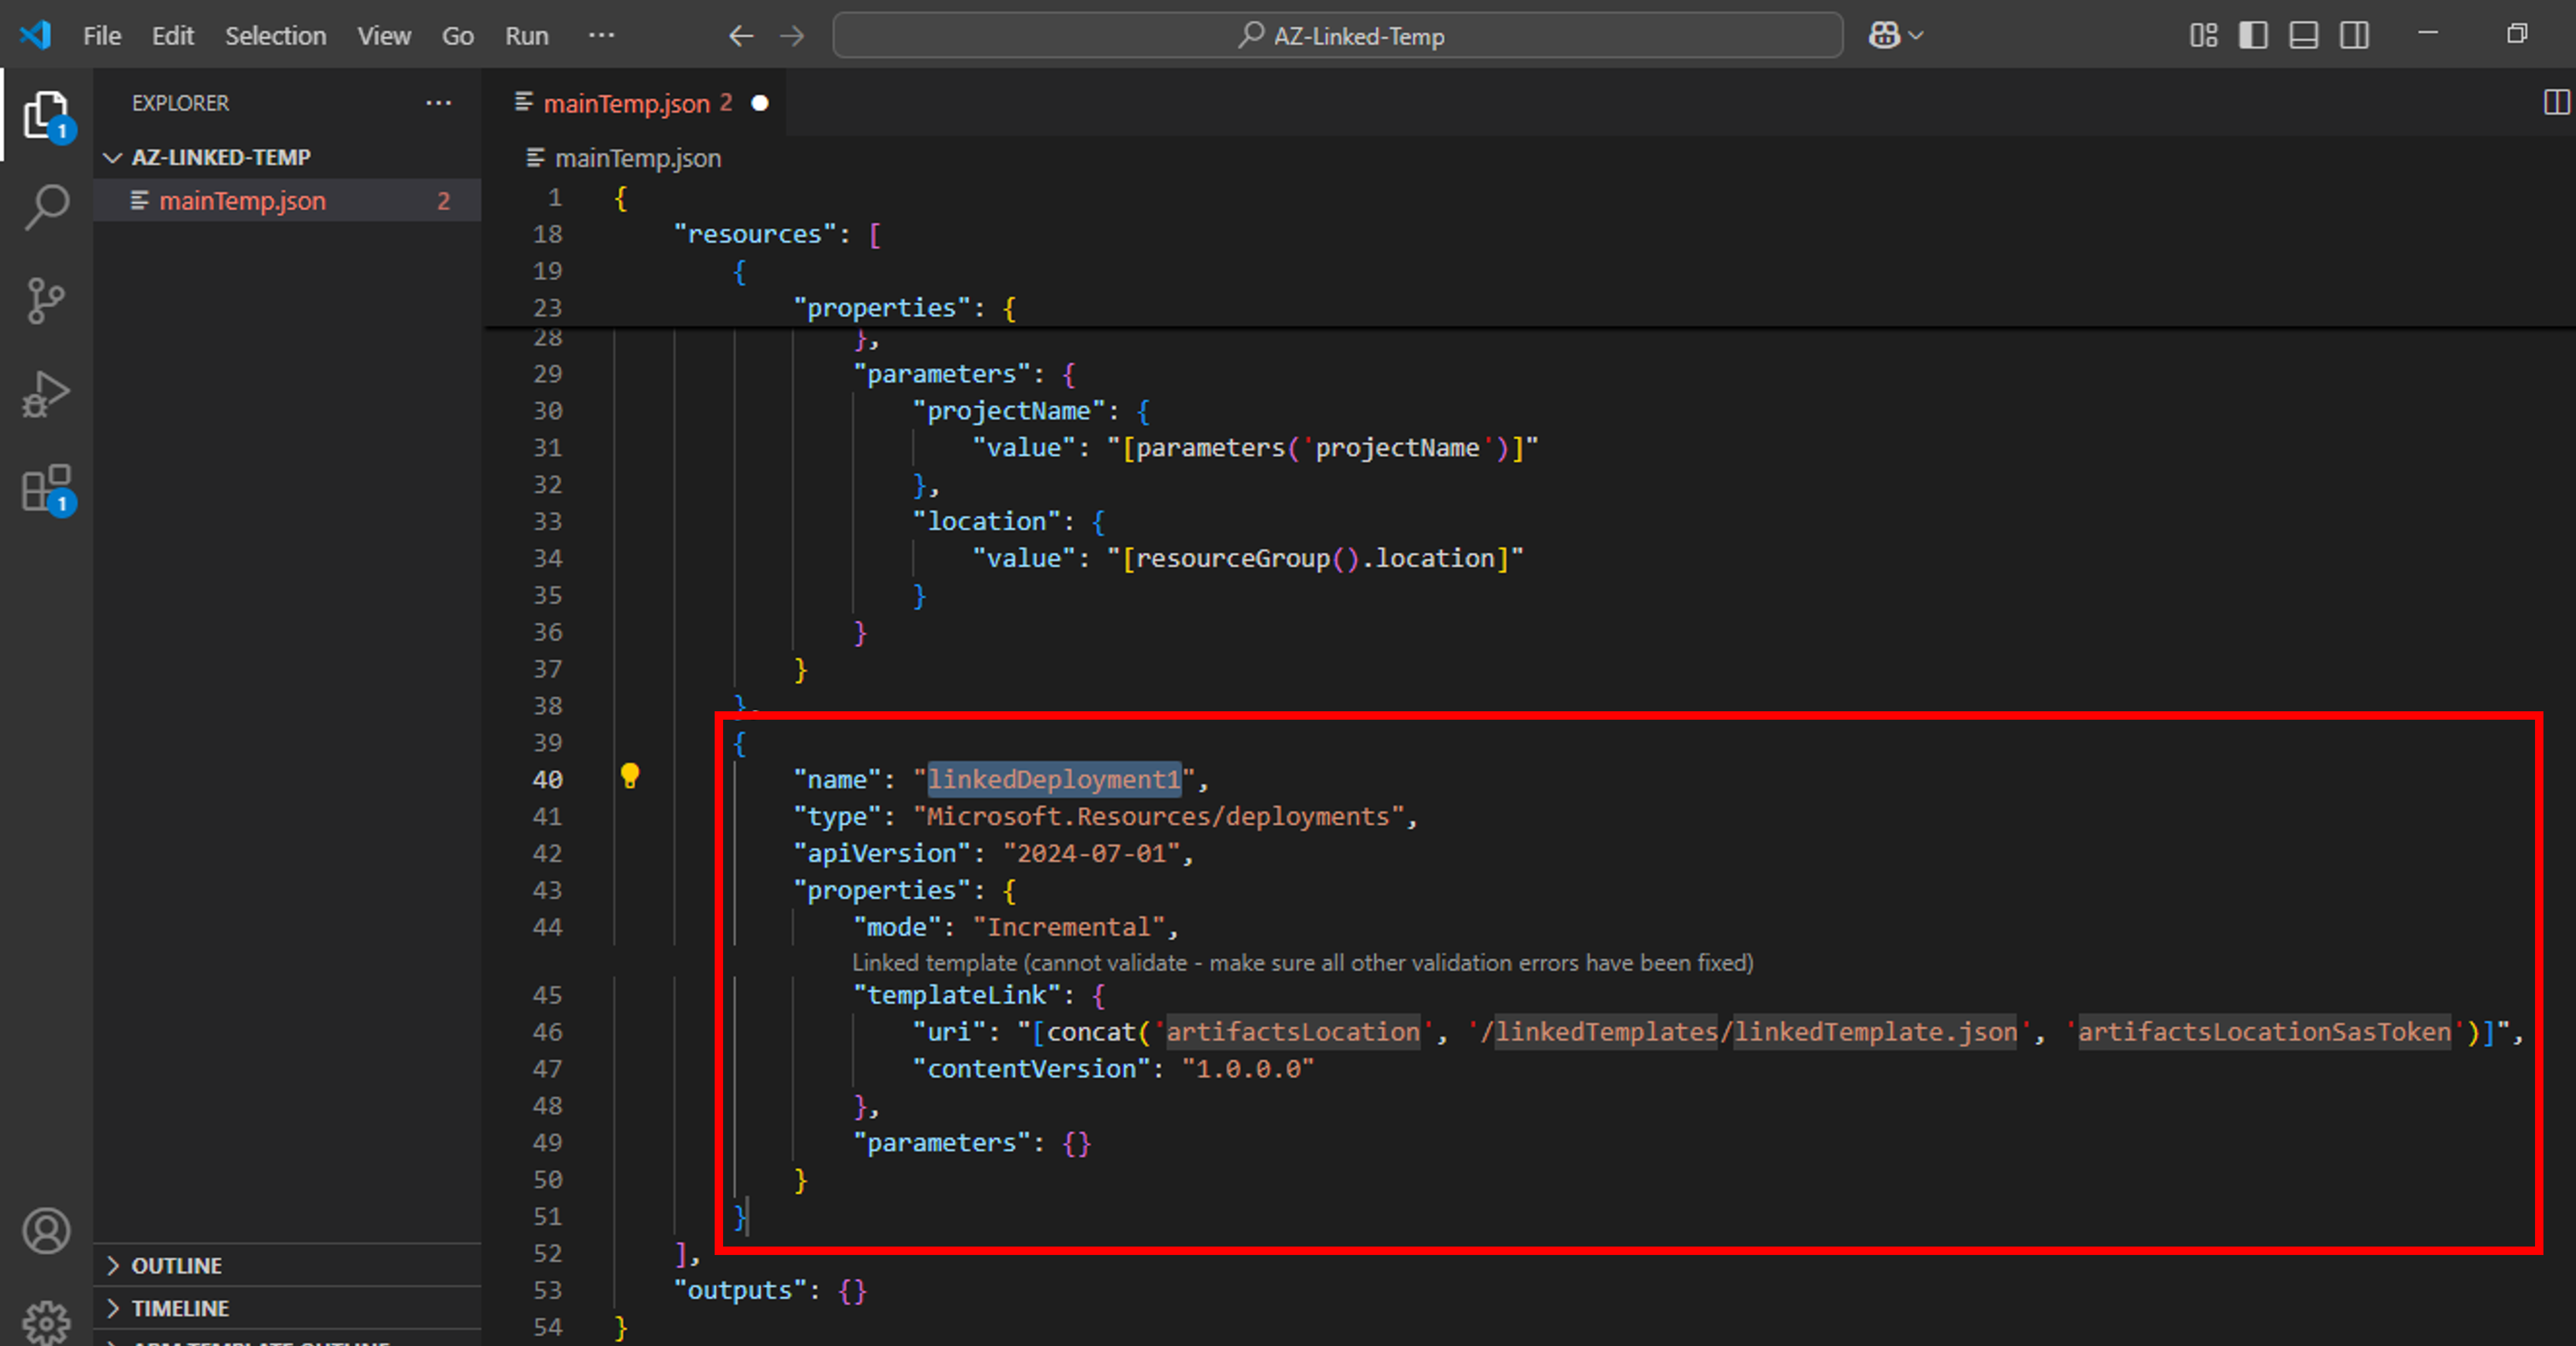
- A new deployment resource named “linkedDeployment1” with default properties shall be added to the template

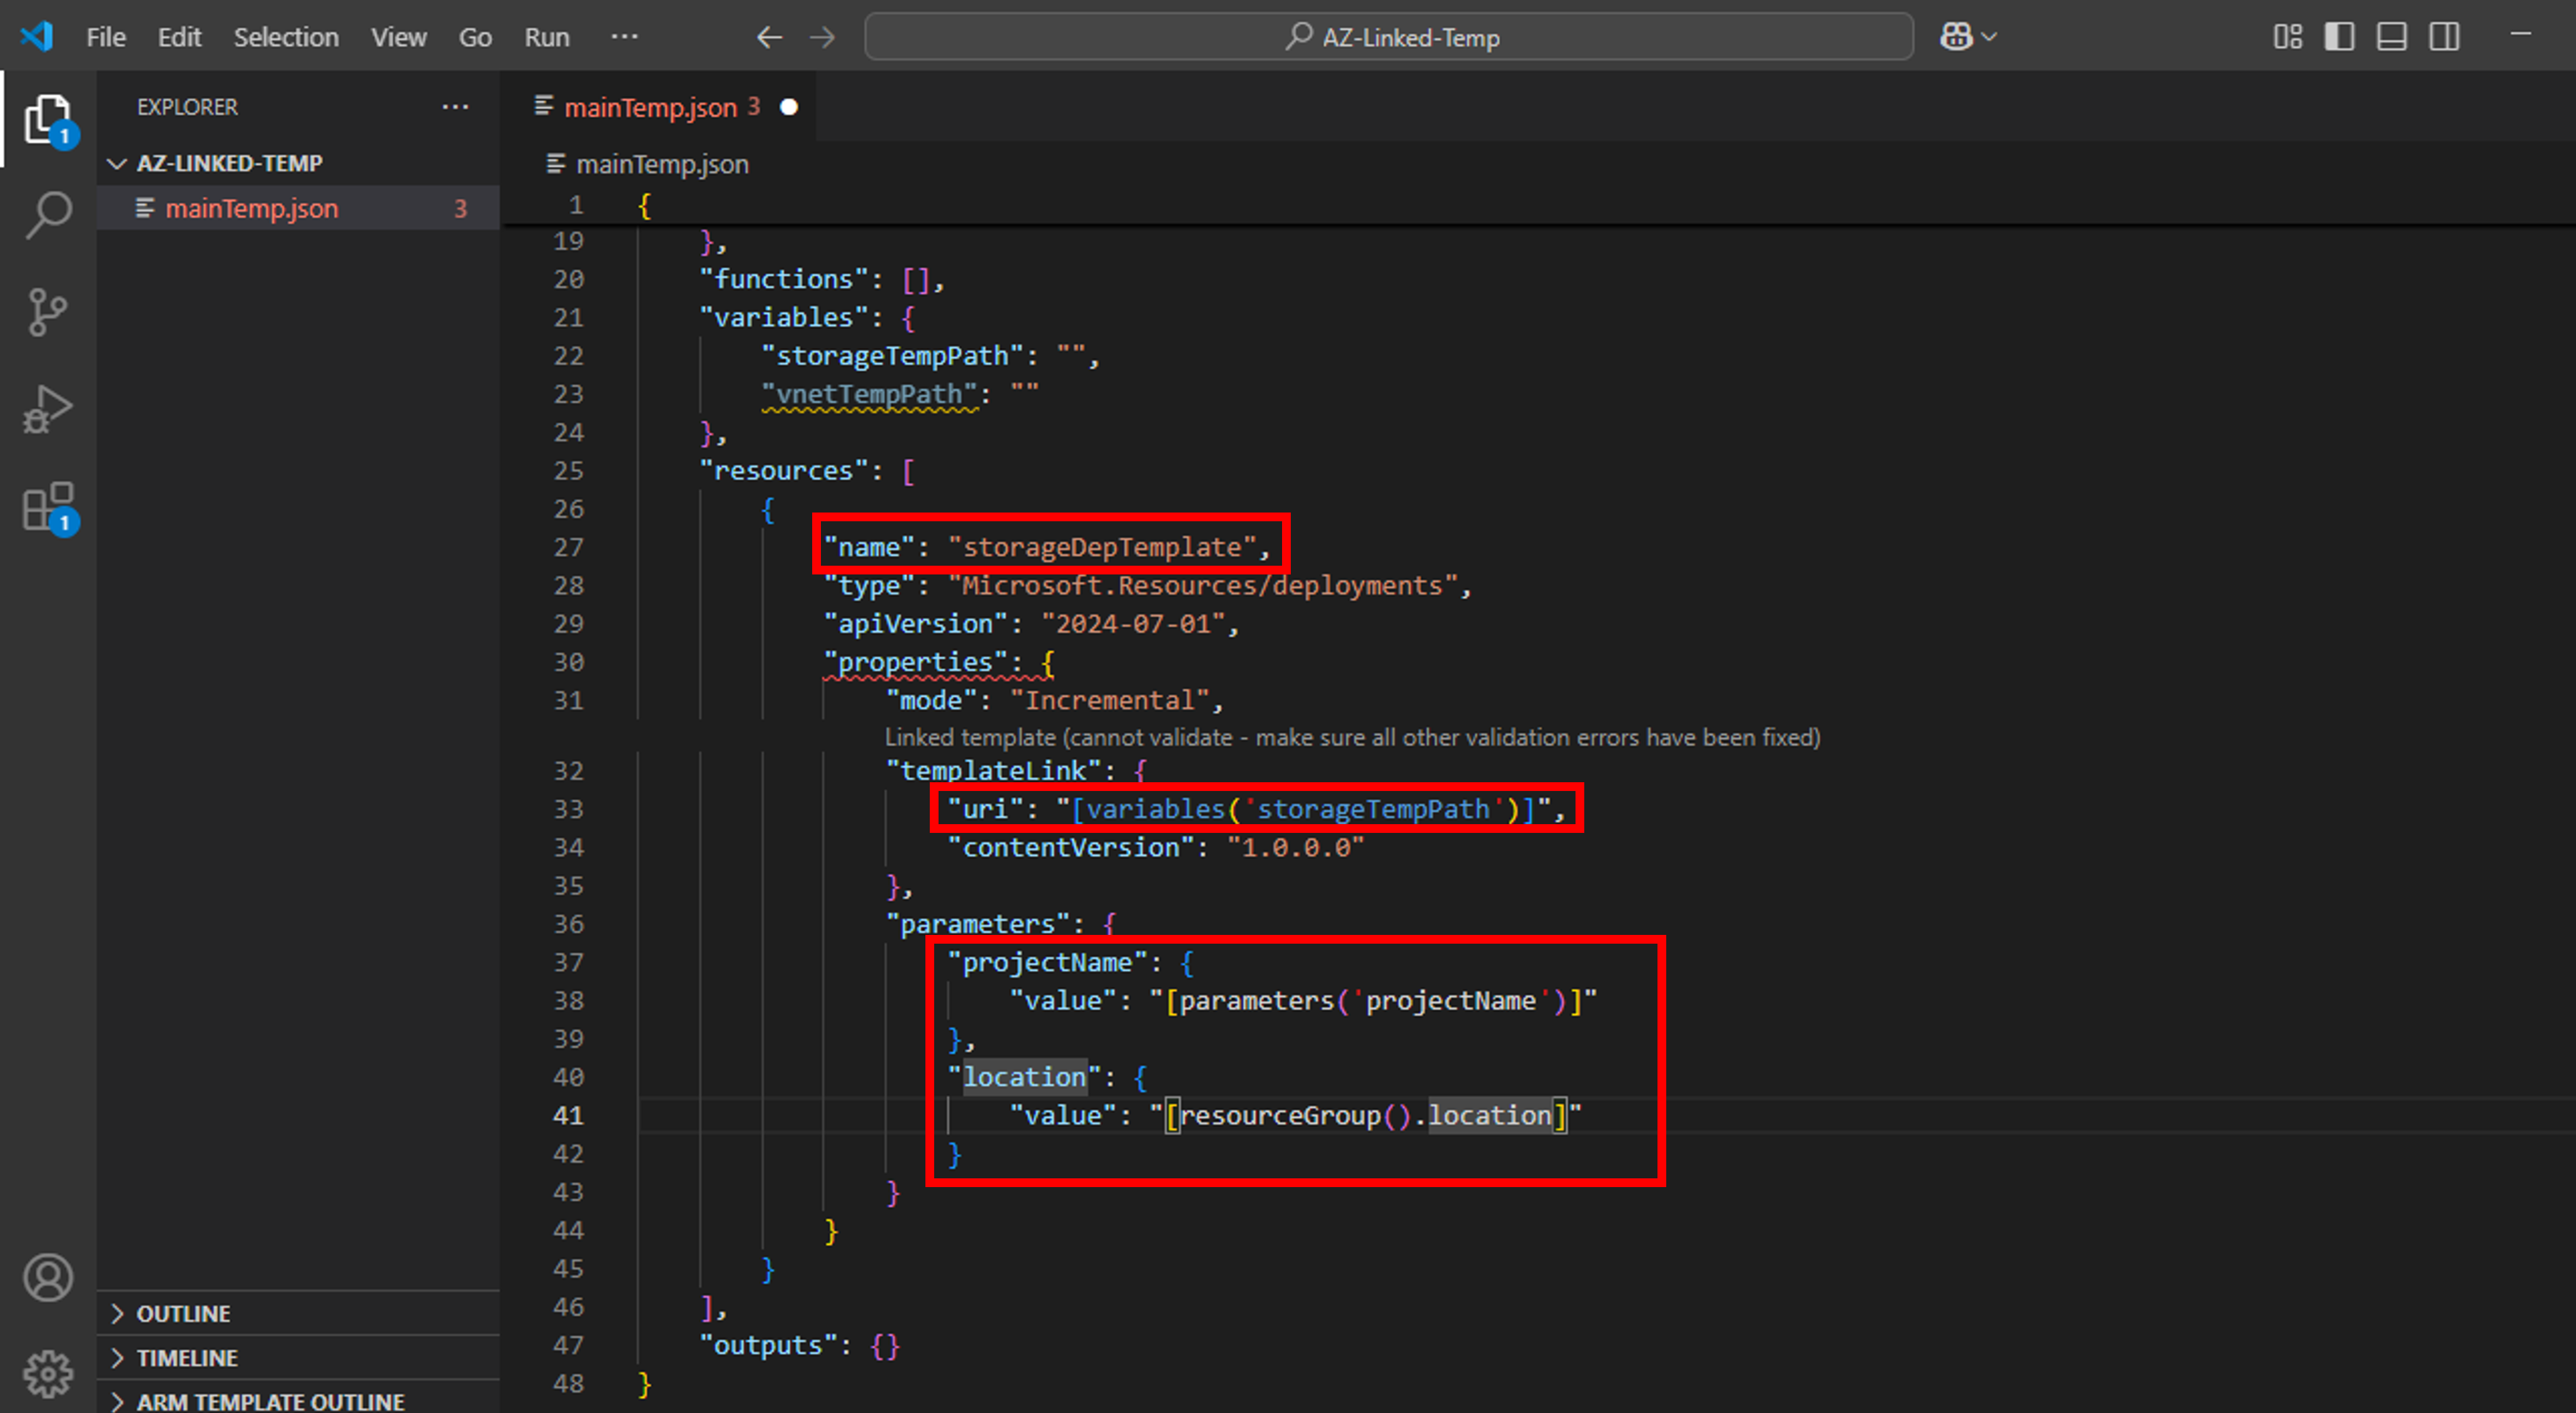
- Change the name of deployment resource to “storageDepTemplate”. Update templateLink: uri property to call variable storageTempPath. Also, update deployment resource parameters as mentioned in the snap.

- Now, we need to create another deployment resource for virtual network template. Place your cursor in the template resources block, type arm-linked, and select arm-linked-template-uri snippet

- A new deployment resource named “linkedDeployment1” with default properties shall be added to the template

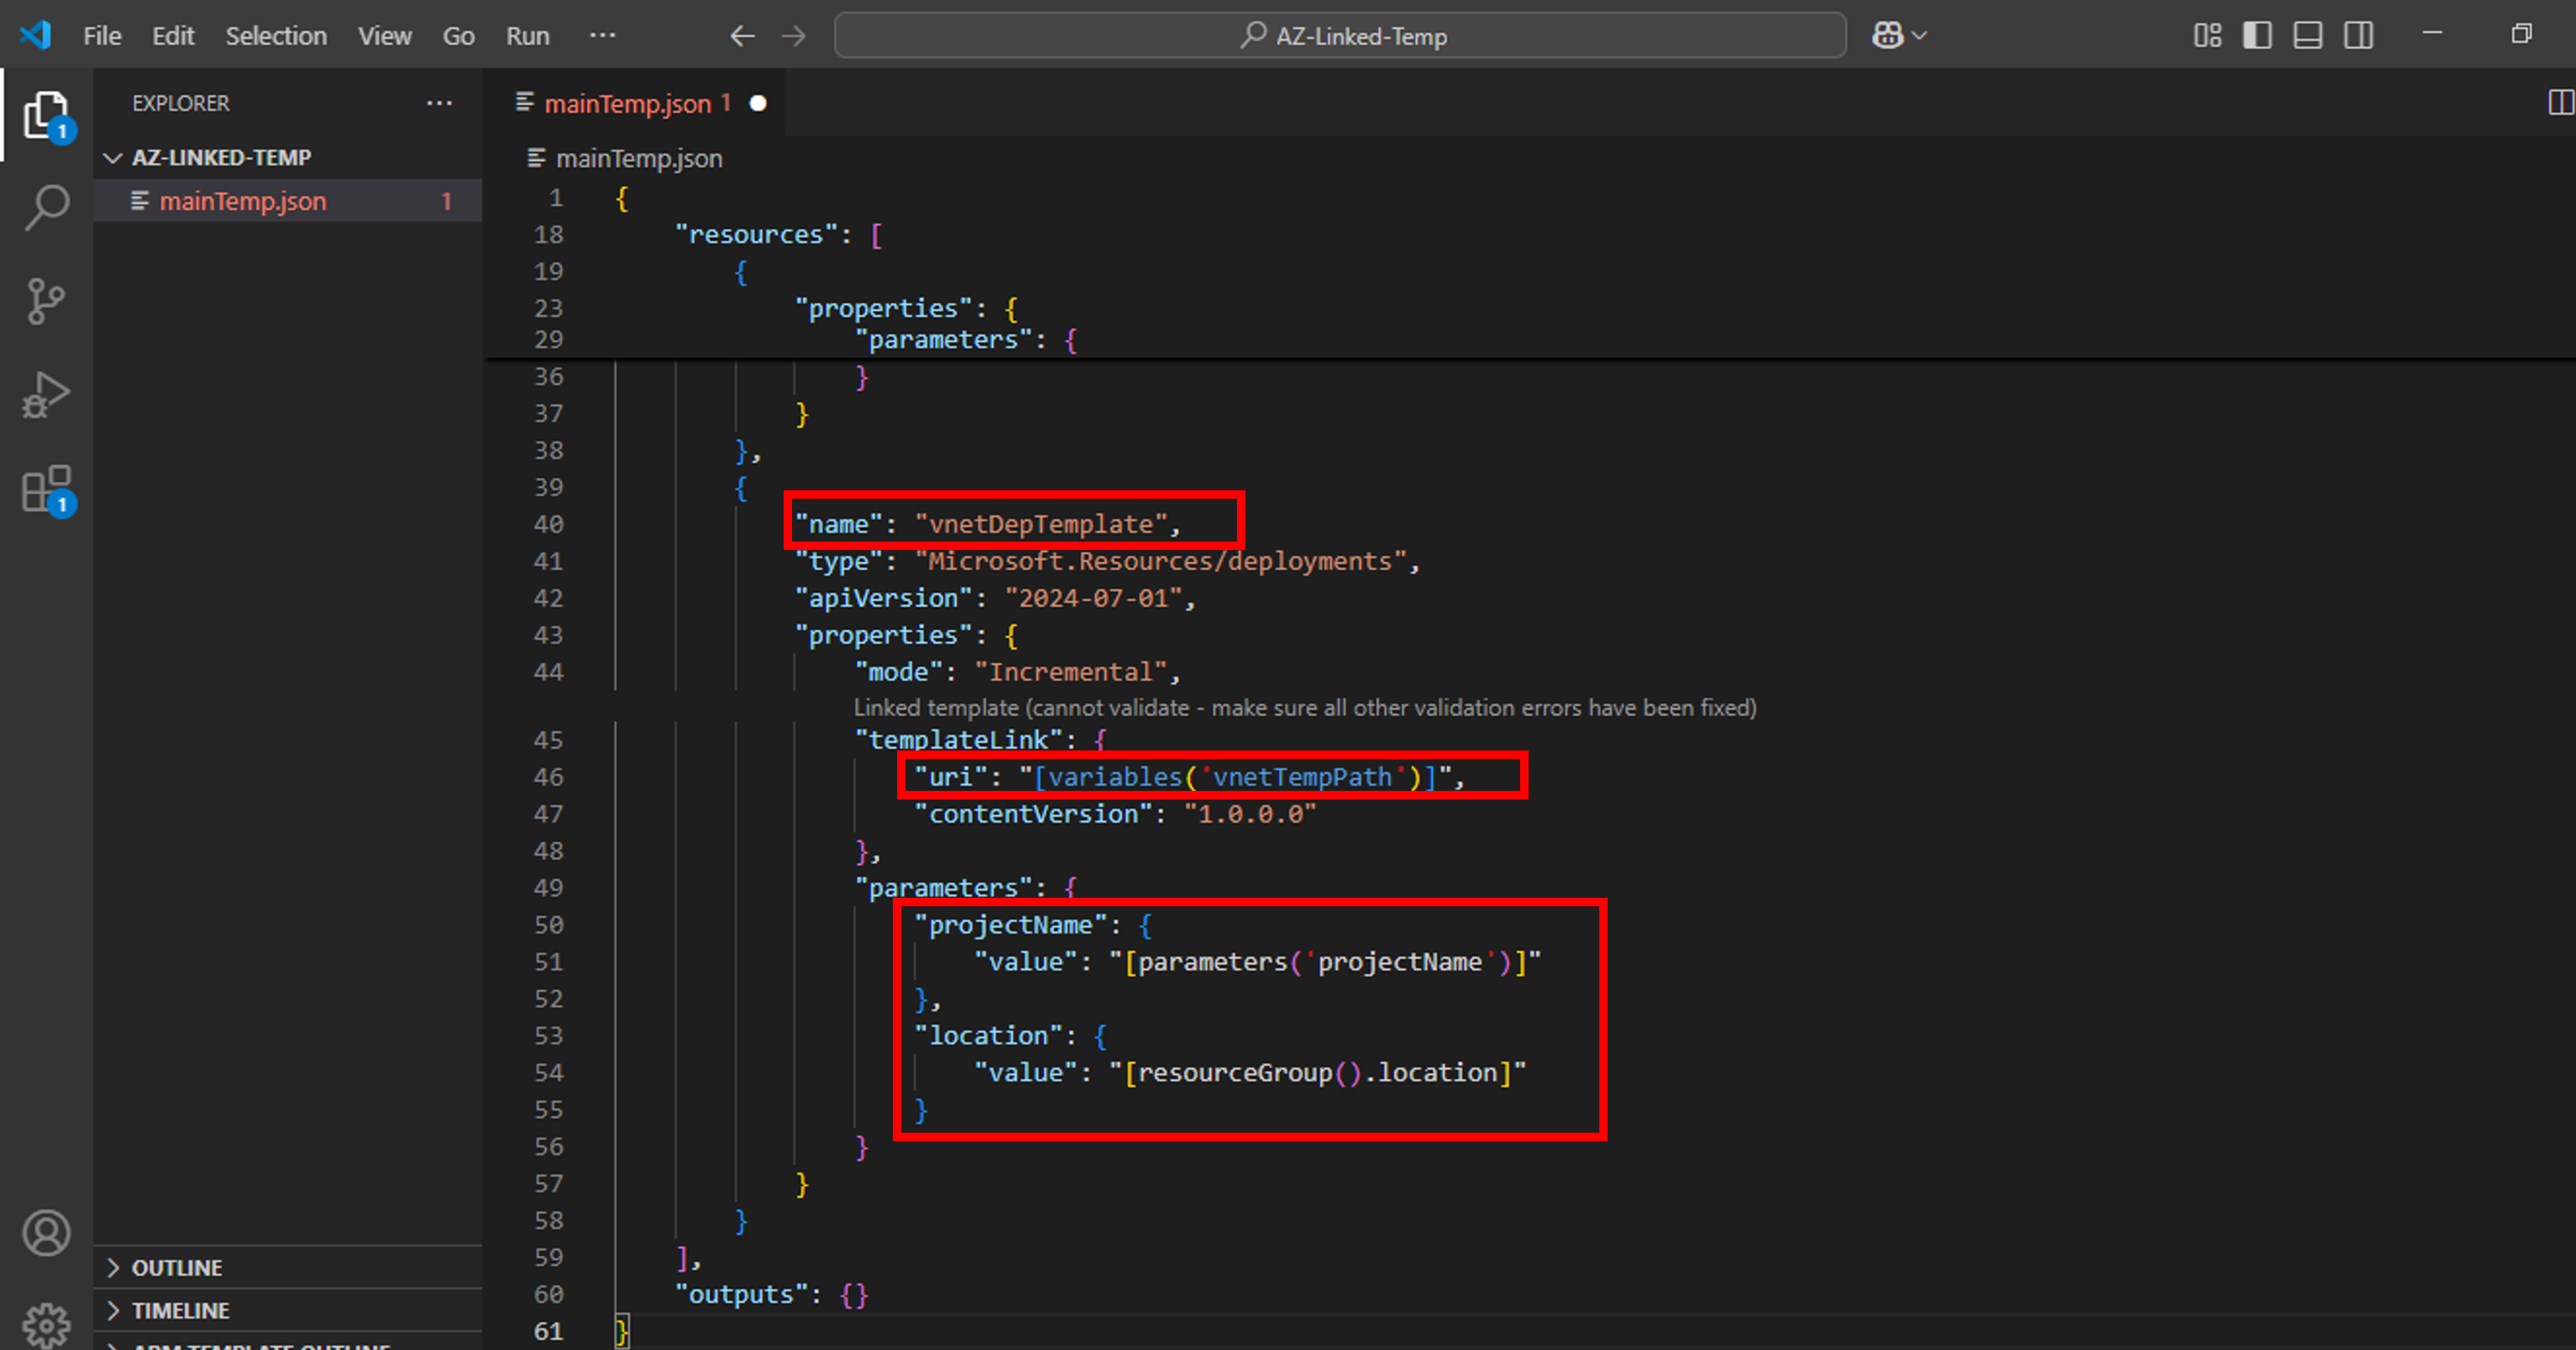
- Change the name of deployment resource to “vnetDepTemplate”. Update templateLink: uri property to call variable vnetTempPath. Also, update deployment resource parameters as mentioned in the snap.

Create Azure Storage Account (Child) Deployment Template
Now, we need to create a child template for Azure storage account deployment.
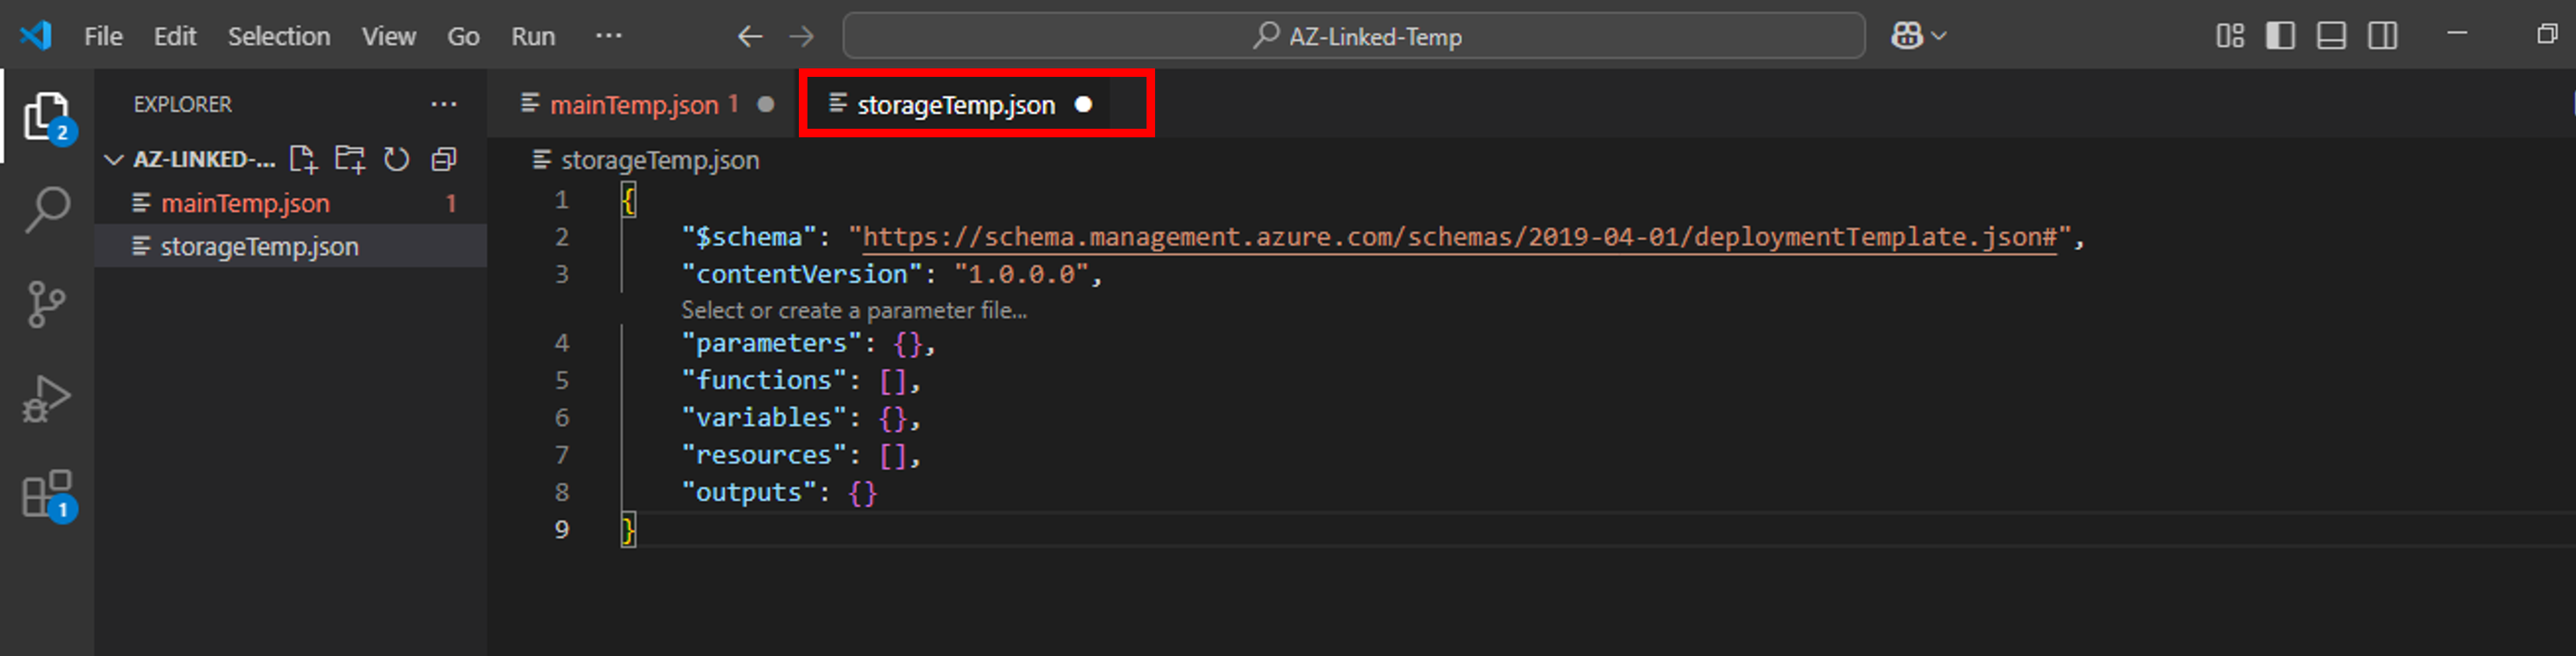
- Open New File from File menu and name it as storageTemp.json. Press enter -> Create File. This will create a blank JSON file with the mentioned name.

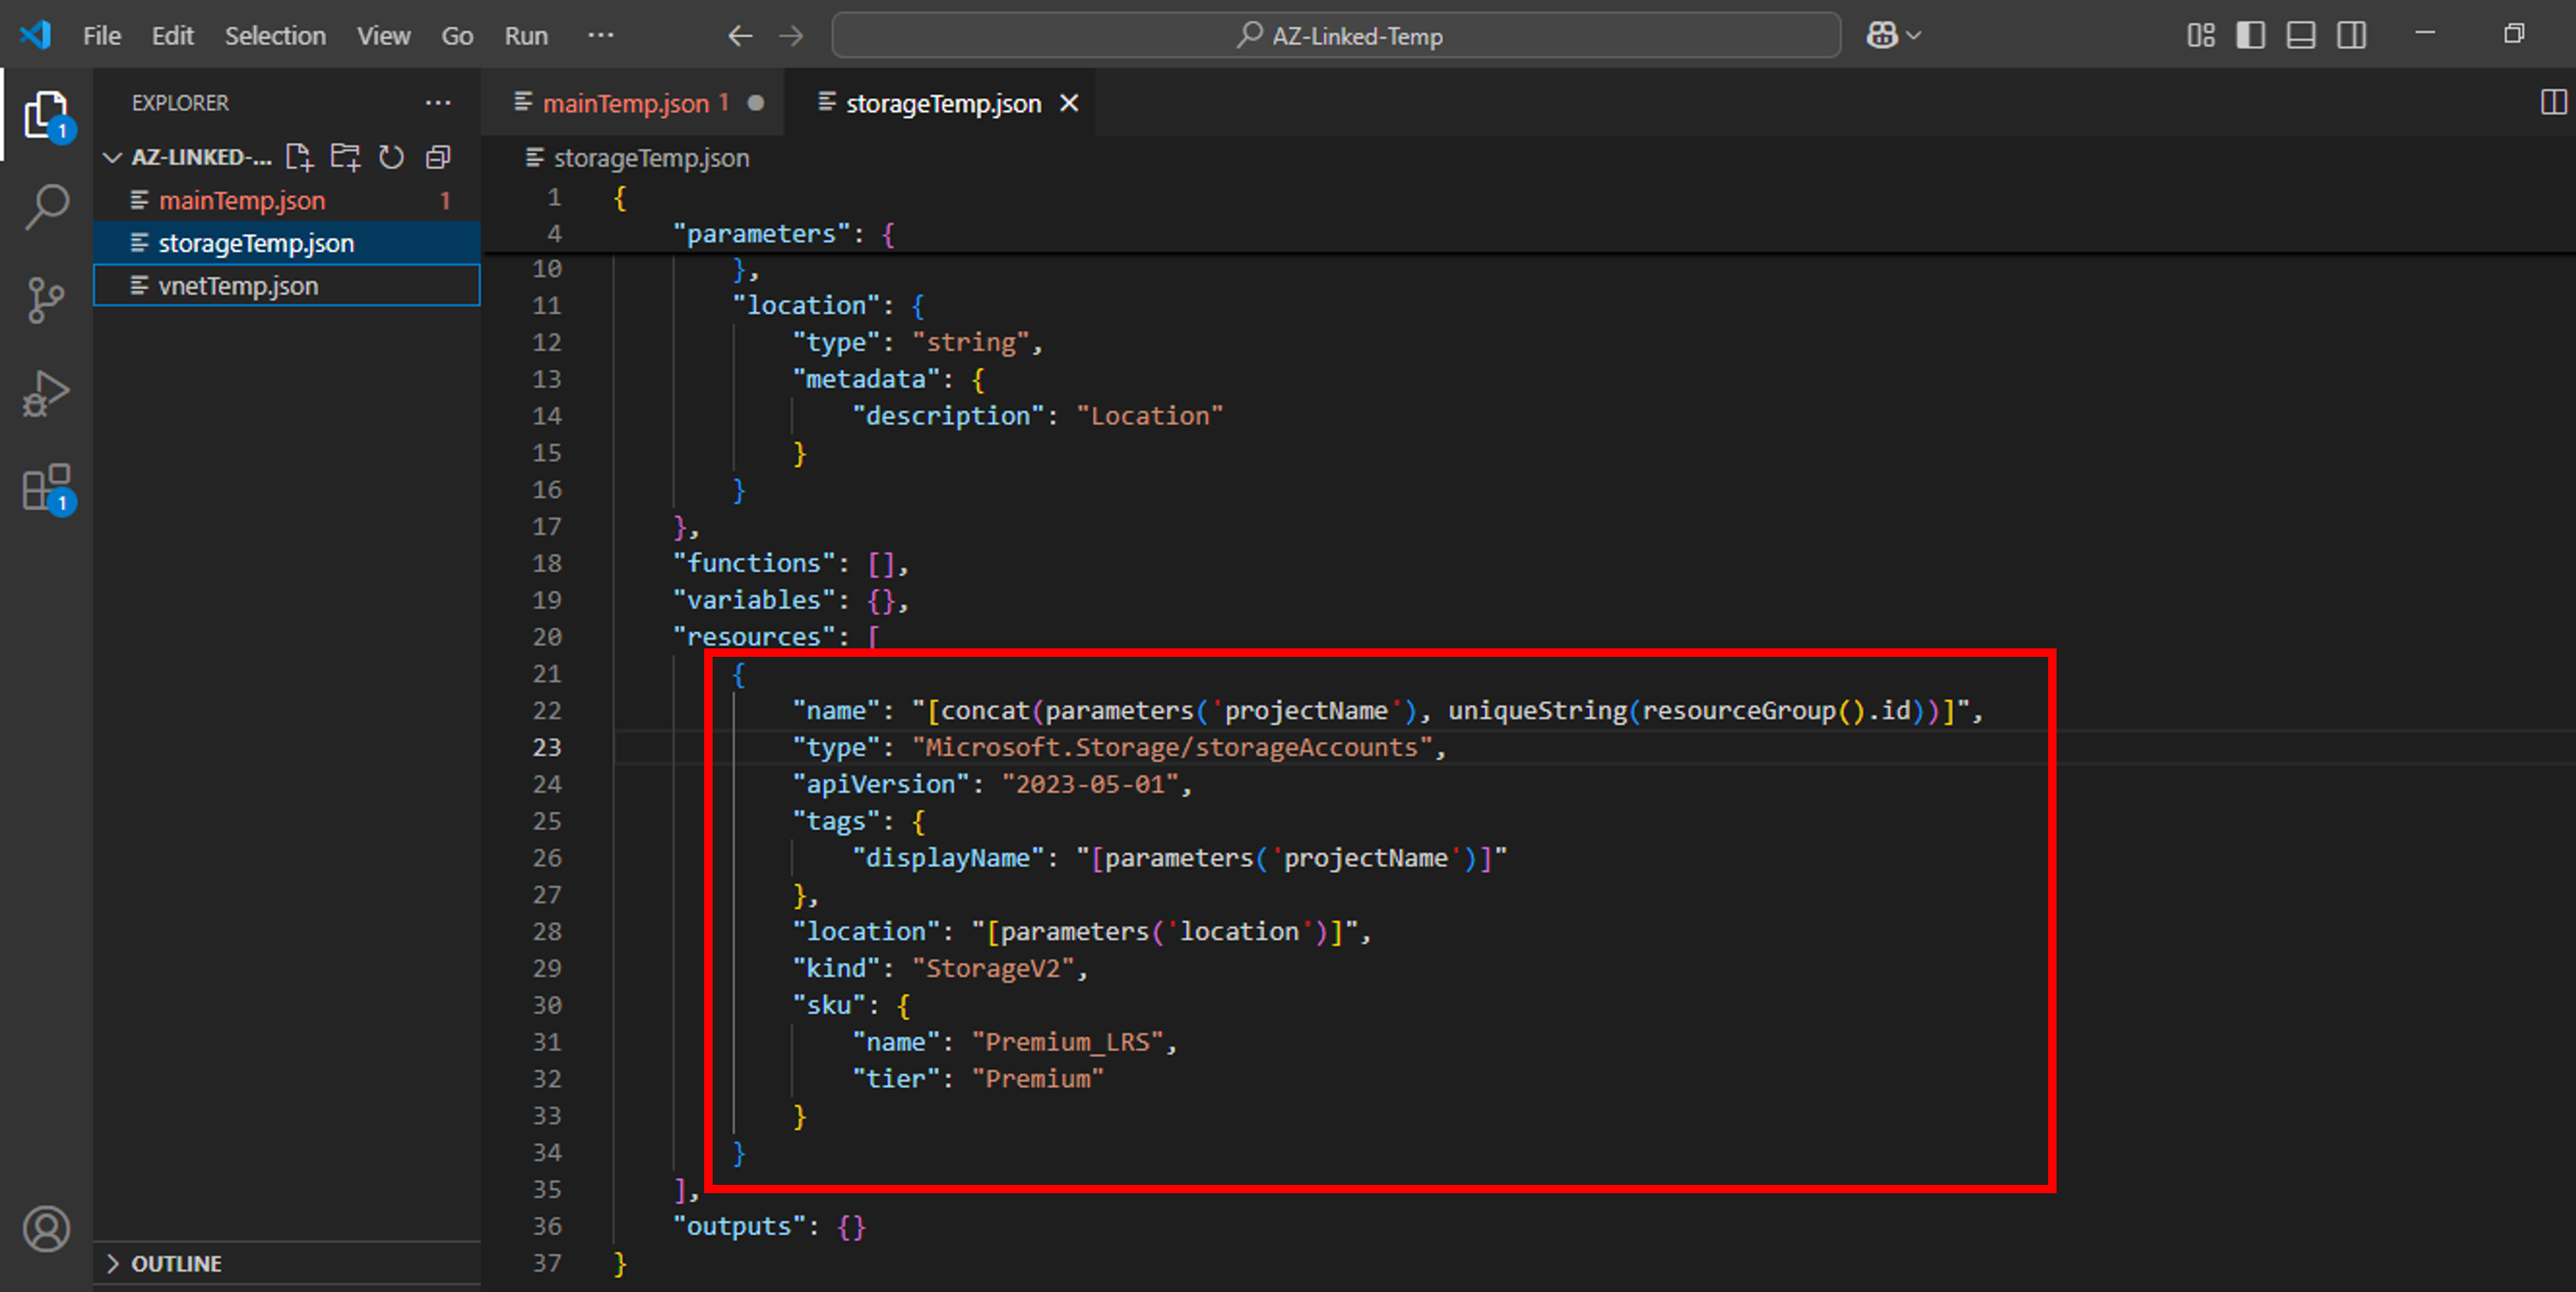
- Next, create two parameters named projectName and location as depicted in snap below. projectName parameter will be used as a prefix to name storage account while location parameter will be used to specify deployment region of the storage account.

- Next, we need to create a storage account resource. Change name, displayName and location property as per the snap below. As Storage Account name must be unique across Azure Cloud, we generate a unique name by concatenating projectName with a 13 place alphanumeric value generated through uniquestring() function.


Create Azure Virtual Network Deployment (Child) Template
Now, we need to create a child template for Azure virtual network deployment.
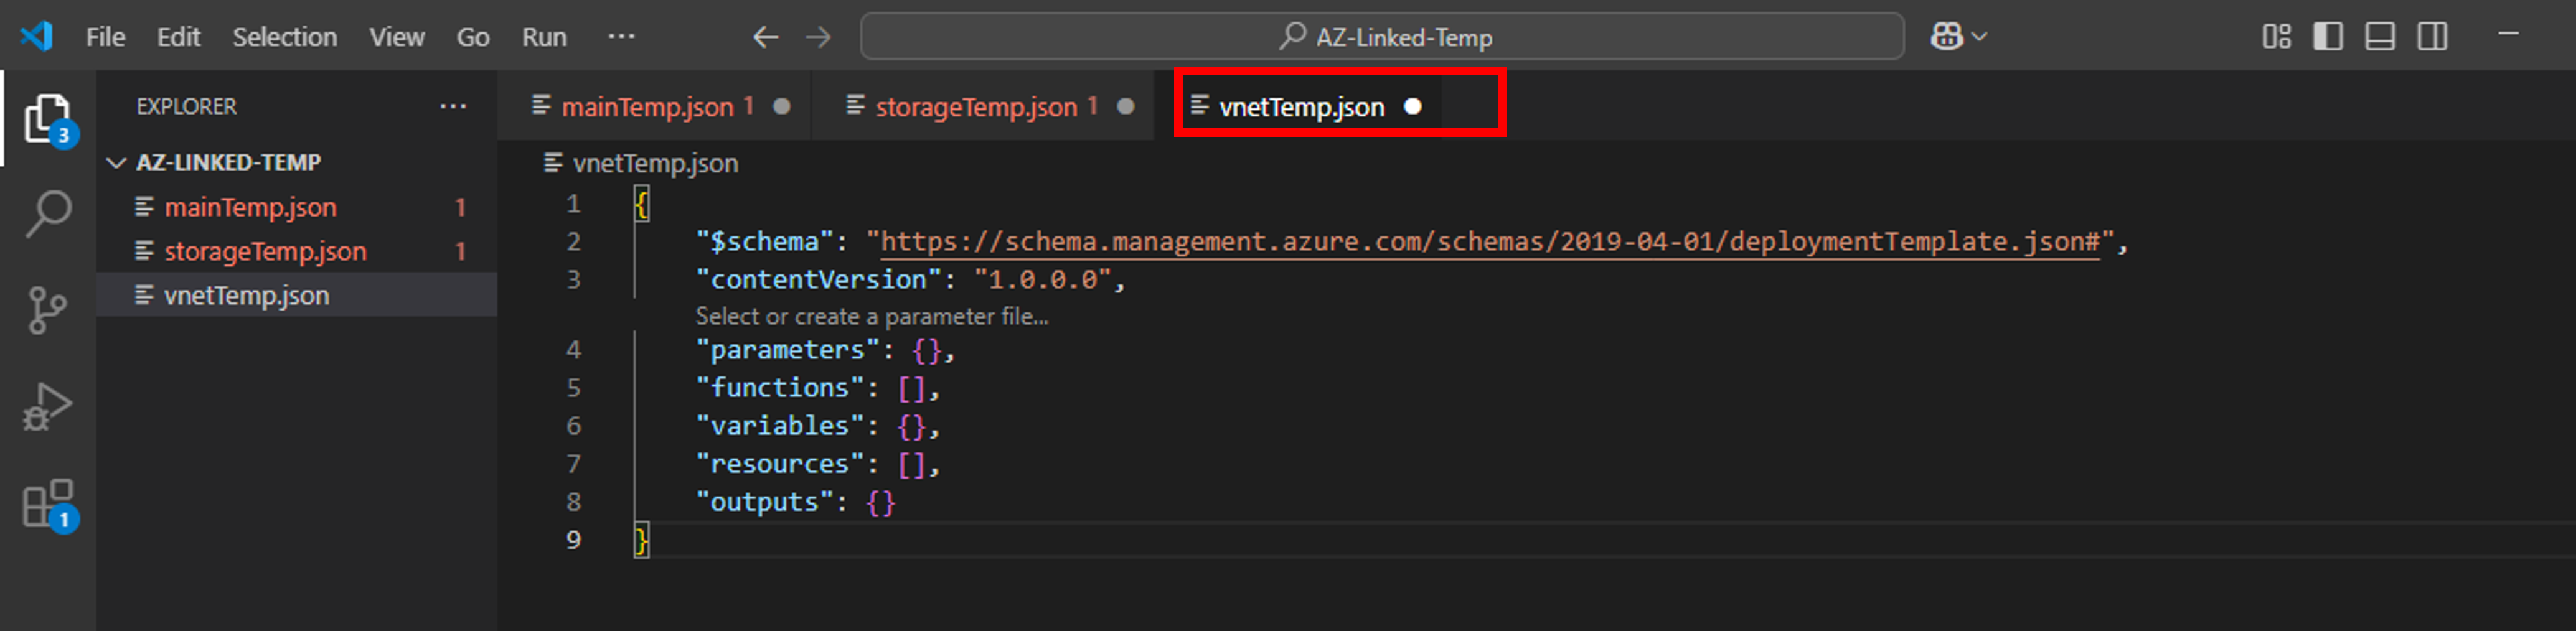
- Open New File from File menu and name it as vnetTemp.json. Press enter -> Create File. This will create a blank JSON file with the mentioned name.

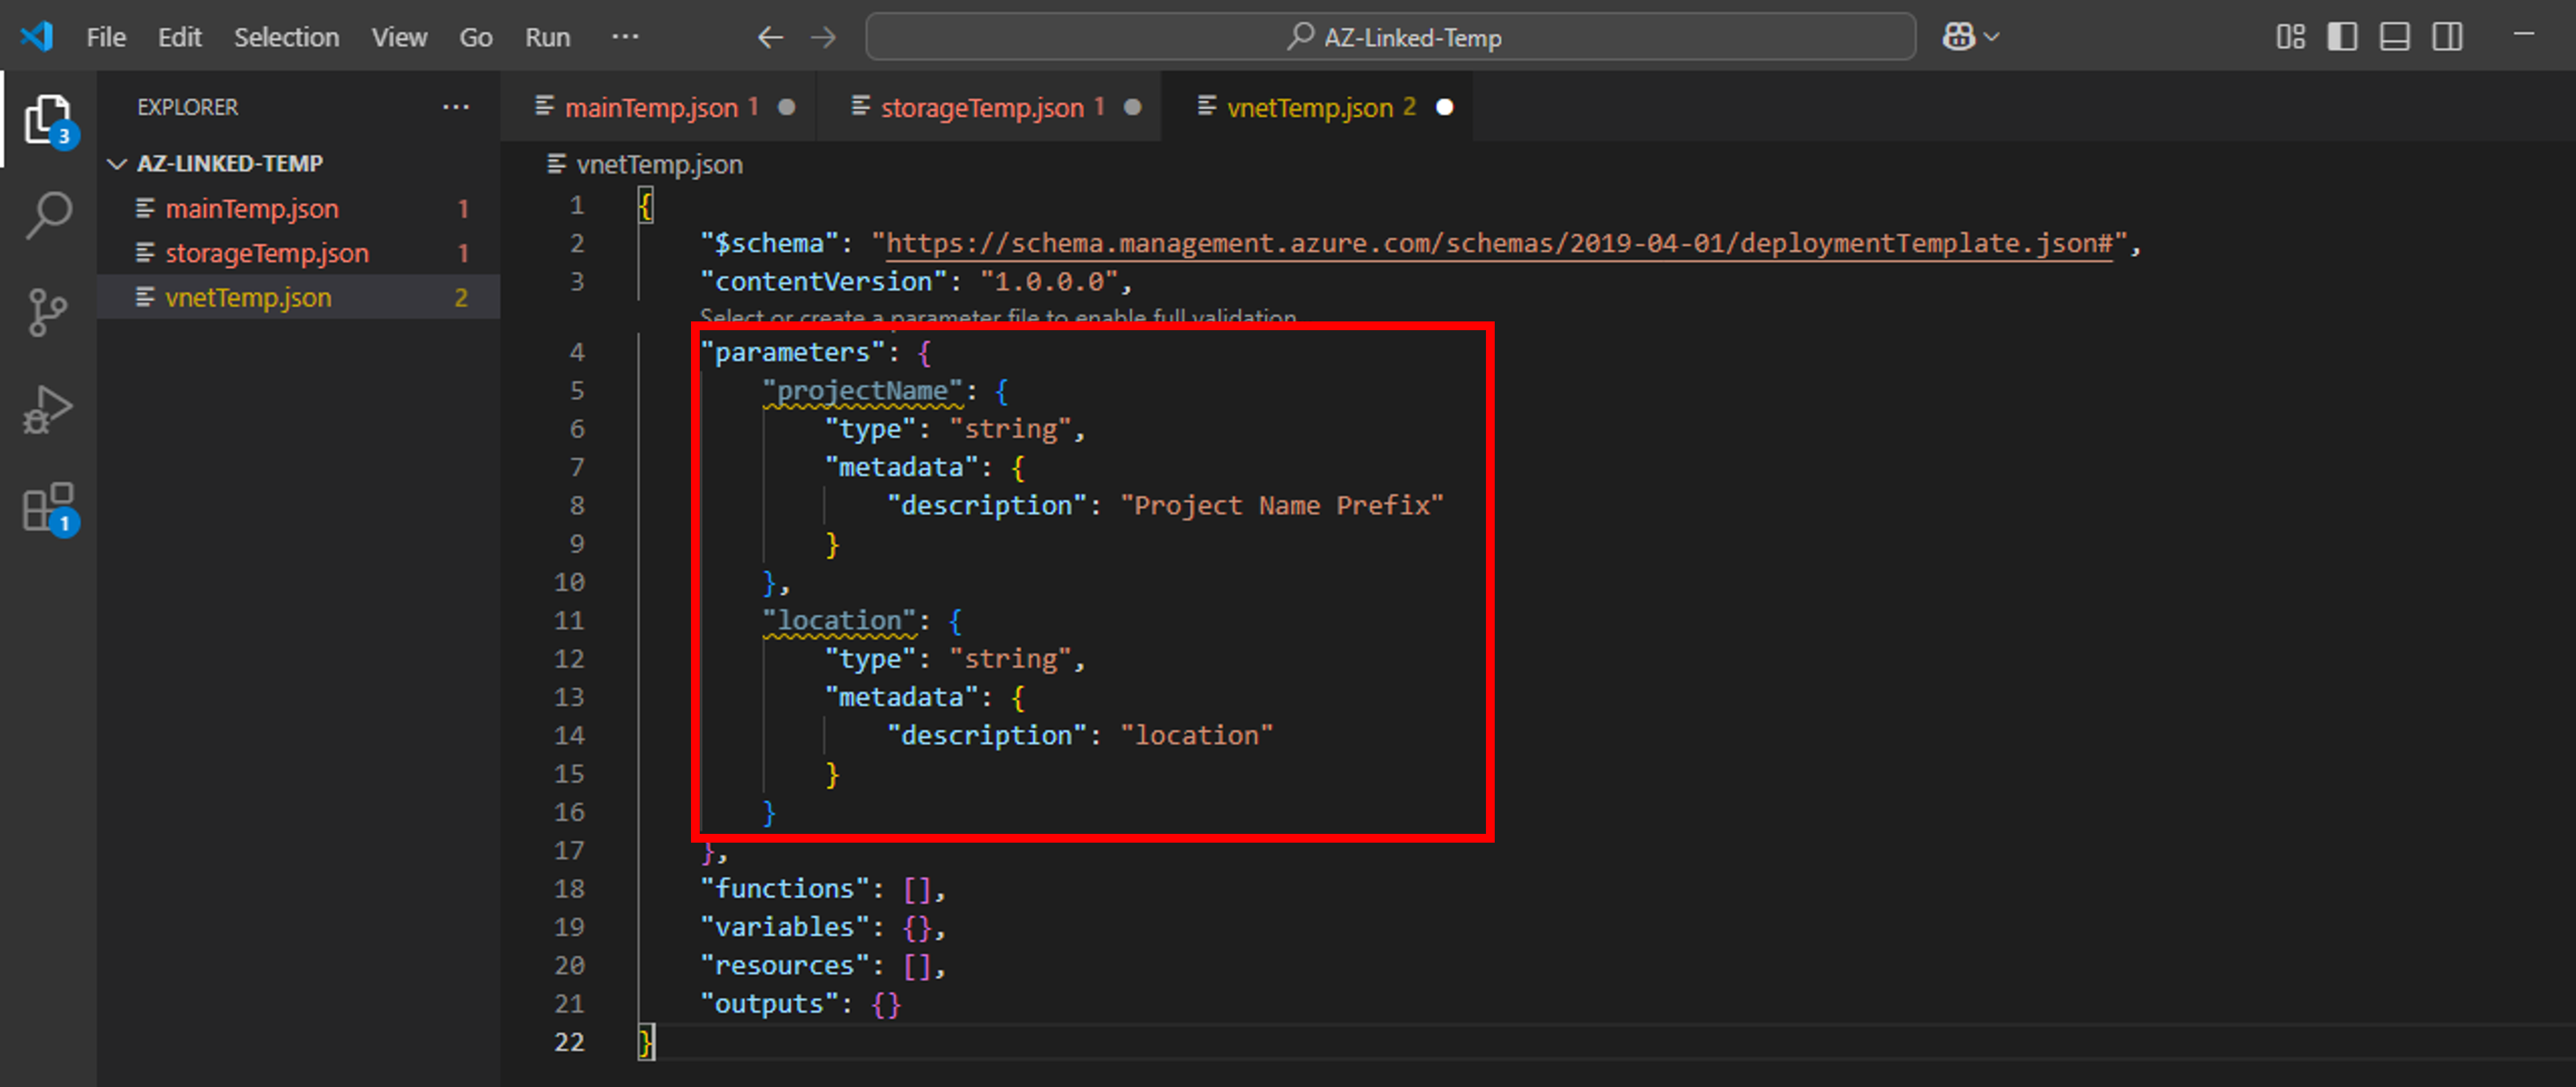
- Next, create two parameters named projectName and location as depicted in snap below. projectName parameter will be used as a prefix to name vnet while location parameter will be used to specify deployment region of the virtual network.

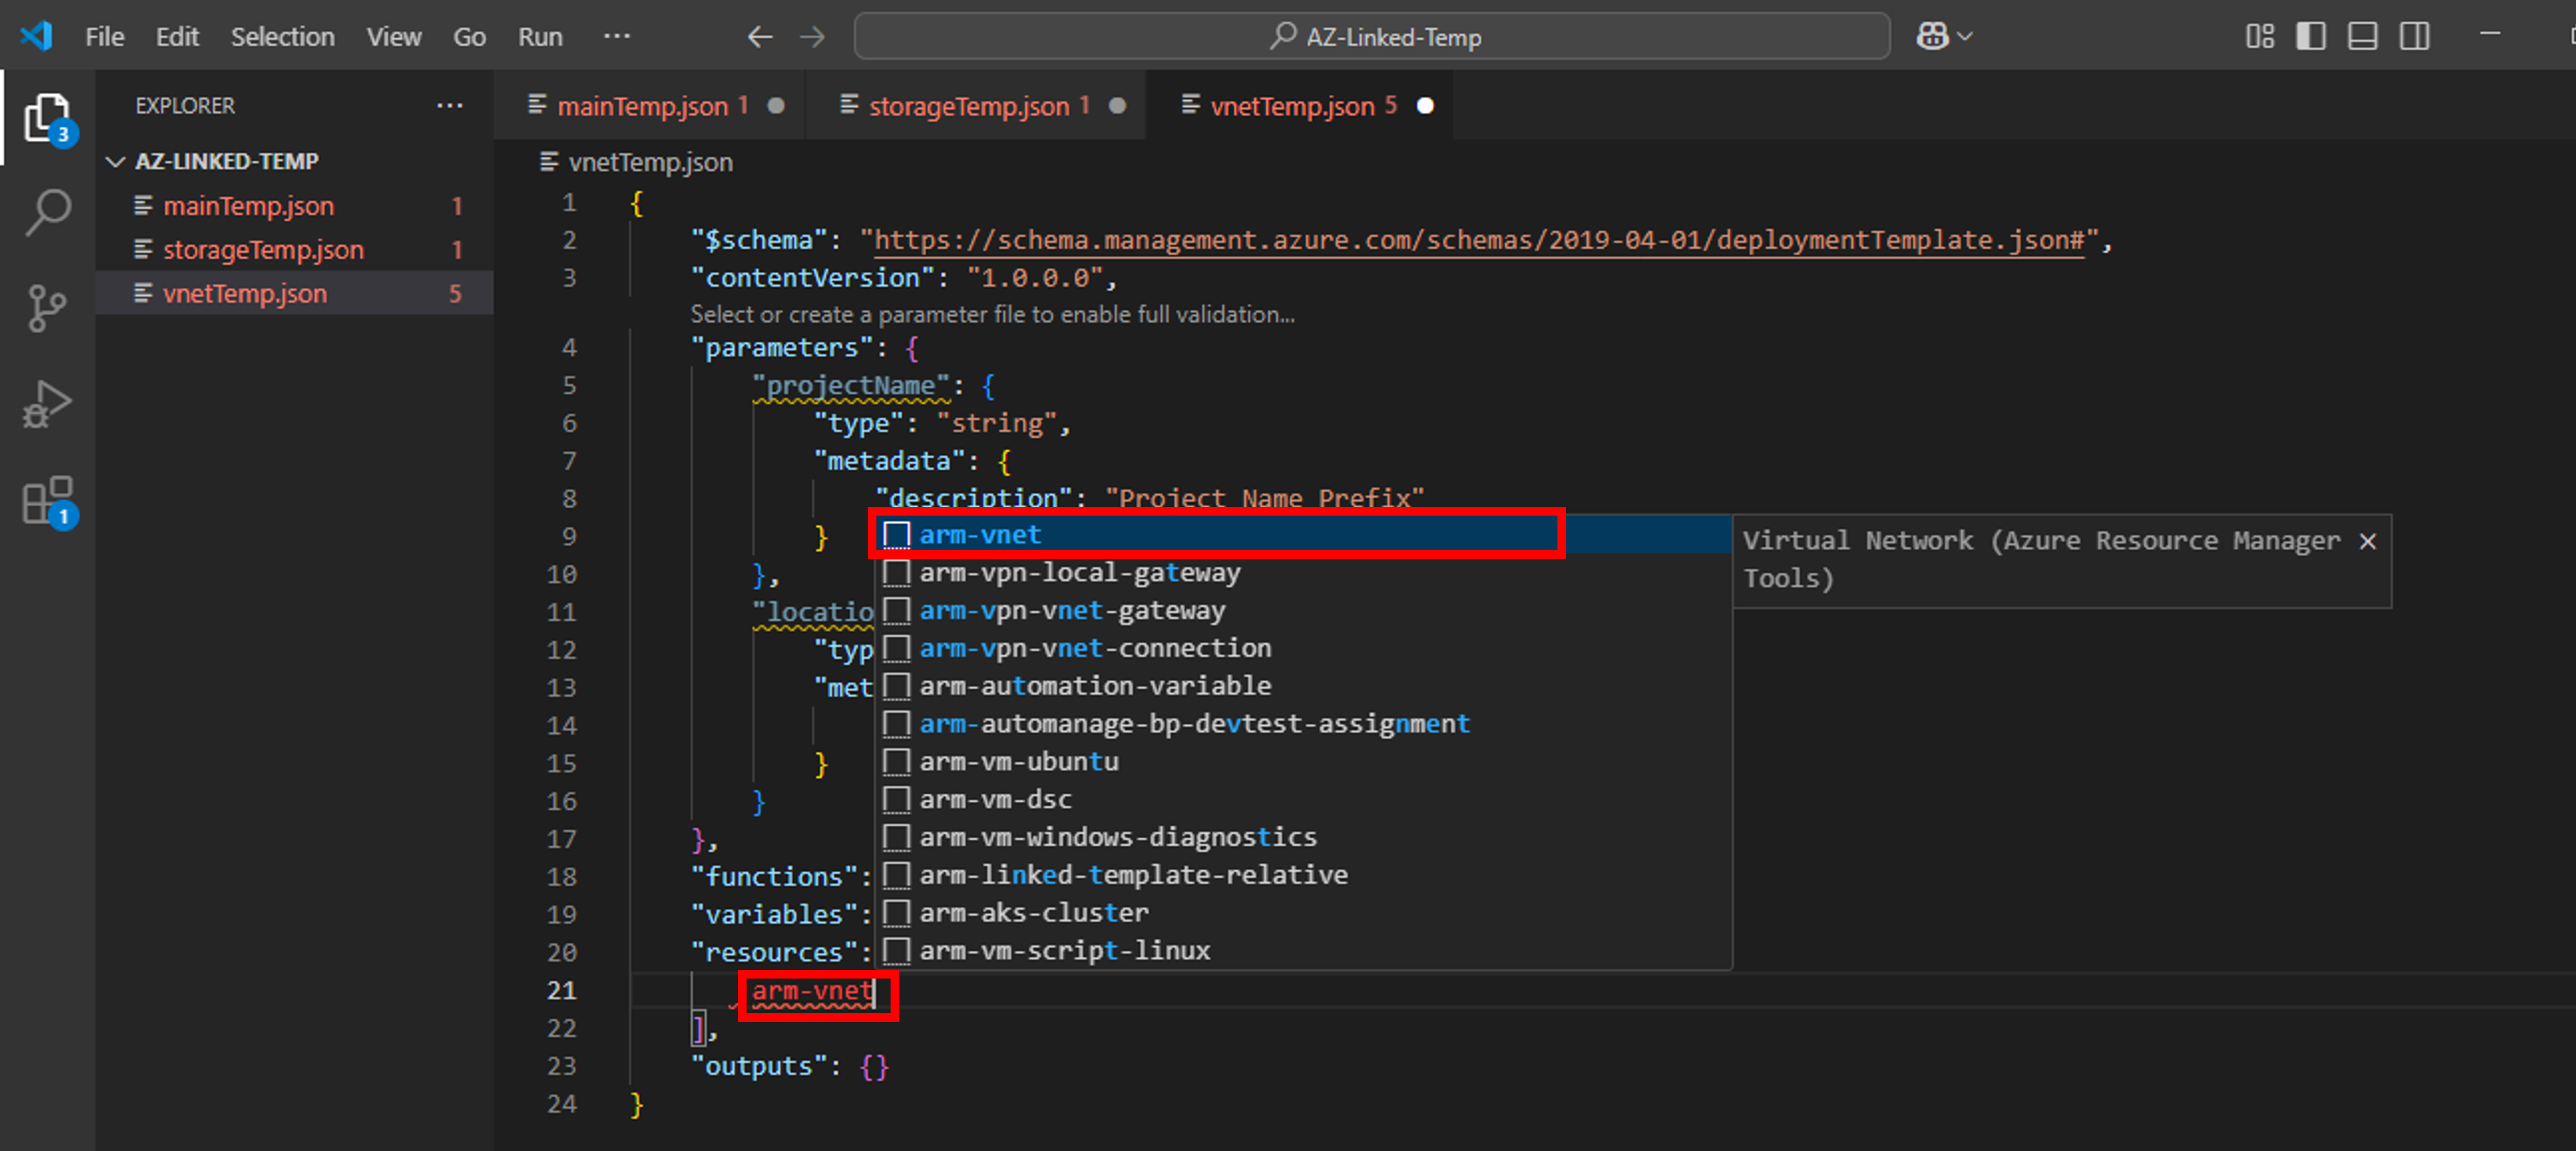
- Next, we need to create a vnet resource. Place your cursor in the template resources block, type arm-vnet, and select arm-vnet snippet

- A new resource named “virtualNetwork1” with default properties shall be added to the template

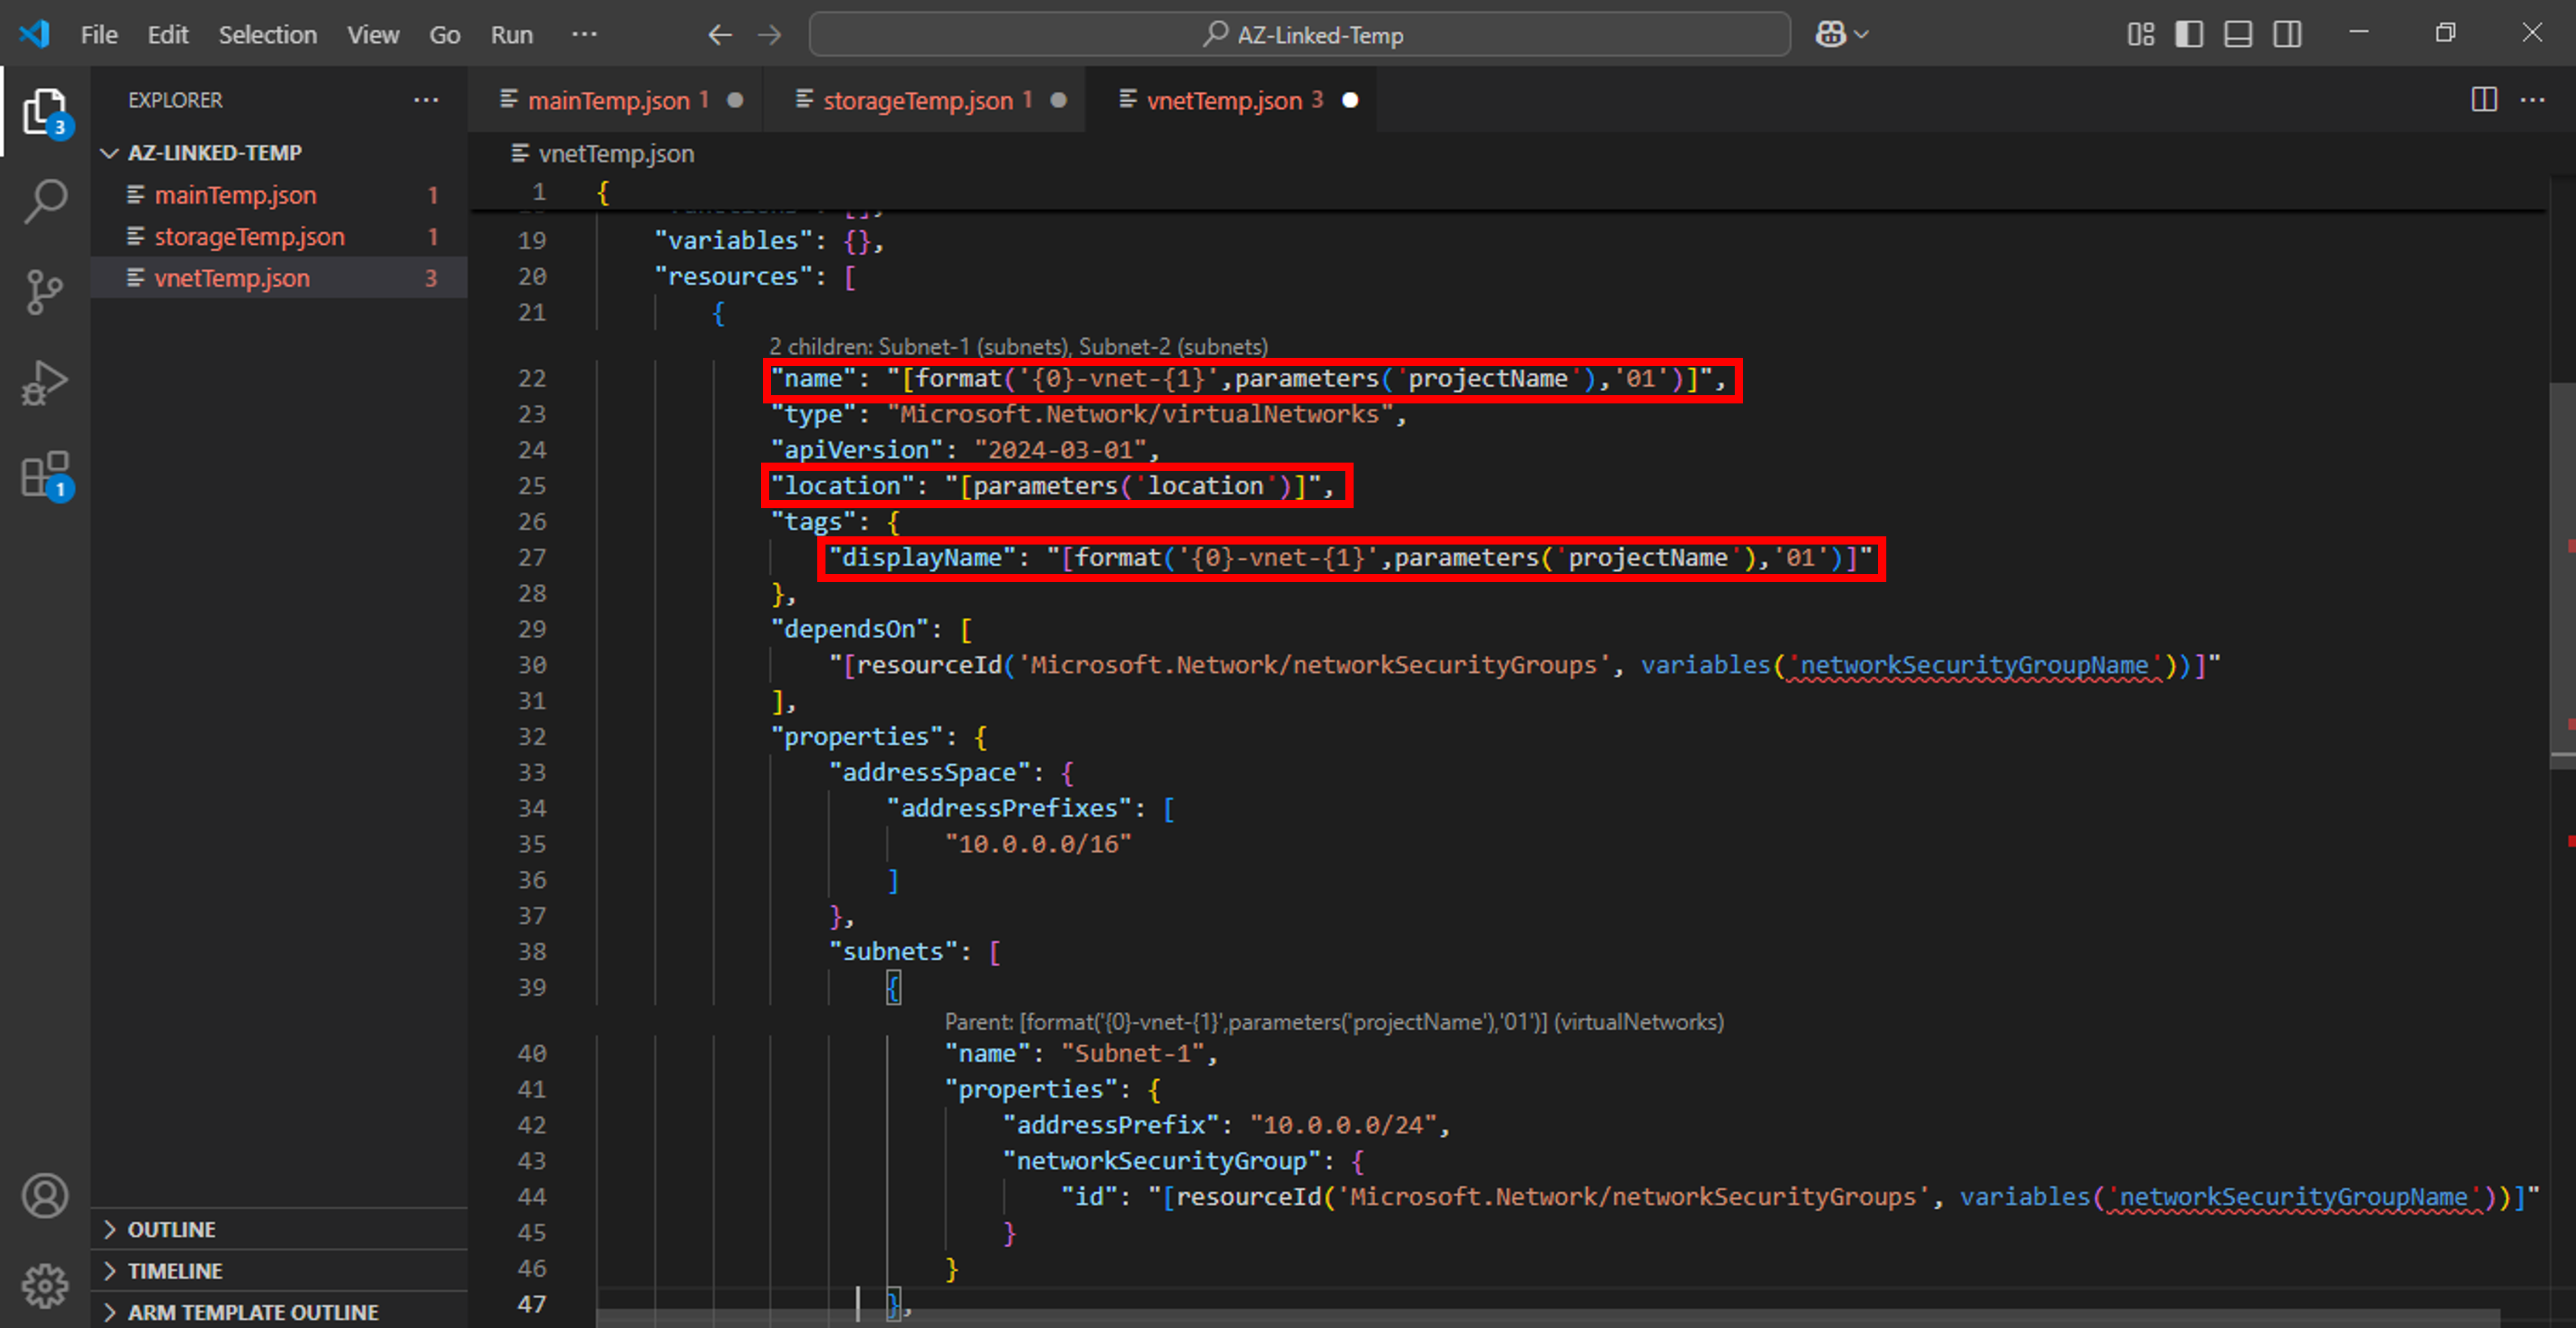
- Change name, displayName and location property as per the snap below. Note that I have used format() function to define name of vnet resource. format() function is used to create dynamic strings by inserting values into a string pattern. Its syntax is format(string, arg1, arg2, …) where placeholders like {0}, {1} and non-changing text are used in place of string value. {0} refers to arg1, {1} refers to arg2 and so on. In our case, -vnet- is non-changing text.

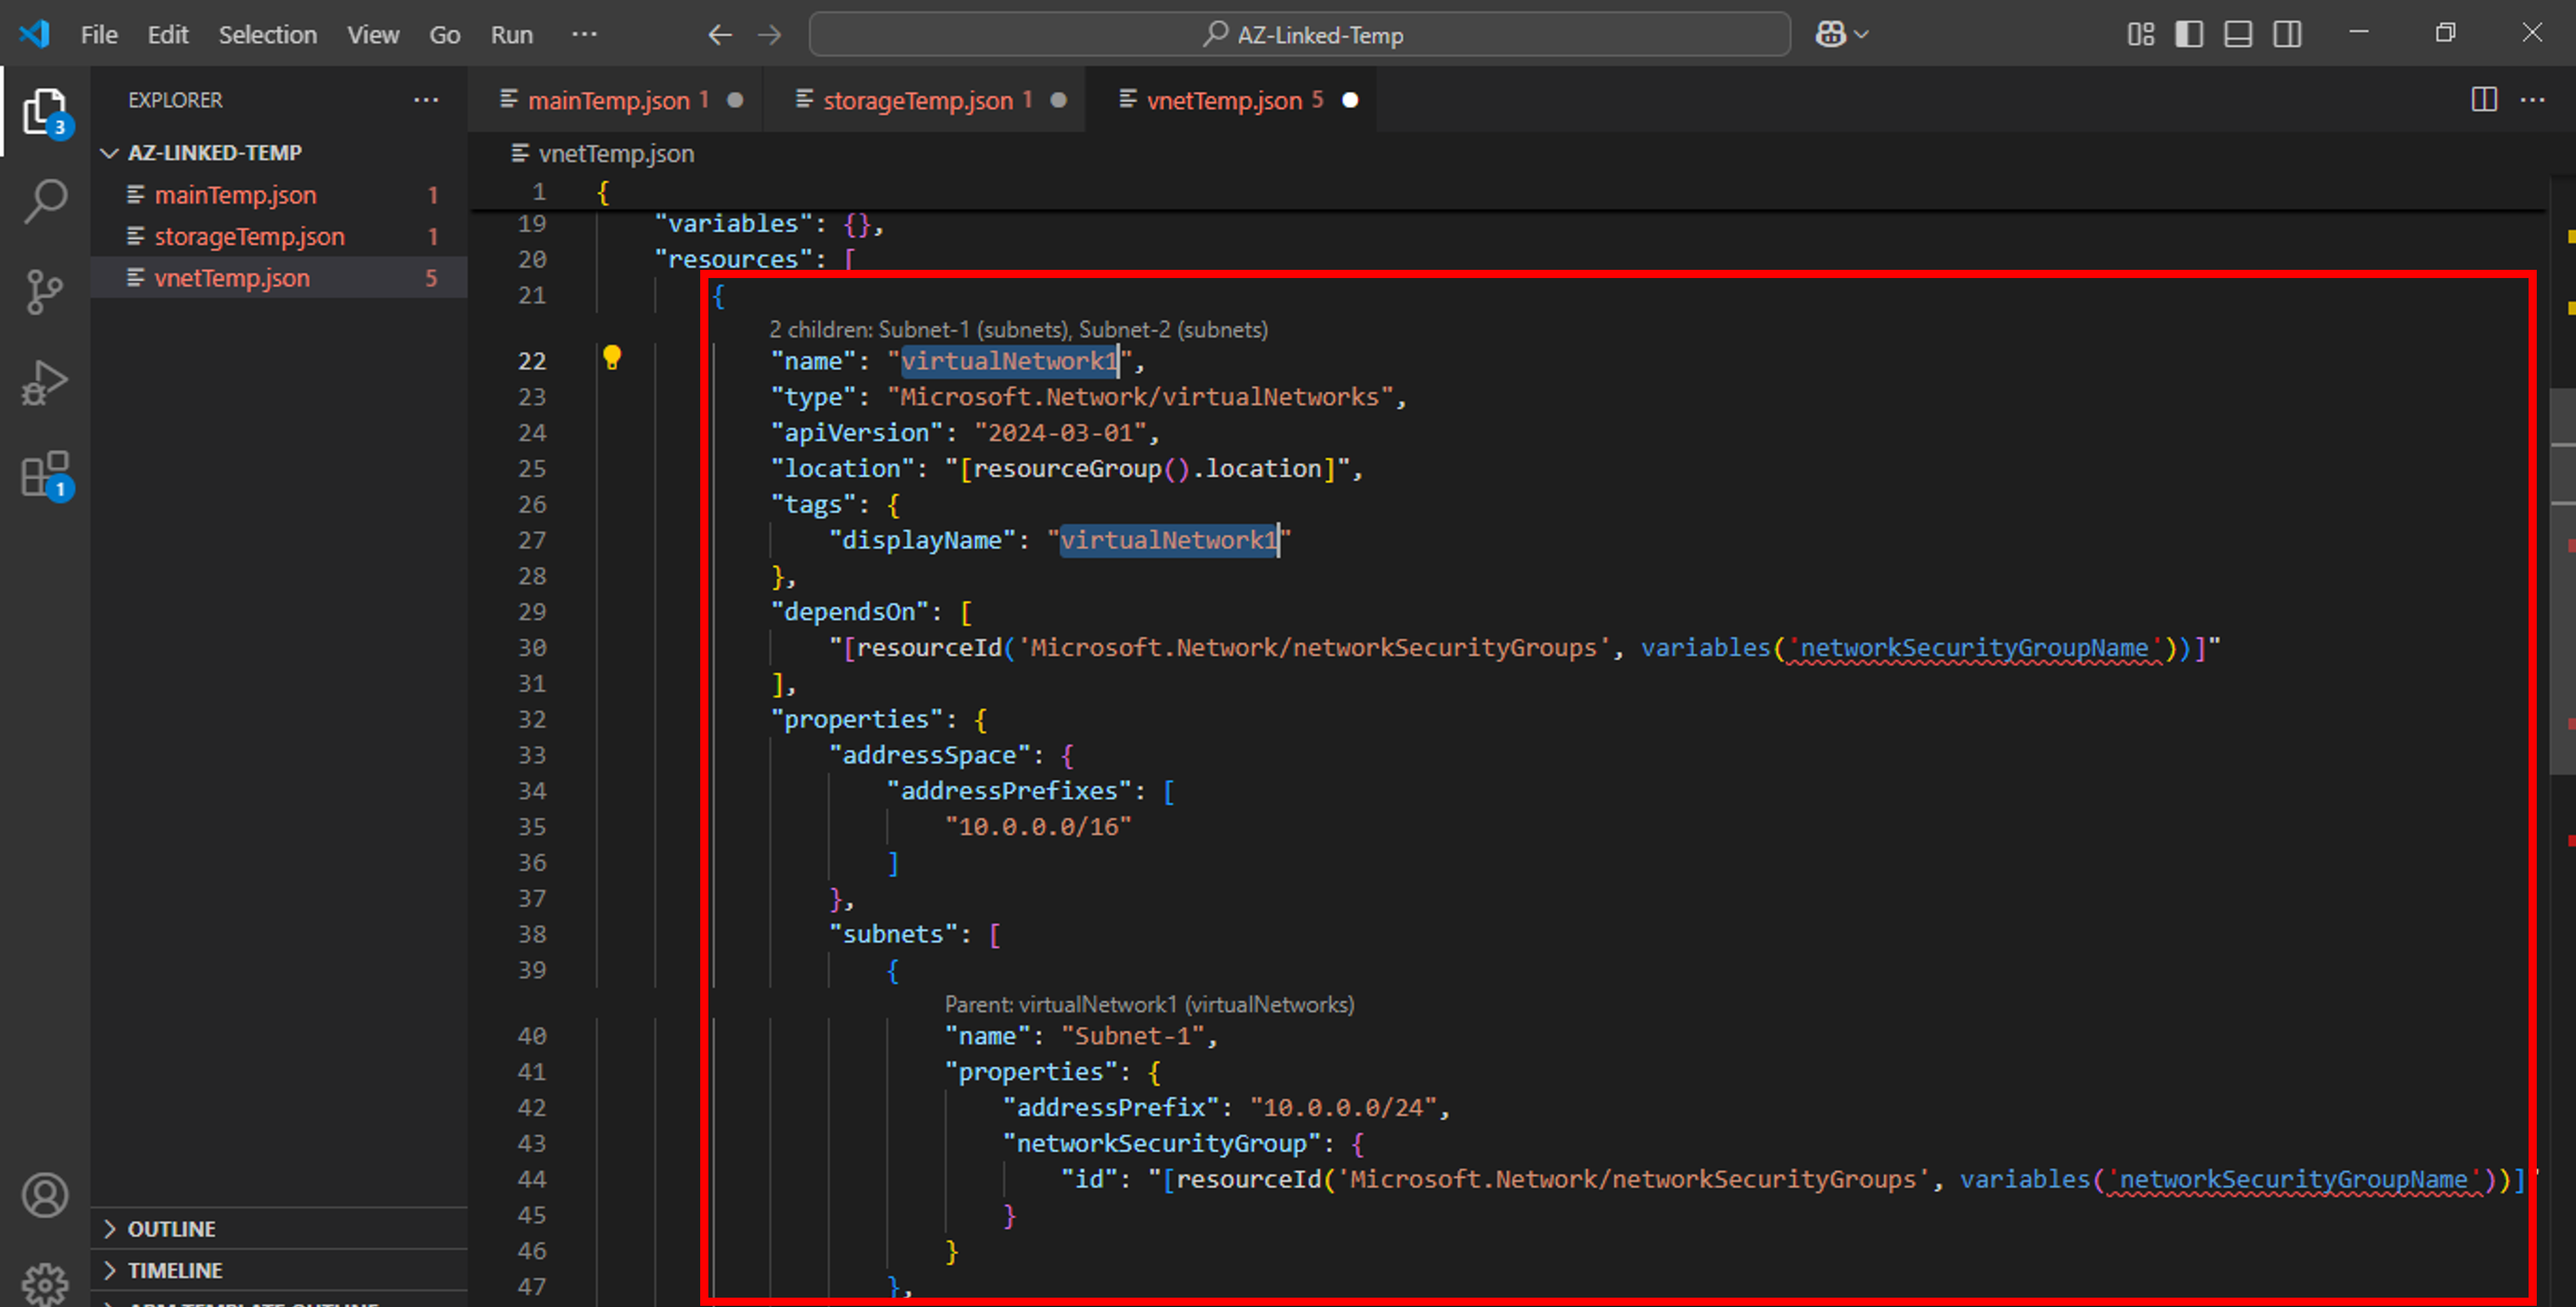
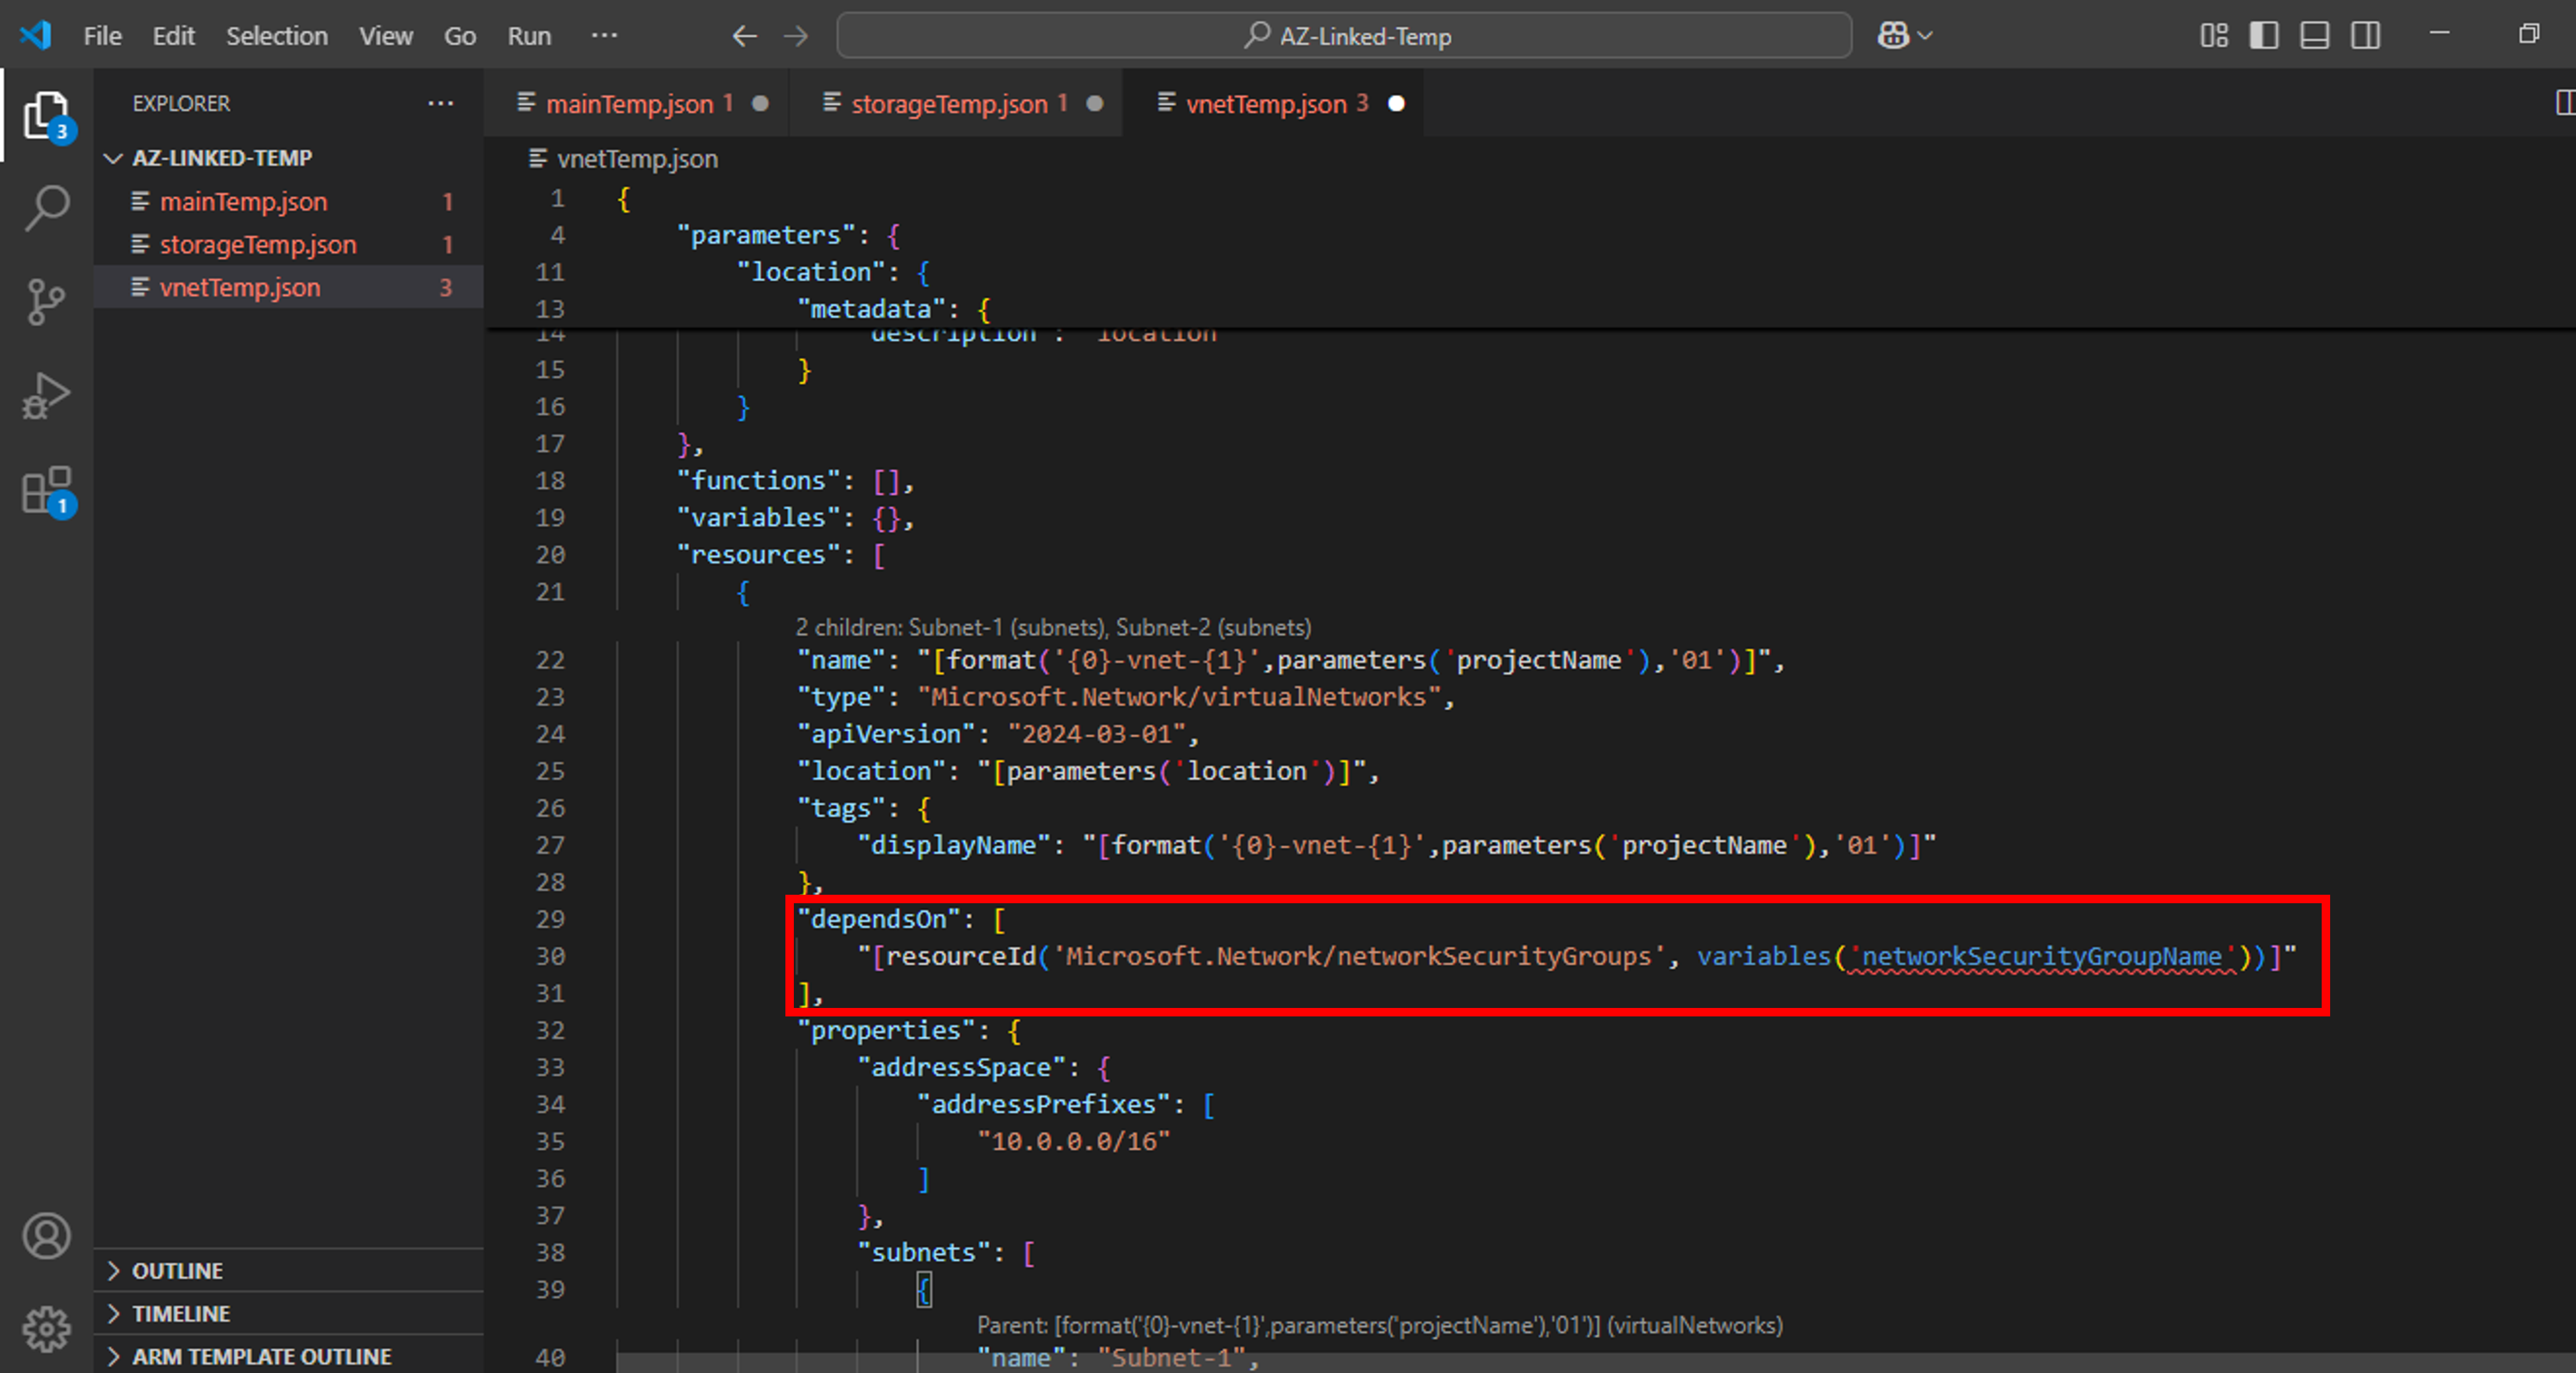
- The dependsOn element enables you to define a resource as dependent on one or more resources. A resource cannot be deployed unless its dependency mentioned in the dependson element has been fulfilled by creating the mentioned resource first. A vnet resource depends on Network Security Group which is why this appears in default snippet. However, for ease of deployment in this tutorial, remove depends on element highlighted in snap below so that we don’t have to create Network Security Group resource.

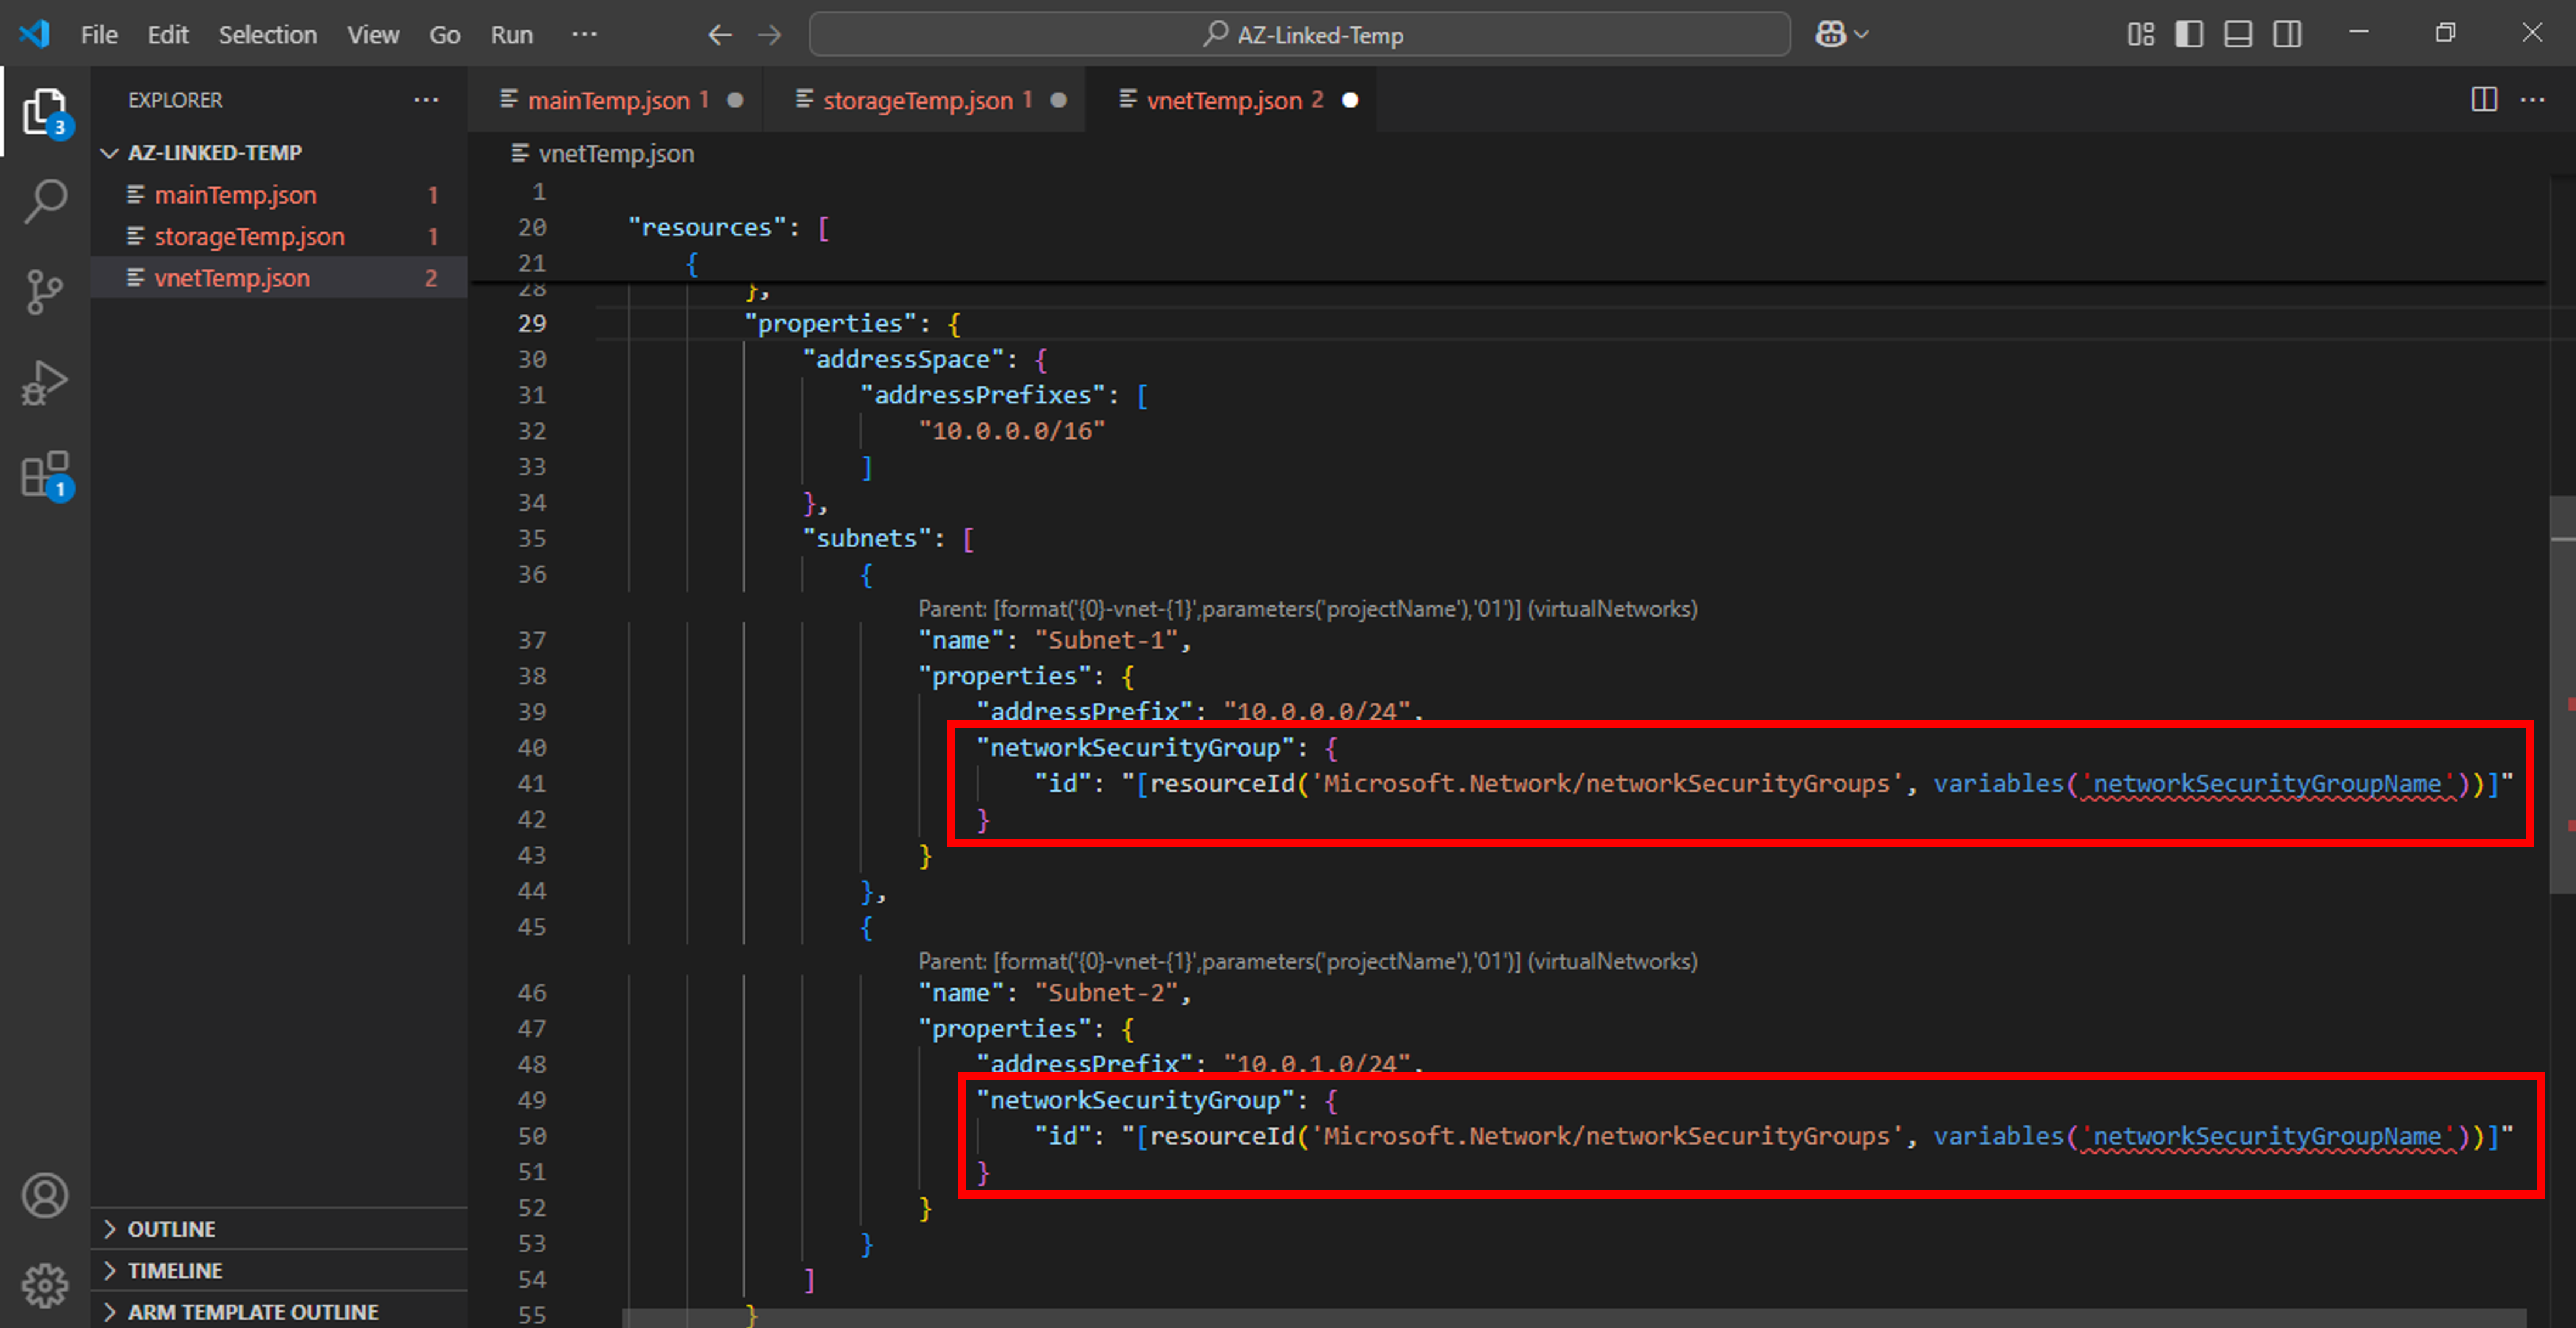
- Remove networkSecurityGroup property in the subnets section as well.
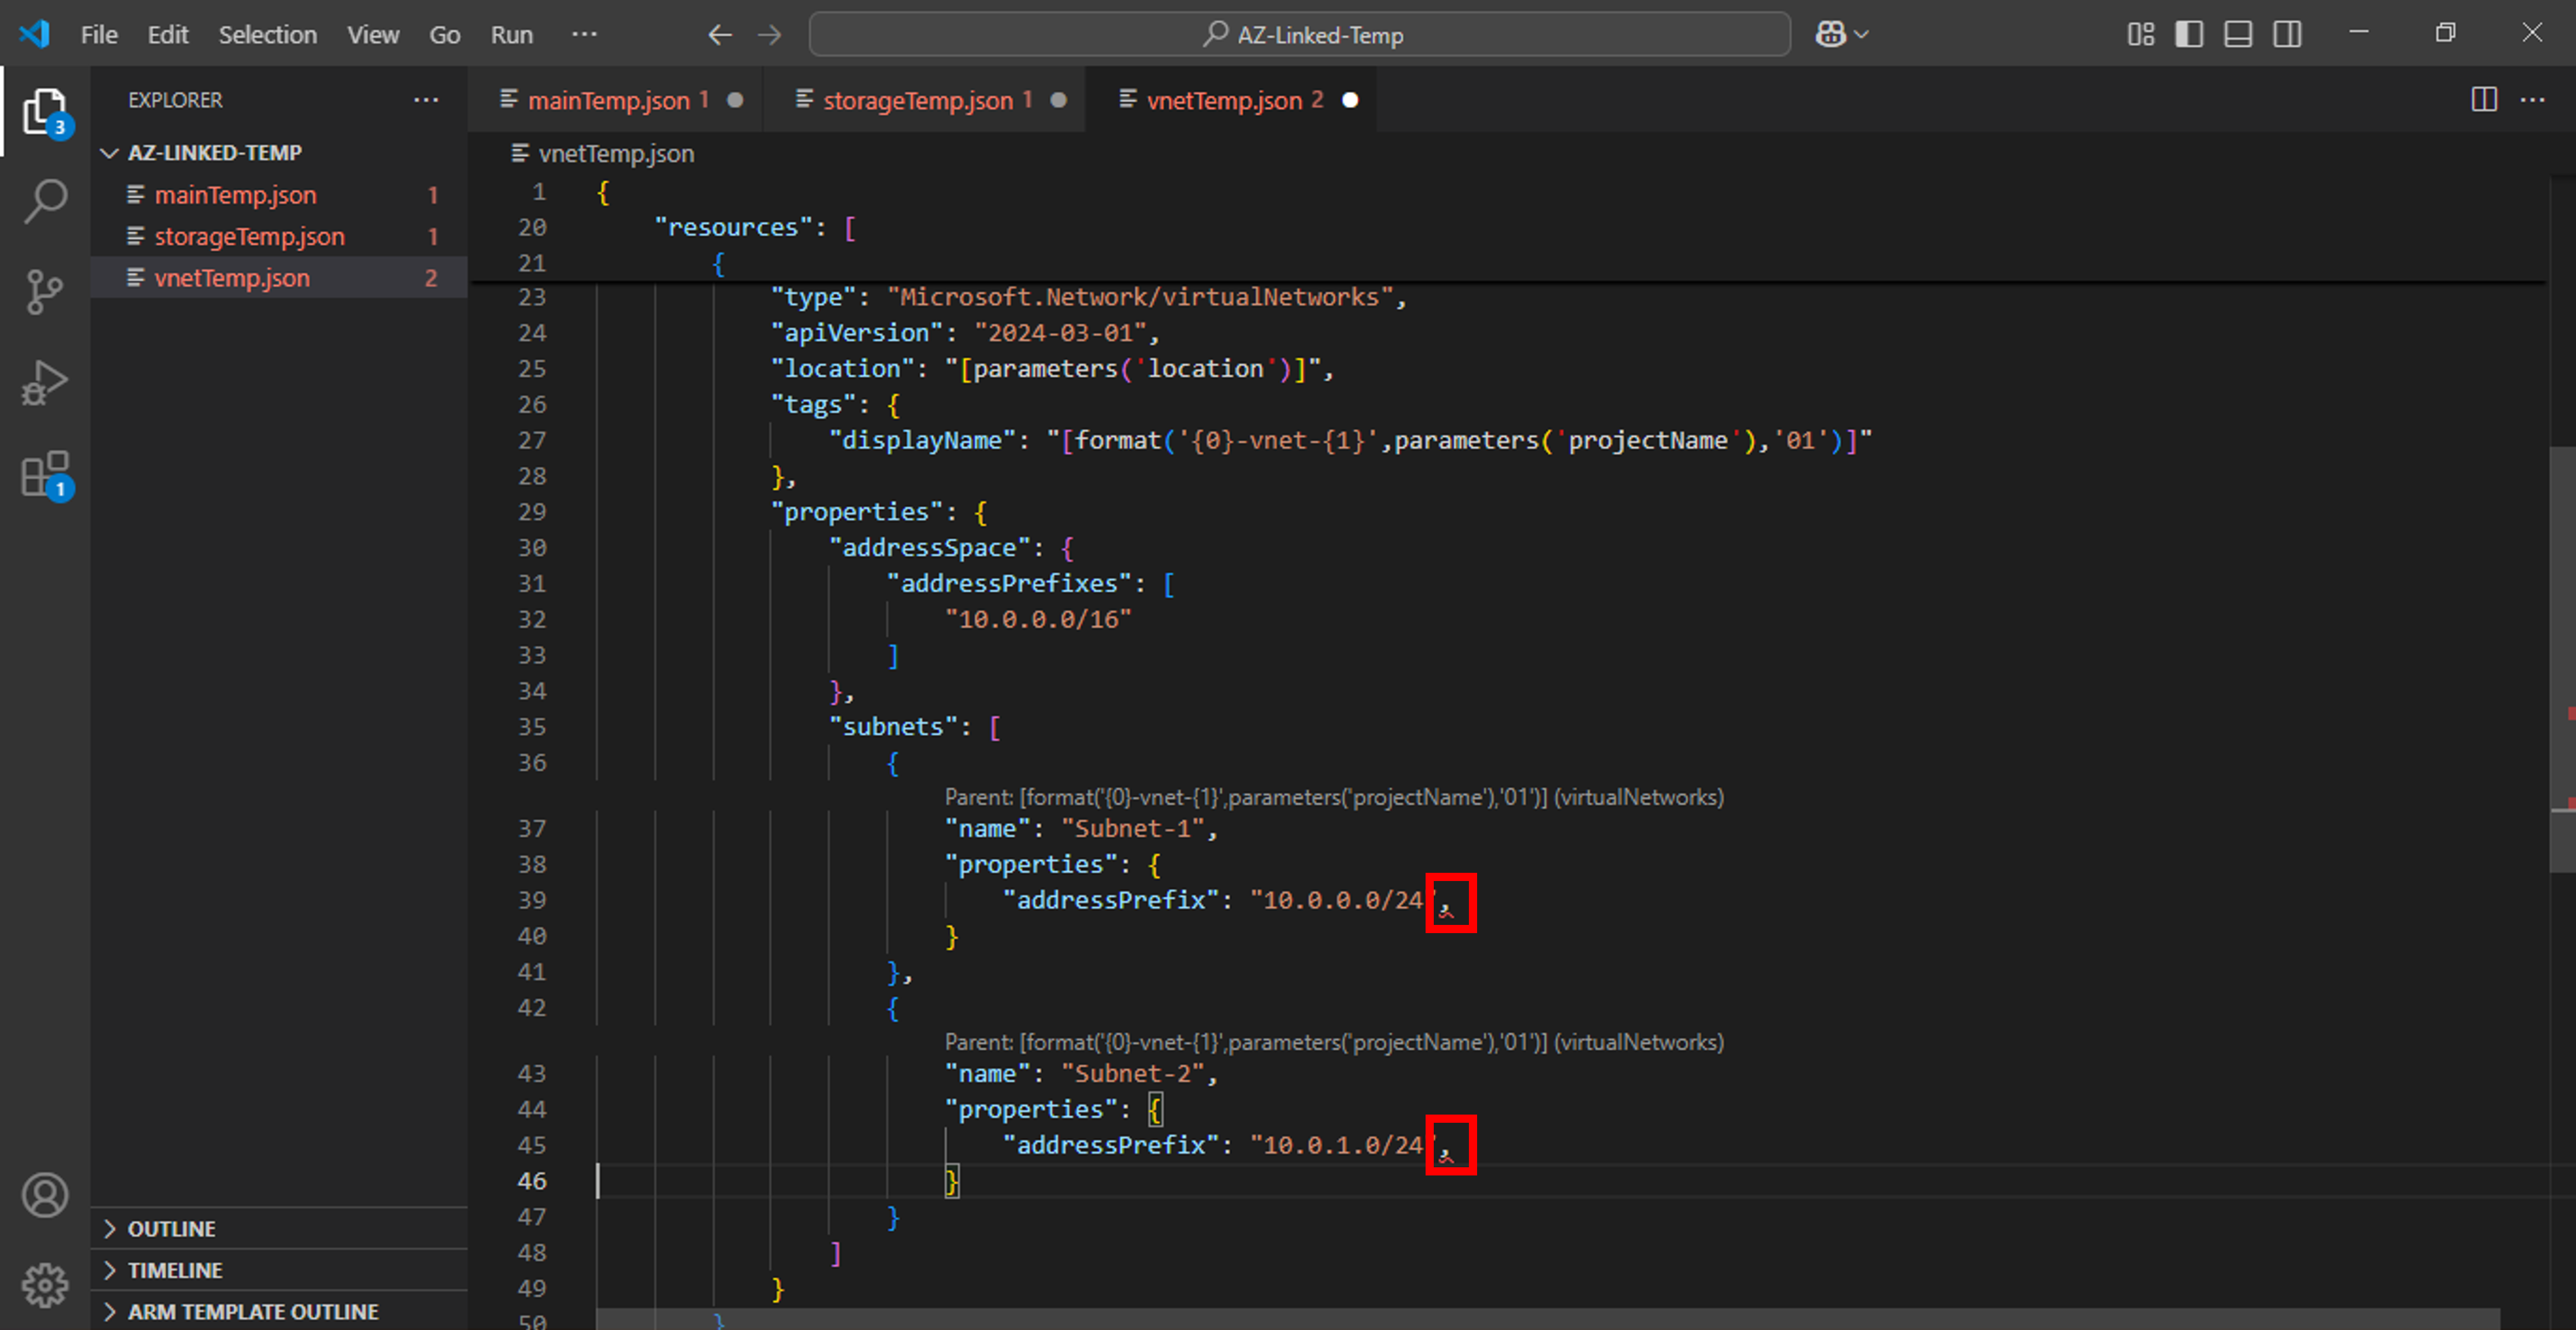
- Remember to remove , at the end of addressprefix.

Stage Linked Templates on GitHub
Now, we need to stage both the linked templates on GitHub.
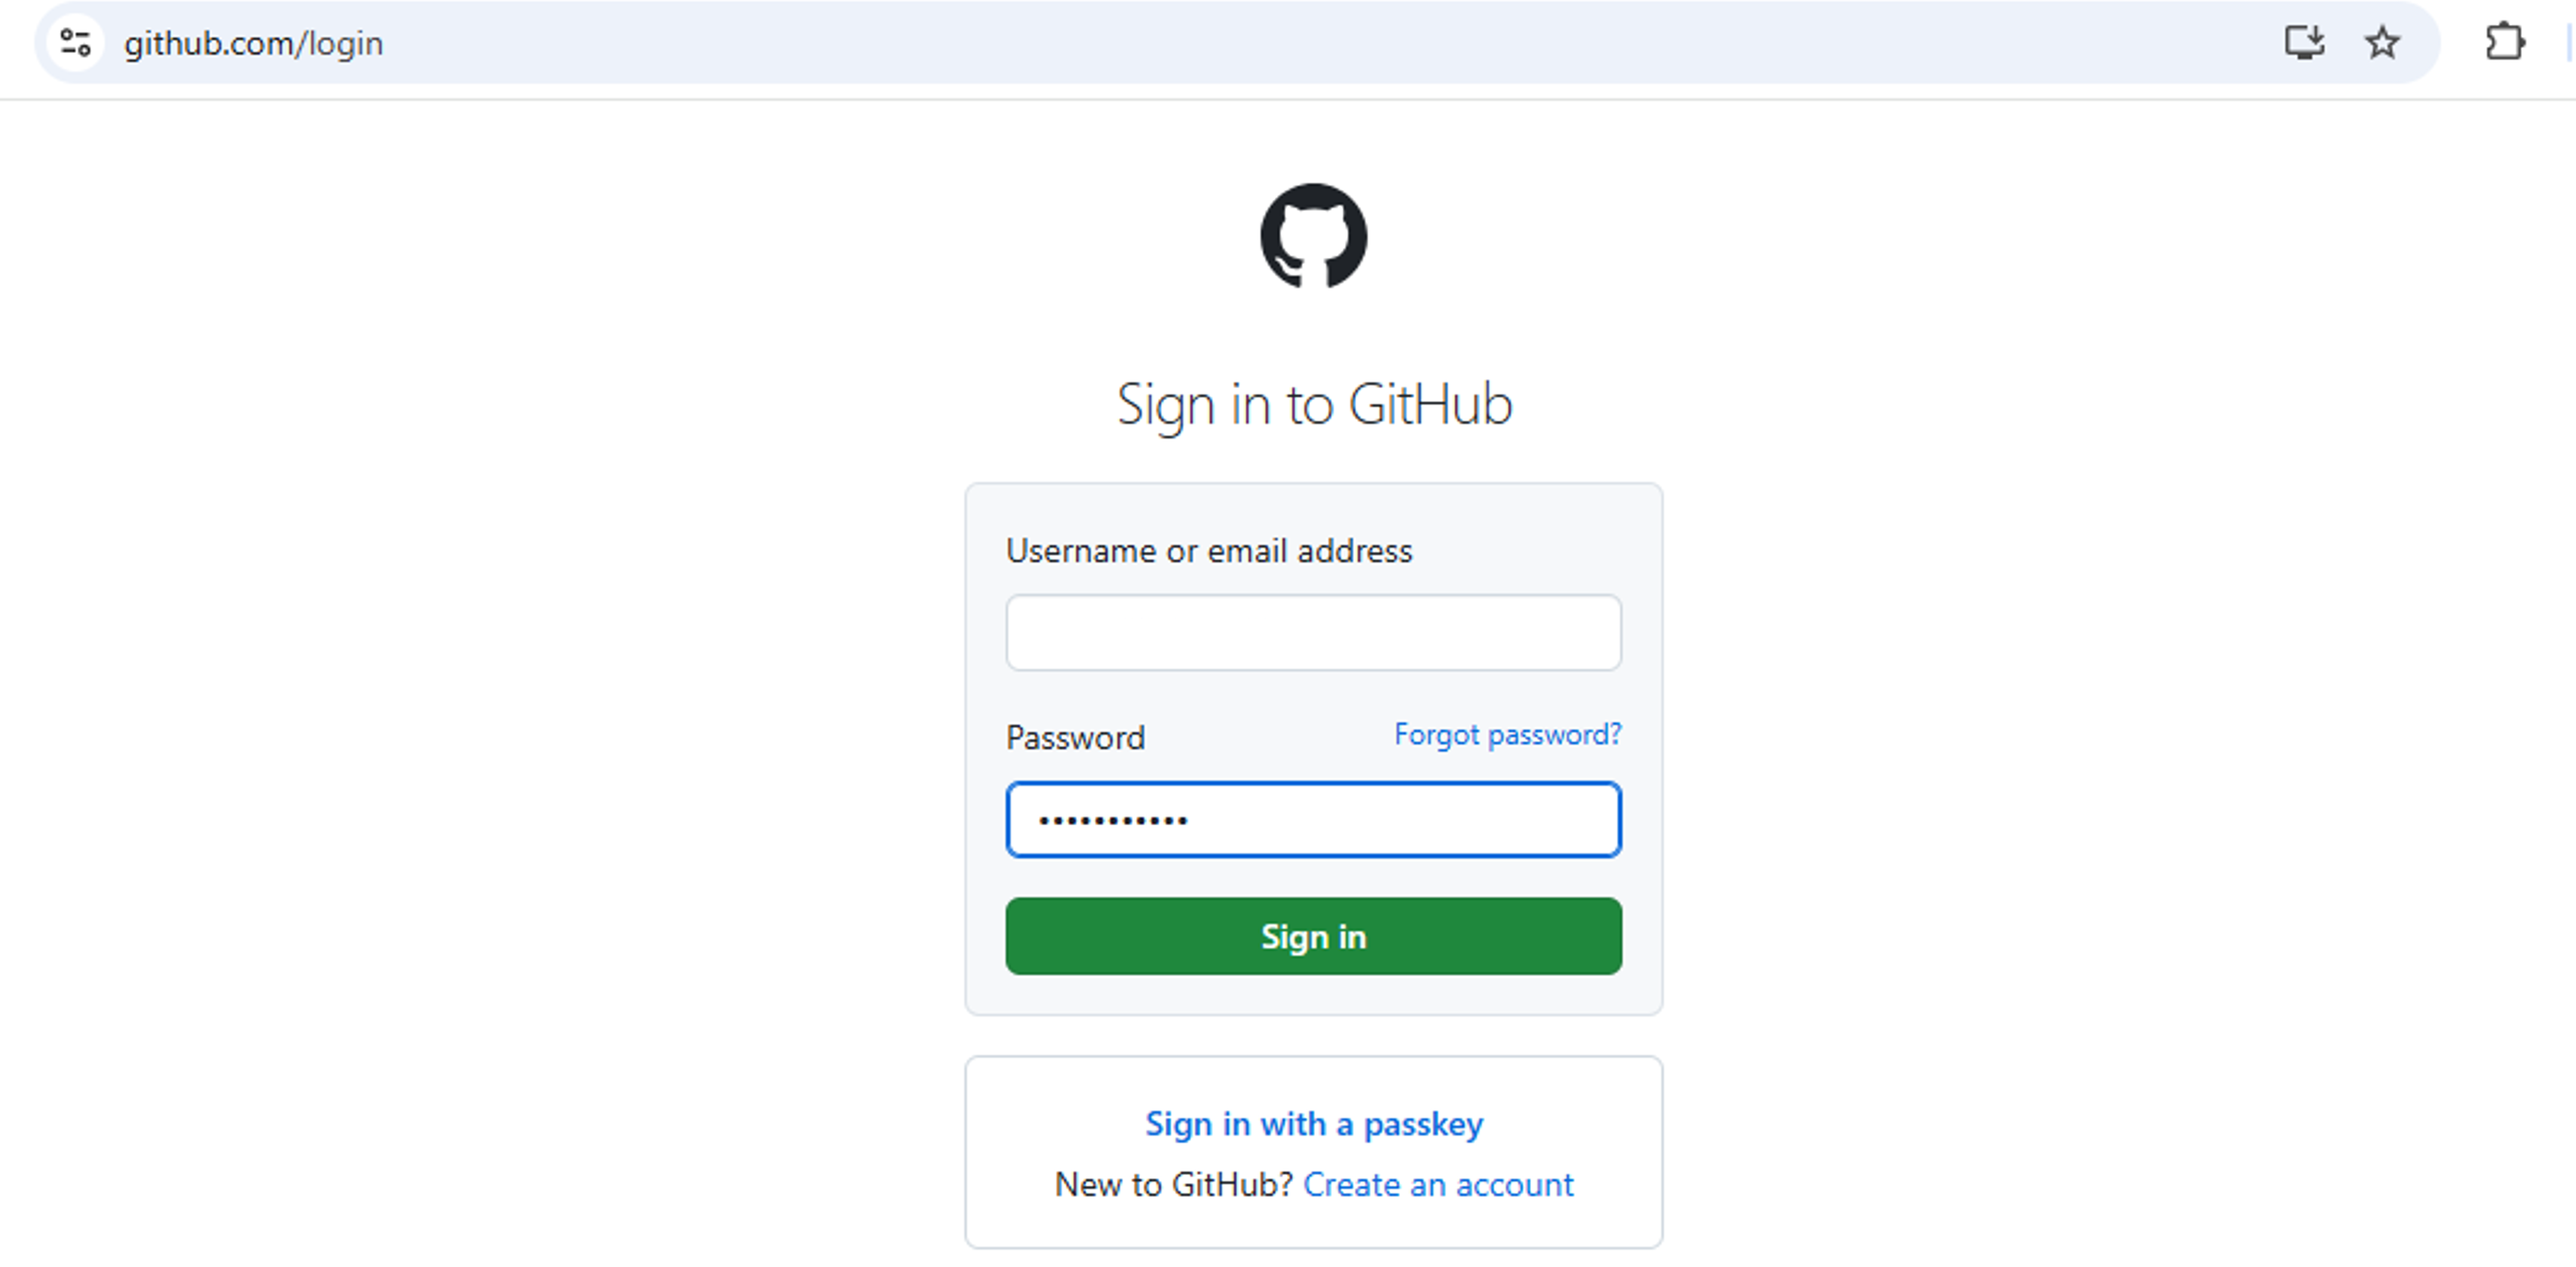
- Sign in to your GitHub account. In case you don’t have an account, create a new account.

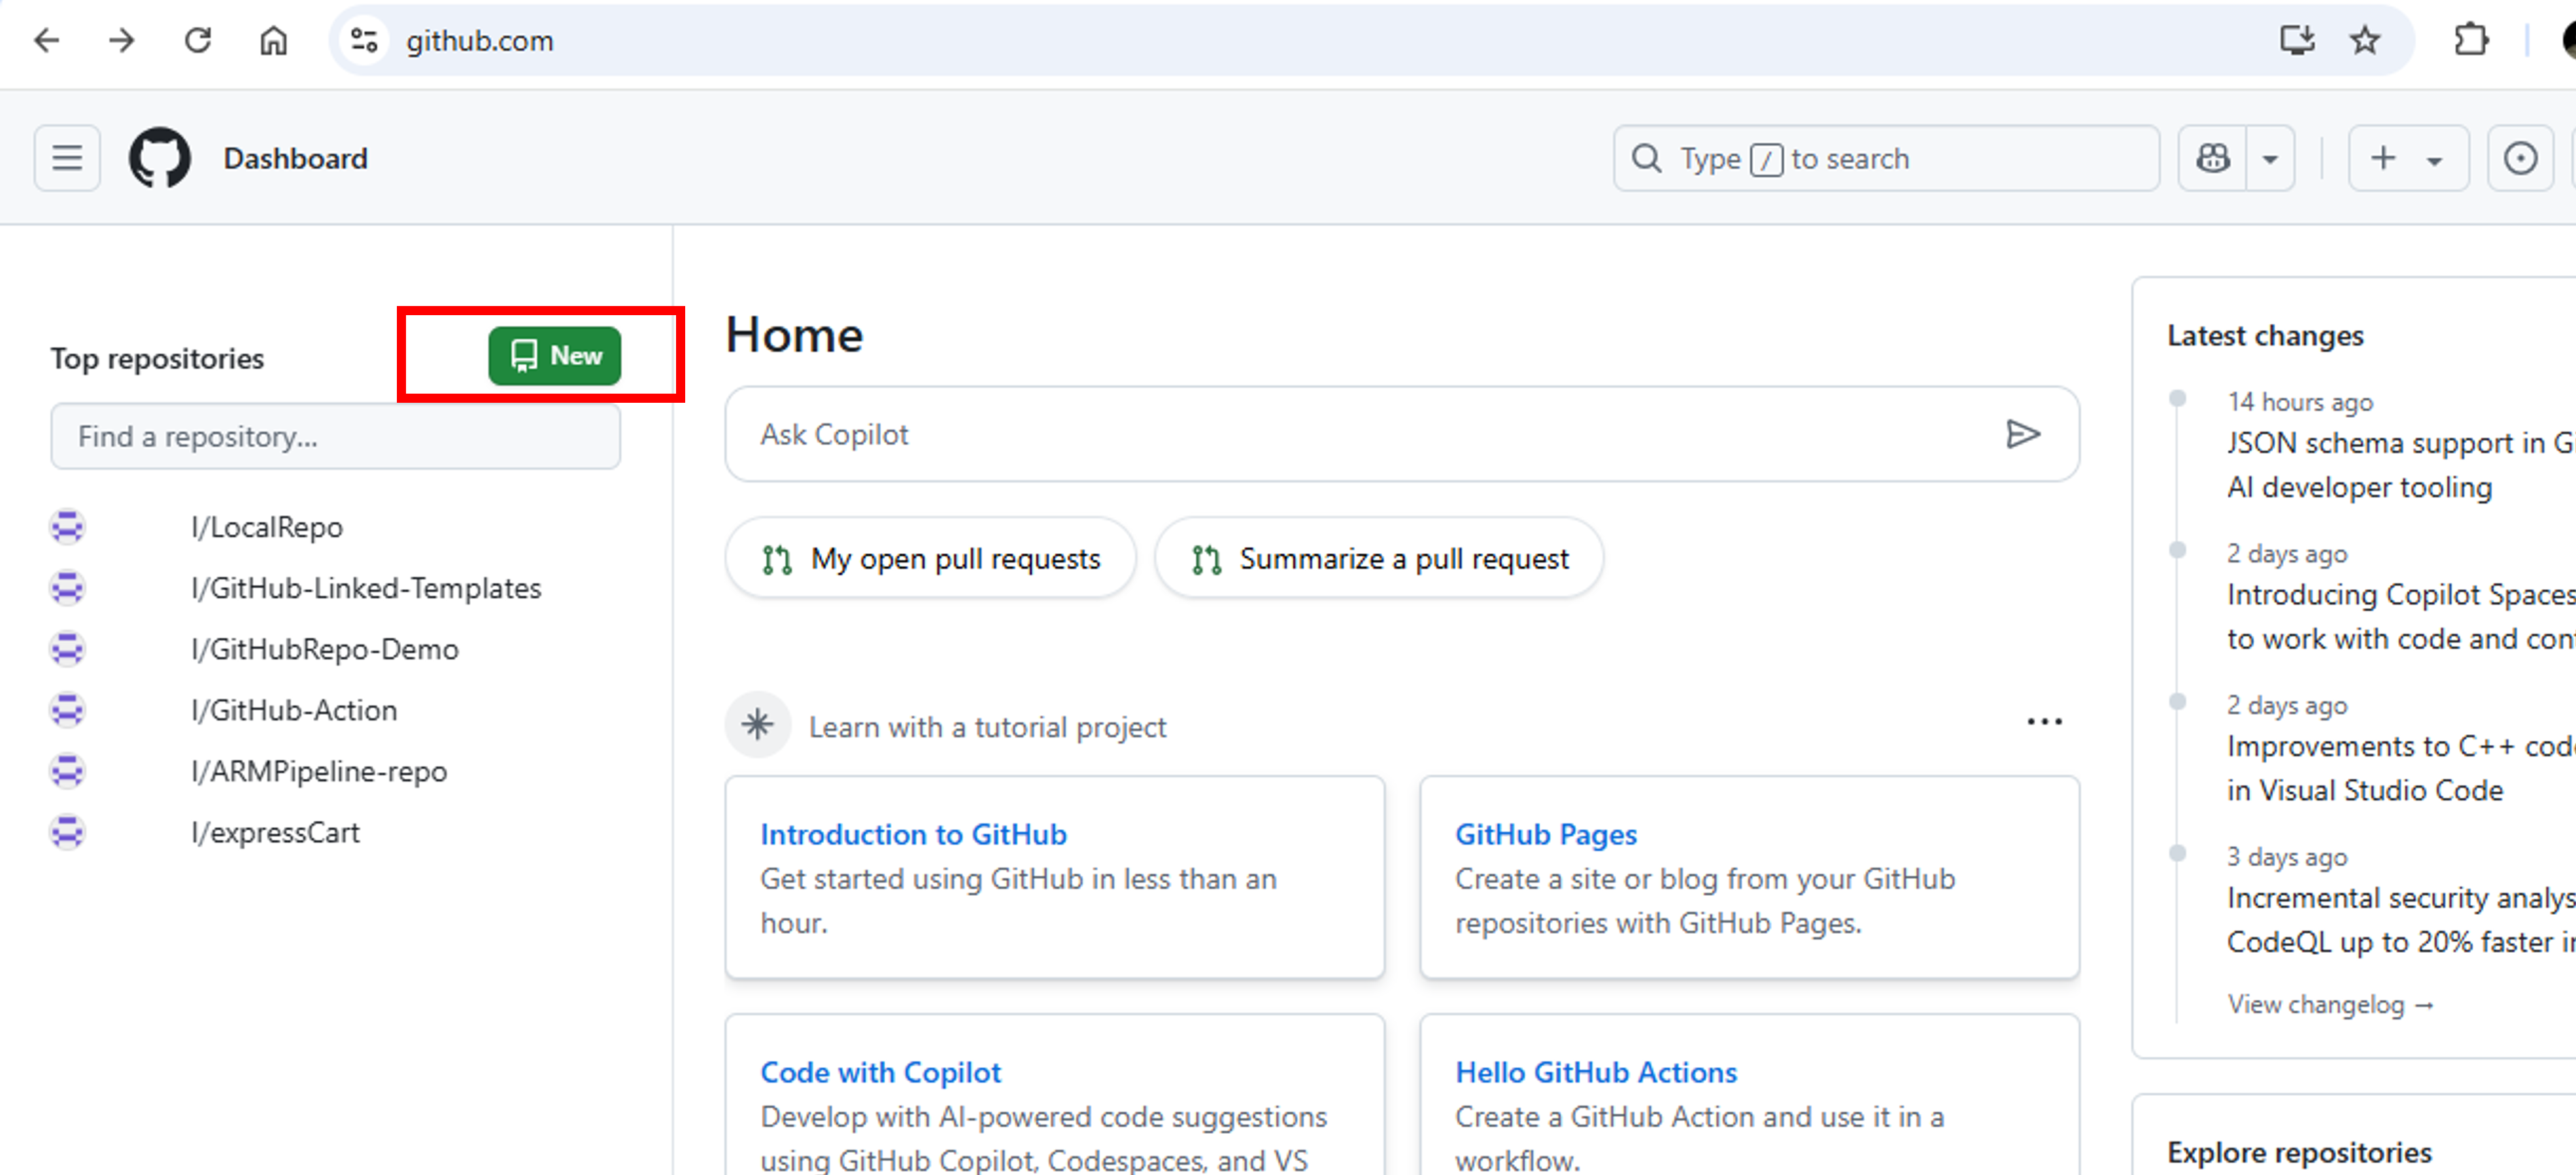
- Create a new repository by clicking New button as depicted in snap below. A GitHub repository is a folder-like structure on GitHub where you store your code, its history, and can collaborate with others.

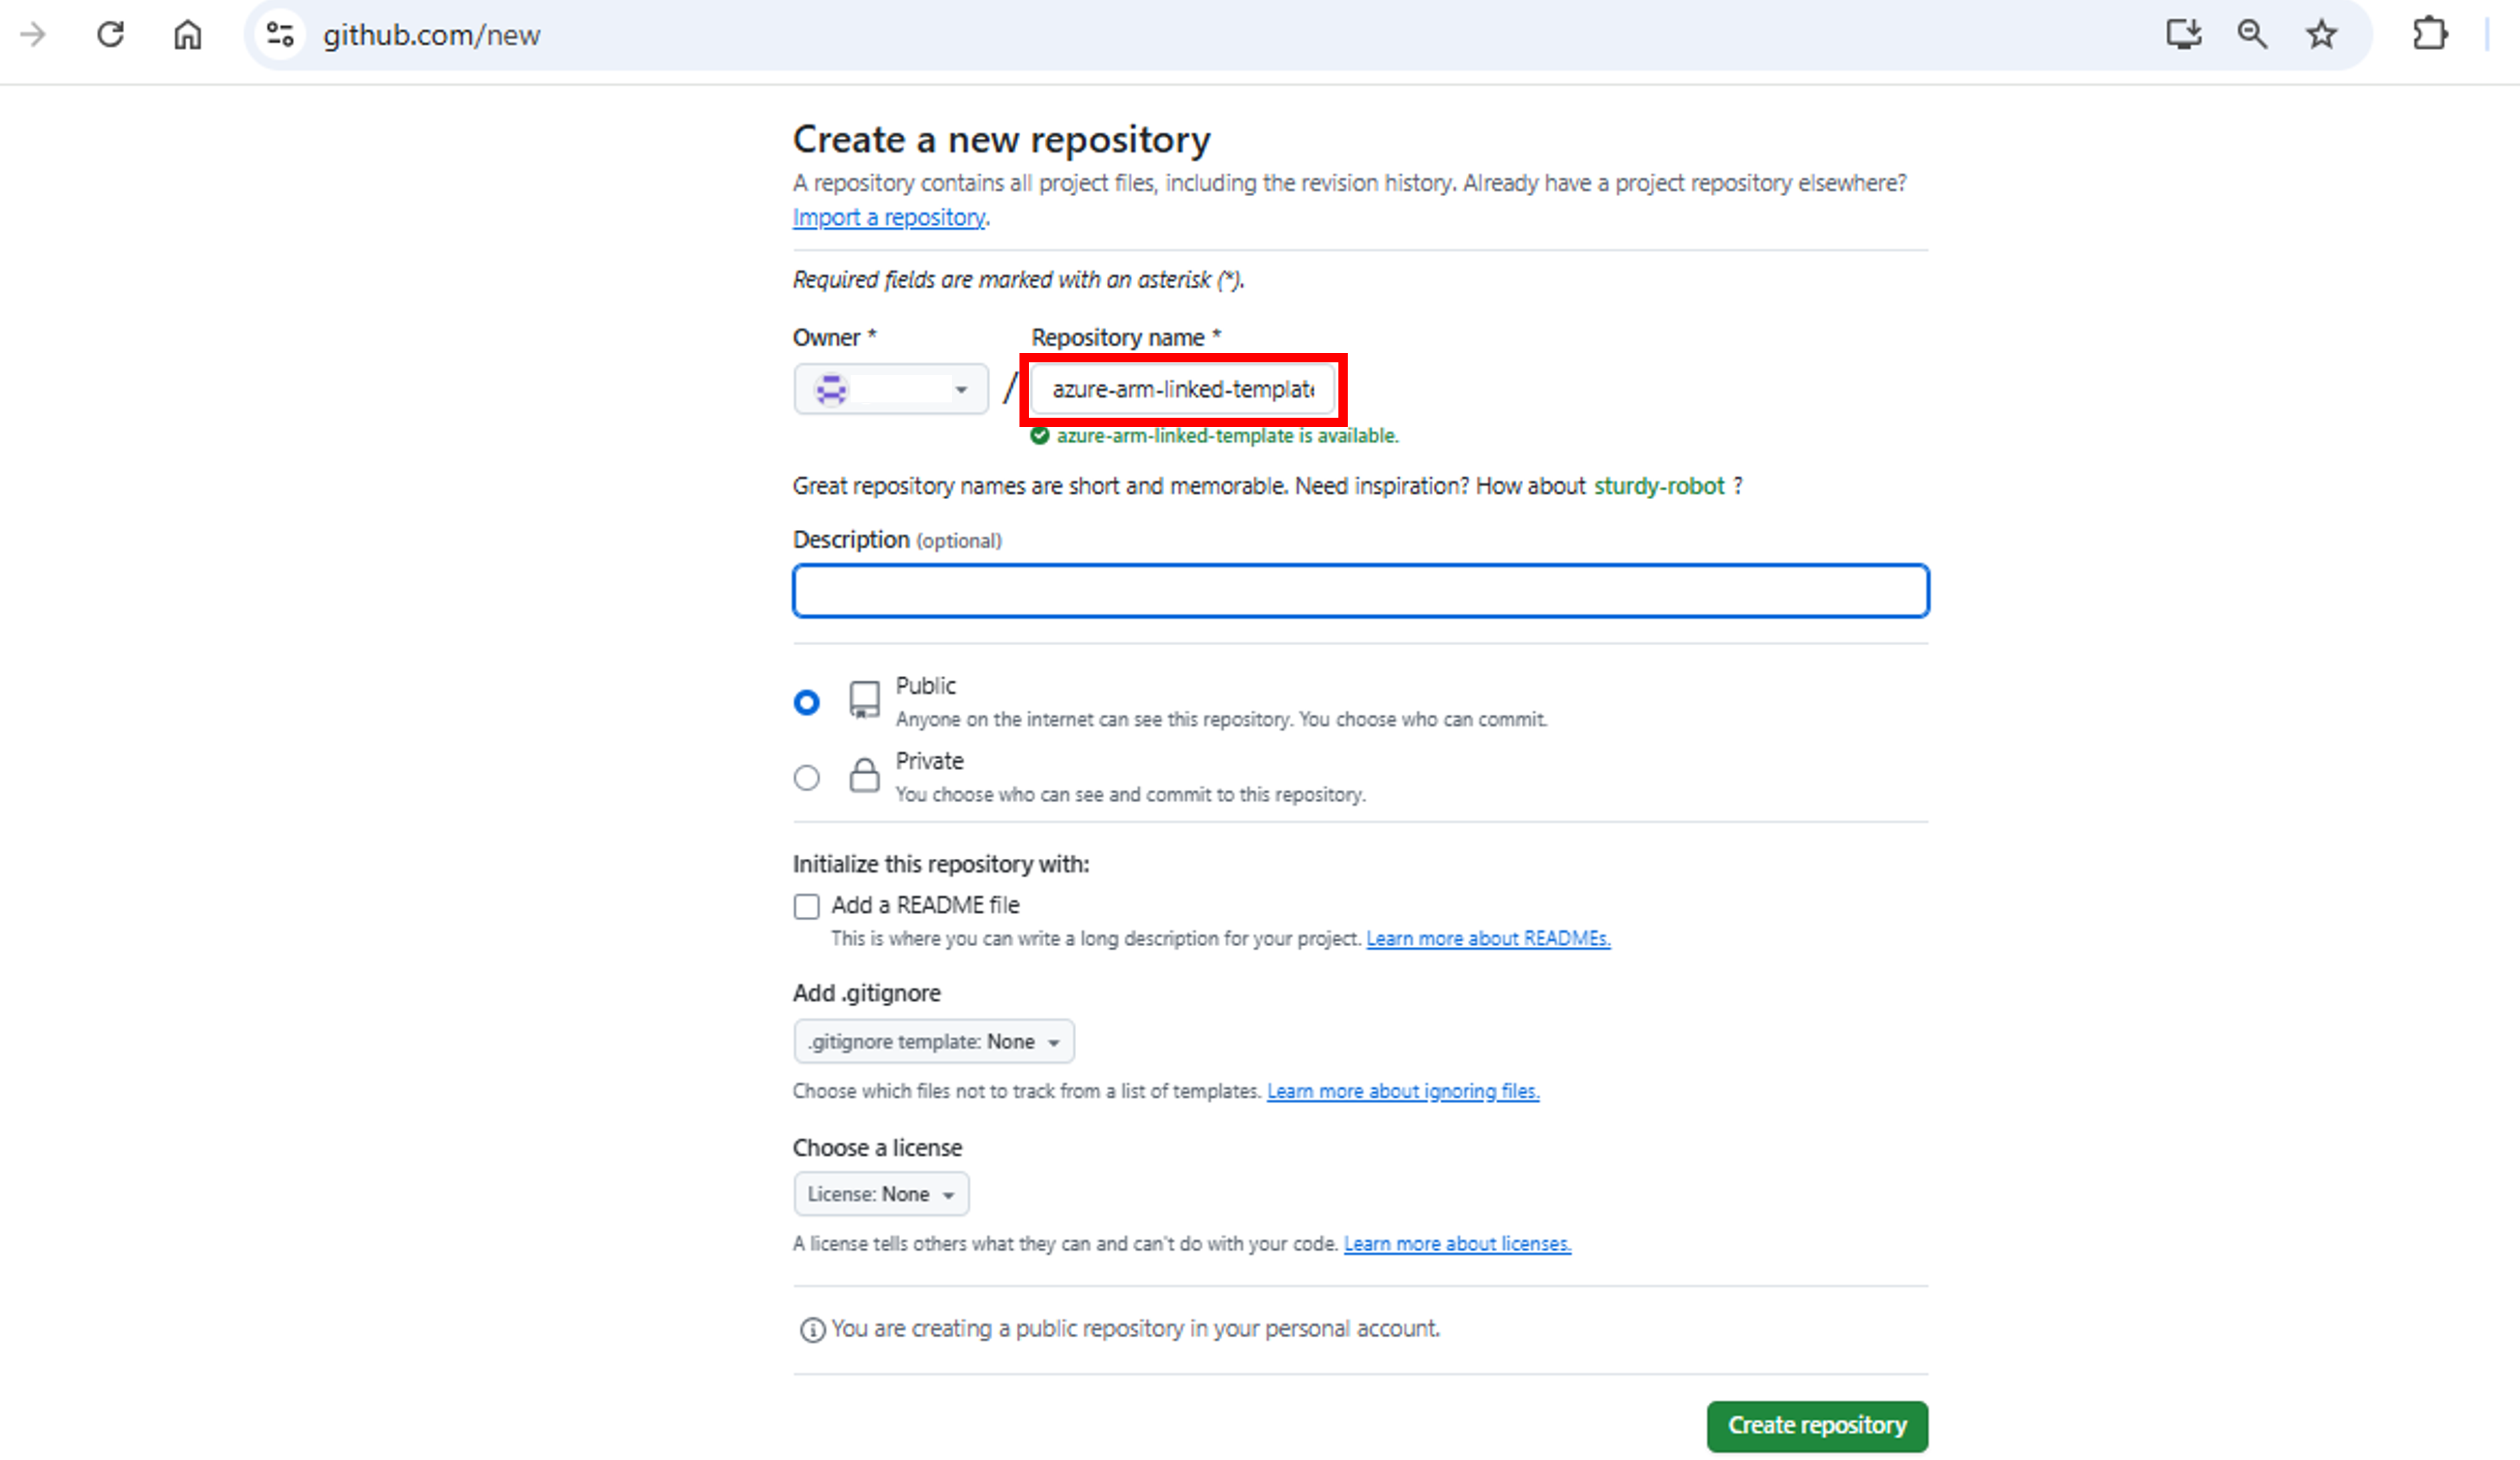
- Give a name to the repository. In our case, I have named it azure-arm-linked-template. Click on Create Repository. A new repository will be created.

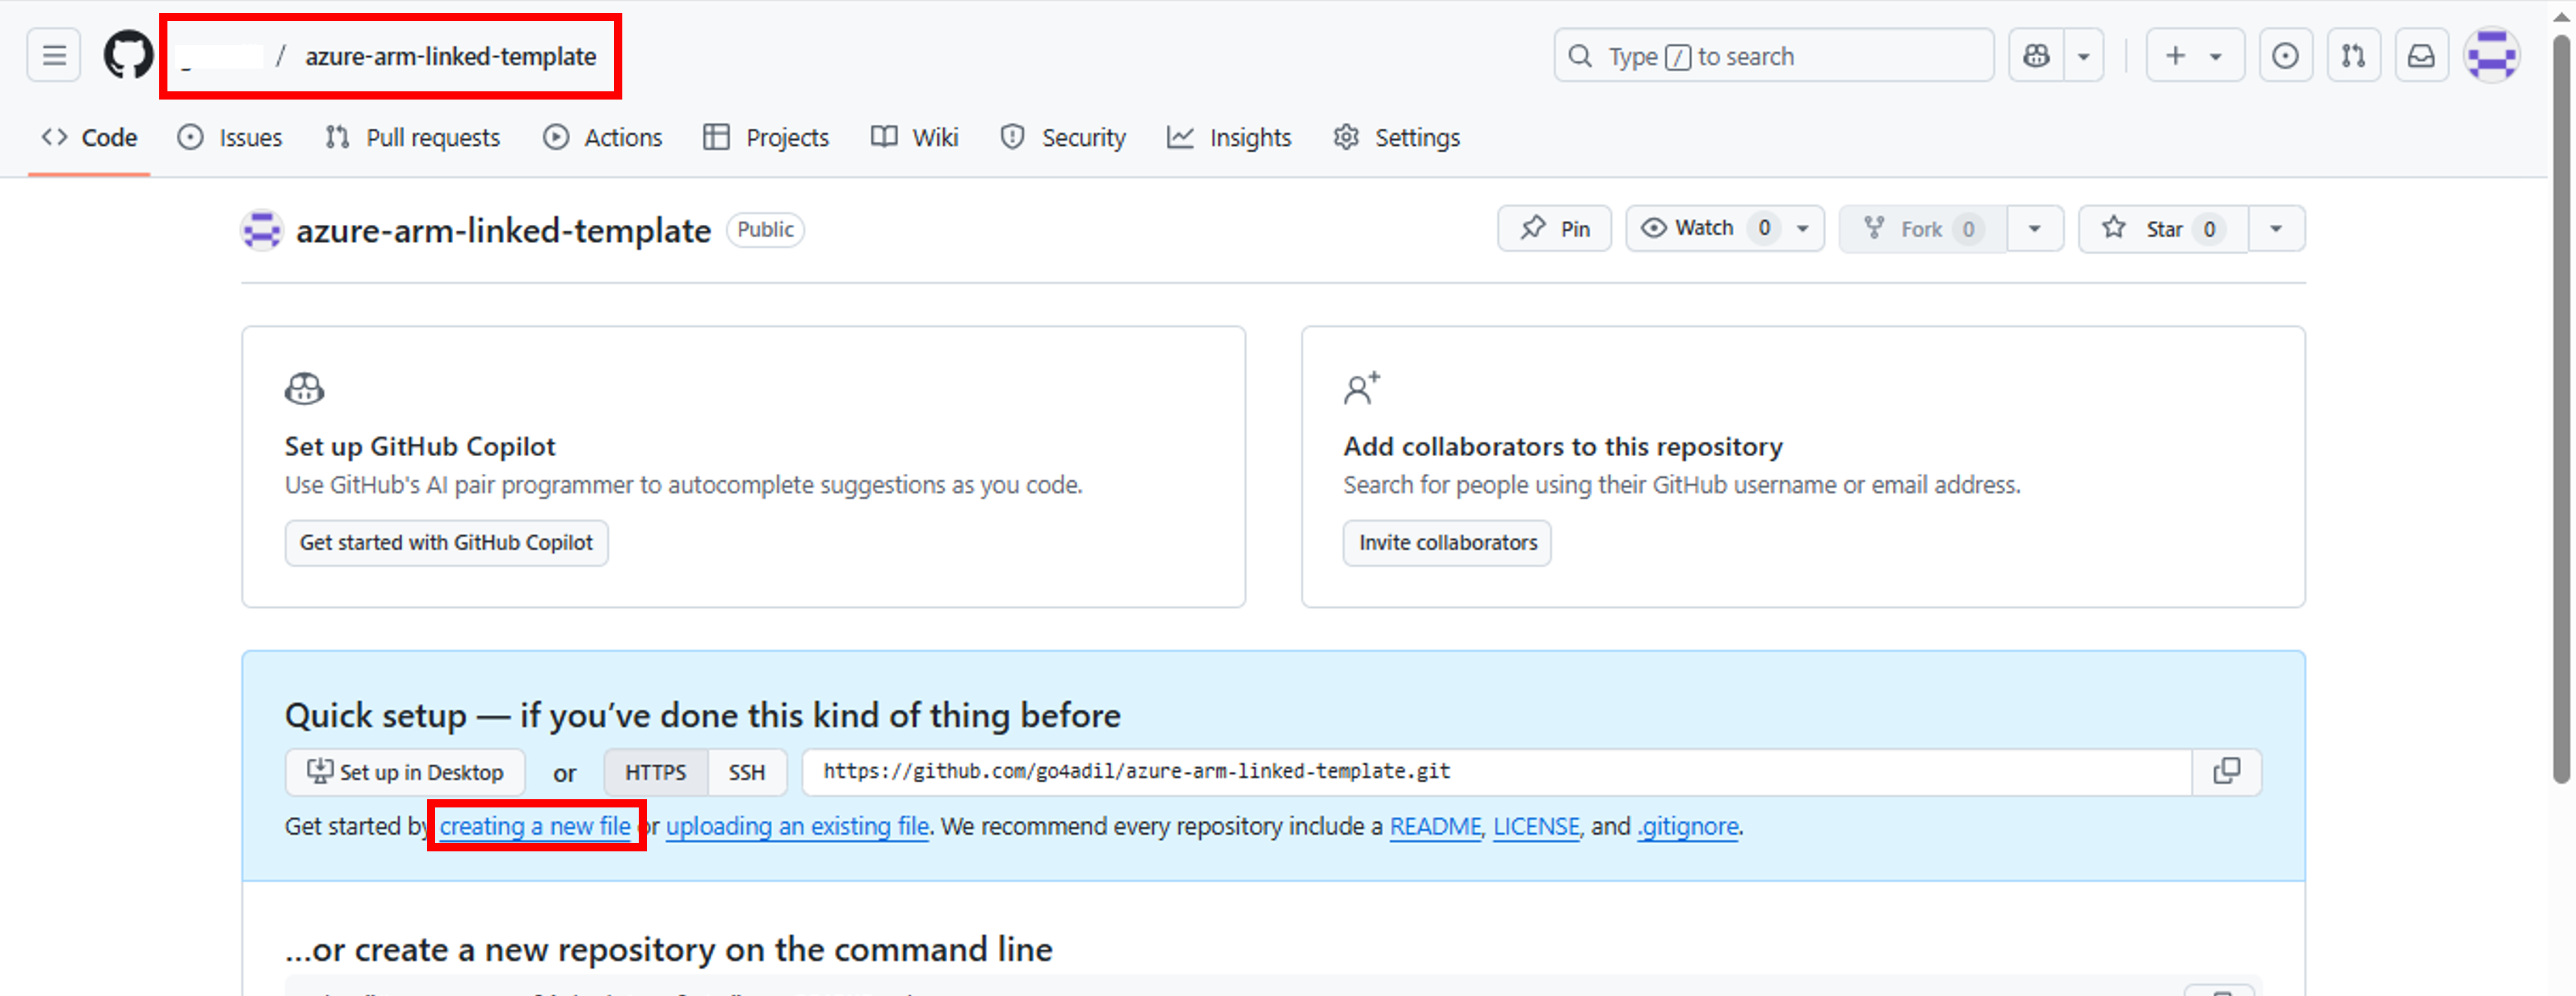
- Now we need to create two files in the repository for storing code of our ARM Linked templates. Click on creating a new file as depicted in the snap.

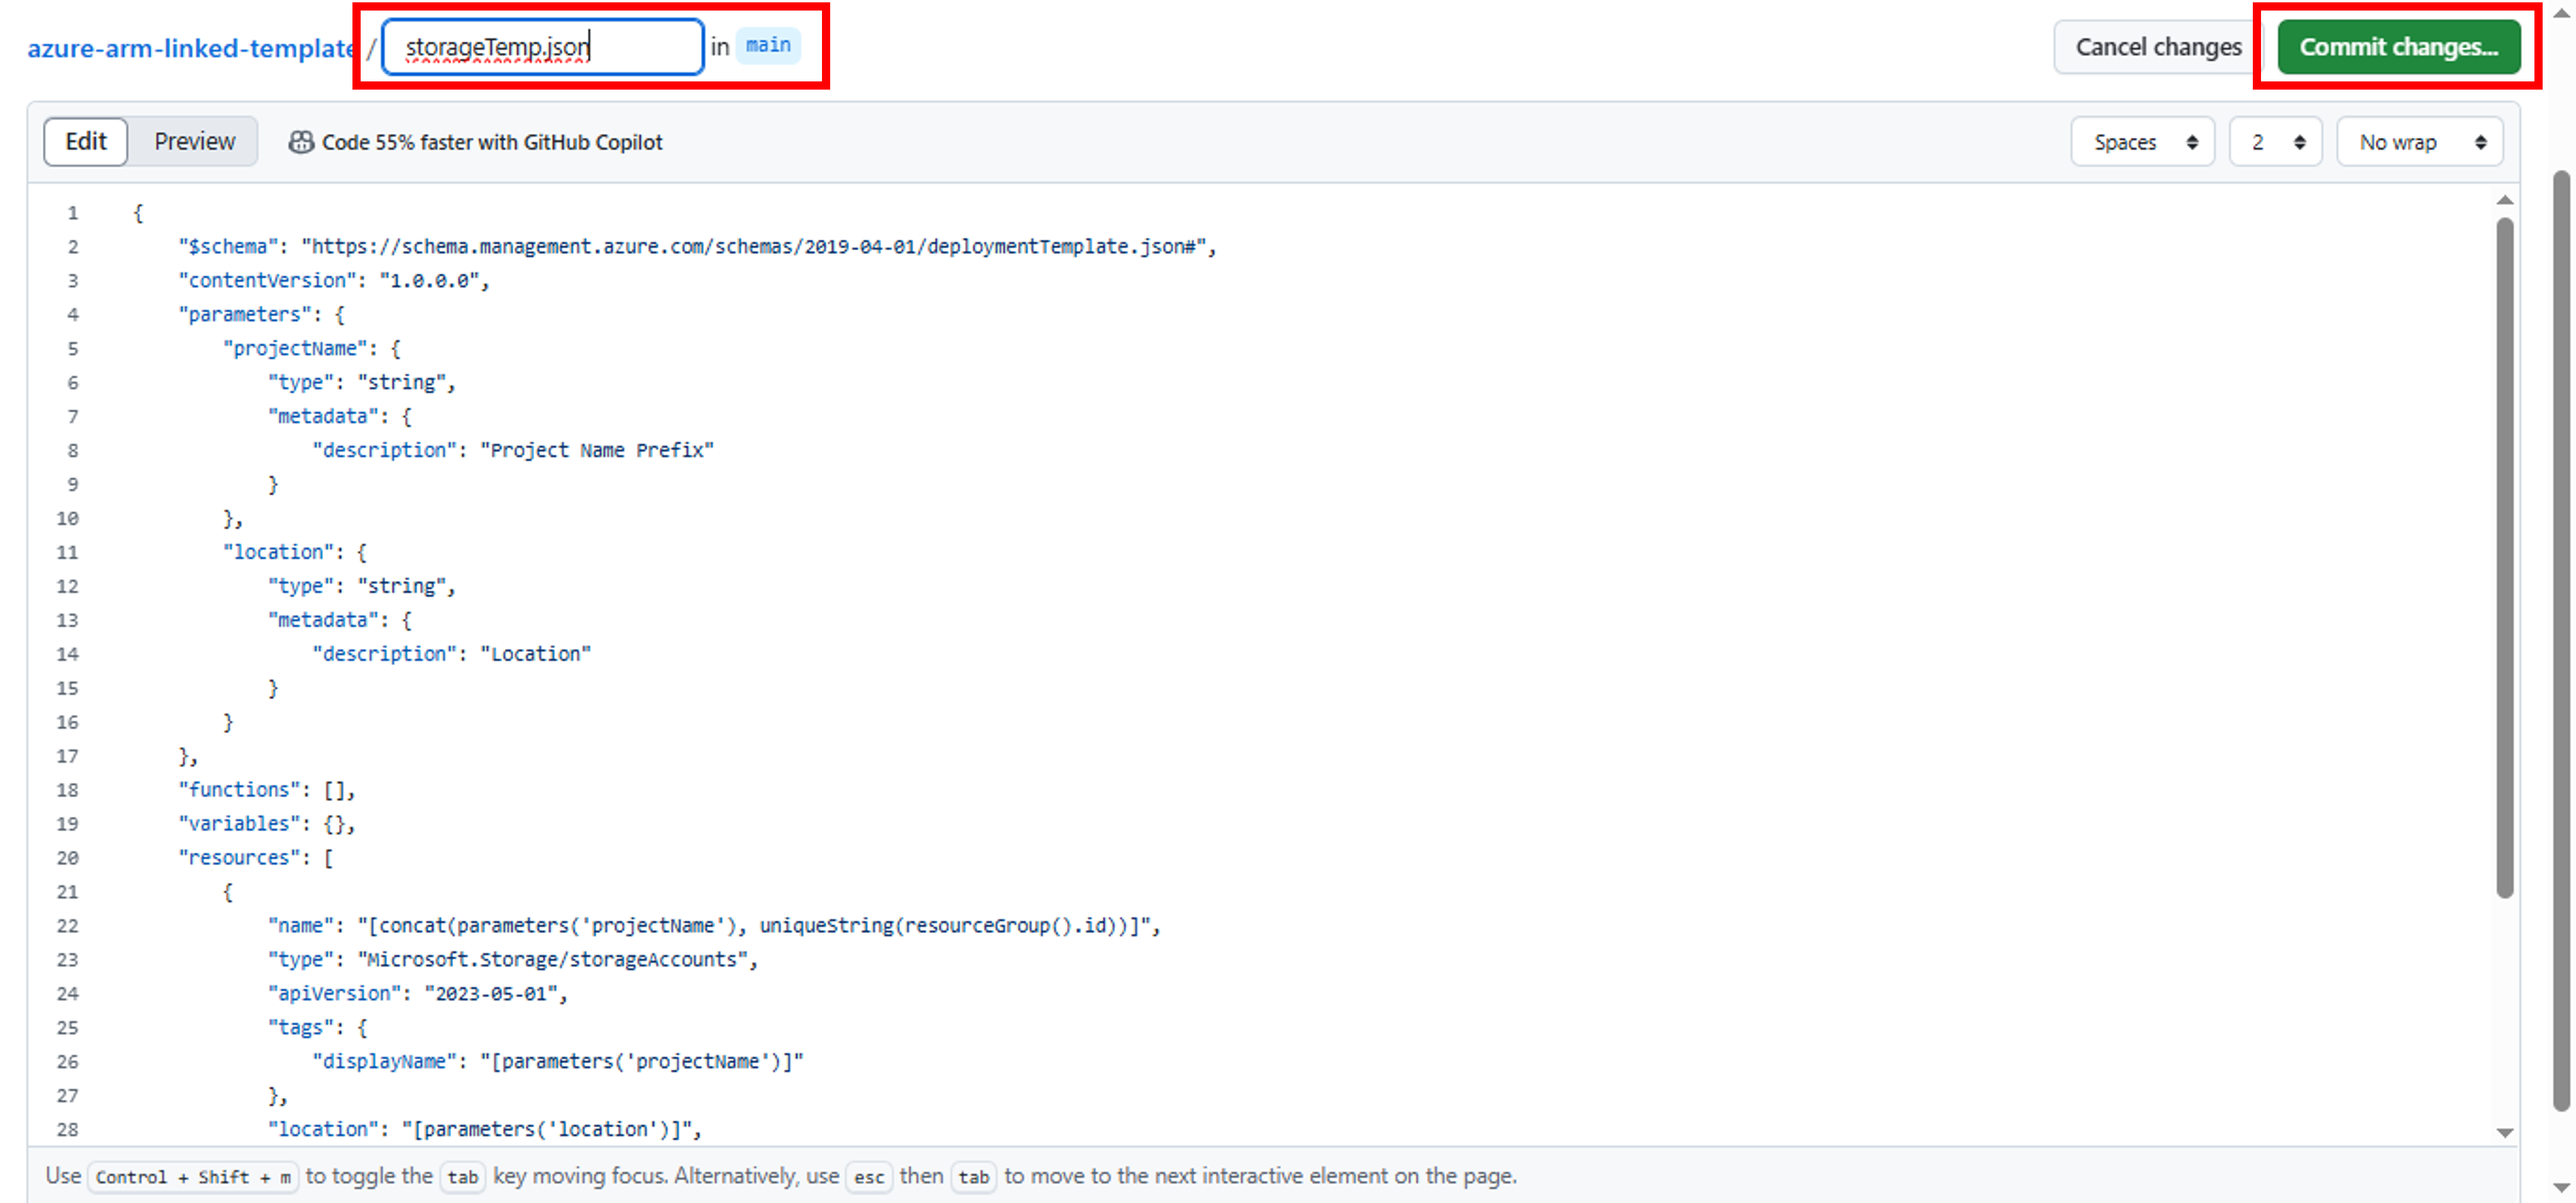
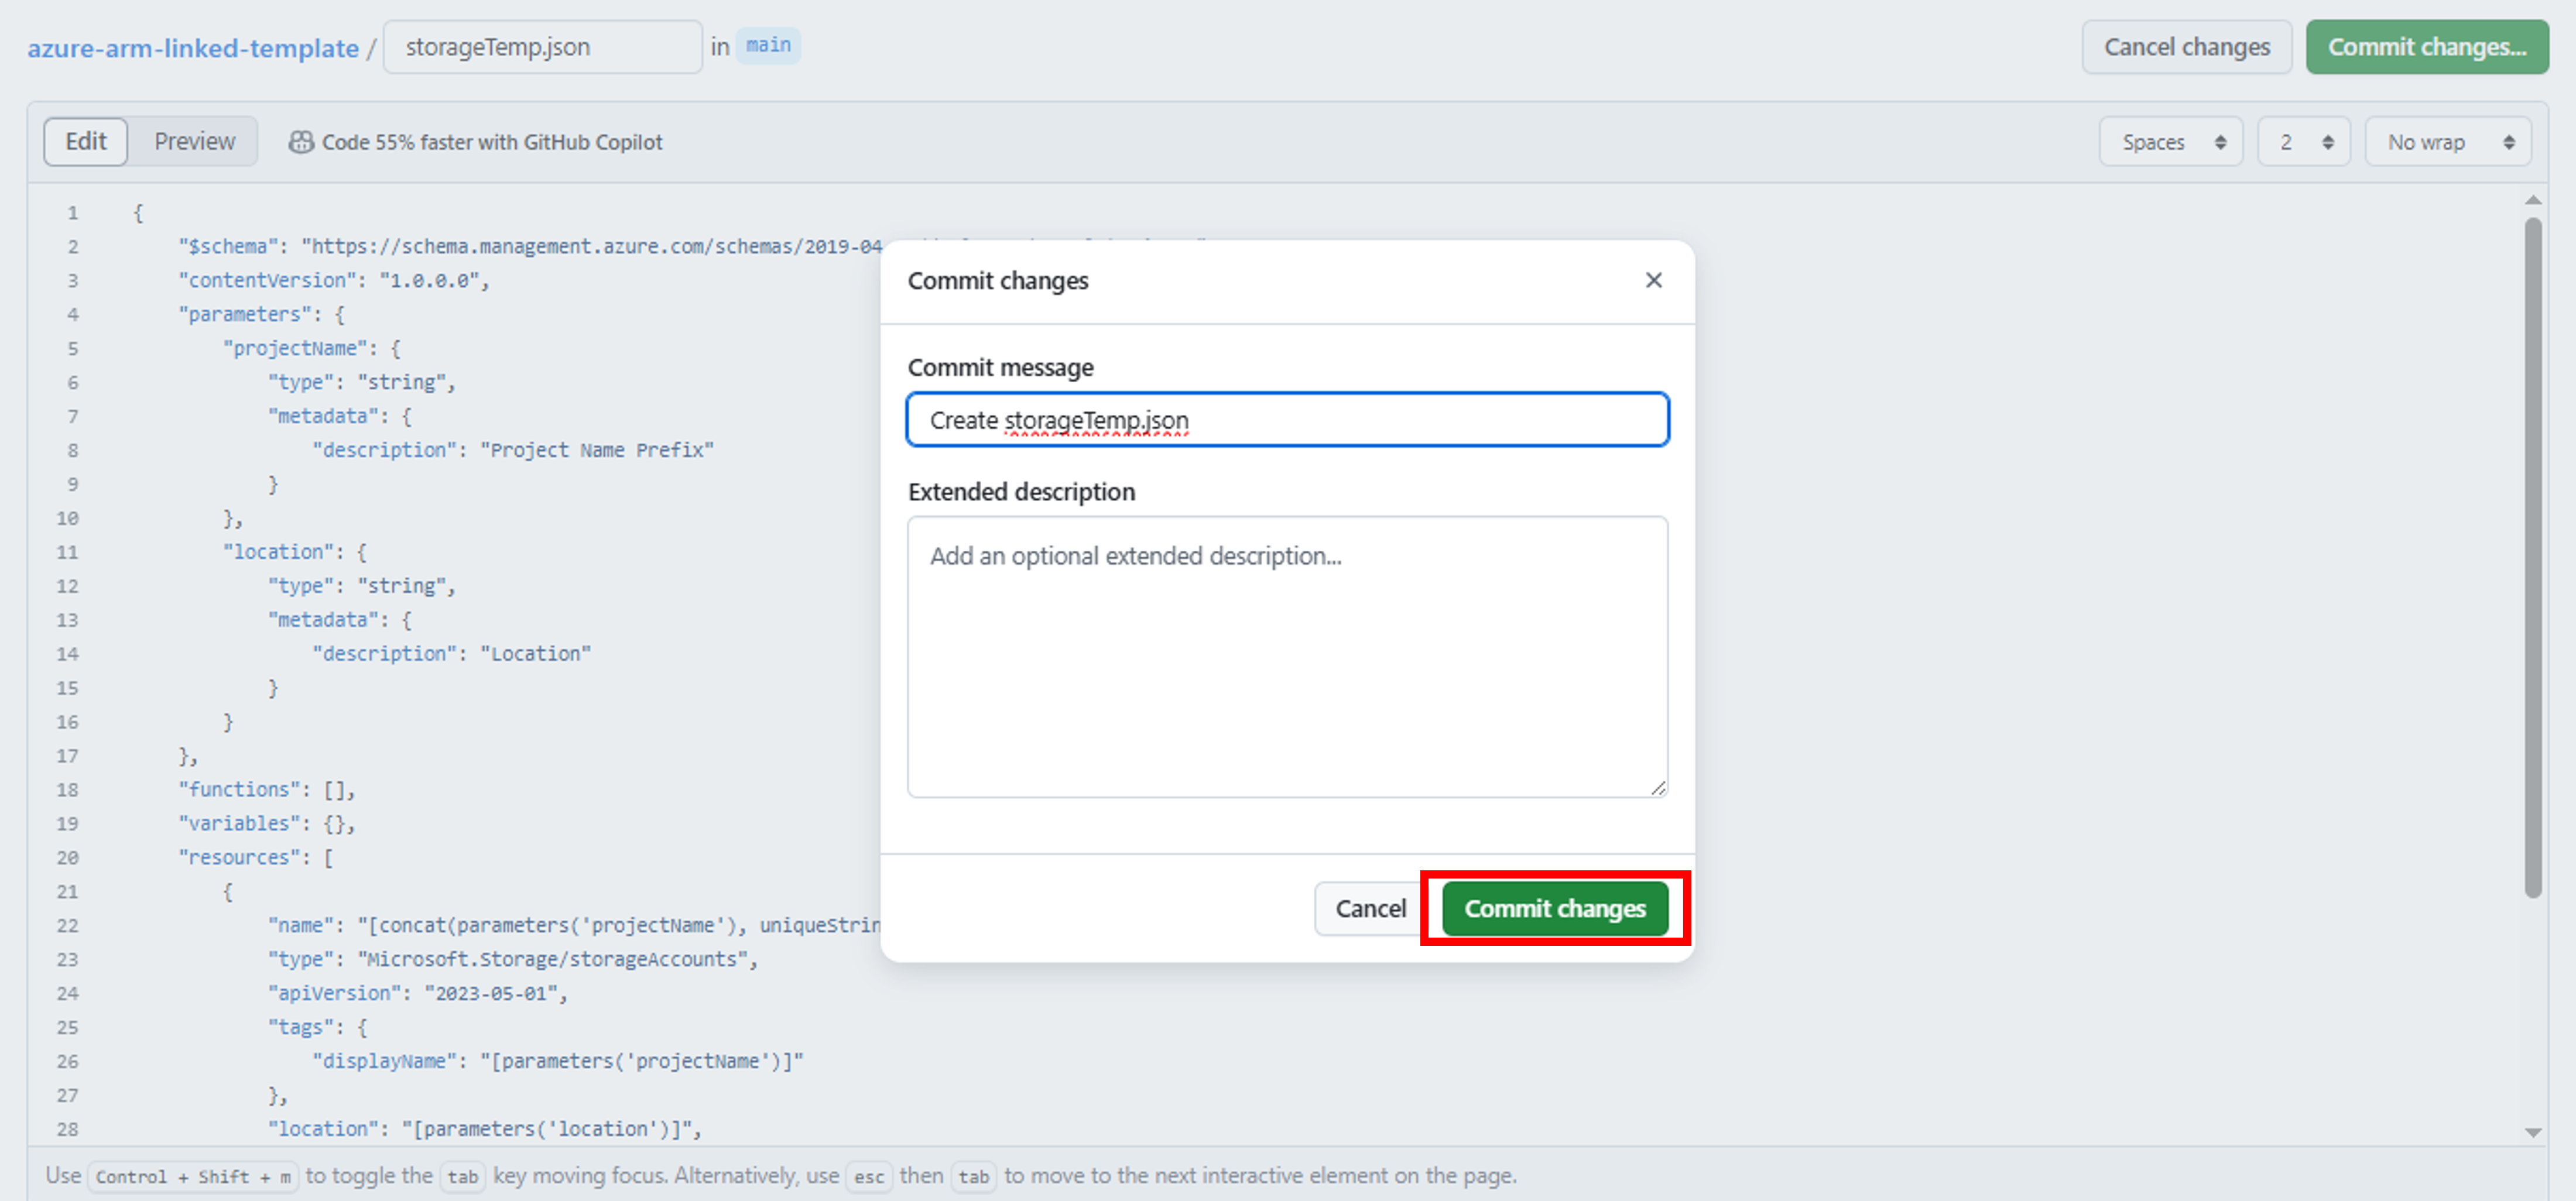
- Name this file as storageTemp.json. Copy storageTemp.json template content from VS Code on your PC and paste in this file. Hit Commit Changes button.

- A message popup window will appear. You may change the commit message. Hit Commit Changes button again.

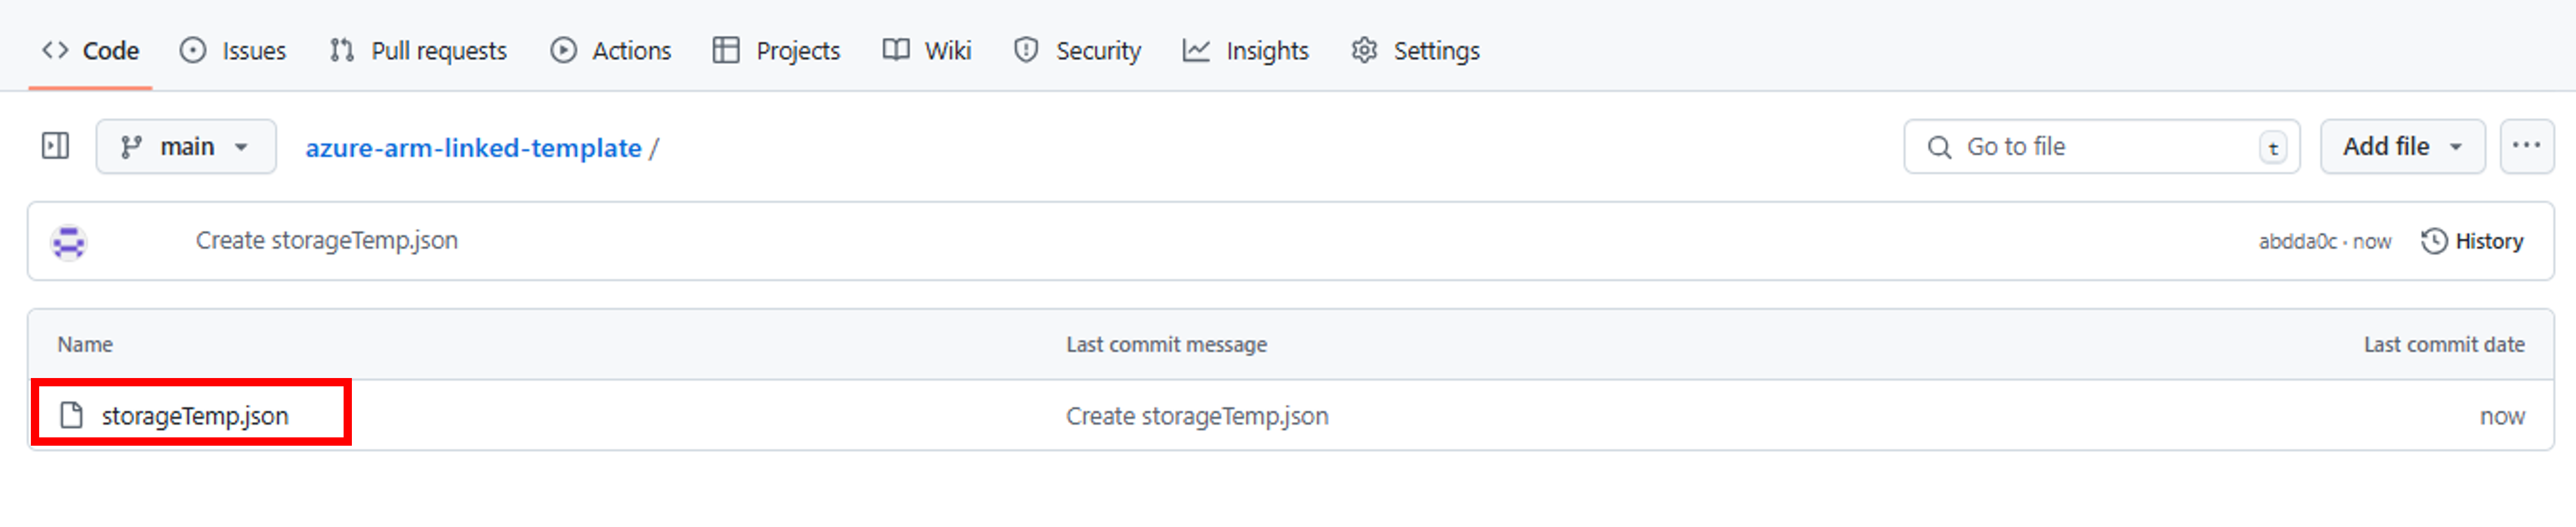
- You will see that a new storageTemp.json file is created in the azure-arm-linked-template repository.

- Now, we need to create another file to store our second template content. Click Add file -> Create new file

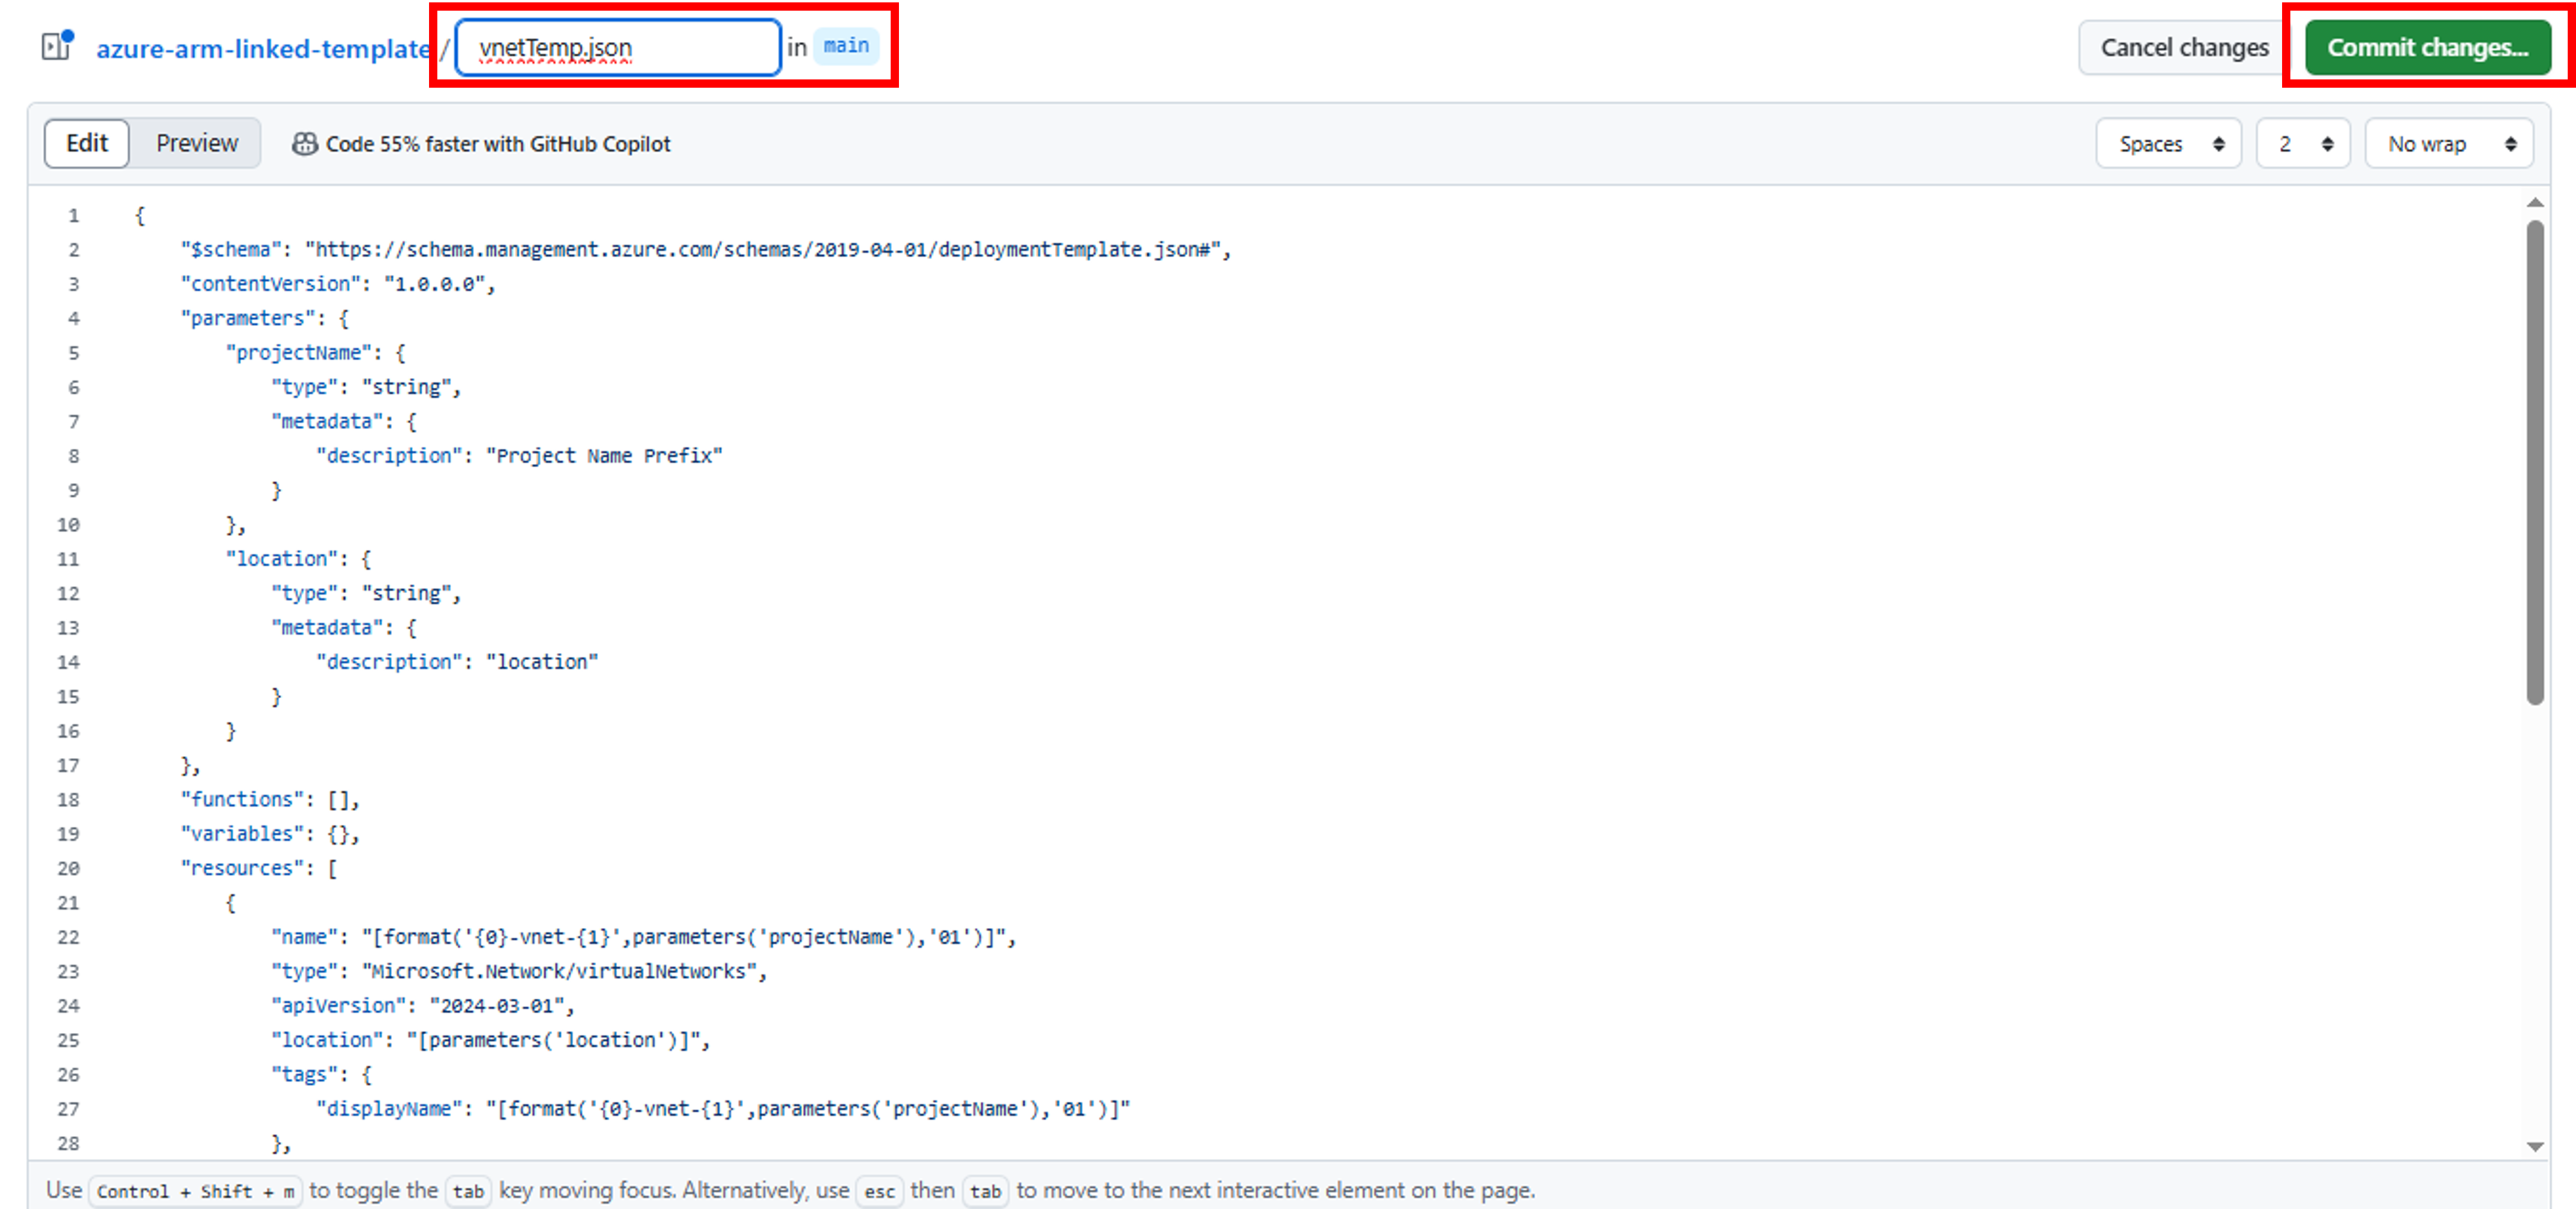
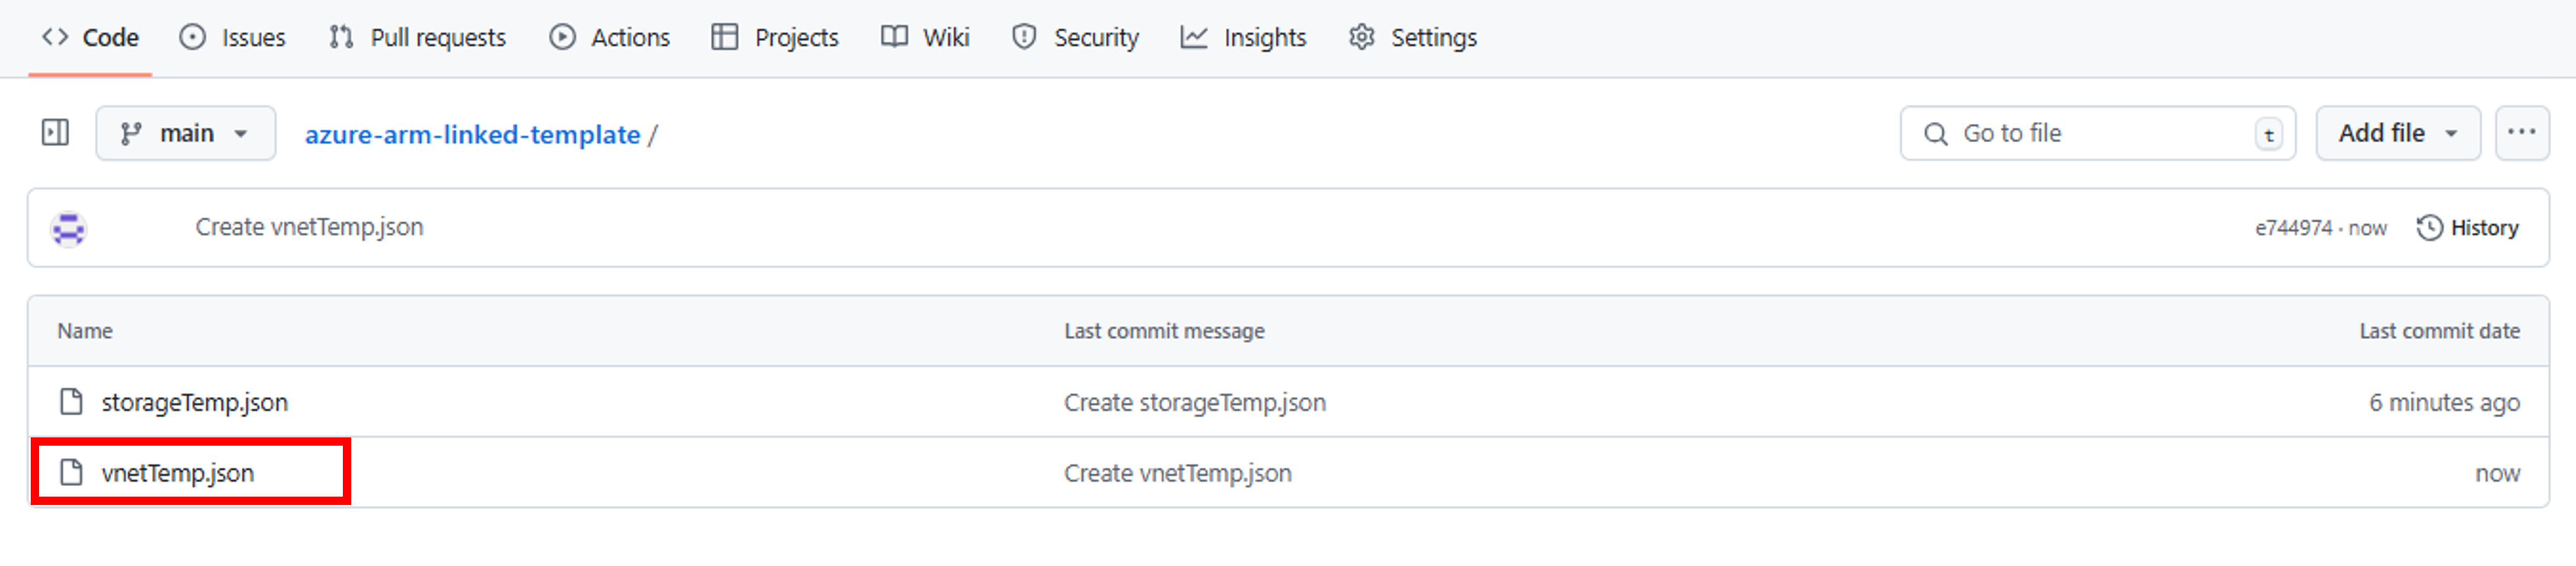
- Name this file as vnetTemp.json. Copy vnetTemp.json template content from VS Code on your PC and paste in this file. Hit Commit Changes button.

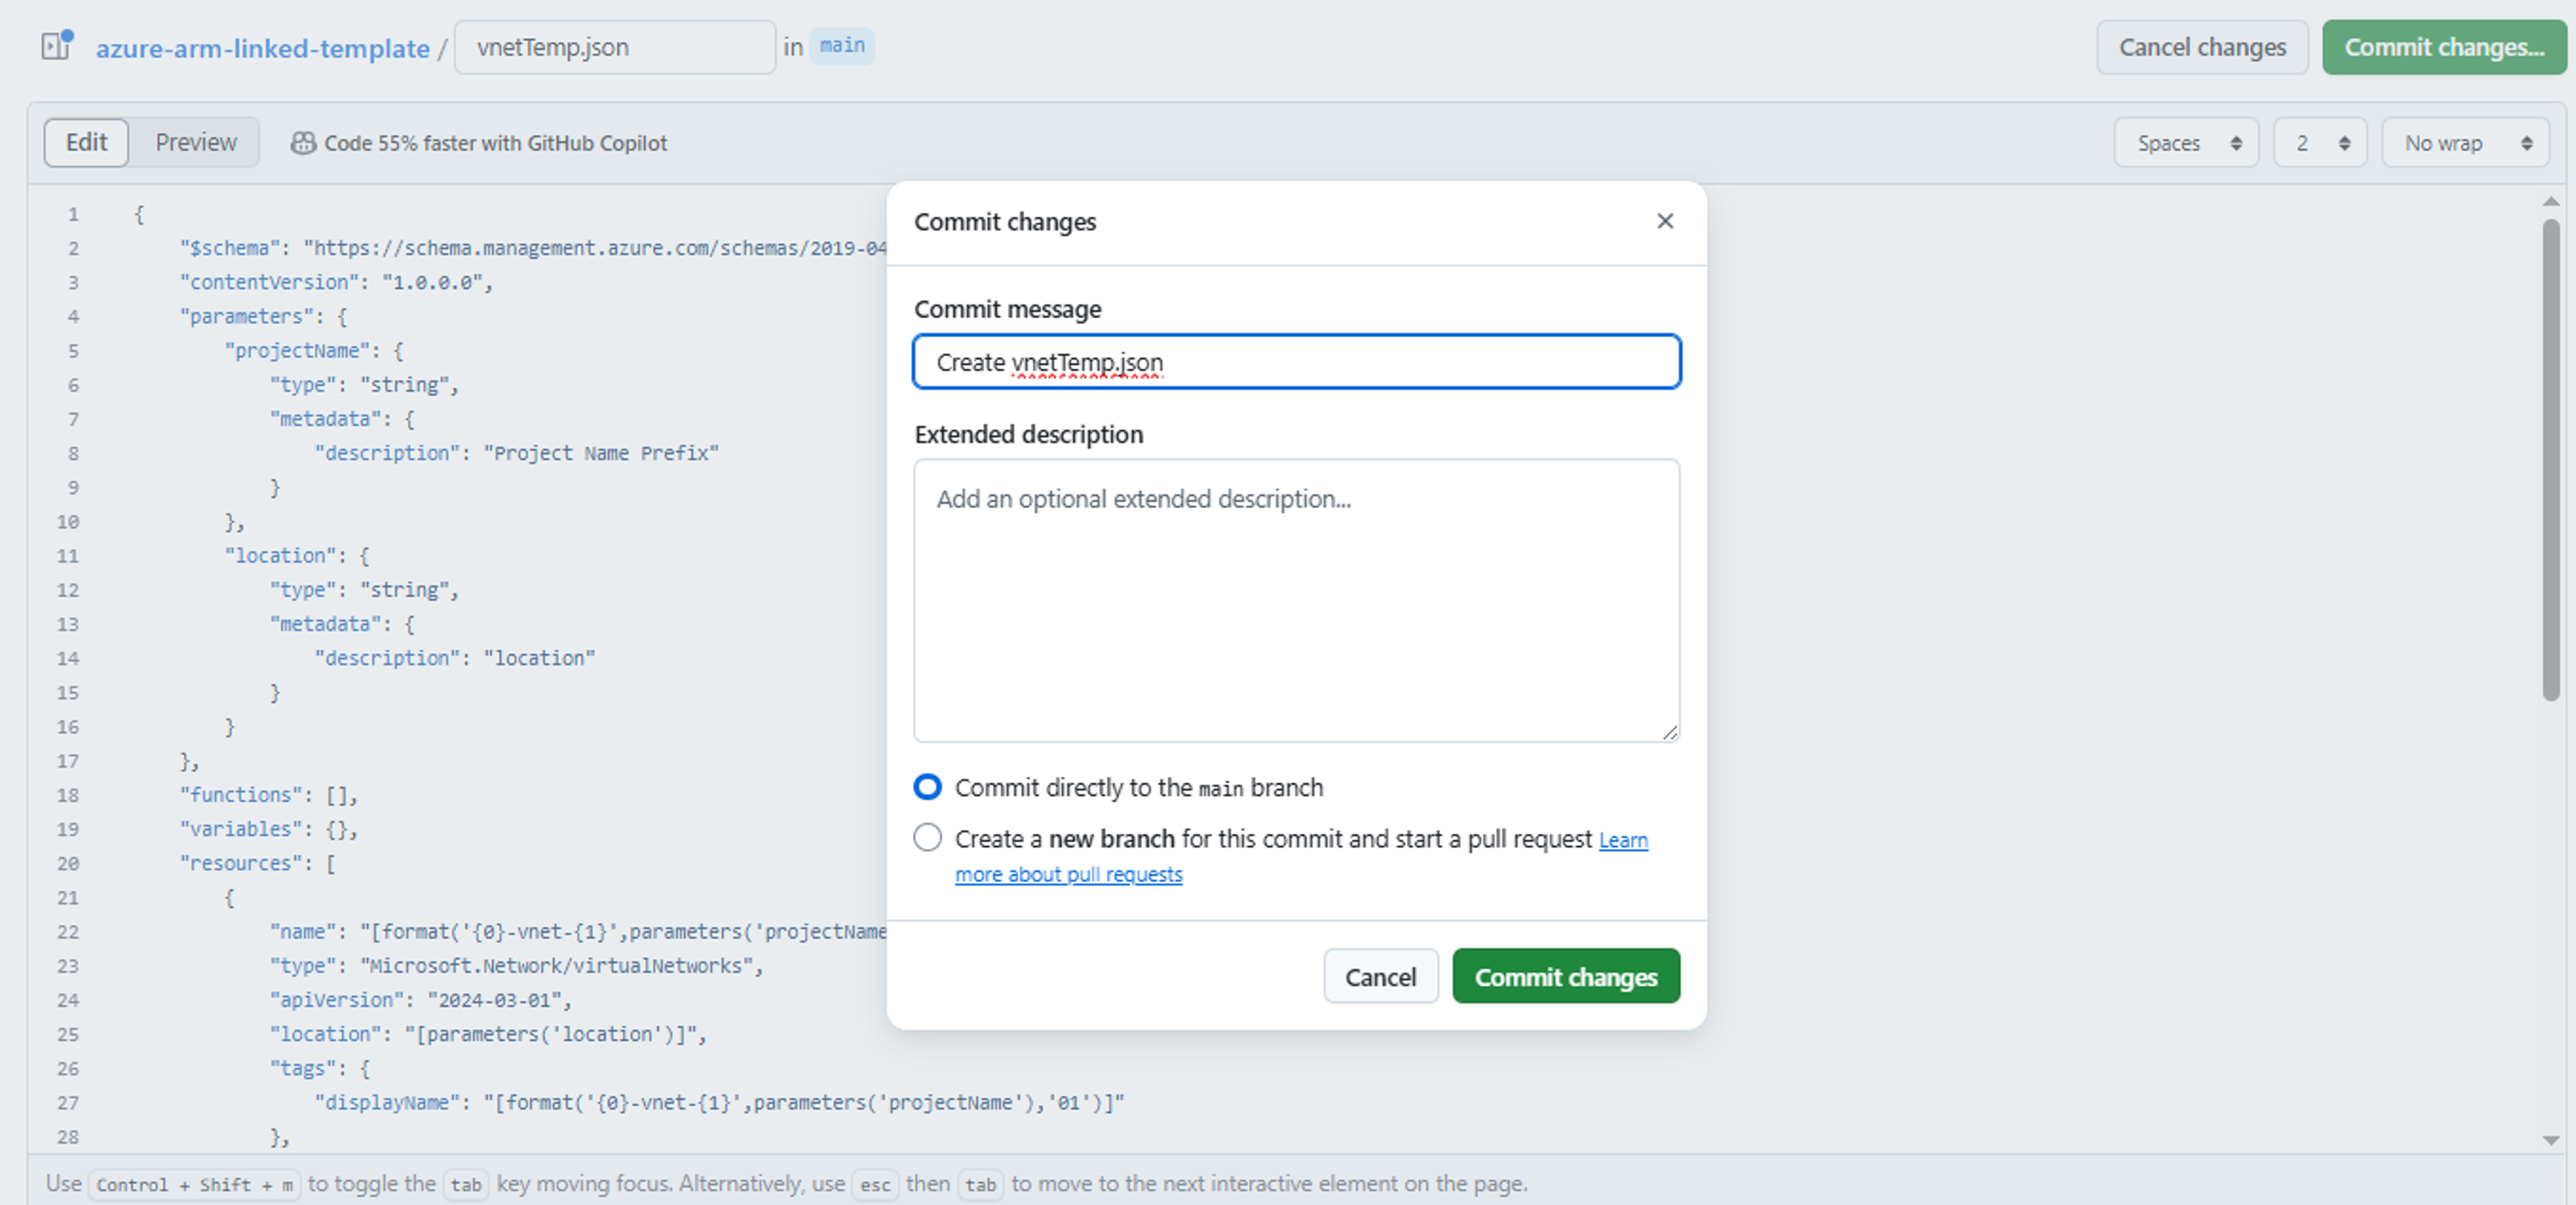
- A message popup window will appear. You may change the commit message. Hit Commit Changes button again.

- You will see that a new vnetTemp.json file is created in the azure-arm-linked-template repository.

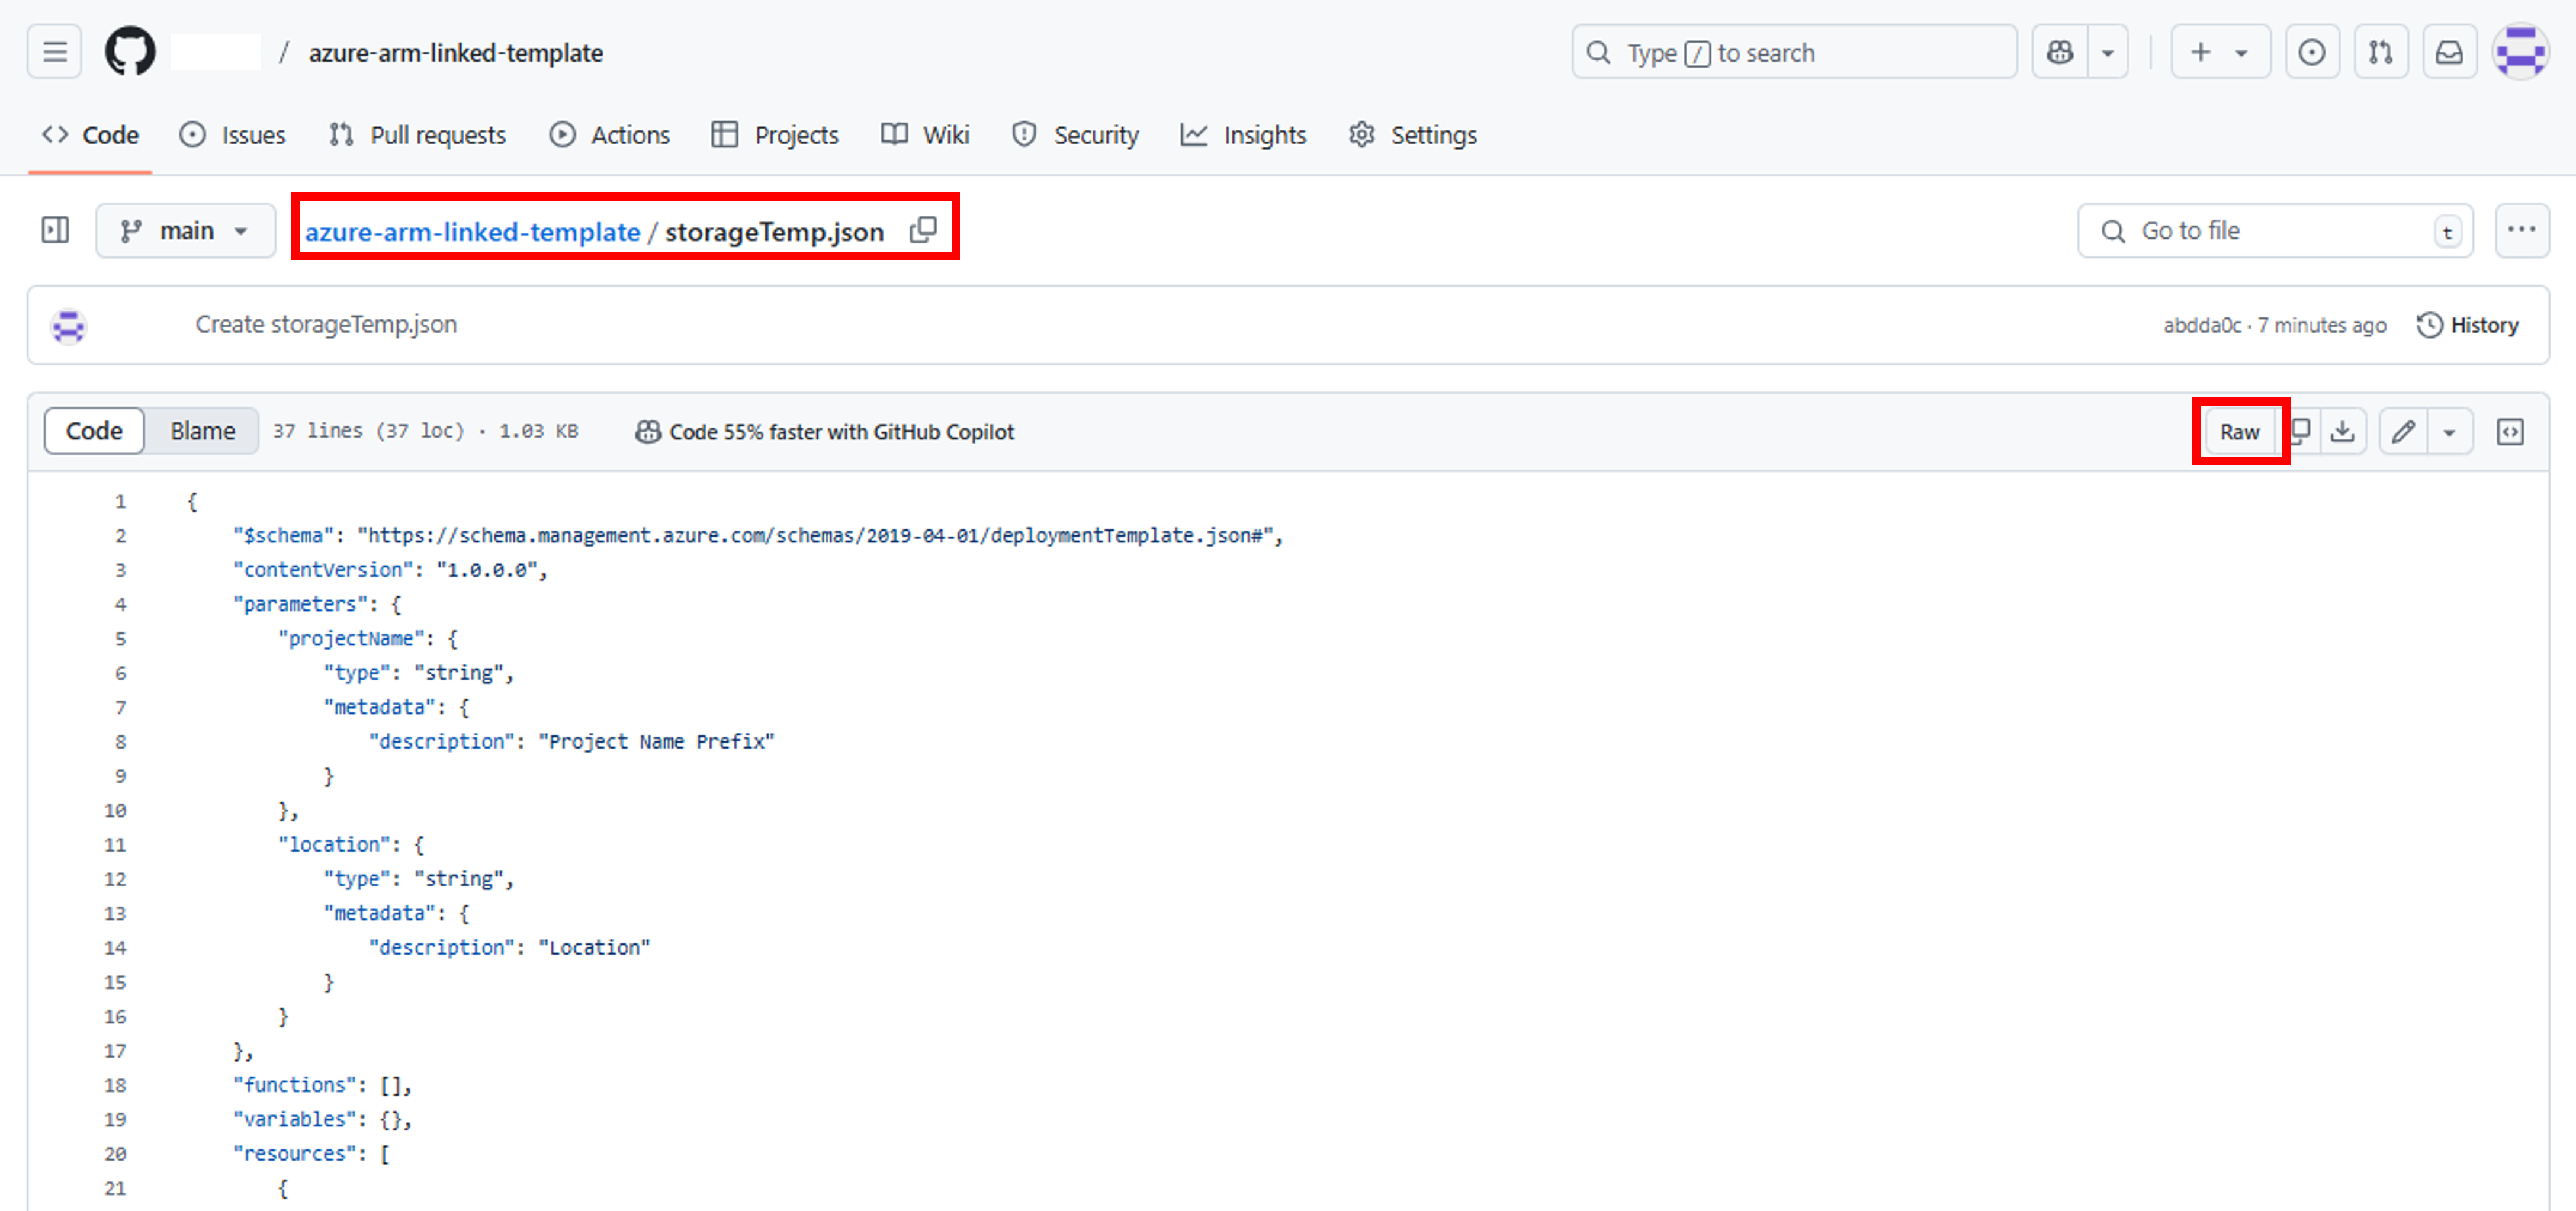
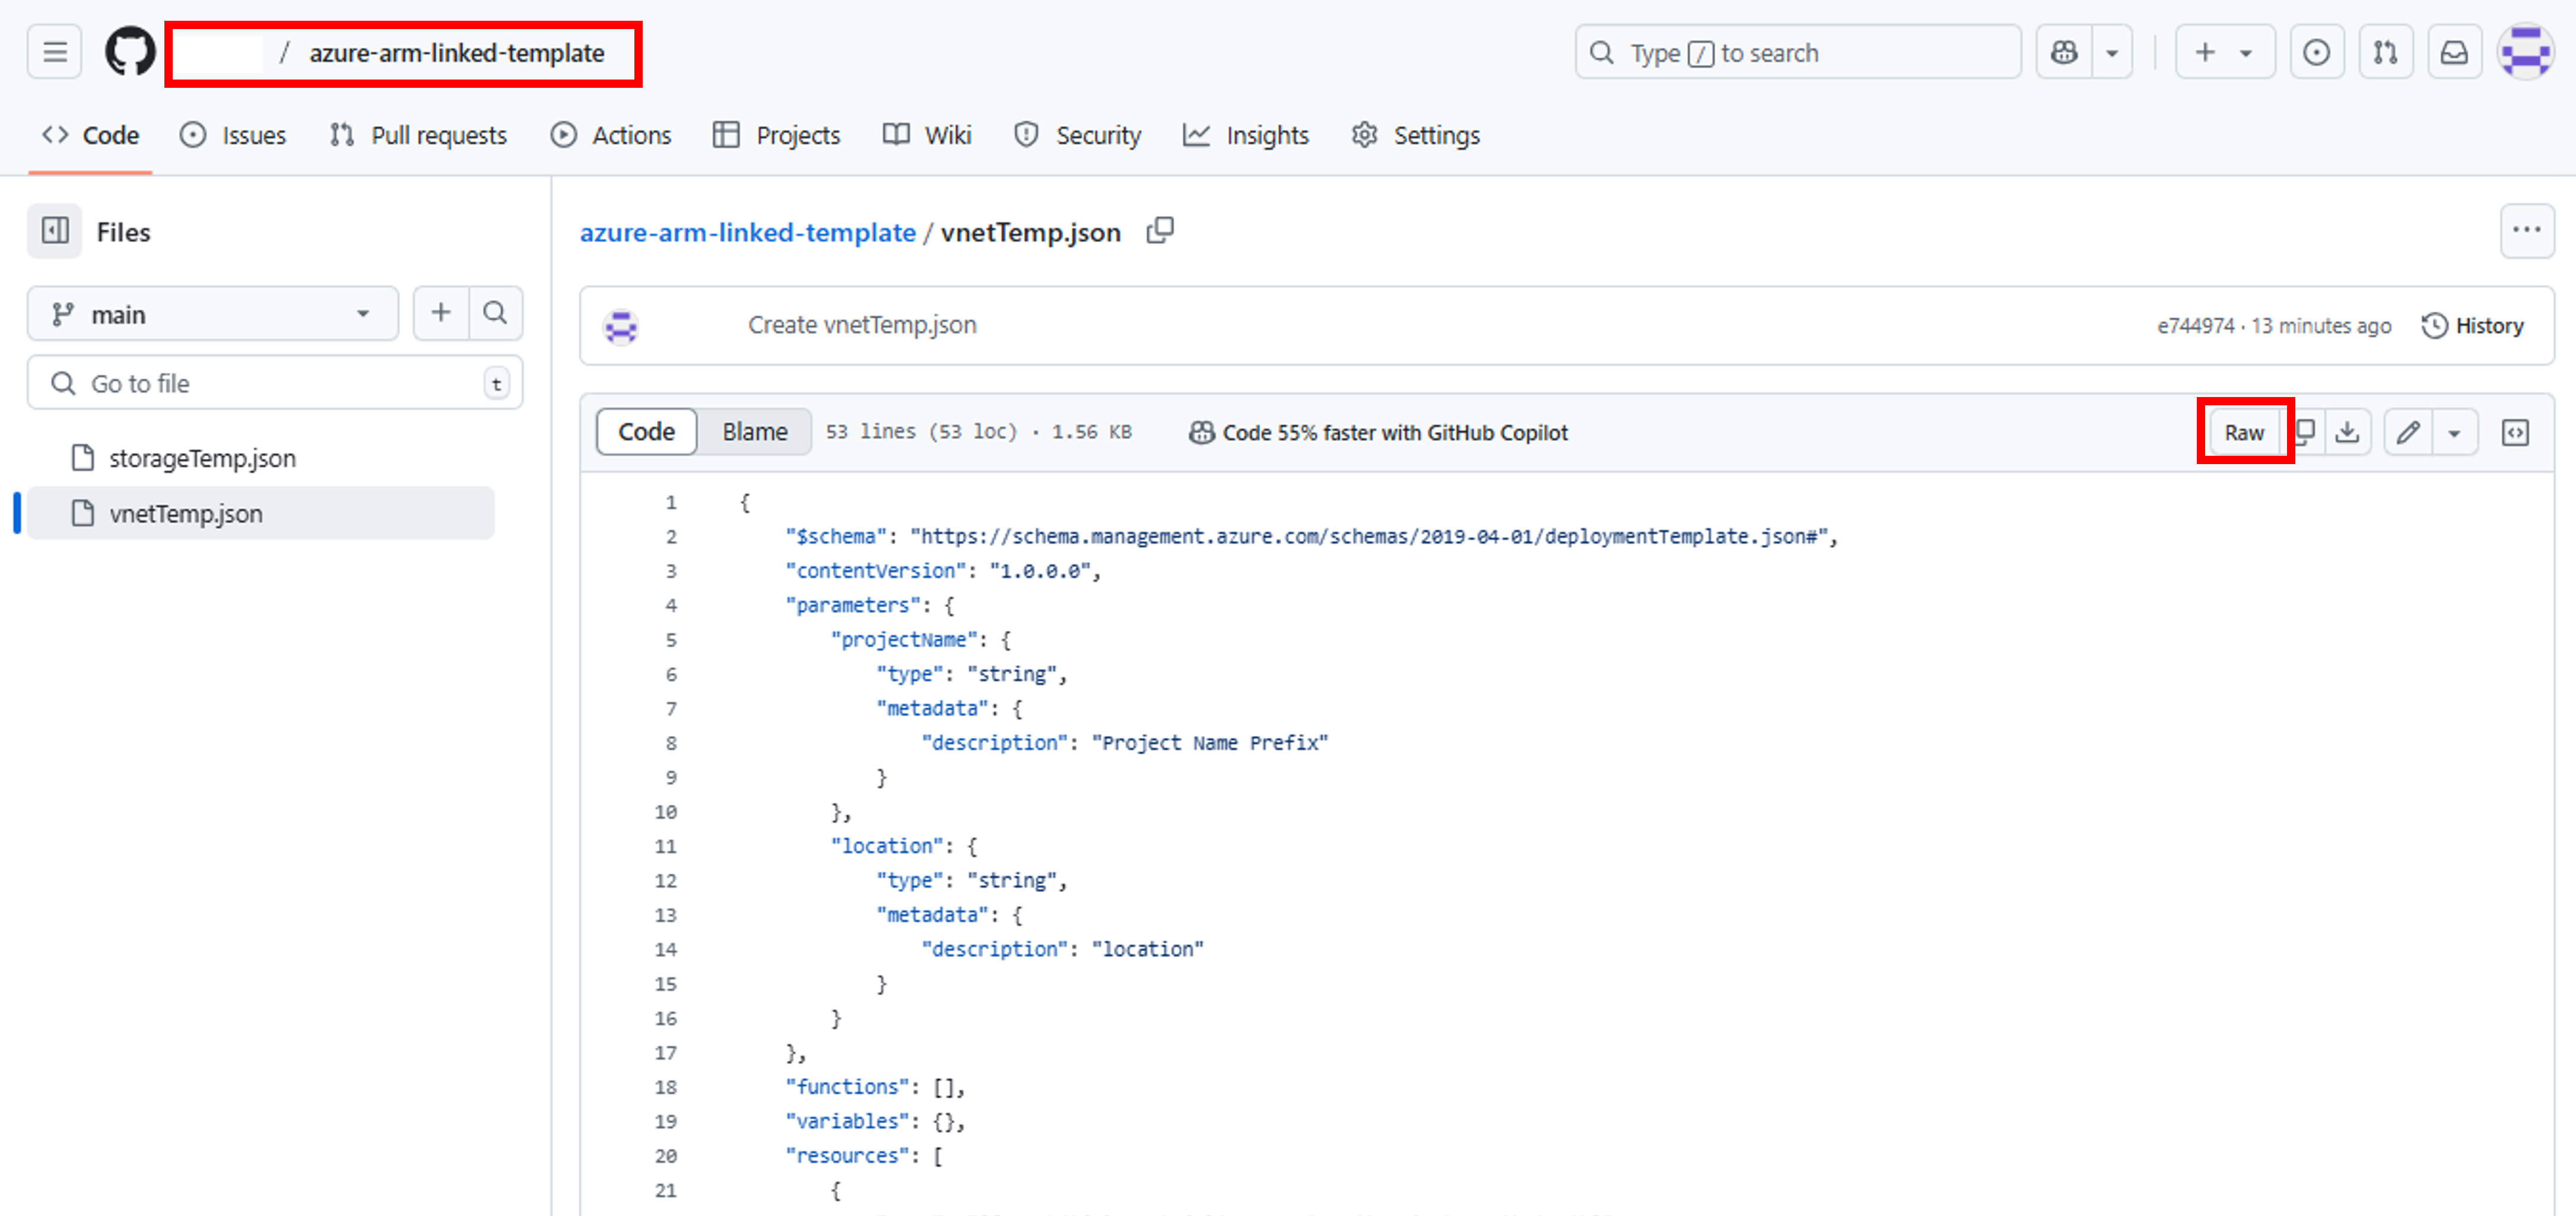
- Open storageTemp.json file by clicking it. Click on Raw button. This will open raw version of the code contained in the file without formatting incorporated by GitHub. To use reference to linked templates in our main template, we must refer to the link containing raw code.

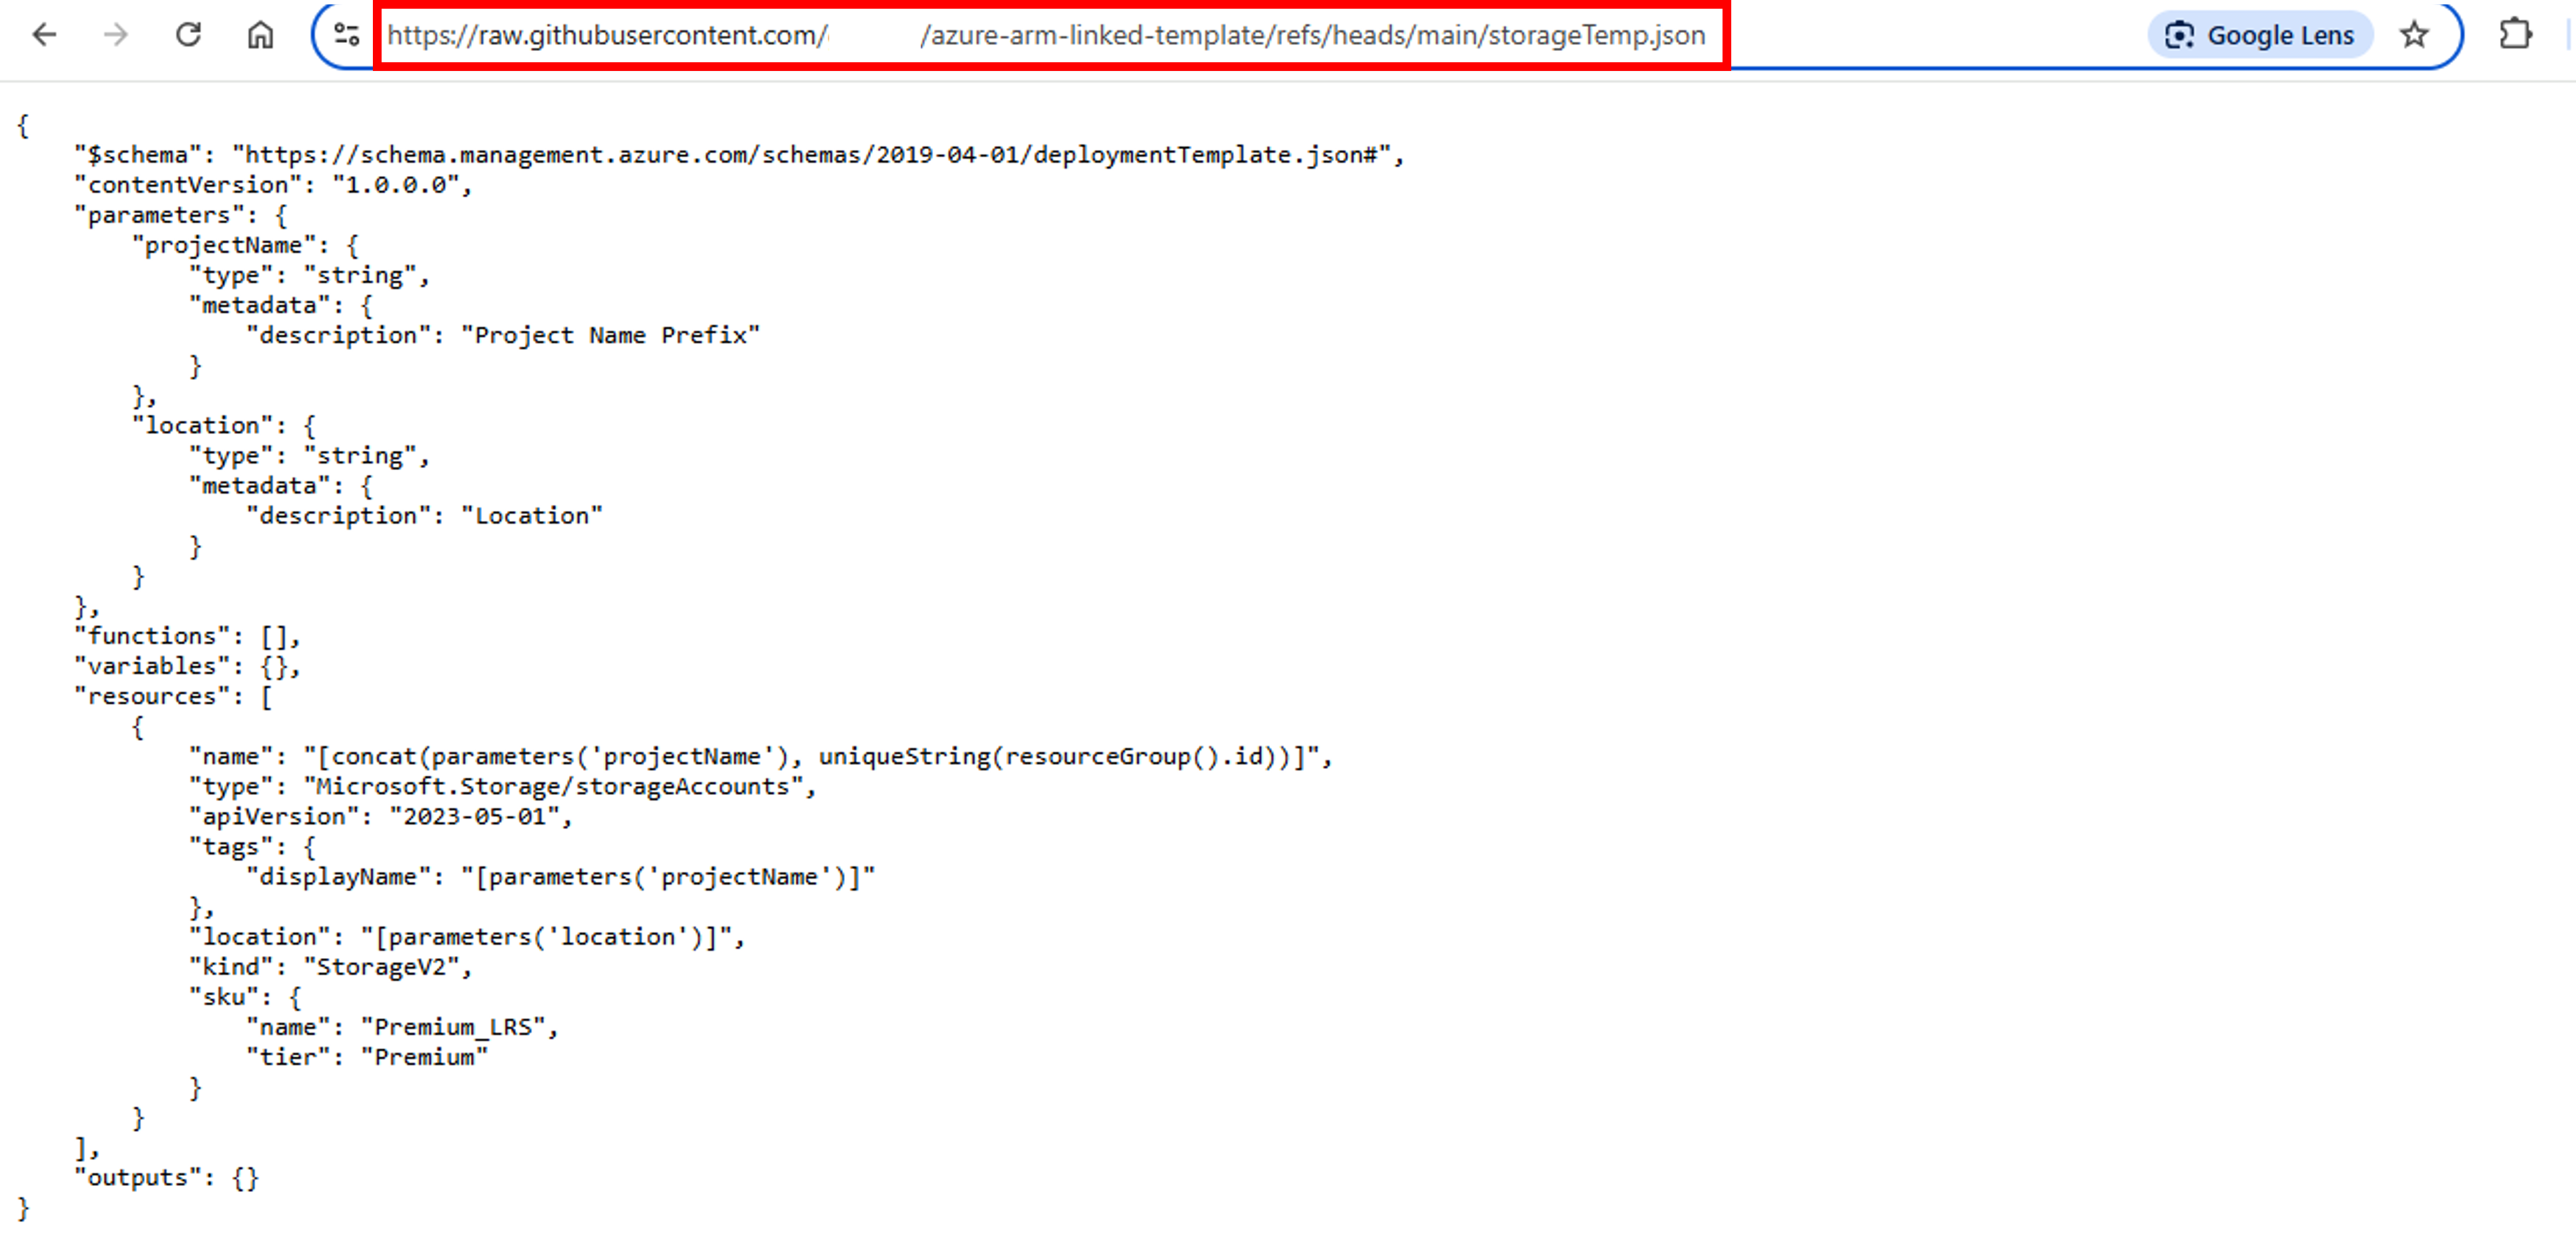
- Copy web address of the raw content, as shown in the snap.

- Now switch to VS Code and copy this web address as value of storageTempPath variable.

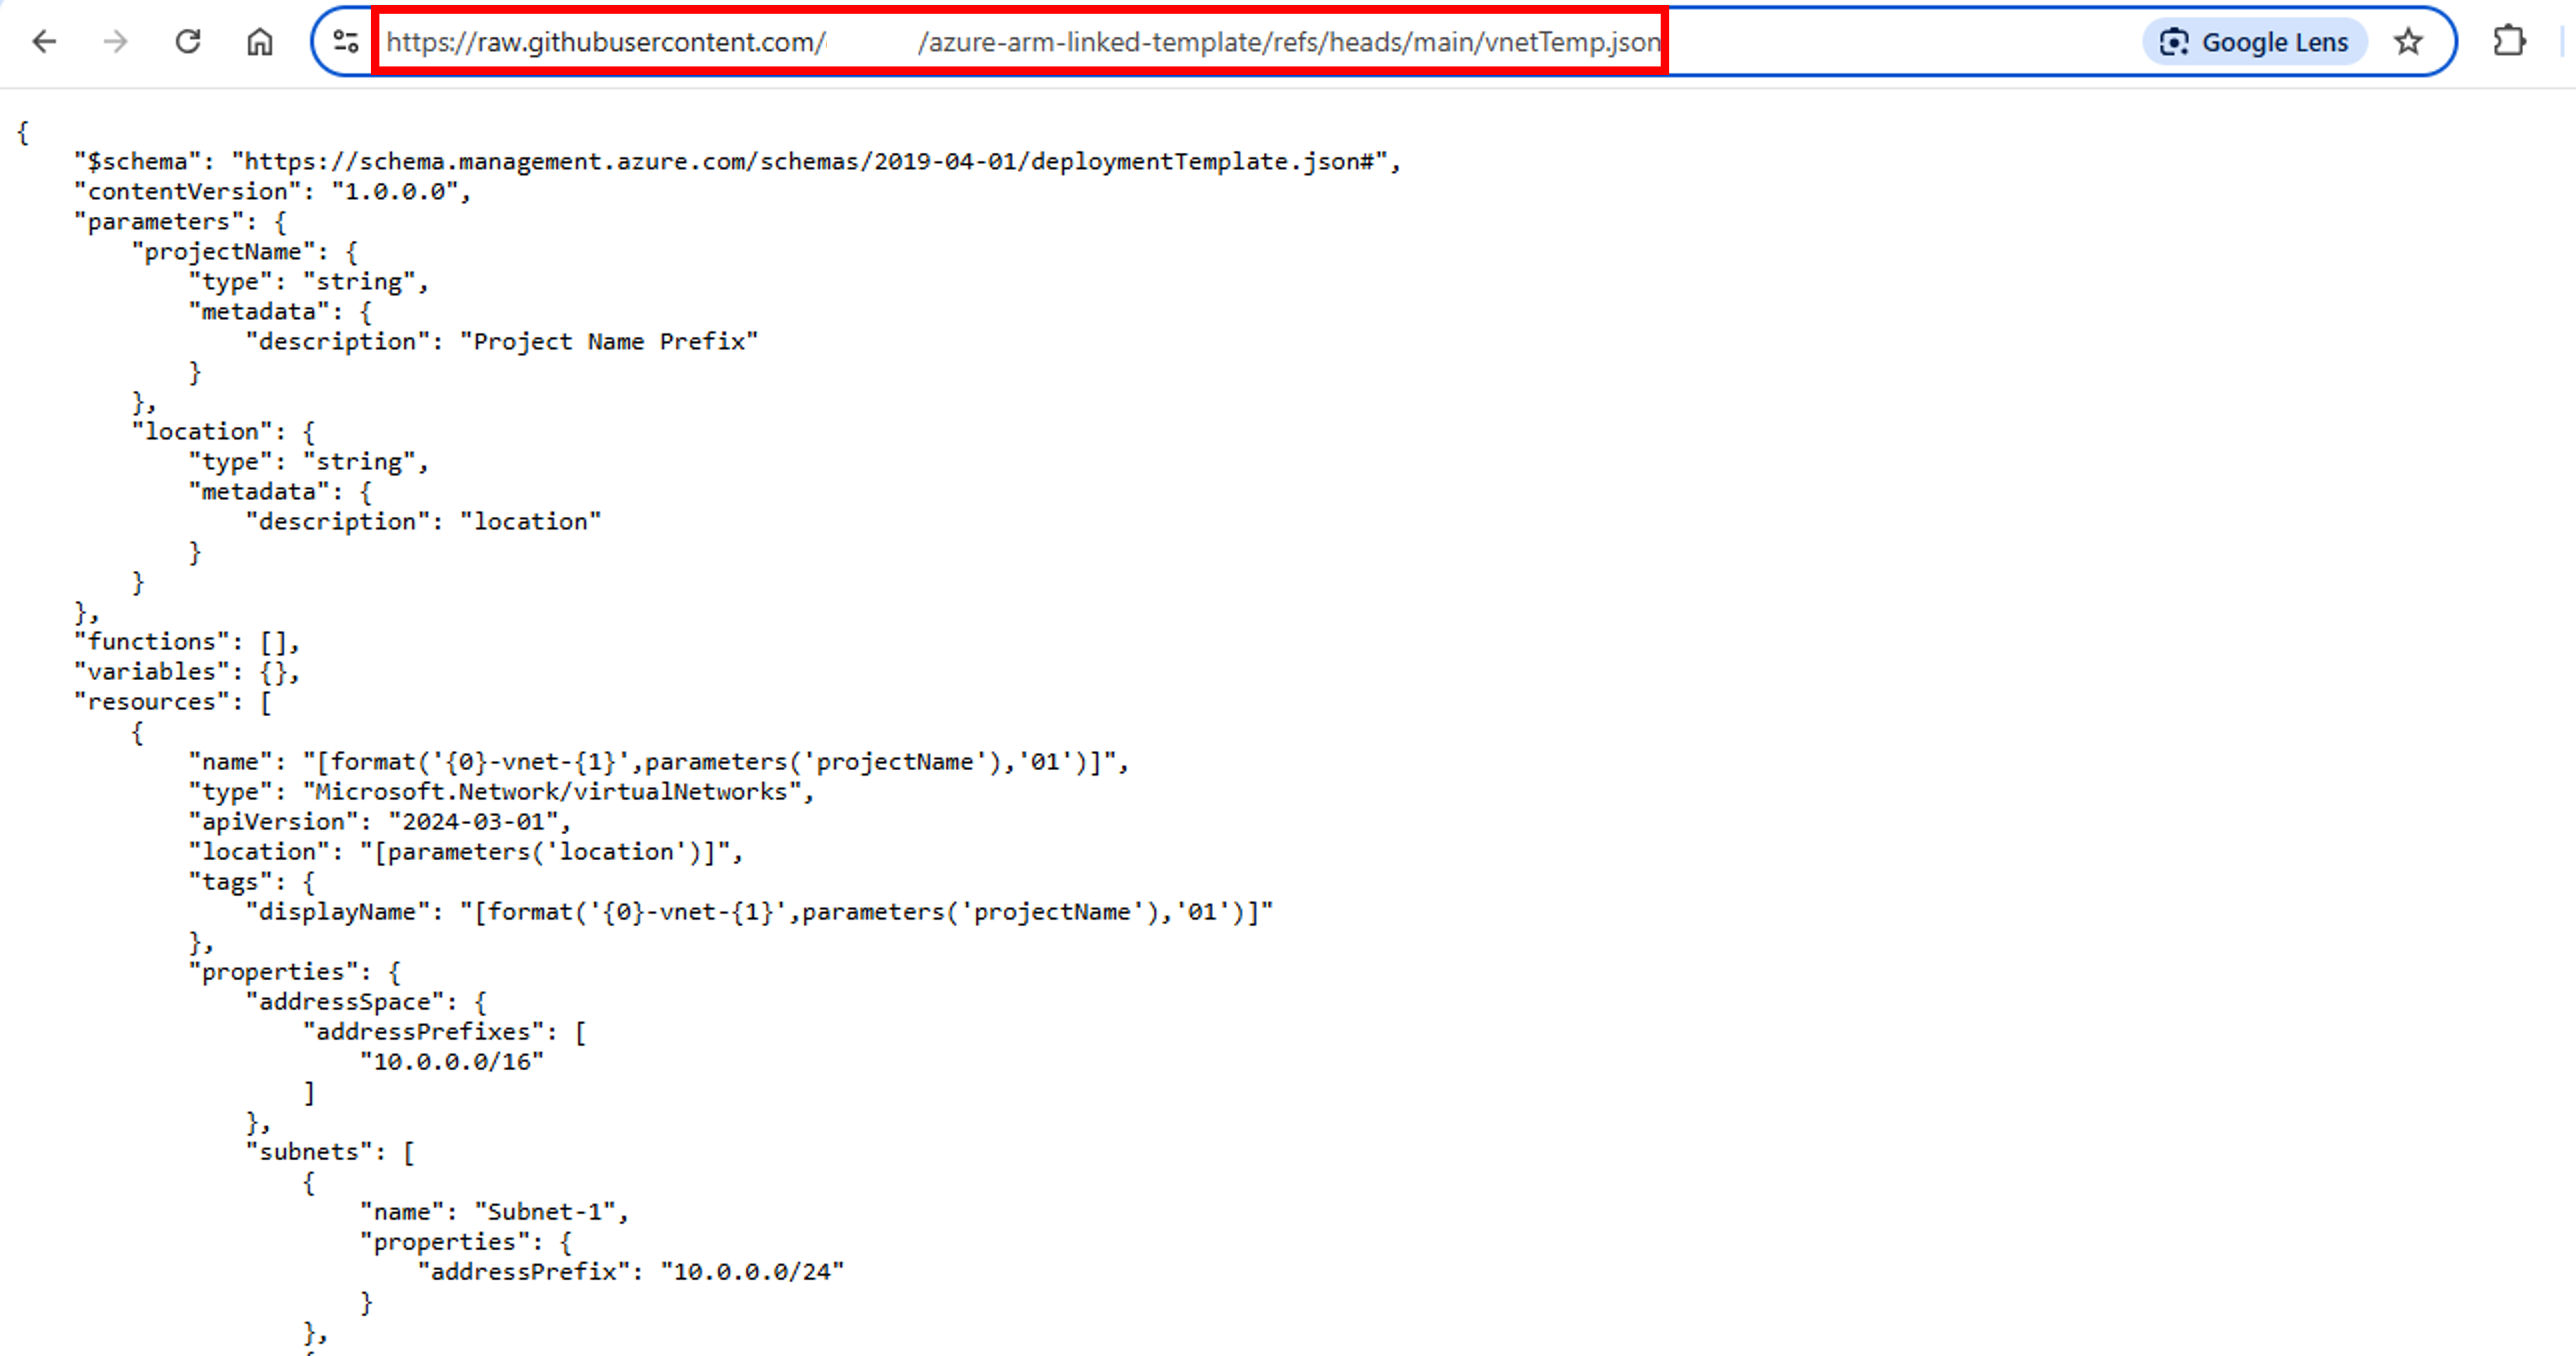
- Next, open vnetTemp.json file by clicking it. Click on Raw button. This will open raw version of the code contained in the file without formatting incorporated by GitHub.

- Copy web address of the raw content, as shown in the snap.

- Now switch to VS Code and copy this web address as value of vnetTempPath variable.


How to Deploy an ARM Linked Template
To deploy ARM Linked template to Azure, you only need to deploy main template. Linked templates are deployed automatically from the main template.
Connect to Az Account
- Connect to your AZ account from VS Code Terminal window. Make sure that you have an active account with Azure to deploy your solution.
- Set context to your subscription.
Create Resource Group
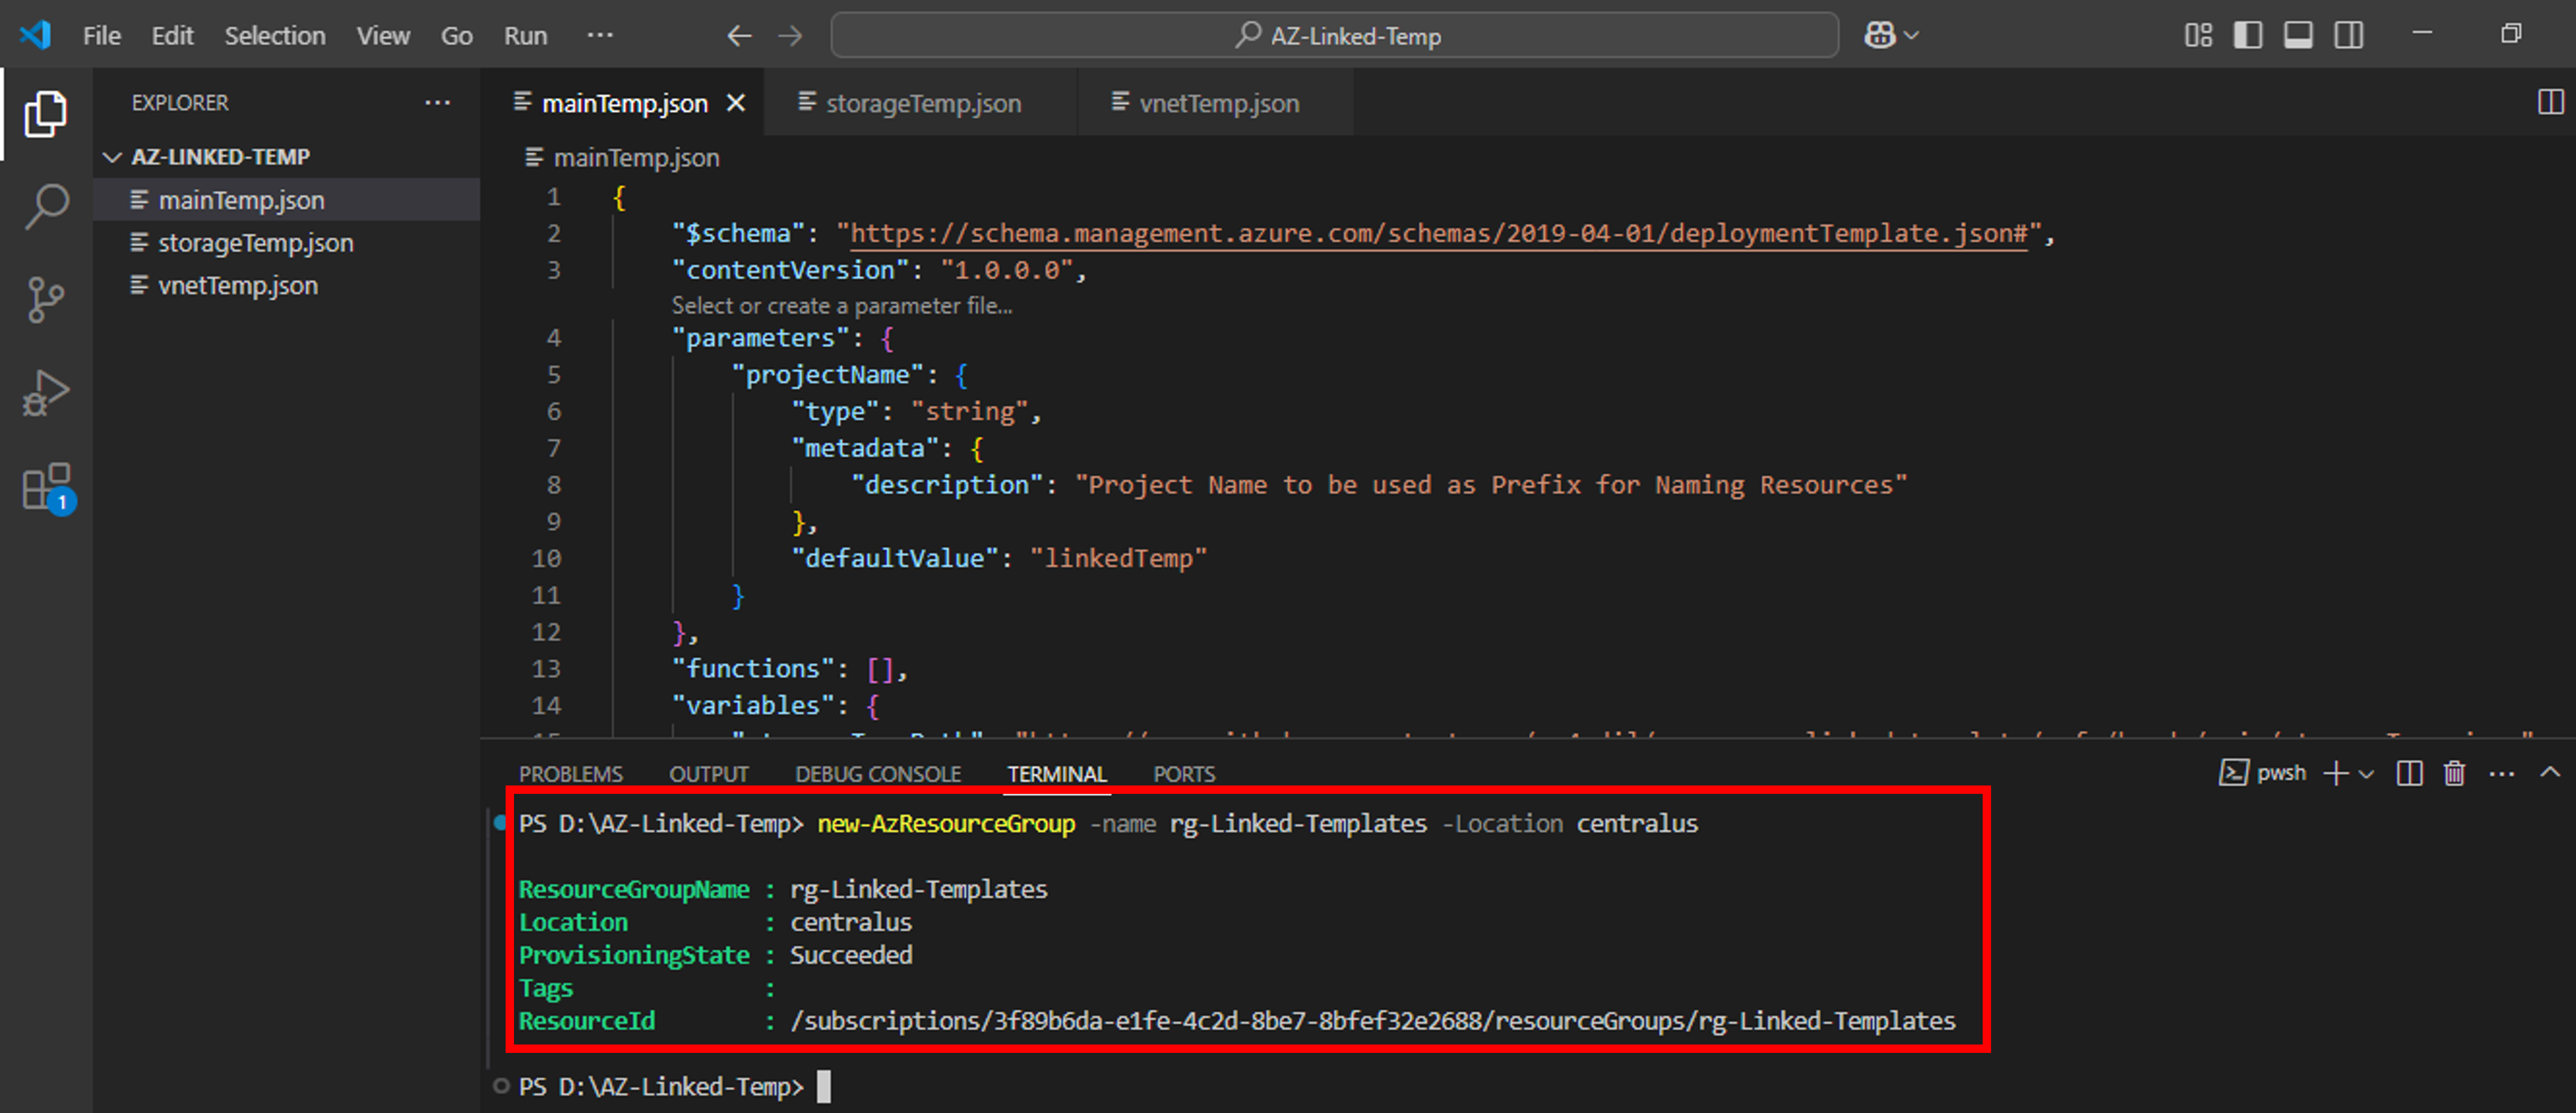
- Next, you need to create a resource group for grouping your resources. Type New-AzResourceGroup -Name rg-Linked-Templates -Location centralus to create a new resource group in Central US region (you can choose any location of your choice).

- Next, run following command to set this resource group as default resource group.
Set-AzDefault -ResourceGroupName rg-Linked-Templates
Deploy Main template to Azure
Run following command to create three environment variables.
$templateFile=”mainTemp.json”
$todayDate=Get-Date -Format “MM-dd-yyyy”
$deploymentName=”mainTemp-“+”$todayDate”
$templateFile is used to contain path to the JSON main template file.
$todayDate is used to store current date.
$deploymentName is used to assign a name to the deployment. This is created by appending template file name and current date.
Now, run following command to deploy the template using ResourceGroup deployment scope:
New-AzResourceGroupDeployment `
-Name $deploymentName `
-TemplateFile $templateFile `
Note: Backtick or Tilde (‘) is a line continuation character in Powershell and used to split a long command across multiple lines.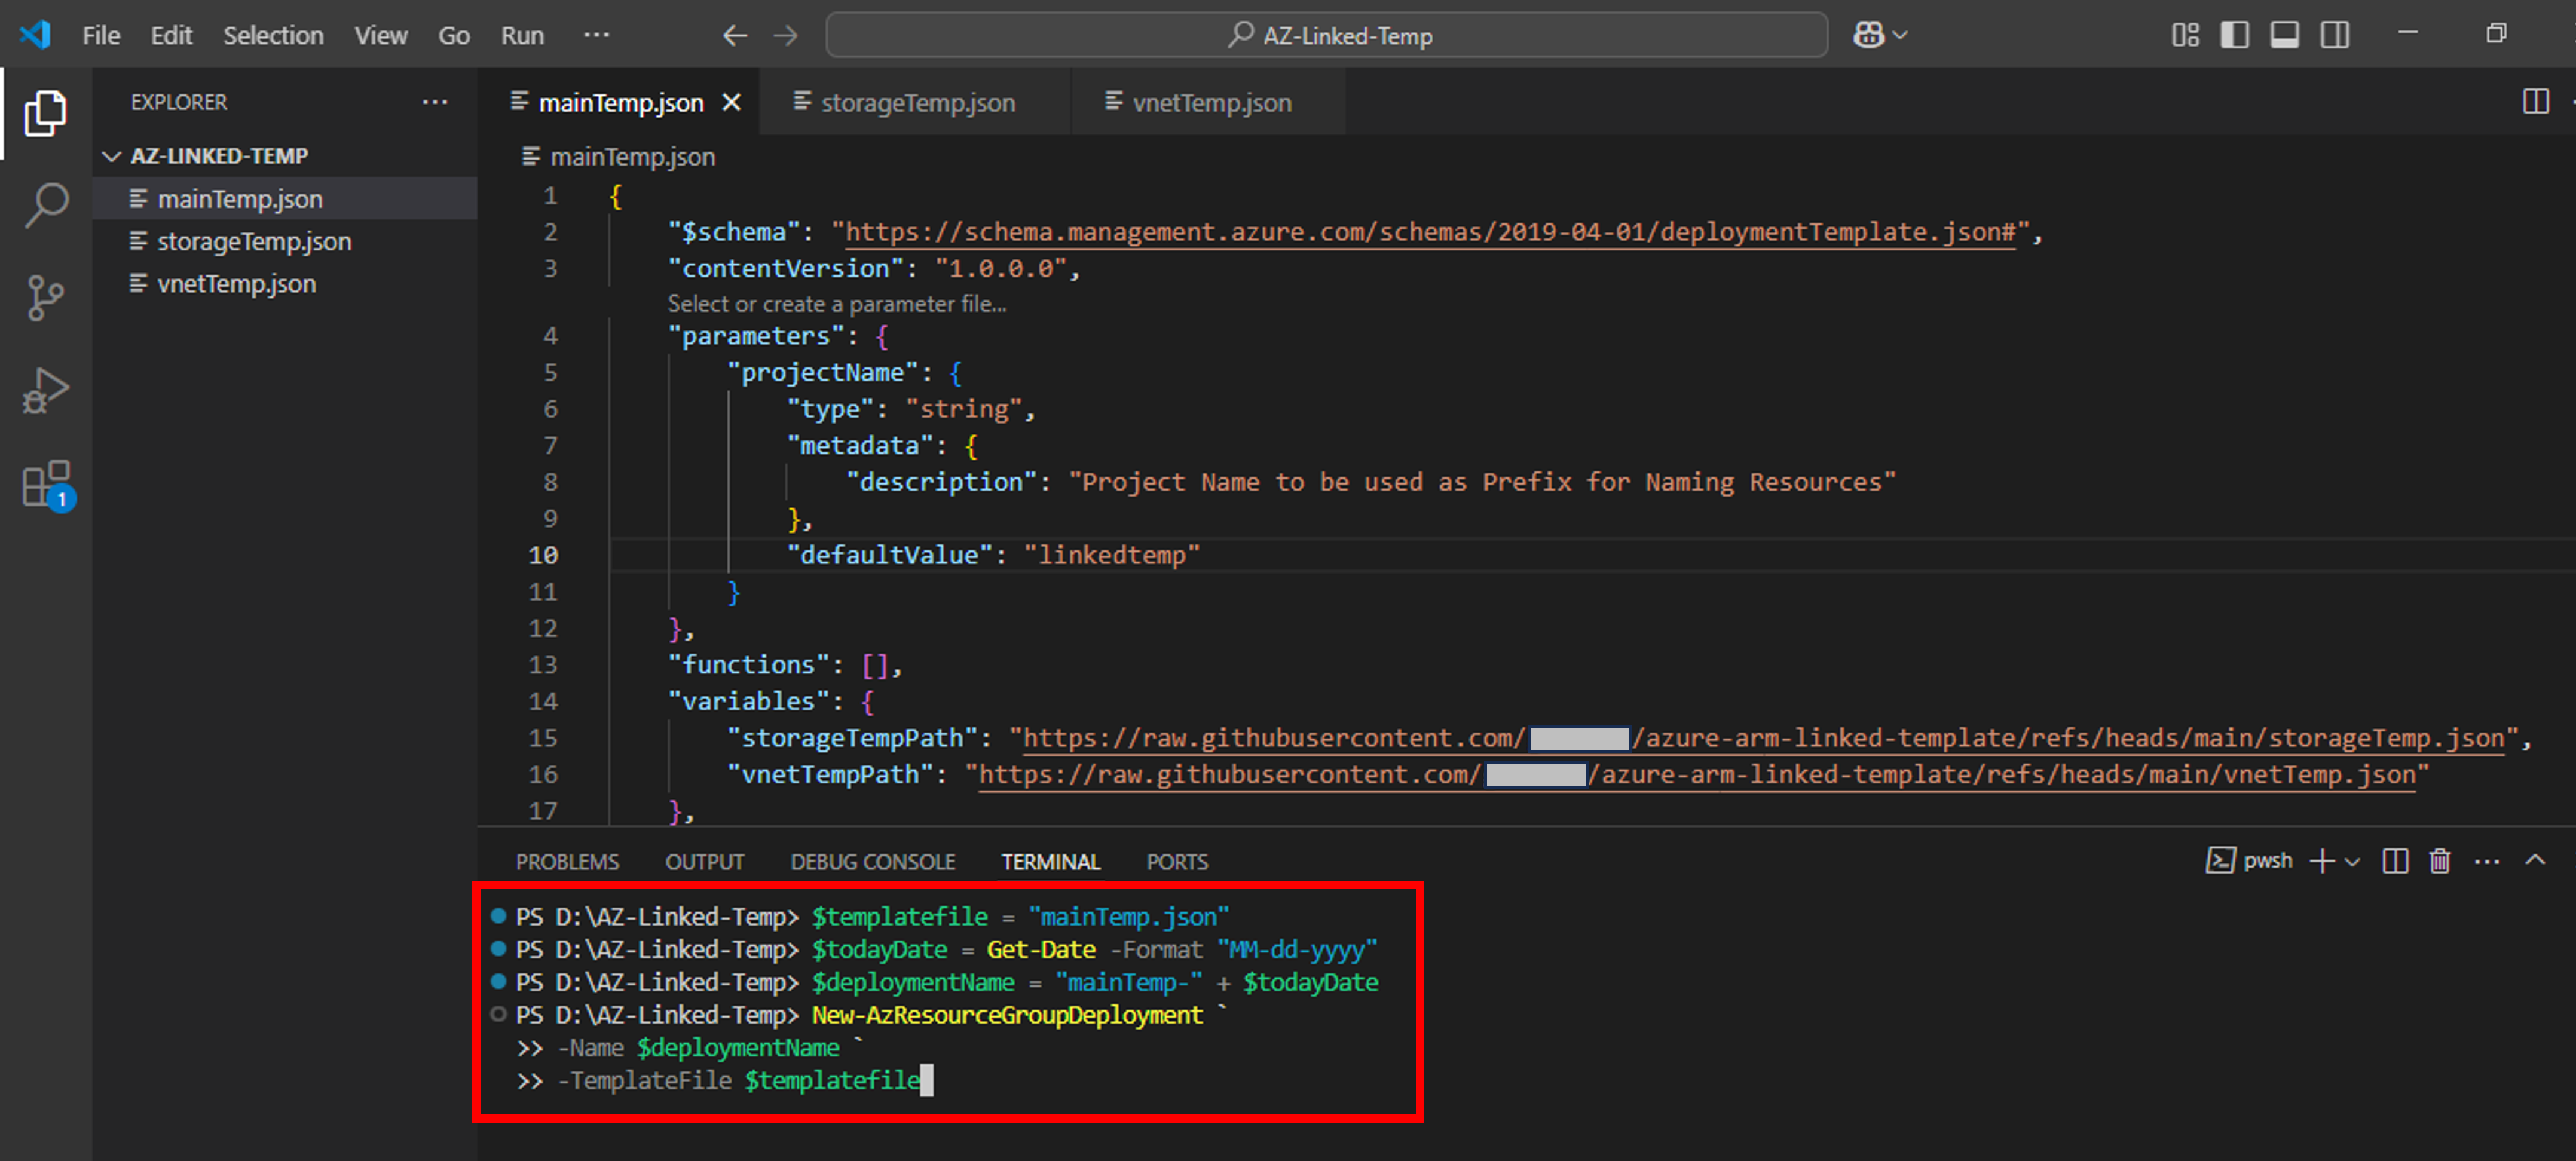
Deployment Result
Great! our ARM template is successfully deployed. You can notice the ProvisioningState: Succeeded message in below snap.
Now let’s switch to Azure Portal to verify that our ARM template is successfully deployed. Go to Resource Groups -> rg-Linked-Templates. Click on the rg-Linked-Templates resource group. Then click on Deployments under Settings. You will notice that three new deployments are created. These deployments refer to three templates used in the tutorial namely main template, storage account template & vnet template.
Now click on Overview under the same resource group to verify the newly created storage account and virtual network. You can spot a new storage account and virtual network within the resource group.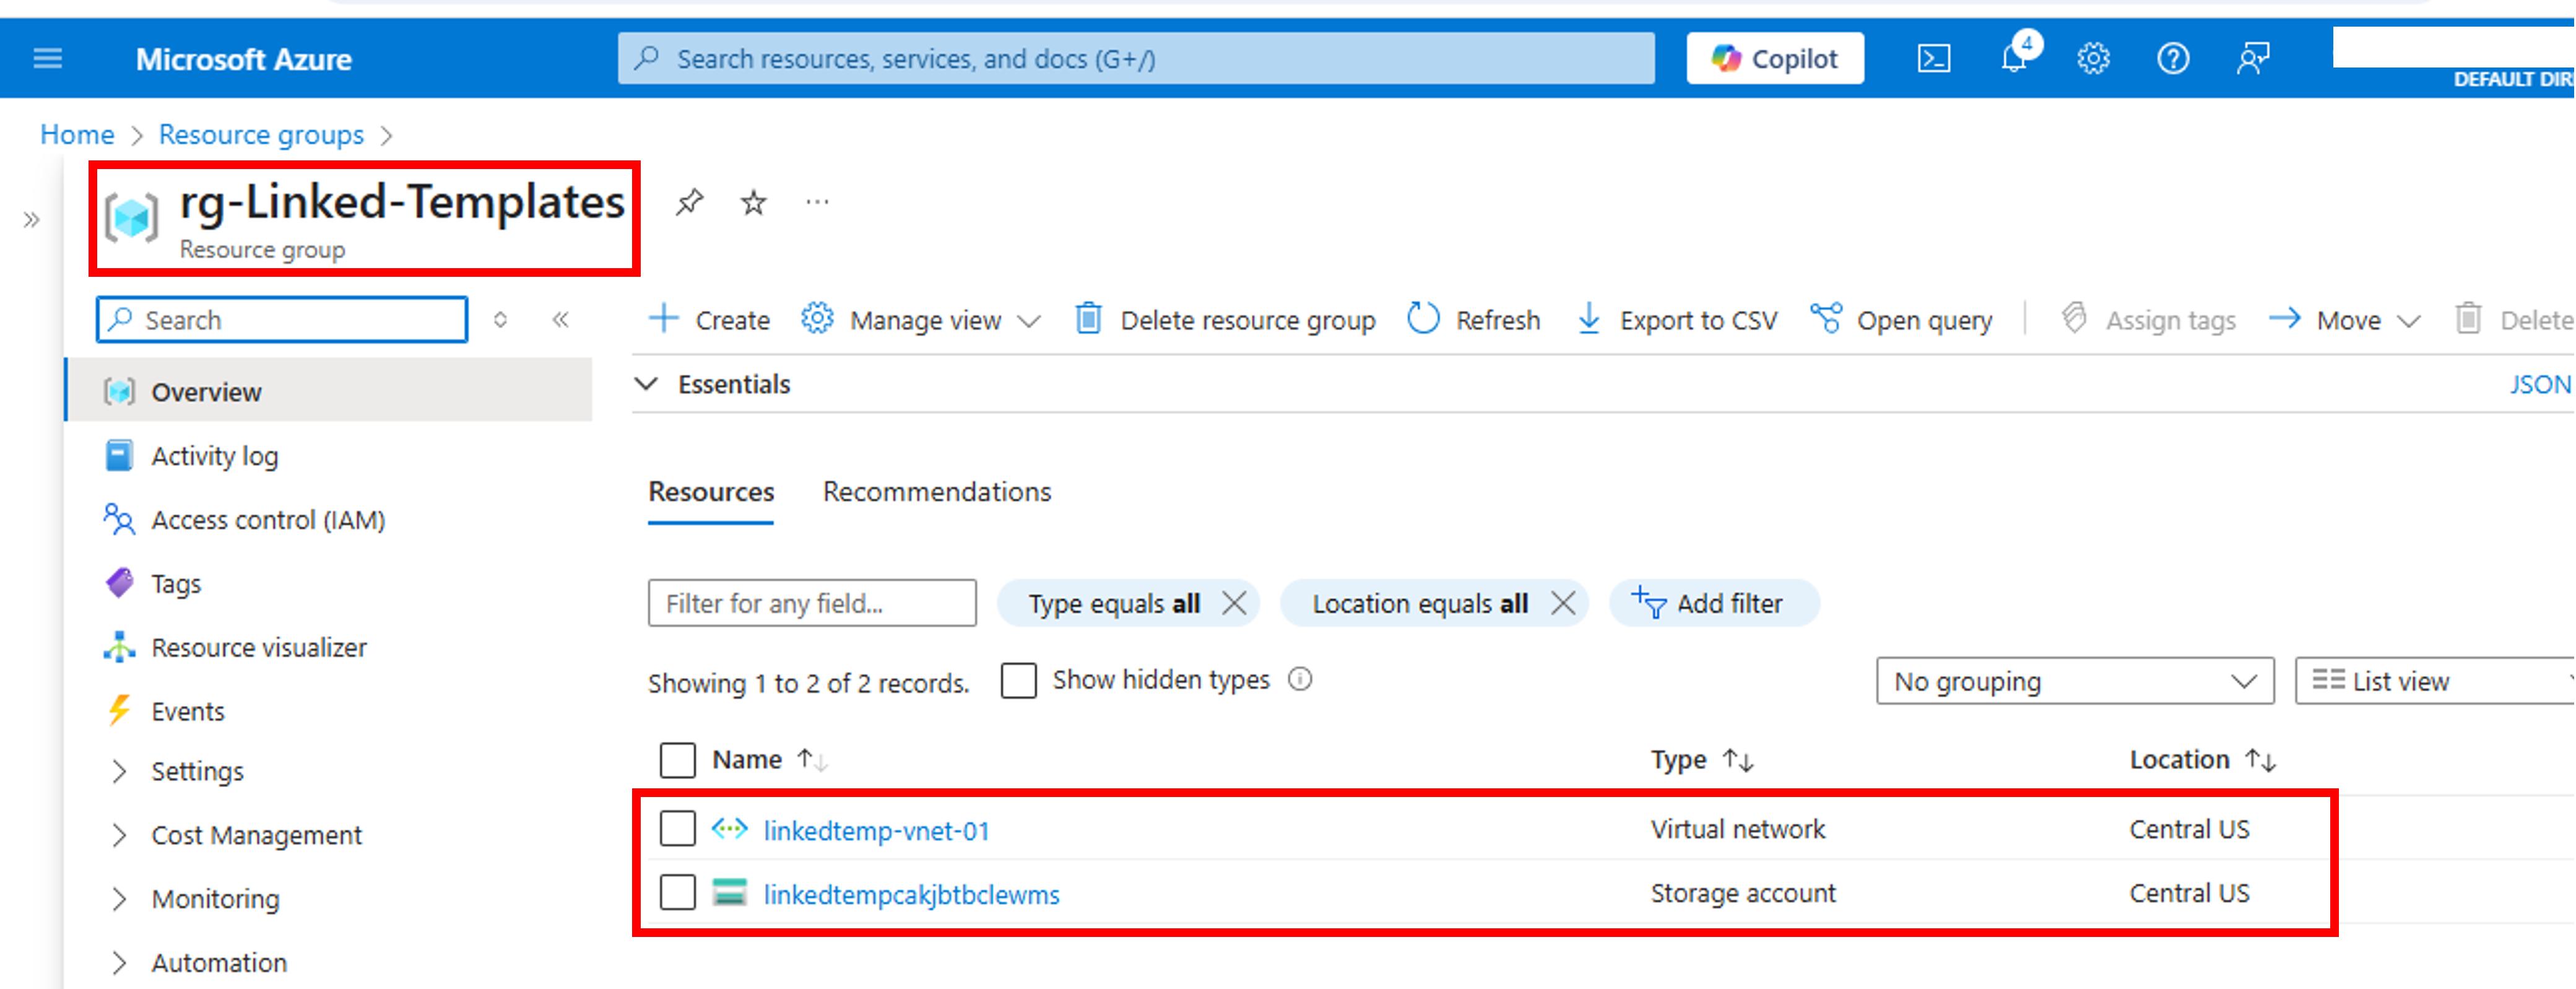
Next, click on the storage account. You will observe that it has the same properties as defined by us in ARM template.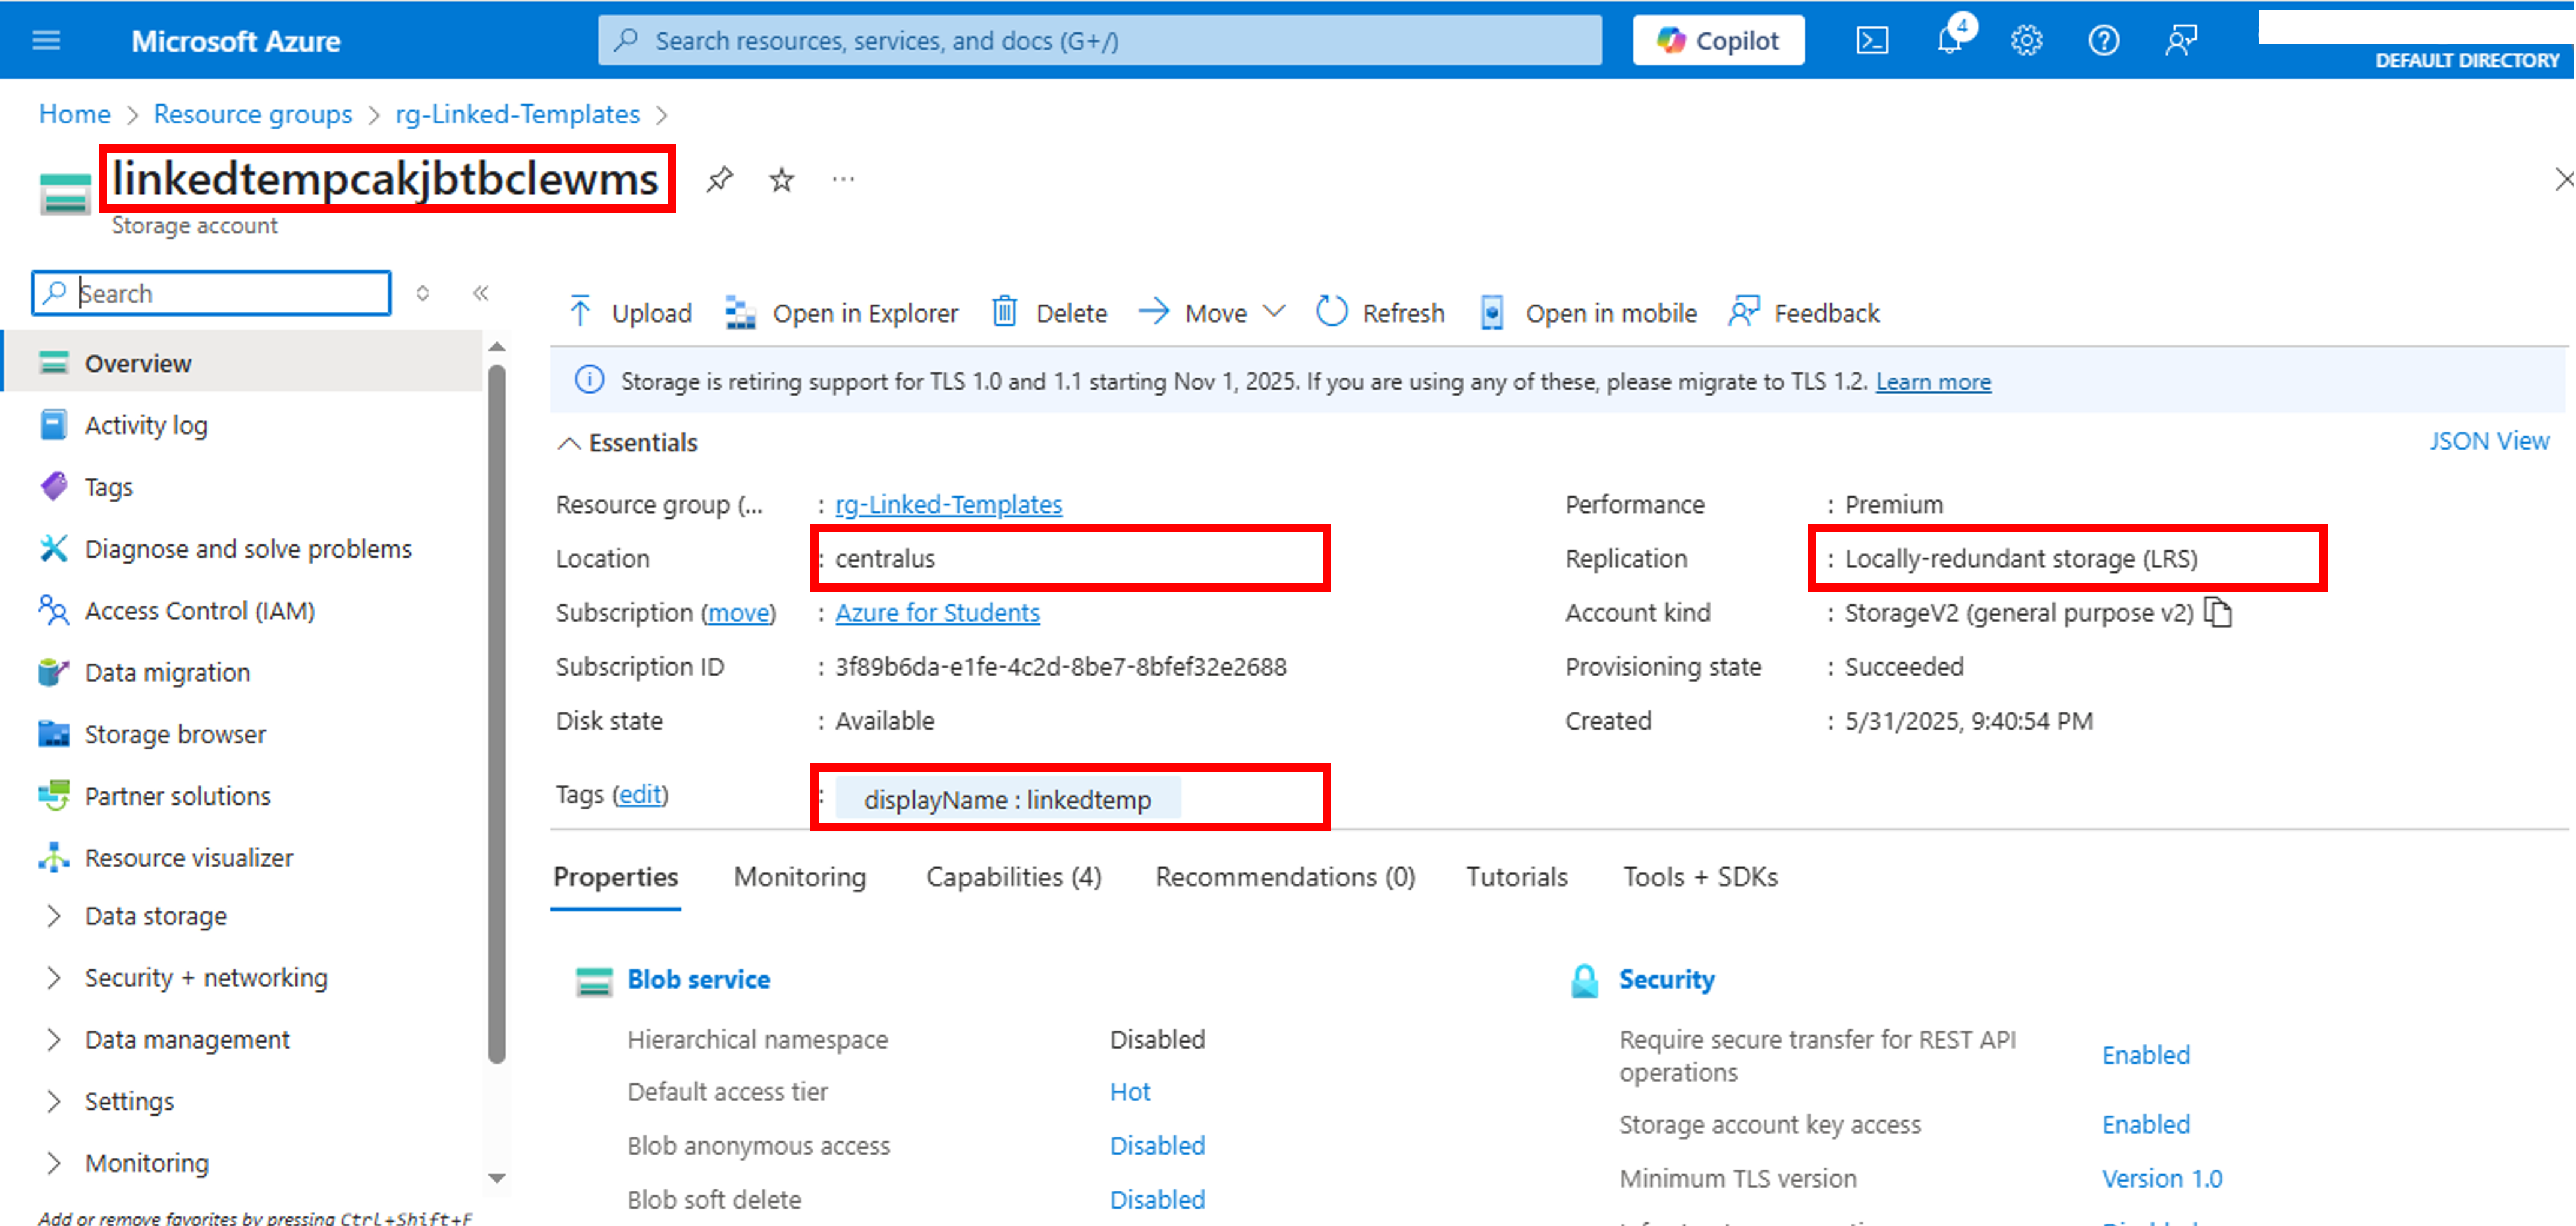
Next, click on the virtual network. You will observe that it has the same properties as defined by us in ARM template.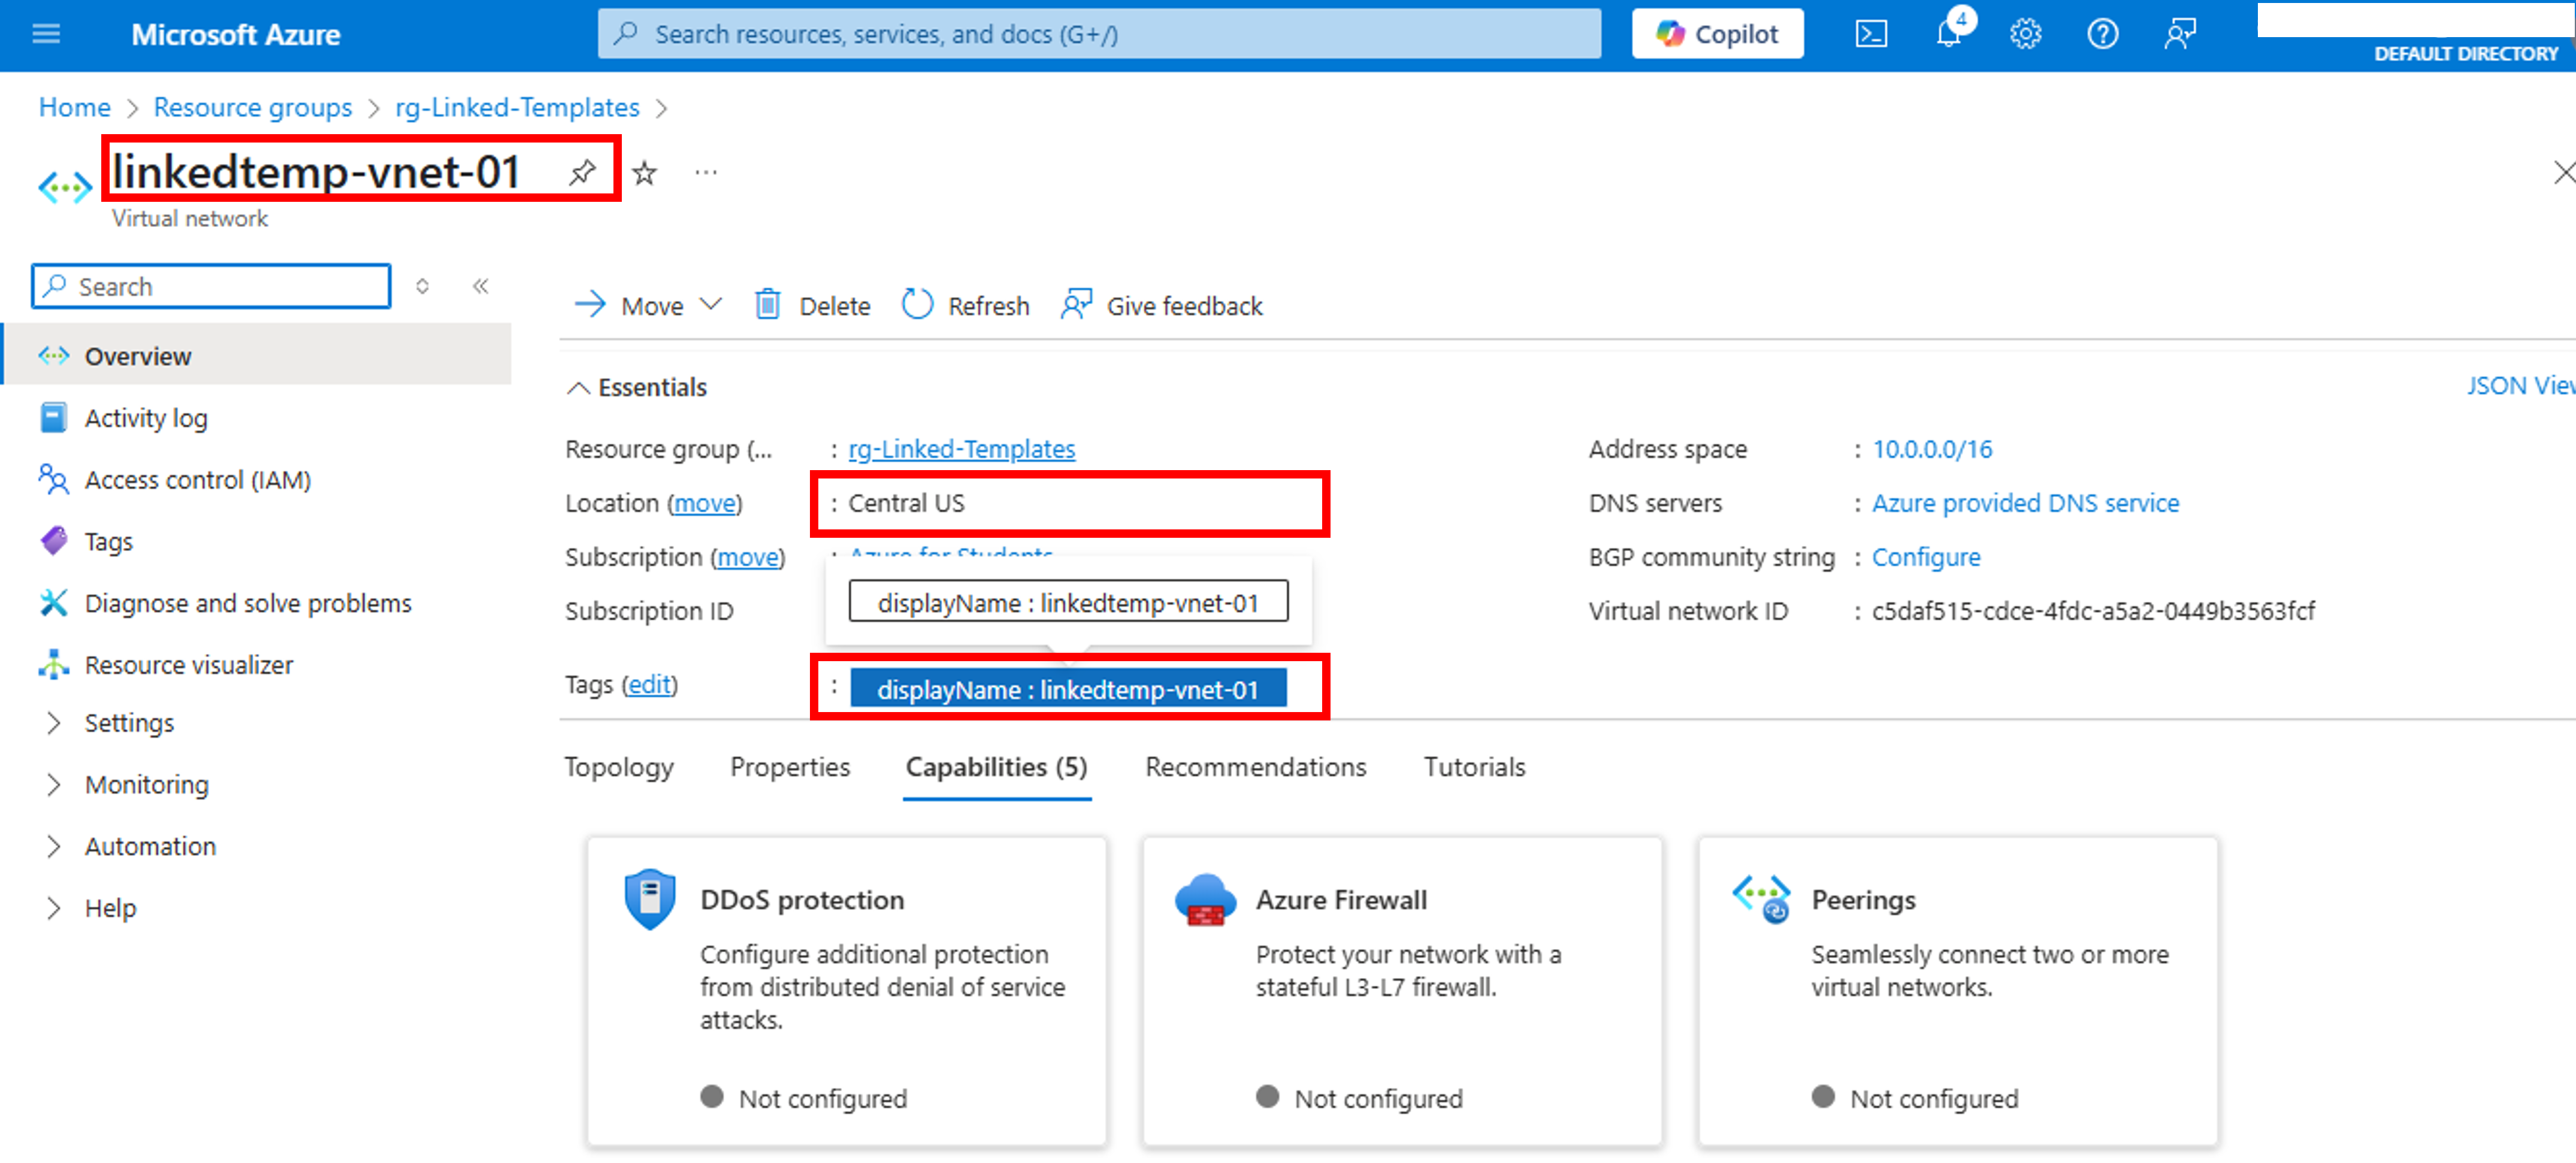
Conclusion
Azure Resource Manager (ARM) Linked template provide a great way to modularize our templates for better visibility, manageability and future re-use. Whenever you feel overwhelmed by infrastructure code in a single template, make use of linked templates to split your code.